Page 612 of 3342
 Install front exhaust pipe and center exhaust pipe.
12) Connect hoses, connectors and cables.
(1) Connect the following hoses.
�Fuel delivery hose, return hose and evaporation
hose
�Heater inlet a")
11) Install front exhaust pipe and center exhaust pipe.
12) Connect hoses, connectors and cables.
(1) Connect the following hoses.
�Fuel delivery hose, return hose and evaporation
hose
�Heater inlet and outlet hoses
�Brake booster vacuum hose
(2) Connect the following connectors.
�Engine ground terminal
�Engine harness connectors
�Front oxygen sensor connector
�Rear oxygen sensor connector
�Alternator connector and terminal
�A/C compressor connectors (With A/C)
(3) Connect the following cables.
�Accelerator cable
�Cruise control cables (With cruise control)
�Clutch cable
�Clutch release spring
CAUTION:
After connecting each cable, adjust them.
B2M1168
13) Install air intake system.
(1) Install air cleaner element.
(2) Install air intake duct with air cleaner upper cover.
B2M0030
(3) Connect connector to mass air flow sensor.
G2M0270
14) Install A/C pressure hoses. (With A/C)
CAUTION:
Use new O-rings.
Tightening torque:
25±7 N⋅m (2.5±0.7 kg-m, 18.1±5.1 ft-lb)
24
2-11SERVICE PROCEDURE
2. Engine
Page 613 of 3342
B2M0307A
15) Install cooling system.
(1) Attach radiator mounting cushions to body.
G2M0220
(2) Install radiator while fitting radiator pins to cush-
ions.
B2M0320
(3) Install radiator brackets and tighten bolts.
Tightening torque:
13.7±1.5 N⋅m (1.4±0.15 kg-m, 10.1±1.1 ft-lb)
G2M0263
(4) Connect radiator fan motor connector.
G2M0267
(5) Connect radiator inlet hose.
25
2-11SERVICE PROCEDURE
2. Engine
Page 615 of 3342
3. Transmission
A: REMOVAL
1. Open front hood fully, and support it with stay.
2. Disconnect battery ground terminal.
3. Remove air intake duct and chamber.
4. Disconnect connectors and cables.
5. Remove starter.
6. Remove pitching stopper.
AT model
7. Separate torque converter from drive plate.
8. Remove ATF level gauge.
9. Remove transmission connector bracket.
Hydraulic clutch model
10. Remove operating cylinder.
11. Set special tools.
12. Remove bolt which holds right upper side of transmission to
engine.
Hydraulic clutch model
13. Remove clutch damper.
14. Remove exhaust system.
�Front exhaust pipe
�Center exhaust pipe
�Rear exhaust pipe [AWD]
AT model
15. Drain ATF to remove ATF drain plug.
16. Disconnect ATF cooler hose from pipe on transmission side,
and remove ATF level gauge guide.
AWD model
17. Remove propeller shaft.
�A
�
�
�
�
�
�
�
�
�
�
�
�
�
�
27
2-11SERVICE PROCEDURE
3. Transmission
Page 618 of 3342
G2M0545
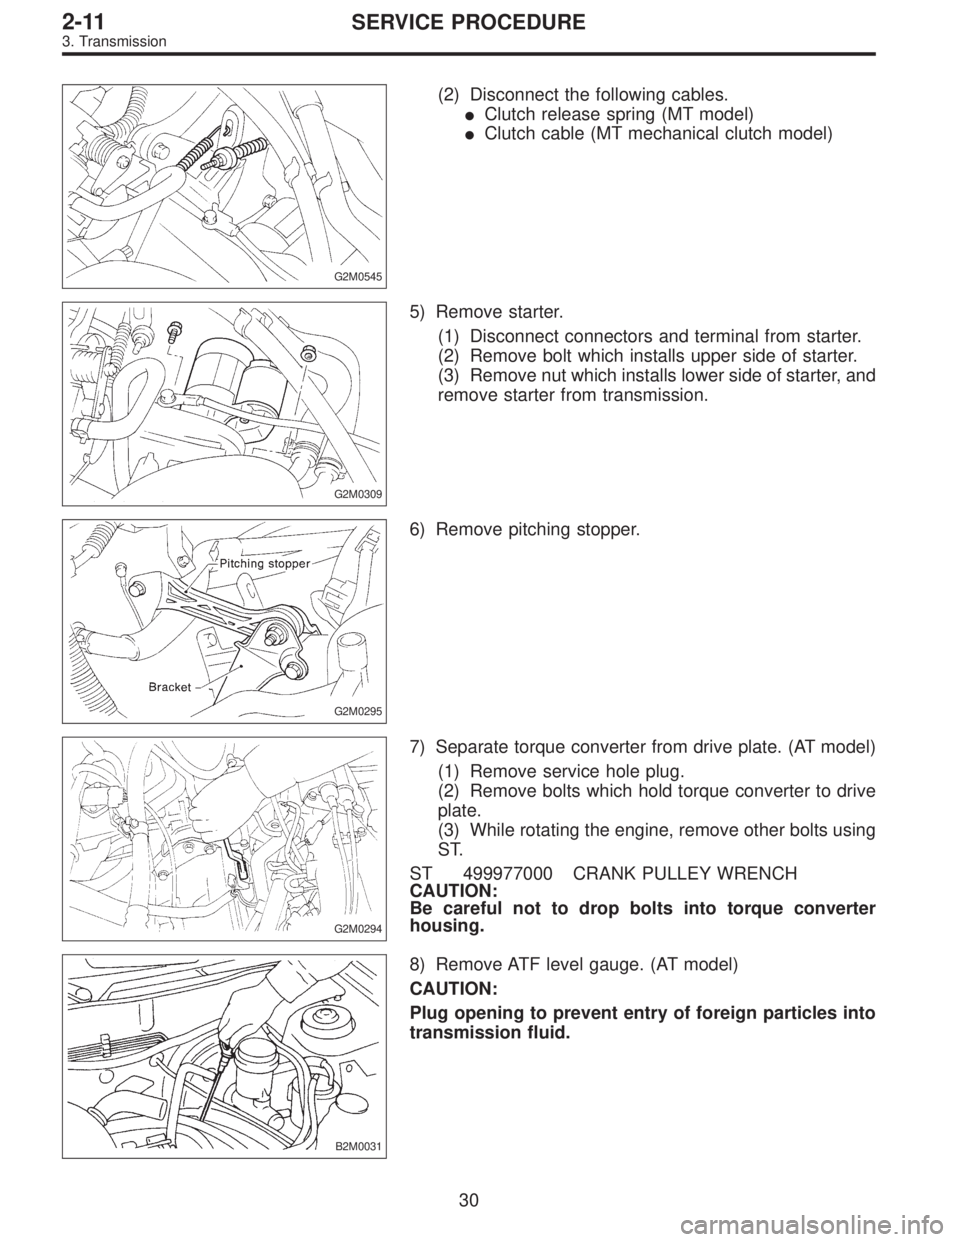
(2) Disconnect the following cables.
�Clutch release spring (MT model)
�Clutch cable (MT mechanical clutch model)
G2M0309
5) Remove starter.
(1) Disconnect connectors and terminal from starter.
(2) Remove bolt which installs upper side of starter.
(3) Remove nut which installs lower side of starter, and
remove starter from transmission.
G2M0295
6) Remove pitching stopper.
G2M0294
7) Separate torque converter from drive plate. (AT model)
(1) Remove service hole plug.
(2) Remove bolts which hold torque converter to drive
plate.
(3) While rotating the engine, remove other bolts using
ST.
ST 499977000 CRANK PULLEY WRENCH
CAUTION:
Be careful not to drop bolts into torque converter
housing.
B2M0031
8) Remove ATF level gauge. (AT model)
CAUTION:
Plug opening to prevent entry of foreign particles into
transmission fluid.
30
2-11SERVICE PROCEDURE
3. Transmission
Page 624 of 3342
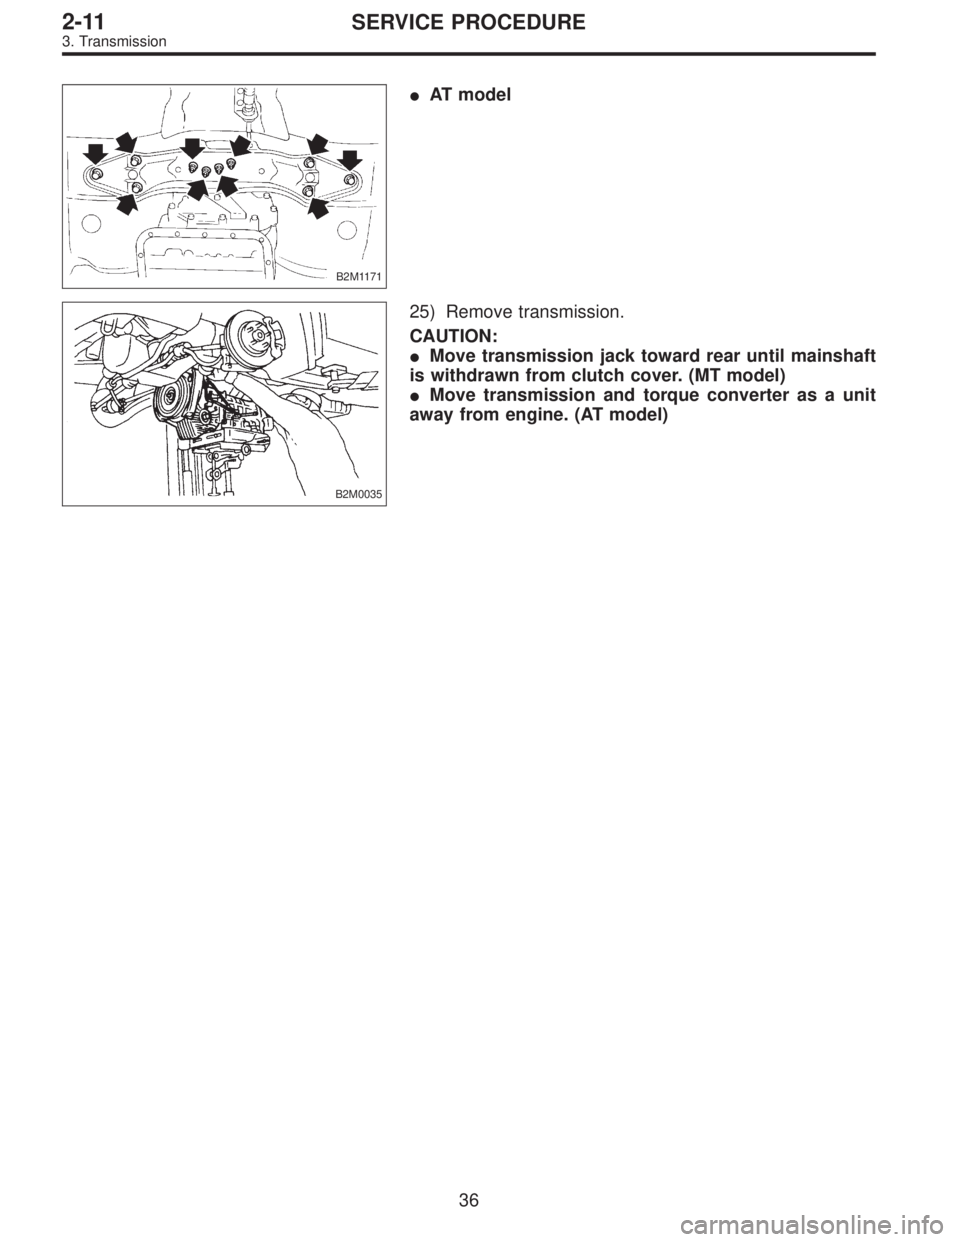
B2M1171
�AT model
B2M0035
25) Remove transmission.
CAUTION:
�Move transmission jack toward rear until mainshaft
is withdrawn from clutch cover. (MT model)
�Move transmission and torque converter as a unit
away from engine. (AT model)
36
2-11SERVICE PROCEDURE
3. Transmission
Page 625 of 3342
B: INSTALLATION
1. Install transmission to engine.
2. Install transmission rear crossmember.
3. Take off transmission jack.
4. Tighten nuts which hold lower side of transmission to engine.
5. Tighten bolt which holds right upper side of transmission to
engine.
AT model
6. Install torque converter to drive plate.
Hydraulic clutch model
7. Install operating cylinder.
8. Remove special tools.
9. Install pitching stopper.
10. Install front drive shafts into transmission.
11. Install stabilizer clamps onto front crossmember.
12. Install gear shift rod and stay.
�B
�
�
�
�
�
�
�
�
�
�
�
37
2-11SERVICE PROCEDURE
3. Transmission
Page 627 of 3342
B2M0035
1) Install transmission onto engine.
(1) Gradually raise transmission with transmission
jack.
(2) Engage them at splines.
CAUTION:
Be careful not to strike mainshaft against clutch cover.
(MT model)
G2M0832
2) Install transmission rear crossmember.
�MT model
Tightening torque:
T1: 69±15 N⋅m (7.0±1.5 kg-m, 51±11 ft-lb)
T2: 137±20 N⋅m (14±2 kg-m, 101±14 ft-lb)
B2M1172A
�AT model
Tightening torque:
T1: 37±10 N⋅m (3.8±1.0 kg-m, 27±7 ft-lb)
T2: 69±15 N⋅m (7.0±1.5 kg-m, 51±11 ft-lb)
G2M0292
3) Take off transmission jack.
4) Tighten nuts which hold lower side of transmission to
engine.
Tightening torque:
50±4 N⋅m (5.1±0.4 kg-m, 36.9±2.9 ft-lb)
G2M0299
5) Tighten bolt which holds right upper side of transmis-
sion to engine.
Tightening torque:
50±4 N⋅m (5.1±0.4 kg-m, 36.9±2.9 ft-lb)
39
2-11SERVICE PROCEDURE
3. Transmission
Page 628 of 3342
G2M0294
6) Install torque converter to drive plate. (AT model)
(1) Tighten bolts which hold torque converter to drive
plate.
(2) Tighten other bolts while rotating the engine by
using ST.
ST 499977000 CRANK PULLEY WRENCH
CAUTION:
Be careful not to drop bolts into torque converter
housing.
Tightening torque:
25±2 N⋅m (2.5±0.2 kg-m, 18.1±1.4 ft-lb)
(3) Clog plug onto service hole.
B2M0017
(4) Install V-belt cover.
B2M1179B
7) Install operating cylinder. (Hydraulic clutch model)
Tightening torque:
37±3 N⋅m (3.8±0.3 kg-m, 27.5±2.2 ft-lb)
G2M0313
8) Remove special tools.
40
2-11SERVICE PROCEDURE
3. Transmission
 Install cooling system.
(1) Attach radiator mounting cushions to body.
G2M0220
(2) Install radiator while fitting radiator pins to cush-
ions.
B2M0320
(3) Install radiator brackets and ti")


 Install transmission onto engine.
(1) Gradually raise transmission with transmission
jack.
(2) Engage them at splines.
CAUTION:
Be careful not to strike mainshaft against clutch cover.
(MT")
 Install torque converter to drive plate. (AT model)
(1) Tighten bolts which hold torque converter to drive
plate.
(2) Tighten other bolts while rotating the engine by
using ST.
ST 499977000")