Page 1077 of 2890
Tightening torque:
186±20 N⋅m (19±2 kg-m, 137±14 ft-lb)
CAUTION:
�Use a new axle nut.
�Always tighten axle nut before installing wheel on
vehicle. If wheel is installed and comes in contact with
ground when axle nut is loose, wheel bearings may be
damaged.
�Be sure to tighten axle nut to specified torque. Do
not overtighten it as this may damage wheel bearing.
12) Install O-ring to hub cap flange, and install hub cap by
lightly tapping it with a plastic-faced hammer.
13) Install wheel and tighten wheel nuts to specified
torque.
Tightening torque (Wheel nut):
88±10 N⋅m (9±1 kg-m, 65±7 ft-lb)
4. Front and Rear Drive Shafts
A: REMOVAL
1. FRONT DRIVE SHAFT
1) Disconnect ground cable from battery.
2) Jack-up vehicle, support it with safety stands (rigid
racks), and remove front wheel cap and wheels.
3) Unlock axle nut.
4) While depressing brake pedal, remove axle nut using a
socket wrench.
CAUTION:
Be sure to loosen and retighten axle nut after remov-
ing wheel from vehicle. Failure to follow this rule may
damage wheel bearings.
5) Disconnect stabilizer link from transverse link.
6) Disconnect transverse link from housing.
G4M0279
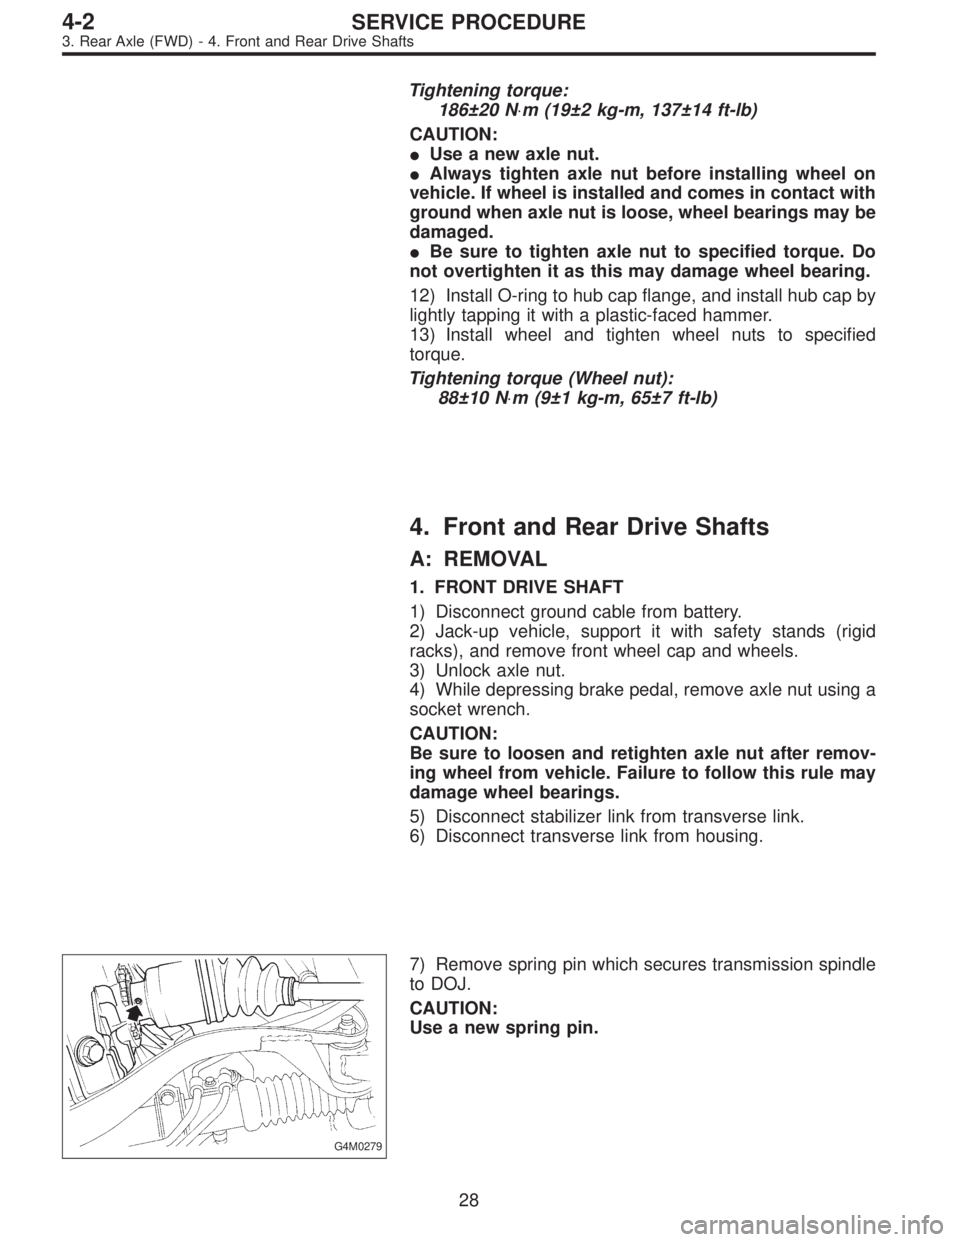
7) Remove spring pin which secures transmission spindle
to DOJ.
CAUTION:
Use a new spring pin.
28
4-2SERVICE PROCEDURE
3. Rear Axle (FWD) - 4. Front and Rear Drive Shafts
Page 1078 of 2890
Tightening torque:
186±20 N⋅m (19±2 kg-m, 137±14 ft-lb)
CAUTION:
�Use a new axle nut.
�Always tighten axle nut before installing wheel on
vehicle. If wheel is installed and comes in contact with
ground when axle nut is loose, wheel bearings may be
damaged.
�Be sure to tighten axle nut to specified torque. Do
not overtighten it as this may damage wheel bearing.
12) Install O-ring to hub cap flange, and install hub cap by
lightly tapping it with a plastic-faced hammer.
13) Install wheel and tighten wheel nuts to specified
torque.
Tightening torque (Wheel nut):
88±10 N⋅m (9±1 kg-m, 65±7 ft-lb)
4. Front and Rear Drive Shafts
A: REMOVAL
1. FRONT DRIVE SHAFT
1) Disconnect ground cable from battery.
2) Jack-up vehicle, support it with safety stands (rigid
racks), and remove front wheel cap and wheels.
3) Unlock axle nut.
4) While depressing brake pedal, remove axle nut using a
socket wrench.
CAUTION:
Be sure to loosen and retighten axle nut after remov-
ing wheel from vehicle. Failure to follow this rule may
damage wheel bearings.
5) Disconnect stabilizer link from transverse link.
6) Disconnect transverse link from housing.
G4M0279
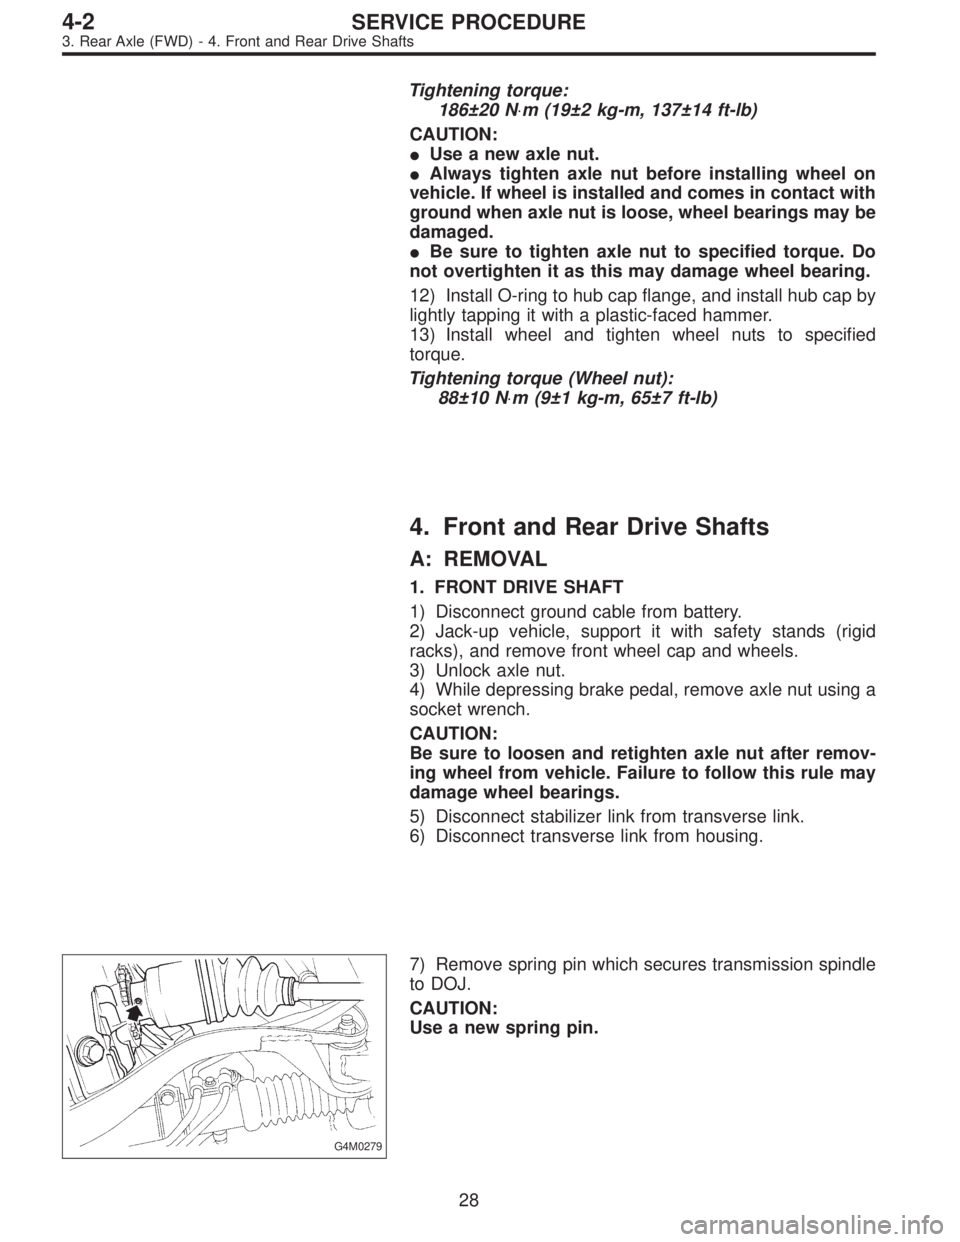
7) Remove spring pin which secures transmission spindle
to DOJ.
CAUTION:
Use a new spring pin.
28
4-2SERVICE PROCEDURE
3. Rear Axle (FWD) - 4. Front and Rear Drive Shafts
Page 1079 of 2890
G4M0216
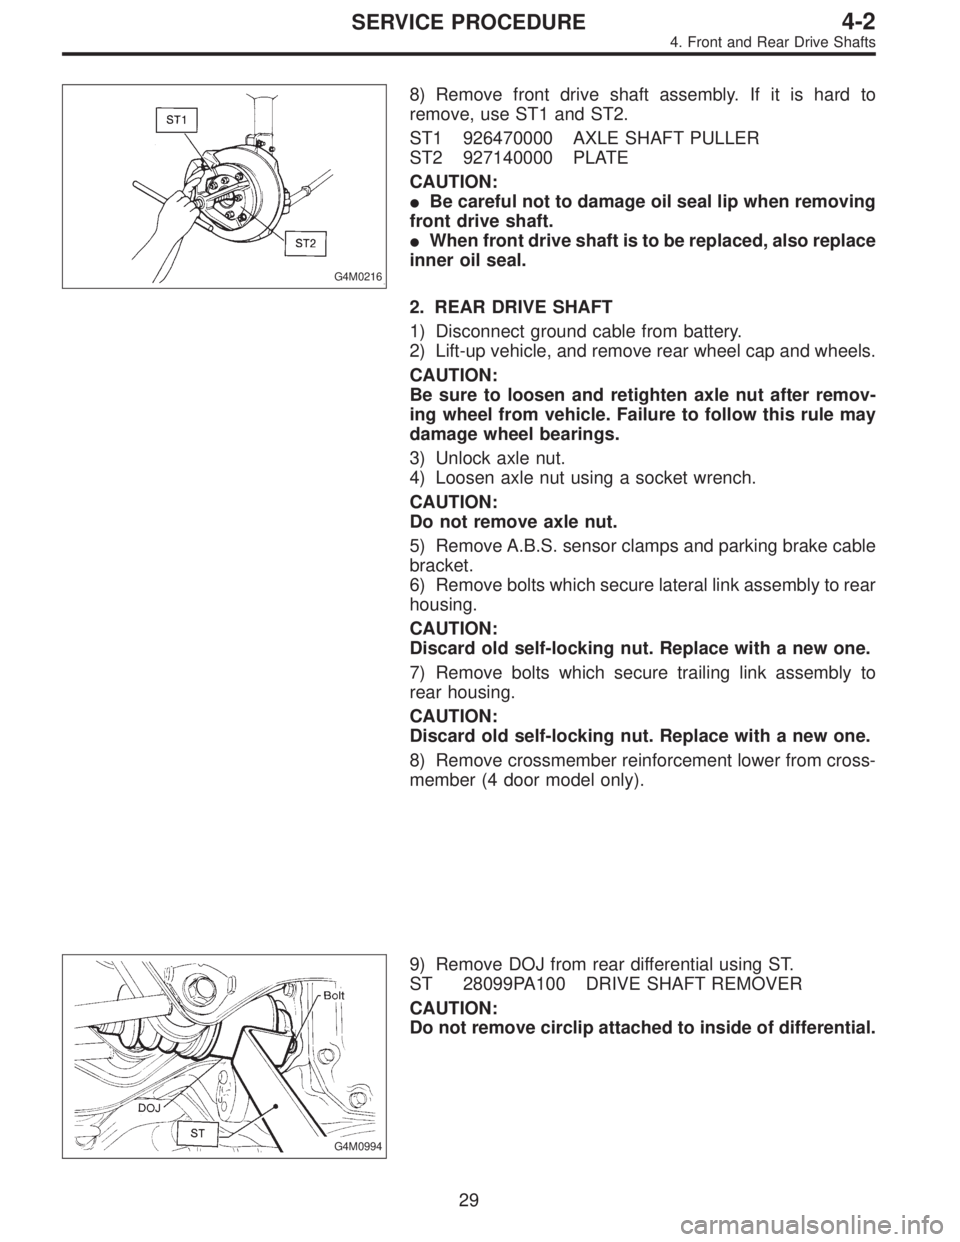
8) Remove front drive shaft assembly. If it is hard to
remove, use ST1 and ST2.
ST1 926470000 AXLE SHAFT PULLER
ST2 927140000 PLATE
CAUTION:
�Be careful not to damage oil seal lip when removing
front drive shaft.
�When front drive shaft is to be replaced, also replace
inner oil seal.
2. REAR DRIVE SHAFT
1) Disconnect ground cable from battery.
2) Lift-up vehicle, and remove rear wheel cap and wheels.
CAUTION:
Be sure to loosen and retighten axle nut after remov-
ing wheel from vehicle. Failure to follow this rule may
damage wheel bearings.
3) Unlock axle nut.
4) Loosen axle nut using a socket wrench.
CAUTION:
Do not remove axle nut.
5) Remove A.B.S. sensor clamps and parking brake cable
bracket.
6) Remove bolts which secure lateral link assembly to rear
housing.
CAUTION:
Discard old self-locking nut. Replace with a new one.
7) Remove bolts which secure trailing link assembly to
rear housing.
CAUTION:
Discard old self-locking nut. Replace with a new one.
8) Remove crossmember reinforcement lower from cross-
member (4 door model only).
G4M0994
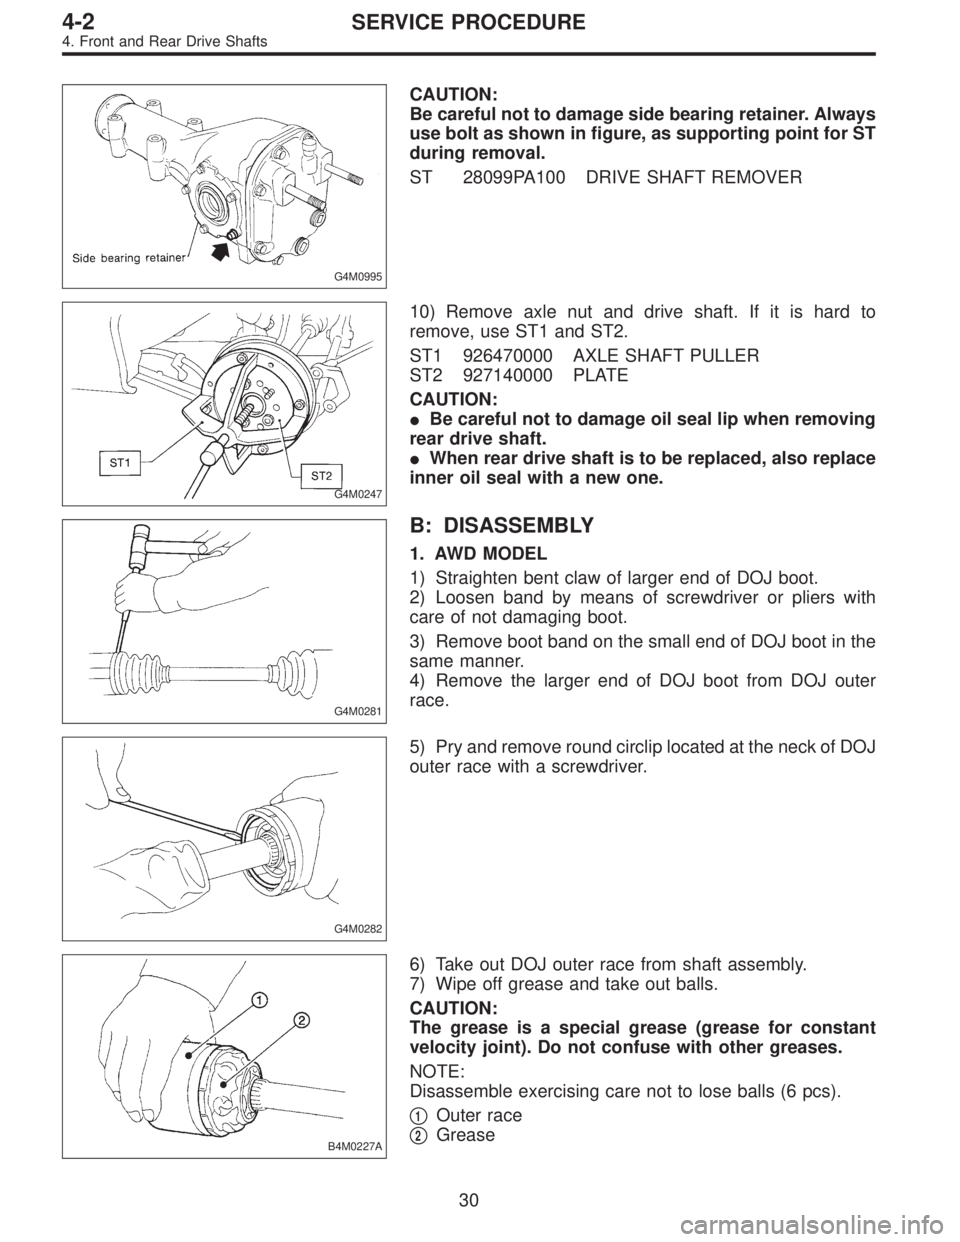
9) Remove DOJ from rear differential using ST.
ST 28099PA100 DRIVE SHAFT REMOVER
CAUTION:
Do not remove circlip attached to inside of differential.
29
4-2SERVICE PROCEDURE
4. Front and Rear Drive Shafts
Page 1080 of 2890
G4M0995
CAUTION:
Be careful not to damage side bearing retainer. Always
use bolt as shown in figure, as supporting point for ST
during removal.
ST 28099PA100 DRIVE SHAFT REMOVER
G4M0247
10) Remove axle nut and drive shaft. If it is hard to
remove, use ST1 and ST2.
ST1 926470000 AXLE SHAFT PULLER
ST2 927140000 PLATE
CAUTION:
�Be careful not to damage oil seal lip when removing
rear drive shaft.
�When rear drive shaft is to be replaced, also replace
inner oil seal with a new one.
G4M0281
B: DISASSEMBLY
1. AWD MODEL
1) Straighten bent claw of larger end of DOJ boot.
2) Loosen band by means of screwdriver or pliers with
care of not damaging boot.
3) Remove boot band on the small end of DOJ boot in the
same manner.
4) Remove the larger end of DOJ boot from DOJ outer
race.
G4M0282
5) Pry and remove round circlip located at the neck of DOJ
outer race with a screwdriver.
B4M0227A
6) Take out DOJ outer race from shaft assembly.
7) Wipe off grease and take out balls.
CAUTION:
The grease is a special grease (grease for constant
velocity joint). Do not confuse with other greases.
NOTE:
Disassemble exercising care not to lose balls (6 pcs).
�
1Outer race
�
2Grease
30
4-2SERVICE PROCEDURE
4. Front and Rear Drive Shafts
Page 1081 of 2890
8) To remove the cage from the inner race, turn the cage
by a half pitch to the track groove of the inner race and shift
the cage.
9) Remove snap ring, which fixes inner race to shaft, by
using pliers.
10) Take out DOJ inner race.
11) Take off DOJ cage from shaft and remove DOJ boot.
CAUTION:
Be sure to wrap shaft splines with vinyl tape to prevent
boot from scratches.
12) Remove UFJ/BJ boot in the same procedure as steps
1) to 3).
13) Thus, disassembly of axle is completed, but UFJ/BJ is
unable to be disassembled.
G4M0281
2. FWD MODEL
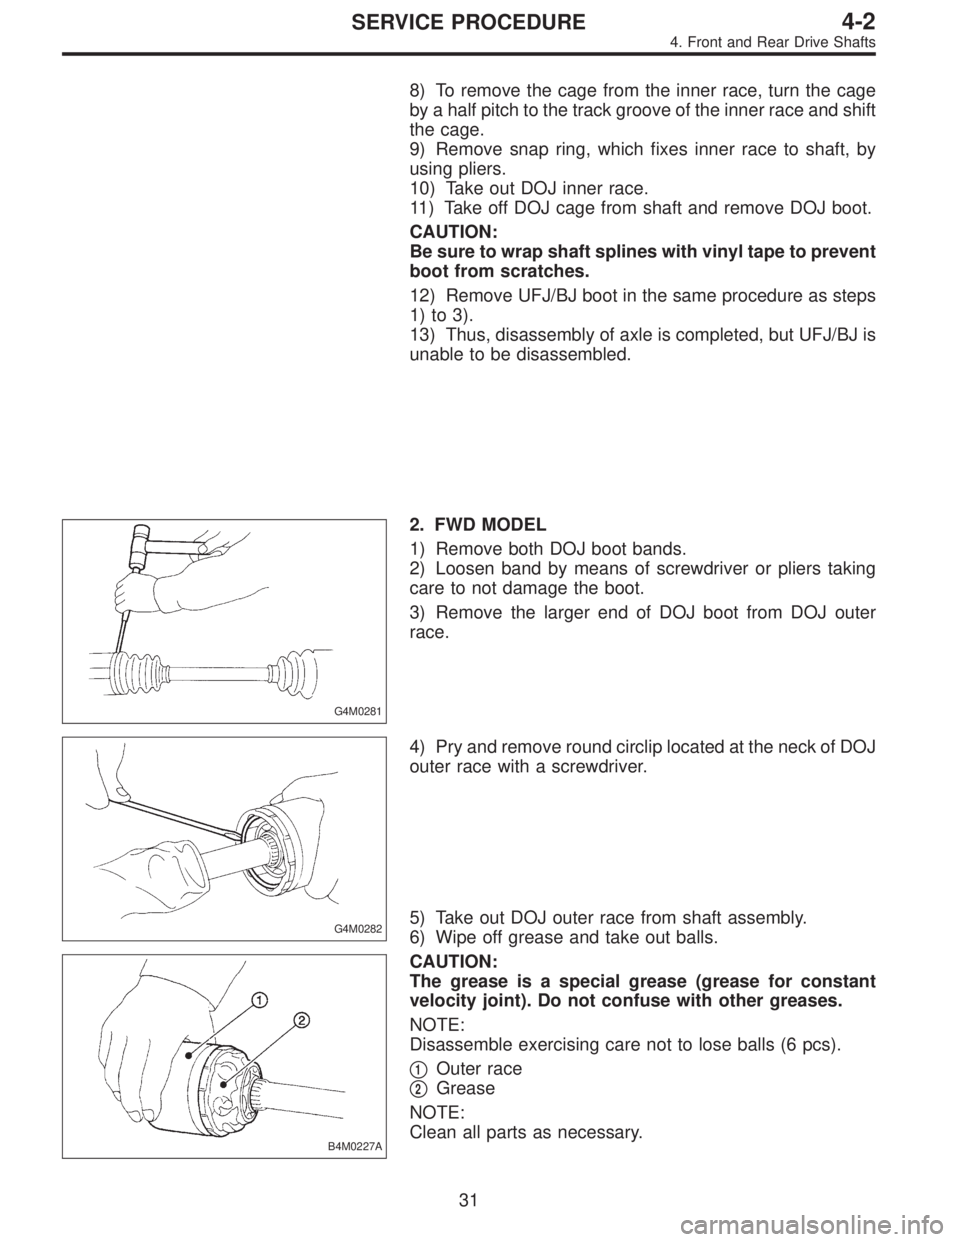
1) Remove both DOJ boot bands.
2) Loosen band by means of screwdriver or pliers taking
care to not damage the boot.
3) Remove the larger end of DOJ boot from DOJ outer
race.
G4M0282
4) Pry and remove round circlip located at the neck of DOJ
outer race with a screwdriver.
B4M0227A
5) Take out DOJ outer race from shaft assembly.
6) Wipe off grease and take out balls.
CAUTION:
The grease is a special grease (grease for constant
velocity joint). Do not confuse with other greases.
NOTE:
Disassemble exercising care not to lose balls (6 pcs).
�
1Outer race
�
2Grease
NOTE:
Clean all parts as necessary.
31
4-2SERVICE PROCEDURE
4. Front and Rear Drive Shafts
Page 1082 of 2890
7) To remove the cage from the inner race, turn the cage
by a half pitch to the track groove of the inner race and shift
the cage.
8) Remove snap ring, which holds the inner race to shaft,
by using pliers.
9) Take out DOJ inner race.
10) Take off DOJ cage from shaft and remove DOJ boot.
CAUTION:
Be sure to wrap shaft splines with vinyl tape to protect
the boot from scratches.
11) Place drive shaft in a vise between wooden blocks.
CAUTION:
Do not place drive shaft directly in the vise; use
wooden block.
B4M0689A
12) Raise boot band claws by means of screwdriver and
hammer.
B4M0690
13) Cut and remove the boot.
CAUTION:
The boot must be replaced with a new one whenever
it is removed.
14) Thus, disassembly of axle is completed, but UFJ can-
not be disassembled.
32
4-2SERVICE PROCEDURE
4. Front and Rear Drive Shafts
Page 1093 of 2890
G4M0289
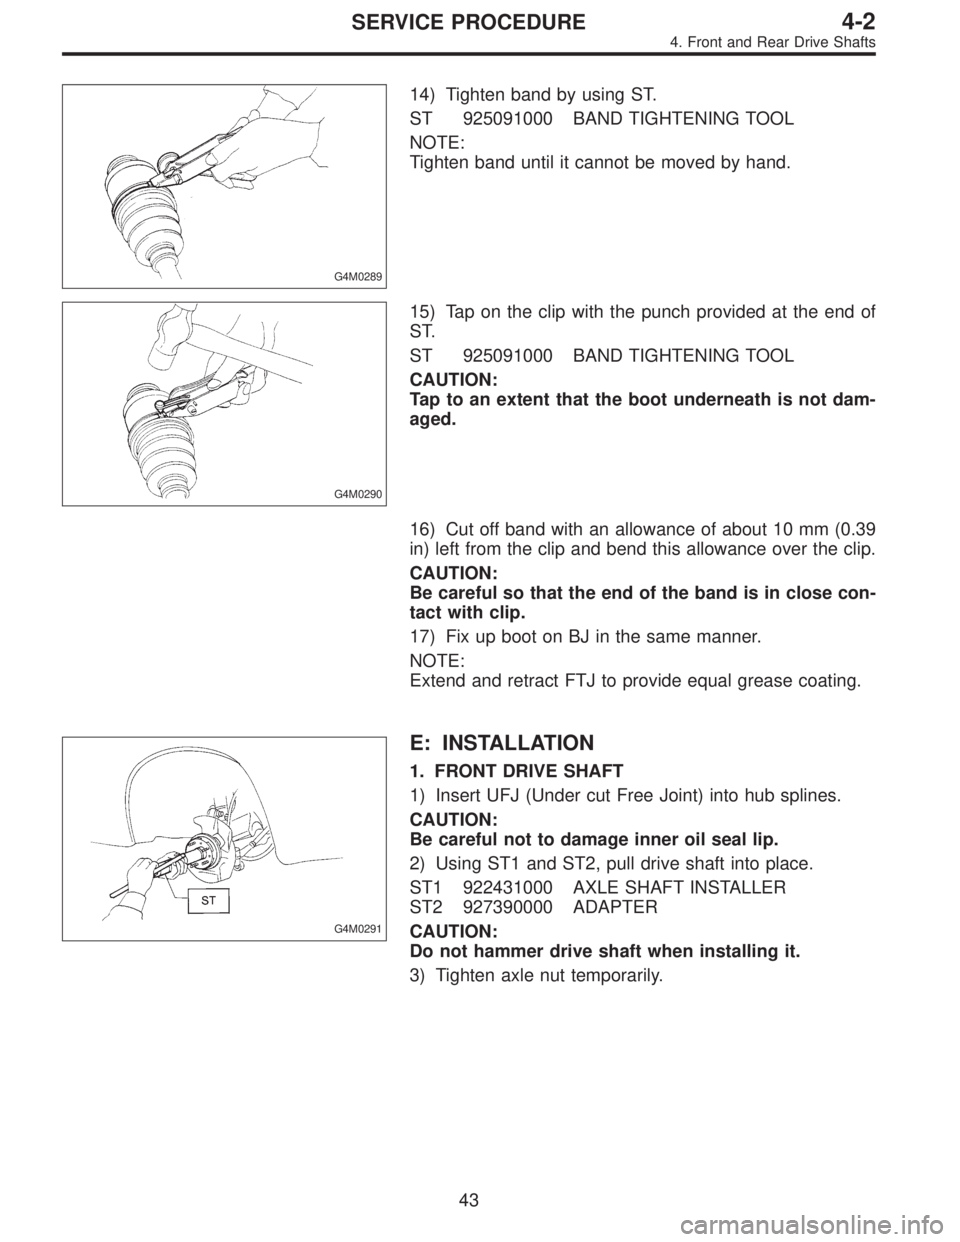
14) Tighten band by using ST.
ST 925091000 BAND TIGHTENING TOOL
NOTE:
Tighten band until it cannot be moved by hand.
G4M0290
15) Tap on the clip with the punch provided at the end of
ST.
ST 925091000 BAND TIGHTENING TOOL
CAUTION:
Tap to an extent that the boot underneath is not dam-
aged.
16) Cut off band with an allowance of about 10 mm (0.39
in) left from the clip and bend this allowance over the clip.
CAUTION:
Be careful so that the end of the band is in close con-
tact with clip.
17) Fix up boot on BJ in the same manner.
NOTE:
Extend and retract FTJ to provide equal grease coating.
G4M0291
E: INSTALLATION
1. FRONT DRIVE SHAFT
1) Insert UFJ (Under cut Free Joint) into hub splines.
CAUTION:
Be careful not to damage inner oil seal lip.
2) Using ST1 and ST2, pull drive shaft into place.
ST1 922431000 AXLE SHAFT INSTALLER
ST2 927390000 ADAPTER
CAUTION:
Do not hammer drive shaft when installing it.
3) Tighten axle nut temporarily.
43
4-2SERVICE PROCEDURE
4. Front and Rear Drive Shafts
Page 1094 of 2890
G4M0279
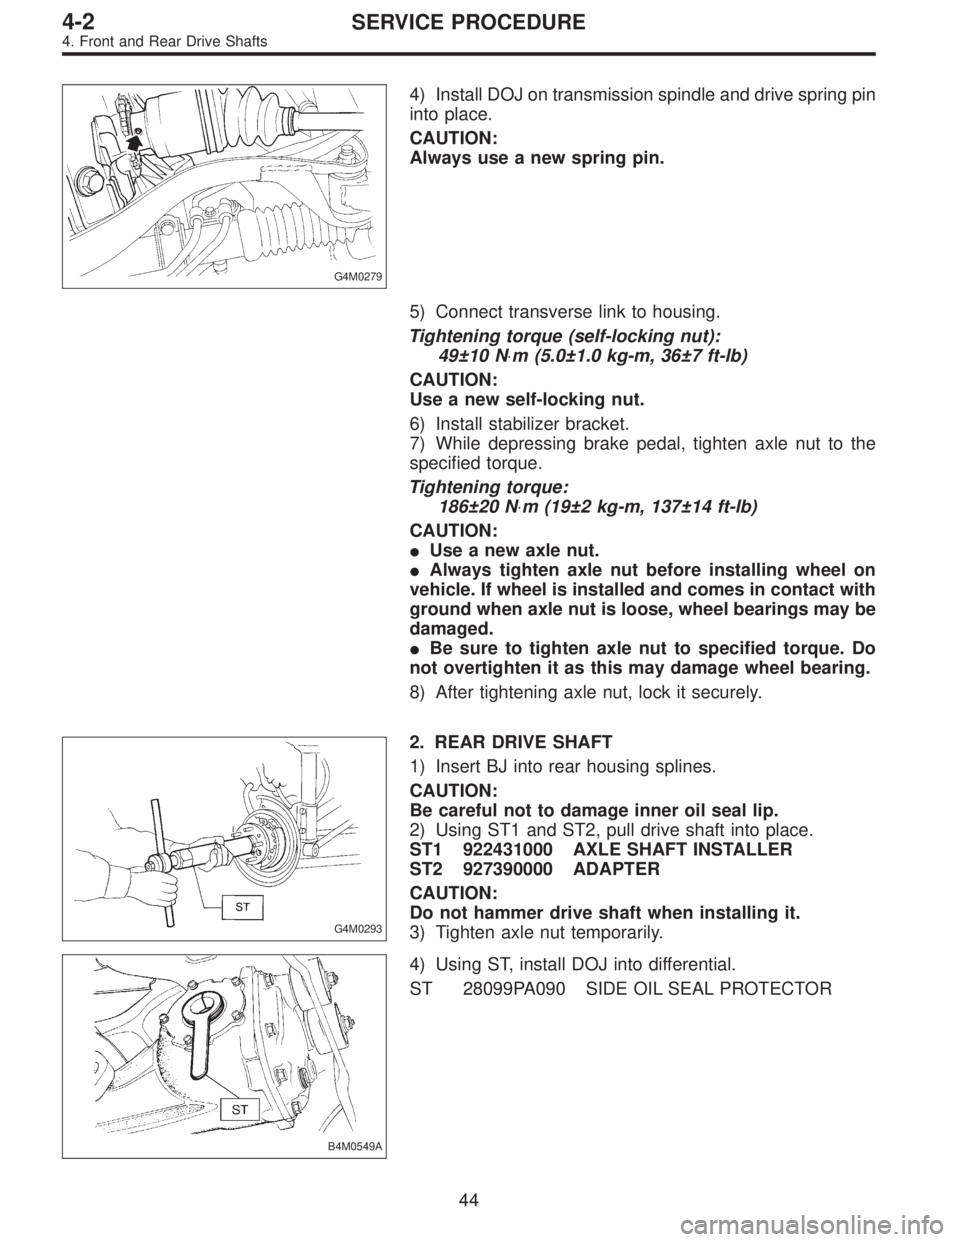
4) Install DOJ on transmission spindle and drive spring pin
into place.
CAUTION:
Always use a new spring pin.
5) Connect transverse link to housing.
Tightening torque (self-locking nut):
49±10 N⋅m (5.0±1.0 kg-m, 36±7 ft-lb)
CAUTION:
Use a new self-locking nut.
6) Install stabilizer bracket.
7) While depressing brake pedal, tighten axle nut to the
specified torque.
Tightening torque:
186±20 N⋅m (19±2 kg-m, 137±14 ft-lb)
CAUTION:
�Use a new axle nut.
�Always tighten axle nut before installing wheel on
vehicle. If wheel is installed and comes in contact with
ground when axle nut is loose, wheel bearings may be
damaged.
�Be sure to tighten axle nut to specified torque. Do
not overtighten it as this may damage wheel bearing.
8) After tightening axle nut, lock it securely.
G4M0293
2. REAR DRIVE SHAFT
1) Insert BJ into rear housing splines.
CAUTION:
Be careful not to damage inner oil seal lip.
2) Using ST1 and ST2, pull drive shaft into place.
ST1 922431000 AXLE SHAFT INSTALLER
ST2 927390000 ADAPTER
CAUTION:
Do not hammer drive shaft when installing it.
3) Tighten axle nut temporarily.
B4M0549A
4) Using ST, install DOJ into differential.
ST 28099PA090 SIDE OIL SEAL PROTECTOR
44
4-2SERVICE PROCEDURE
4. Front and Rear Drive Shafts