Page 491 of 2543
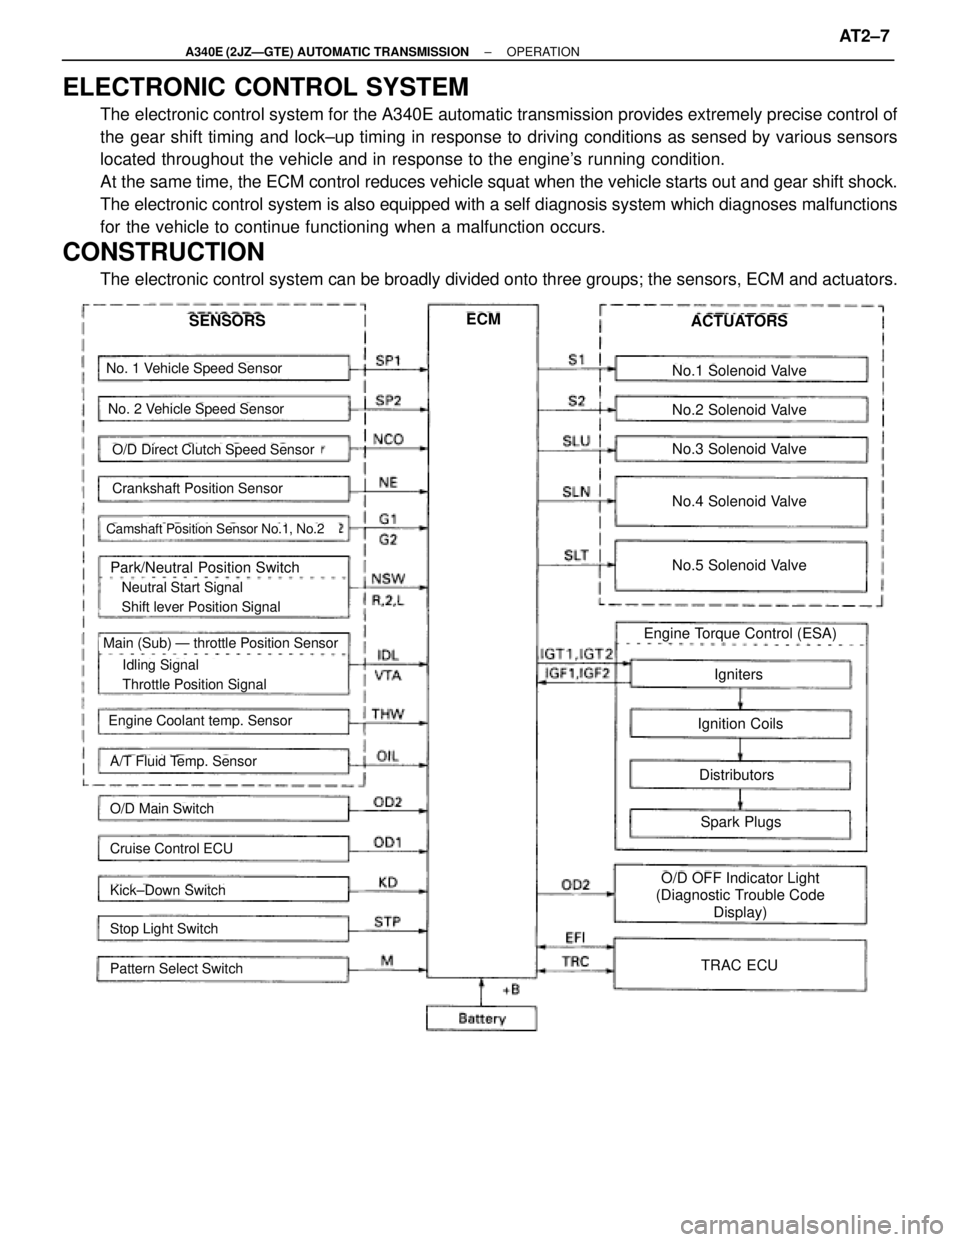
ELECTRONIC CONTROL SYSTEM
The electronic control system for the A340E automatic transmission provides extremely precise control of
the gear shift timing and lock±up timing in response to driving conditions as sensed by various sensors
located throughout the vehicle and in response to the engine's running condition.
At the same time, the ECM control reduces vehicle squat when the vehicle starts out and gear shift shock.
The electronic control system is also equipped with a self diagnosis system which diagnoses malfunctions
for the vehicle to continue functioning when a malfunction occurs.
CONSTRUCTION
The electronic control system can be broadly divided onto three groups; the sensors, ECM and actuators.
No. 1 Vehicle Speed Sensor
No. 2 Vehicle Speed Sensor
Crankshaft Position Sensor
Camshaft Position Sensor No.1, No.2
Park/Neutral Position Switch
� Neutral Start Signal
� Shift lever Position Signal
� Idling Signal
� Throttle Position Signal
Main (Sub) Ð throttle Position Sensor
Engine Coolant temp. Sensor
A/T Fluid Temp. Sensor
O/D Main Switch
Cruise Control ECU
Kick±Down Switch
Stop Light Switch
Pattern Select Switch
SENSORSECMACTUATORS
No.1 Solenoid Valve
No.2 Solenoid Valve
No.3 Solenoid Valve
No.4 Solenoid Valve
No.5 Solenoid Valve
Engine Torque Control (ESA)
Igniters
Ignition Coils
Distributors
Spark Plugs
O/D OFF Indicator Light
(Diagnostic Trouble Code
Display)
TRAC ECU
O/D Direct Clutch Speed Sensor
± A340E (2JZÐGTE) AUTOMATIC TRANSMISSIONOPERATIONAT2±7
Page 1140 of 2543
HIGH±TENSION CORDS INSPECTION
1. REMOVE THROTTLE BODY
(See throttle body removal in SFI System)
2. REMOVE NO.3 TIMING BELT COVER
3. REMOVE CYLINDER HEAD REAR COVER
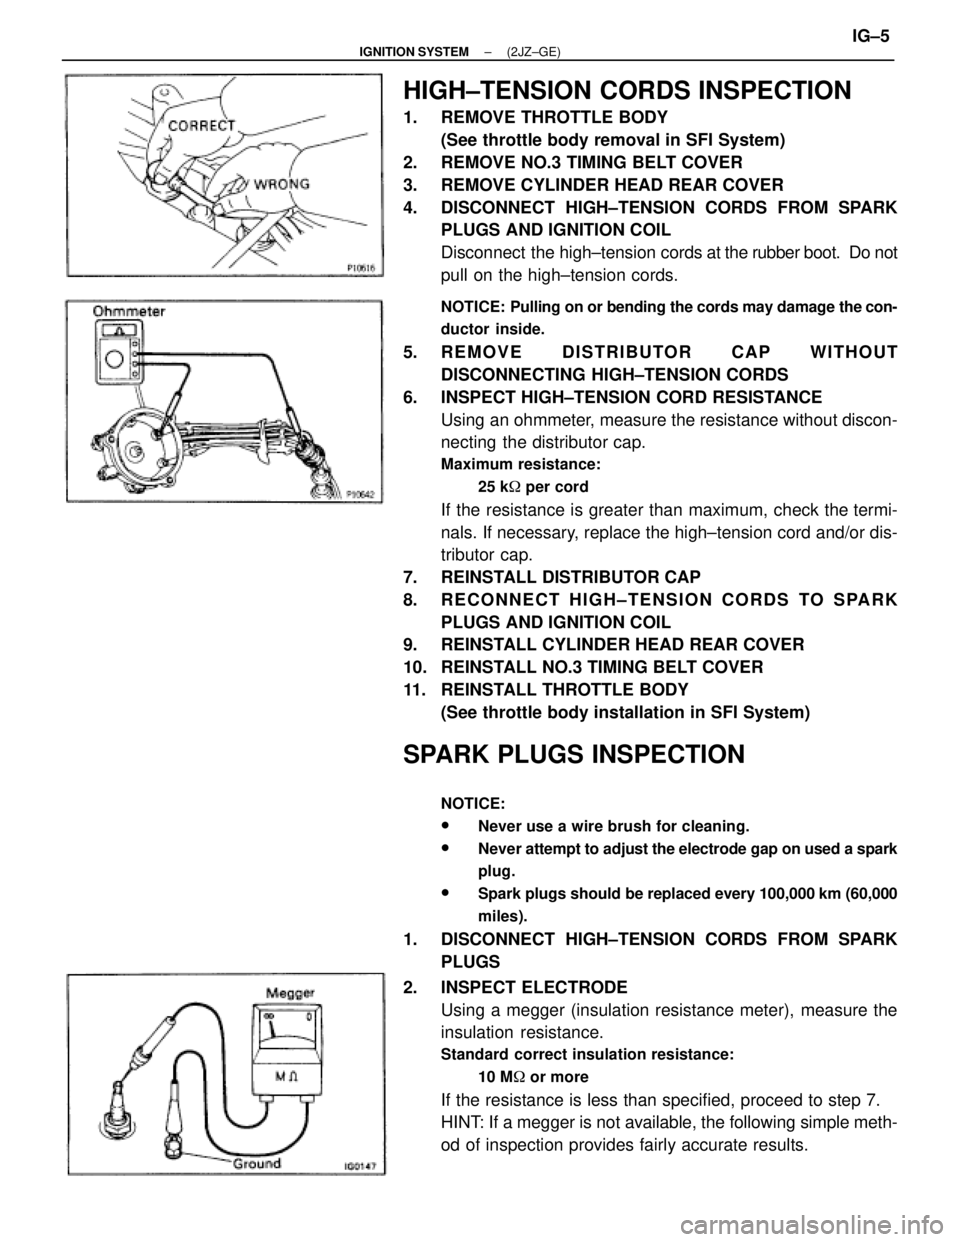
4. DISCONNECT HIGH±TENSION CORDS FROM SPARK
PLUGS AND IGNITION COIL
Disconnect the high±tension cords at the rubber boot. Do not
pull on the high±tension cords.
NOTICE: Pulling on or bending the cords may damage the con-
ductor inside.
5. REMOVE DISTRIBUTOR CAP WITHOUT
DISCONNECTING HIGH±TENSION CORDS
6. INSPECT HIGH±TENSION CORD RESISTANCE
Using an ohmmeter, measure the resistance without discon-
necting the distributor cap.
Maximum resistance:
25 k� per cord
If the resistance is greater than maximum, check the termi-
nals. If necessary, replace the high±tension cord and/or dis-
tributor cap.
7. REINSTALL DISTRIBUTOR CAP
8. RECONNECT HIGH±TENSION CORDS TO SPARK
PLUGS AND IGNITION COIL
9. REINSTALL CYLINDER HEAD REAR COVER
10. REINSTALL NO.3 TIMING BELT COVER
11. REINSTALL THROTTLE BODY
(See throttle body installation in SFI System)
SPARK PLUGS INSPECTION
NOTICE:
wNever use a wire brush for cleaning.
wNever attempt to adjust the electrode gap on used a spark
plug.
wSpark plugs should be replaced every 100,000 km (60,000
miles).
1. DISCONNECT HIGH±TENSION CORDS FROM SPARK
PLUGS
2. INSPECT ELECTRODE
Using a megger (insulation resistance meter), measure the
insulation resistance.
Standard correct insulation resistance:
10 M� or more
If the resistance is less than specified, proceed to step 7.
HINT: If a megger is not available, the following simple meth-
od of inspection provides fairly accurate results.
± IGNITION SYSTEM(2JZ±GE)IG±5
Page 1141 of 2543
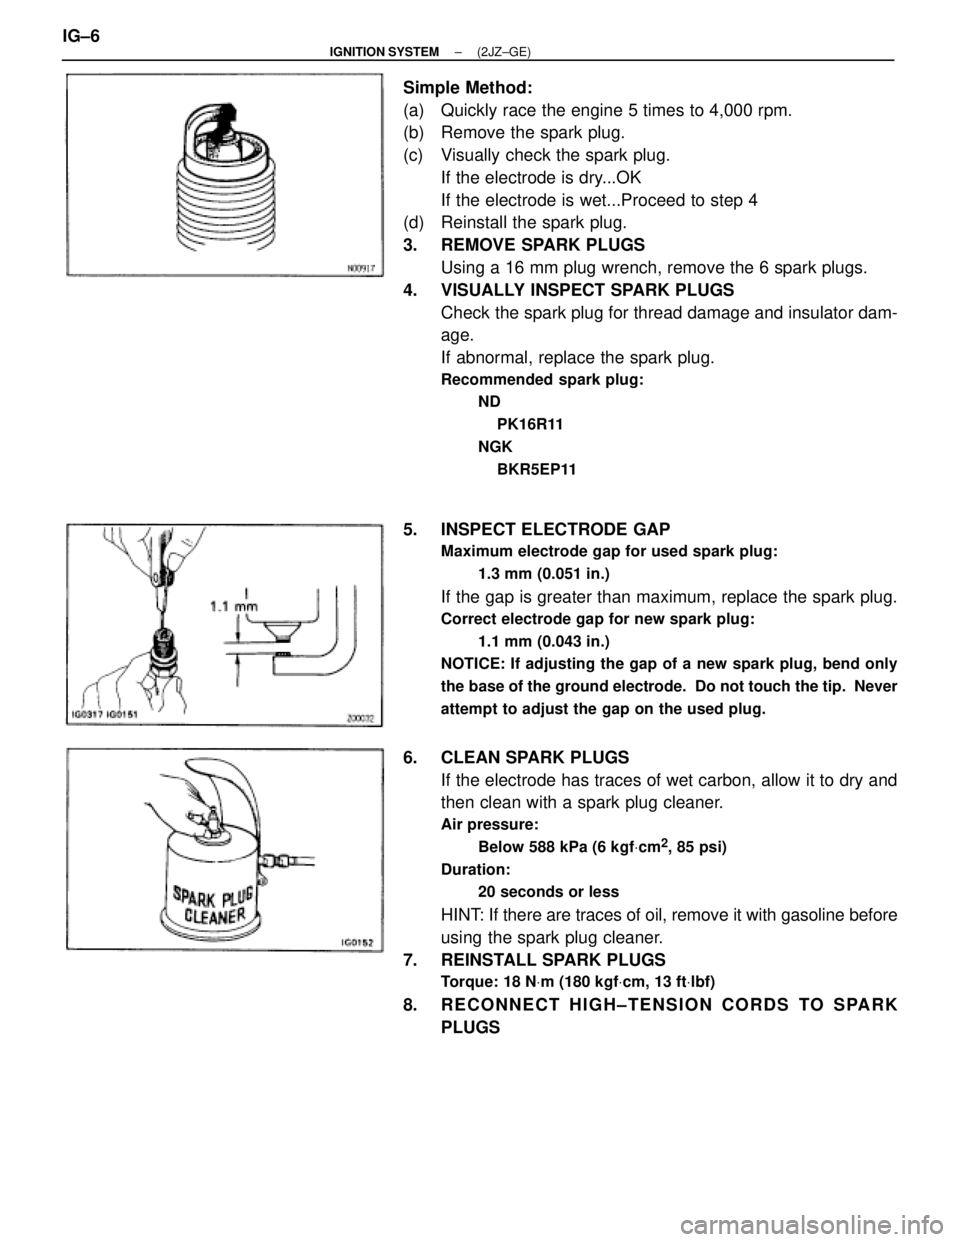
Simple Method:
(a) Quickly race the engine 5 times to 4,000 rpm.
(b) Remove the spark plug.
(c) Visually check the spark plug.
If the electrode is dry...OK
If the electrode is wet...Proceed to step 4
(d) Reinstall the spark plug.
3. REMOVE SPARK PLUGS
Using a 16 mm plug wrench, remove the 6 spark plugs.
4. VISUALLY INSPECT SPARK PLUGS
Check the spark plug for thread damage and insulator dam-
age.
If abnormal, replace the spark plug.
Recommended spark plug:
ND
PK16R11
NGK
BKR5EP11
5. INSPECT ELECTRODE GAP
Maximum electrode gap for used spark plug:
1.3 mm (0.051 in.)
If the gap is greater than maximum, replace the spark plug.
Correct electrode gap for new spark plug:
1.1 mm (0.043 in.)
NOTICE: If adjusting the gap of a new spark plug, bend only
the base of the ground electrode. Do not touch the tip. Never
attempt to adjust the gap on the used plug.
6. CLEAN SPARK PLUGS
If the electrode has traces of wet carbon, allow it to dry and
then clean with a spark plug cleaner.
Air pressure:
Below 588 kPa (6 kgfVcm
2, 85 psi)
Duration:
20 seconds or less
HINT: If there are traces of oil, remove it with gasoline before
using the spark plug cleaner.
7. REINSTALL SPARK PLUGS
Torque: 18 NVm (180 kgfVcm, 13 ftVlbf)
8. RECONNECT HIGH±TENSION CORDS TO SPARK
PLUGS IG±6
± IGNITION SYSTEM(2JZ±GE)
Page 1146 of 2543
(d) Disconnect the high±tension cords from the spark plugs.
Disconnect the high±tension cords at the rubber boot. Do not
pull on the cords.
NOTICE: Pulling on or bending the cords may damage the con-
ductor inside.
(e) Re mo ve th e 7 high±tension cords and 8 cord clamps
assembly.
5. REMOVE CORD CLAMPS FROM HIGH±TENSION CORDS
HIGH±TENSION CORDS AND CORD
CLAMPS INSTALLATION
1. INSTALL HIGH±TENSION CORDS
(a) Connect the high±tension cords to the spark plugs.
wFace the cord of the high±tension cord as shown in the
illustration.
± IGNITION SYSTEM(2JZ±GE)IG±11
Page 1157 of 2543
SPARK PLUGS INSPECTION
NOTICE:
wNever use a wire brush for cleaning.
wNever attempt to adjust the electrode gap on used a spark
plug.
wSpark plugs should be replaced every 100,000 km (60,000
miles).
1. REMOVE IGNITION COILS ASSEMBLIES
(See ignition coils removal)
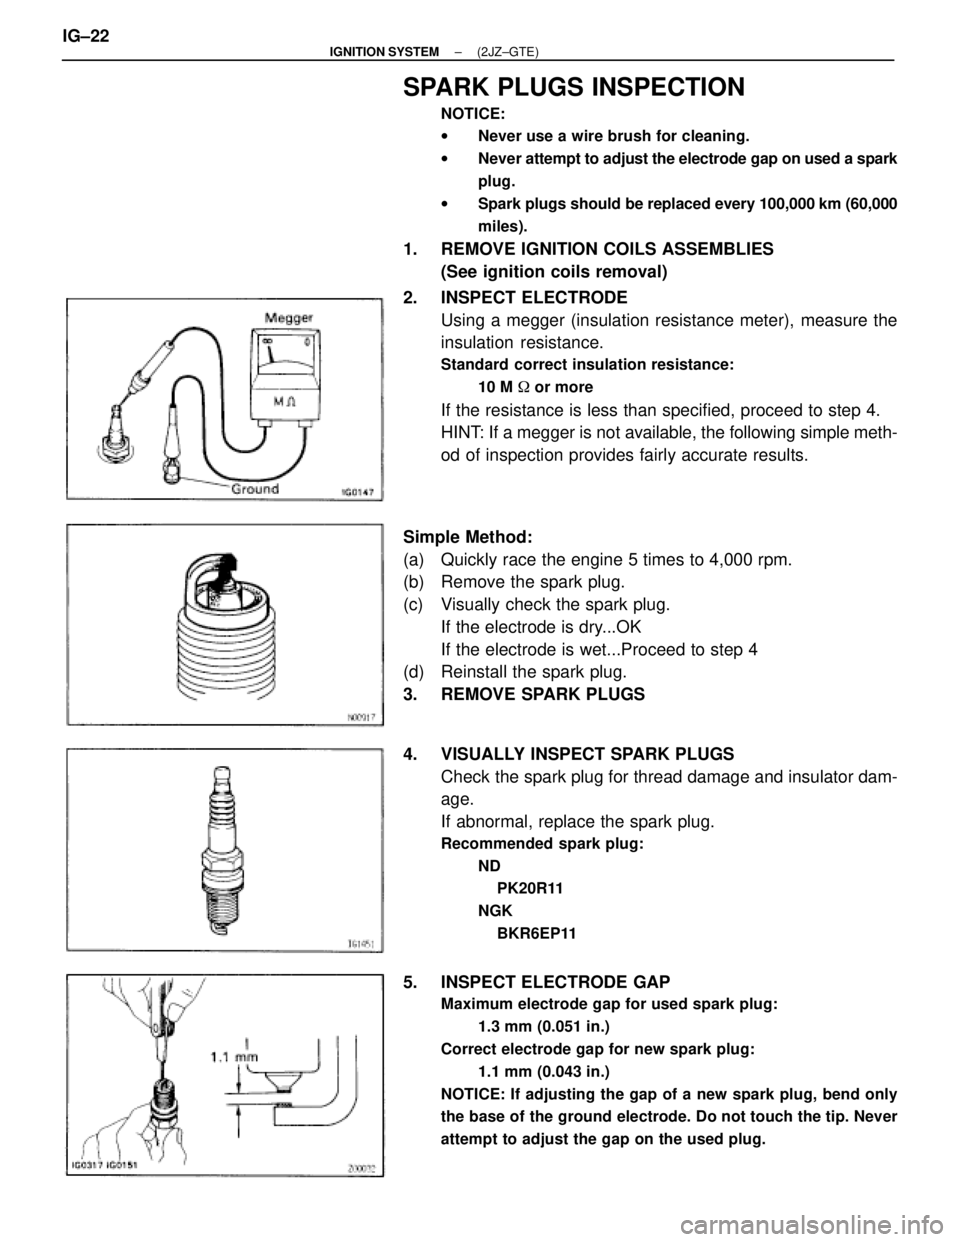
2. INSPECT ELECTRODE
Using a megger (insulation resistance meter), measure the
insulation resistance.
Standard correct insulation resistance:
10 M � or more
If the resistance is less than specified, proceed to step 4.
HINT: If a megger is not available, the following simple meth-
od of inspection provides fairly accurate results.
Simple Method:
(a) Quickly race the engine 5 times to 4,000 rpm.
(b) Remove the spark plug.
(c) Visually check the spark plug.
If the electrode is dry...OK
If the electrode is wet...Proceed to step 4
(d) Reinstall the spark plug.
3. REMOVE SPARK PLUGS
4. VISUALLY INSPECT SPARK PLUGS
Check the spark plug for thread damage and insulator dam-
age.
If abnormal, replace the spark plug.
Recommended spark plug:
ND
PK20R11
NGK
BKR6EP11
5. INSPECT ELECTRODE GAP
Maximum electrode gap for used spark plug:
1.3 mm (0.051 in.)
Correct electrode gap for new spark plug:
1.1 mm (0.043 in.)
NOTICE: If adjusting the gap of a new spark plug, bend only
the base of the ground electrode. Do not touch the tip. Never
attempt to adjust the gap on the used plug.
IG±22± IGNITION SYSTEM(2JZ±GTE)
Page 1158 of 2543
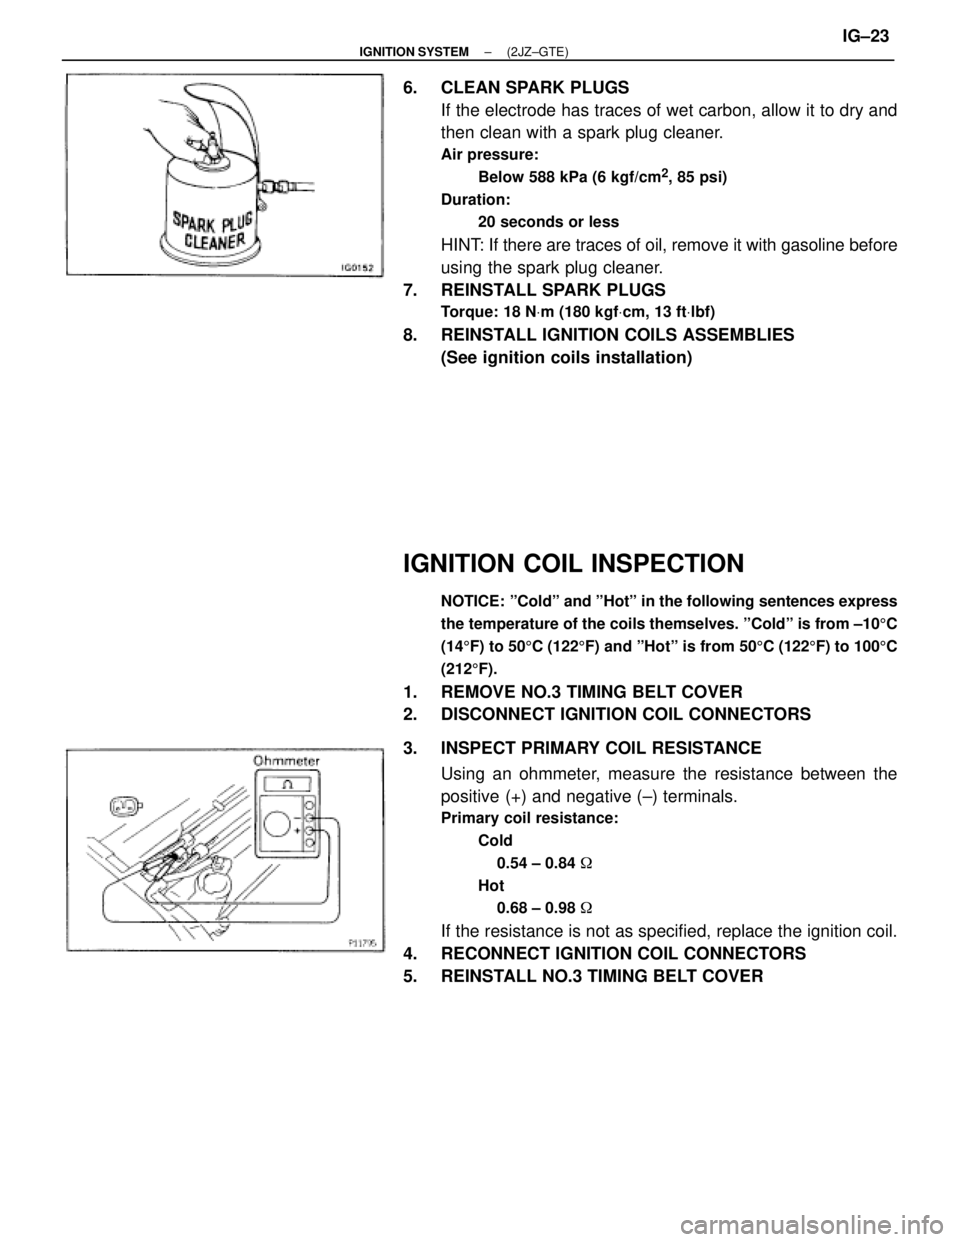
6. CLEAN SPARK PLUGS
If the electrode has traces of wet carbon, allow it to dry and
then clean with a spark plug cleaner.
Air pressure:
Below 588 kPa (6 kgf/cm
2, 85 psi)
Duration:
20 seconds or less
HINT: If there are traces of oil, remove it with gasoline before
using the spark plug cleaner.
7. REINSTALL SPARK PLUGS
Torque: 18 NVm (180 kgfVcm, 13 ftVlbf)
8. REINSTALL IGNITION COILS ASSEMBLIES
(See ignition coils installation)
IGNITION COIL INSPECTION
NOTICE: ºColdº and ºHotº in the following sentences express
the temperature of the coils themselves. ºColdº is from ±105C
(145F) to 505C (1225F) and ºHotº is from 505C (1225F) to 1005C
(2125F).
1. REMOVE NO.3 TIMING BELT COVER
2. DISCONNECT IGNITION COIL CONNECTORS
3. INSPECT PRIMARY COIL RESISTANCE
Using an ohmmeter, measure the resistance between the
positive (+) and negative (±) terminals.
Primary coil resistance:
Cold
0.54 ± 0.84 �
Hot
0.68 ± 0.98 �
If the resistance is not as specified, replace the ignition coil.
4. RECONNECT IGNITION COIL CONNECTORS
5. REINSTALL NO.3 TIMING BELT COVER
± IGNITION SYSTEM(2JZ±GTE)IG±23
Page 1239 of 2543
MAINTENANCE OPERATIONS
ENGINE
Cold Engine Operations
1. REPLACE TIMING BELT
(See timing belt removal and installation in Engine Me-
chanical)
2. INSPECT DRIVE BELT
(See step 3 in on±vehicle insection in Charging System)
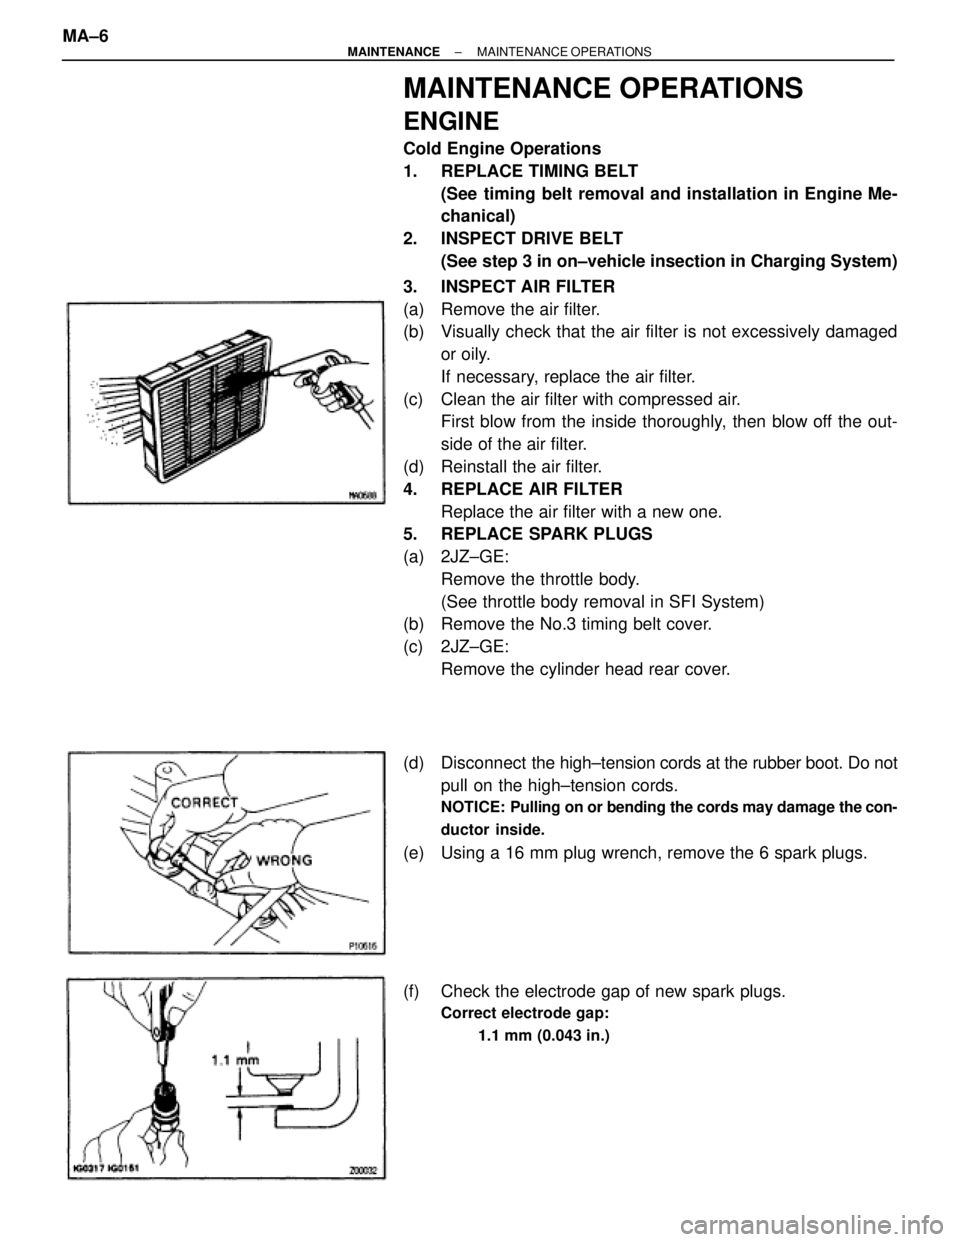
3. INSPECT AIR FILTER
(a) Remove the air filter.
(b) Visually check that the air filter is not excessively damaged
or oily.
If necessary, replace the air filter.
(c) Clean the air filter with compressed air.
First blow from the inside thoroughly, then blow off the out-
side of the air filter.
(d) Reinstall the air filter.
4. REPLACE AIR FILTER
Replace the air filter with a new one.
5. REPLACE SPARK PLUGS
(a) 2JZ±GE:
Remove the throttle body.
(See throttle body removal in SFI System)
(b) Remove the No.3 timing belt cover.
(c) 2JZ±GE:
Remove the cylinder head rear cover.
(d) Disconnect the high±tension cords at the rubber boot. Do not
pull on the high±tension cords.
NOTICE: Pulling on or bending the cords may damage the con-
ductor inside.
(e) Using a 16 mm plug wrench, remove the 6 spark plugs.
(f) Check the electrode gap of new spark plugs.
Correct electrode gap:
1.1 mm (0.043 in.)
MA±6± MAINTENANCEMAINTENANCE OPERATIONS
Page 1240 of 2543
Recommended spark plug:
2JZ±GE
ND
PK16R11
HGK
BKR5EP11
2JZ±GTE
ND
PK20R11
NGK
BKR6EP11
NOTICE: If adjusting the gap of a new spark plug, bend
only the base of the ground electrode. Do not touch the
tip.
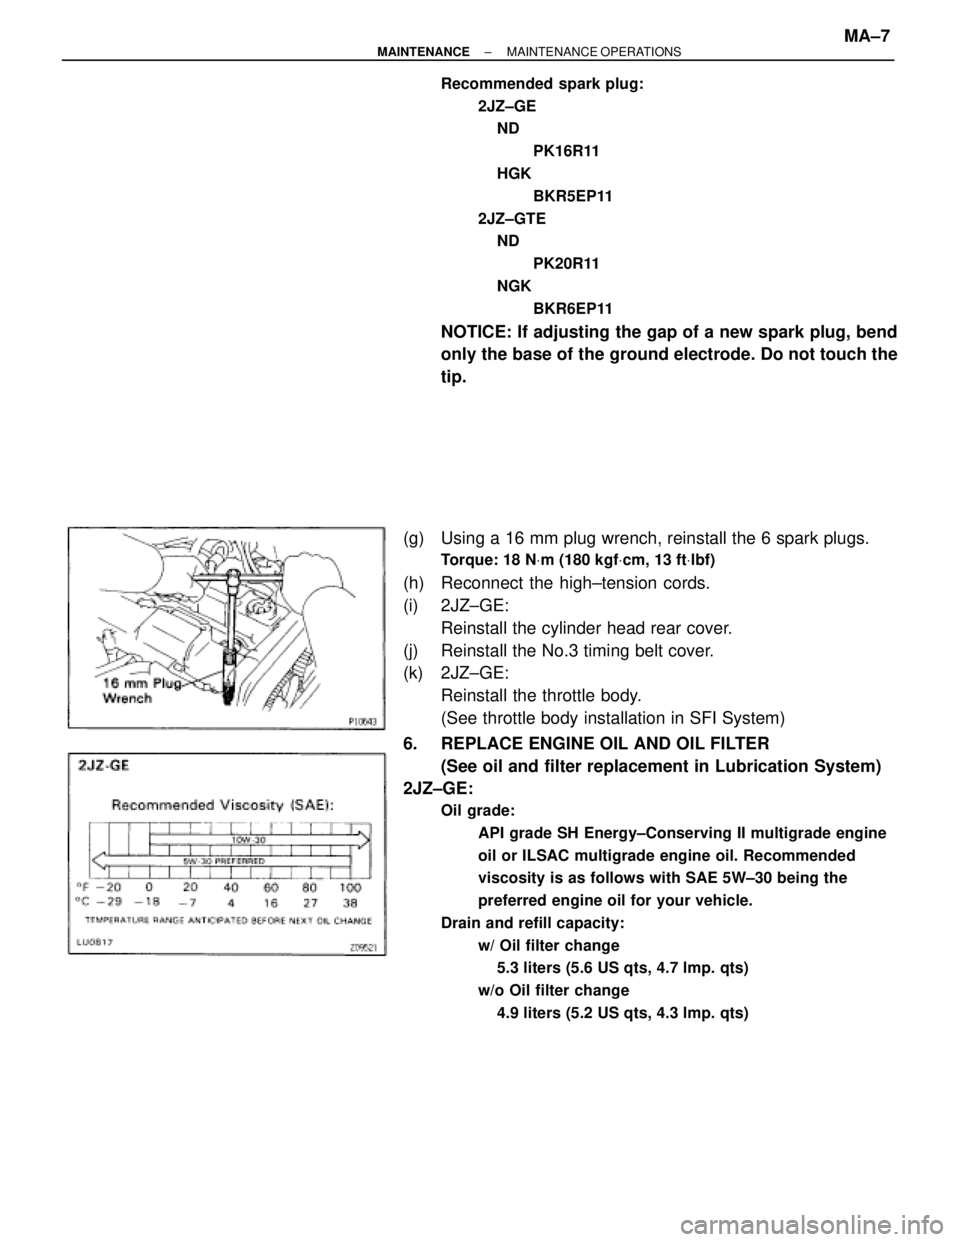
(g) Using a 16 mm plug wrench, reinstall the 6 spark plugs.
Torque: 18 NVm (180 kgfVcm, 13 ftVlbf)
(h) Reconnect the high±tension cords.
(i) 2JZ±GE:
Reinstall the cylinder head rear cover.
(j) Reinstall the No.3 timing belt cover.
(k) 2JZ±GE:
Reinstall the throttle body.
(See throttle body installation in SFI System)
6. REPLACE ENGINE OIL AND OIL FILTER
(See oil and filter replacement in Lubrication System)
2JZ±GE:
Oil grade:
API grade SH Energy±Conserving II multigrade engine
oil or ILSAC multigrade engine oil. Recommended
viscosity is as follows with SAE 5W±30 being the
preferred engine oil for your vehicle.
Drain and refill capacity:
w/ Oil filter change
5.3 liters (5.6 US qts, 4.7 lmp. qts)
w/o Oil filter change
4.9 liters (5.2 US qts, 4.3 lmp. qts)
± MAINTENANCEMAINTENANCE OPERATIONSMA±7