Page 91 of 2543
RECEIVER
ON±VEHICLE INSPECTION
1. OPEN THE HOOD
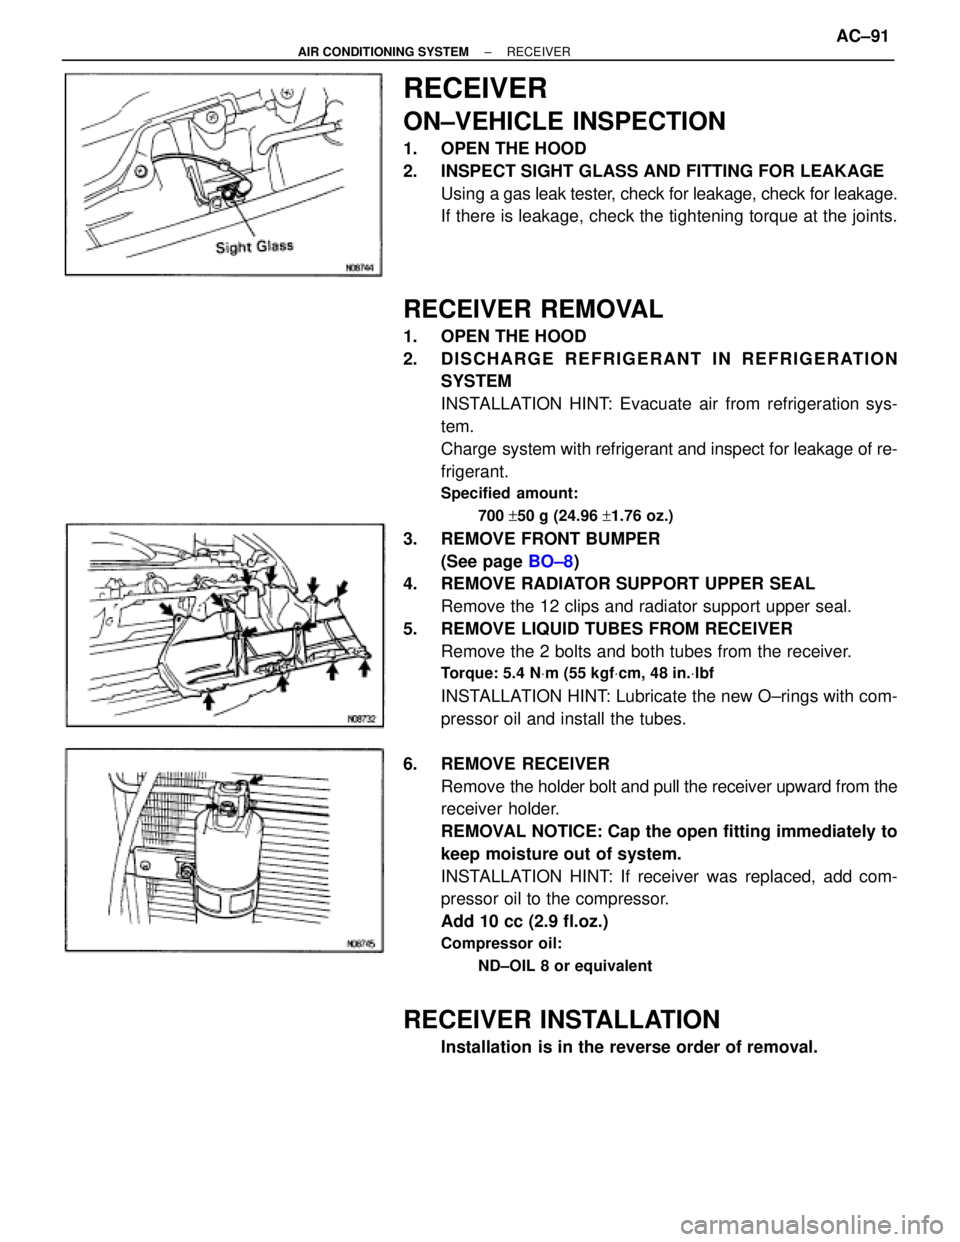
2. INSPECT SIGHT GLASS AND FITTING FOR LEAKAGE
Using a gas leak tester, check for leakage, check for leakage.
If there is leakage, check the tightening torque at the joints.
RECEIVER REMOVAL
1. OPEN THE HOOD
2. DISCHARGE REFRIGERANT IN REFRIGERATION
SYSTEM
INSTALLATION HINT: Evacuate air from refrigeration sys-
tem.
Charge system with refrigerant and inspect for leakage of re-
frigerant.
Specified amount:
700 +50 g (24.96 +1.76 oz.)
3. REMOVE FRONT BUMPER
(See page BO±8)
4. REMOVE RADIATOR SUPPORT UPPER SEAL
Remove the 12 clips and radiator support upper seal.
5. REMOVE LIQUID TUBES FROM RECEIVER
Remove the 2 bolts and both tubes from the receiver.
Torque: 5.4 NVm (55 kgfVcm, 48 in.Vlbf
INSTALLATION HINT: Lubricate the new O±rings with com-
pressor oil and install the tubes.
6. REMOVE RECEIVER
Remove the holder bolt and pull the receiver upward from the
receiver holder.
REMOVAL NOTICE: Cap the open fitting immediately to
keep moisture out of system.
INSTALLATION HINT: If receiver was replaced, add com-
pressor oil to the compressor.
Add 10 cc (2.9 fl.oz.)
Compressor oil:
ND±OIL 8 or equivalent
RECEIVER INSTALLATION
Installation is in the reverse order of removal.
± AIR CONDITIONING SYSTEMRECEIVERAC±91
Page 93 of 2543
9. REMOVE LIQUID TUBE AND DISCHARGE TUBE
Torque: 10 NVm (100 kgfVcm, 7 ftVlbf)
REMOVAL NOTICE: Cap the open fittings immediately to
keep moisture out of the system.
INSTALLATION HINT: Lubricate the new O±rings with com-
pressor oil and install the tubes.
10. REMOVE CONDENSER
(a) Remove the radiator upper mounting.
(b) Push the radiator to engine side.
(c) Remove the condenser upper mounting.
(d) Push the condenser to engine side and remove the liquid
tube piping clamp.
Torque: 4.1 NVm (42 kgfVcm, 36 in.Vlbf)
± AIR CONDITIONING SYSTEMCONDENSERAC±93
Page 1080 of 2543
COOLING SYSTEM
PREPARATION
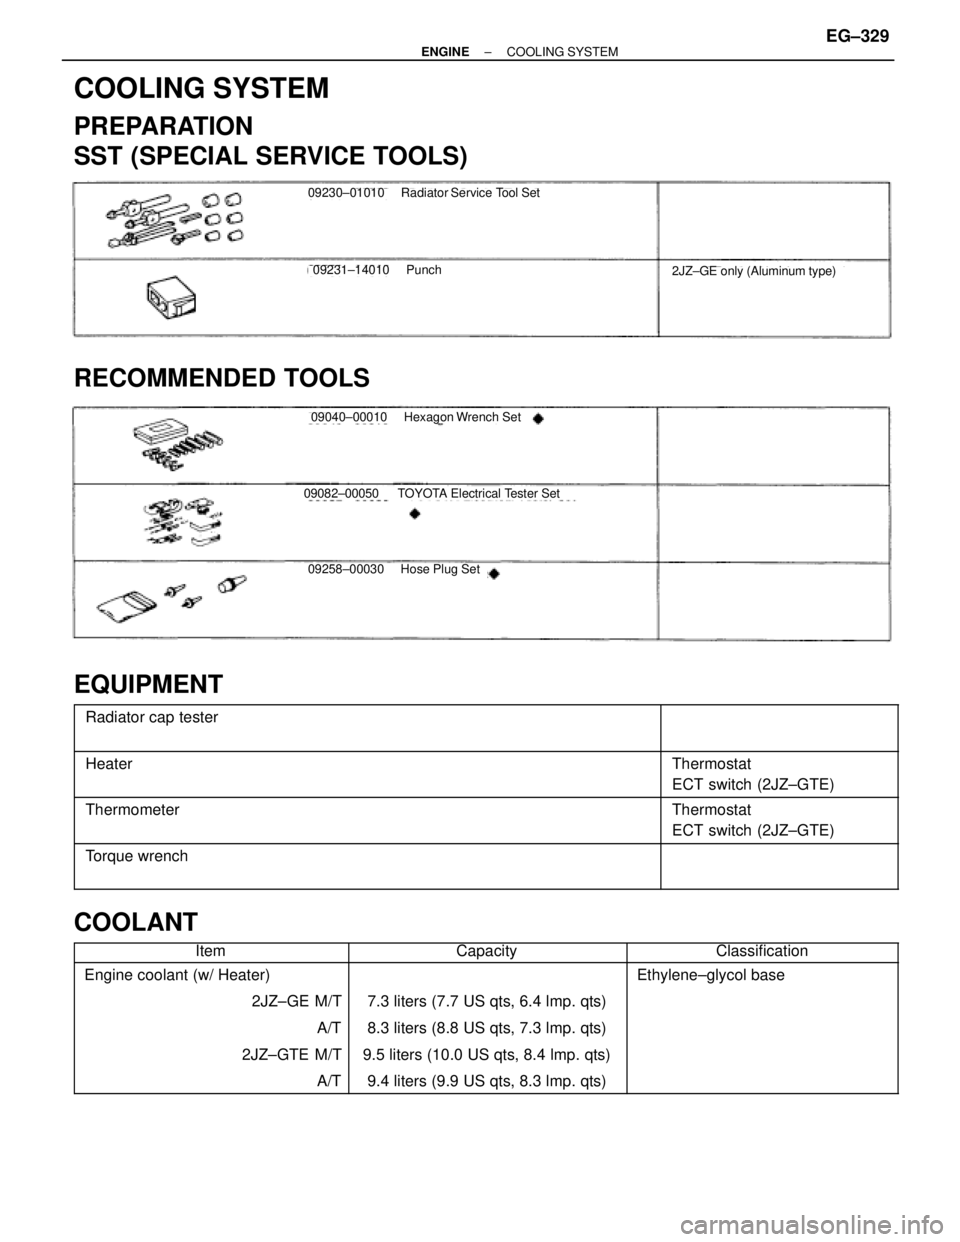
SST (SPECIAL SERVICE TOOLS)
09230±01010 Radiator Service Tool Set
09231±14010 Punch2JZ±GE only (Aluminum type)
RECOMMENDED TOOLS
09040±00010 Hexagon Wrench Set
09082±00050 TOYOTA Electrical Tester Set
09258±00030 Hose Plug Set
EQUIPMENT
������������������������� �
������������������������ �������������������������
Radiator cap tester����������� �
���������� �����������
������������������������� �
������������������������ �������������������������
Heater����������� �
���������� �����������
Thermostat
ECT switch (2JZ±GTE)
������������������������� �
������������������������
Thermometer����������� �
����������
Thermostat
ECT switch (2JZ±GTE)
������������������������� �
������������������������ �������������������������Torque wrench
����������� �
���������� �����������
COOLANT
������������Item������������Capacity������������Classification������������ �
����������� �
����������� �
����������� �
����������� �
����������� ������������
Engine coolant (w/ Heater)
2JZ±GE M/T
A/T
2JZ±GTE M/T
A/T
������������ �
�����������
������������
������������
������������
������������
������������
7.3 liters (7.7 US qts, 6.4 lmp. qts)
8.3 liters (8.8 US qts, 7.3 lmp. qts)
9.5 liters (10.0 US qts, 8.4 lmp. qts)
9.4 liters (9.9 US qts, 8.3 lmp. qts)
������������
������������
������������
������������
������������
������������ ������������
Ethylene±glycol base
± ENGINECOOLING SYSTEMEG±329
Page 1081 of 2543
COOLANT CHECK
1. CHECK ENGINE COOLANT LEVEL AT RADIATOR
RESERVOIR
The engine coolant level should be between the ºLOWº and
ºFULLº lines.
If low, check for leaks and add engine coolant up to the
ºFULLº line.
2. CHECK ENGINE COOLANT QUALITY
(a) Remove the radiator cap.
CAUTION: To avoid the danger of being burned, do not remove
the radiator cap while the engine and radiator are still hot, as
fluid and steam can be blown out under pressure.
(b) There should not be any excessive deposits of rust or scale
around the radiator cap or radiator filler hole, and the coolant
should be free from oil.
If excessively dirty, replace the coolant.
(c) Reinstall the radiator cap. EG±330
± ENGINECOOLING SYSTEM
Page 1082 of 2543
COOLANT REPLACEMENT
1. DRAIN ENGINE COOLANT
(a) Remove the radiator cap.
CAUTION: To avoid the danger of being burned, do not remove
the radiator cap while the engine and radiator are still hot, as
fluid and steam can be blown out under pressure.
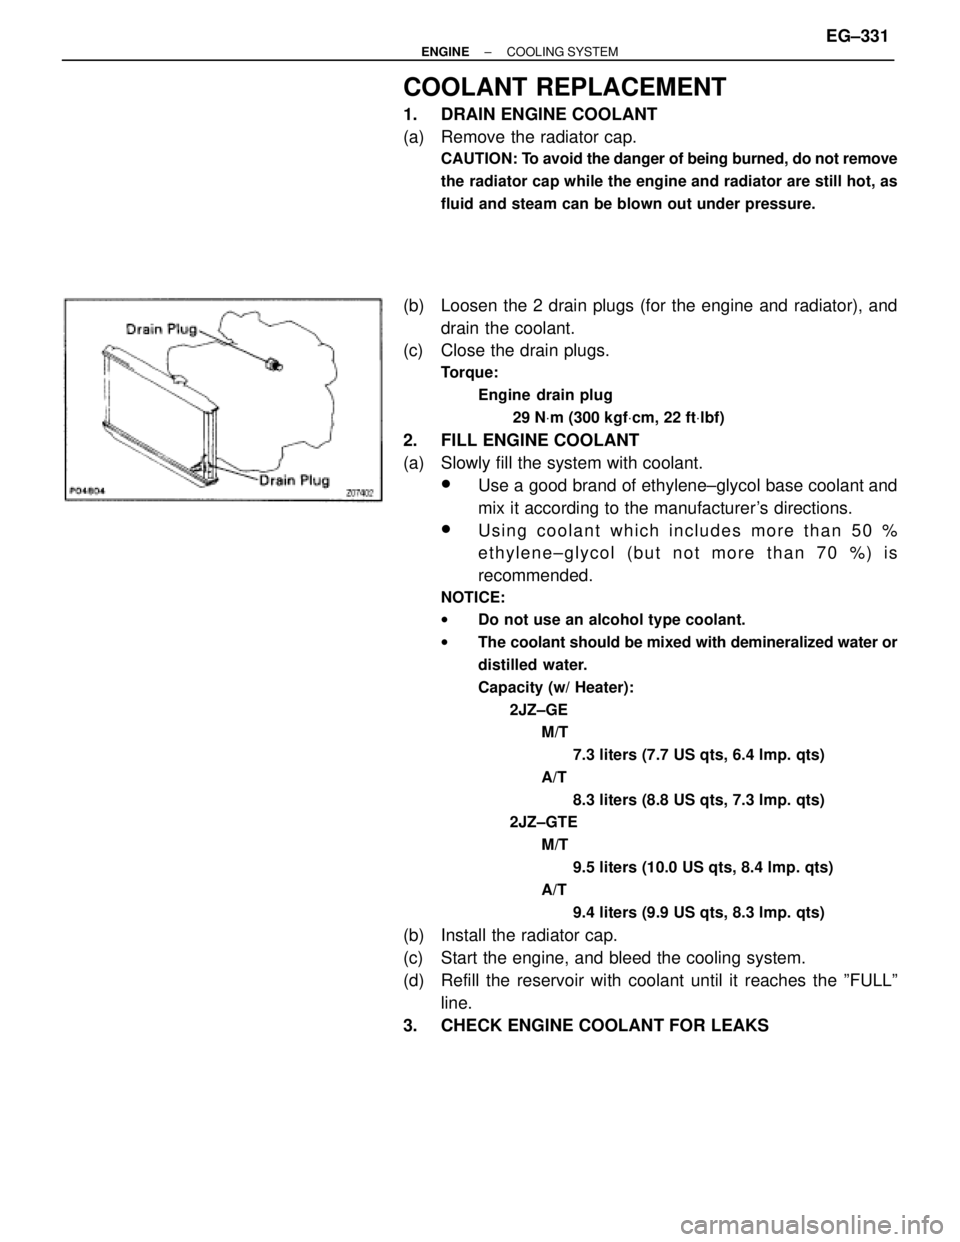
(b) Loosen the 2 drain plugs (for the engine and radiator), and
drain the coolant.
(c) Close the drain plugs.
Torque:
Engine drain plug
29 NVm (300 kgfVcm, 22 ftVlbf)
2. FILL ENGINE COOLANT
(a) Slowly fill the system with coolant.
wUse a good brand of ethylene±glycol base coolant and
mix it according to the manufacturer's directions.
wUsing coolant which includes more than 50 %
ethylene±glycol (but not more than 70 %) is
recommended.
NOTICE:
wDo not use an alcohol type coolant.
wThe coolant should be mixed with demineralized water or
distilled water.
Capacity (w/ Heater):
2JZ±GE
M/T
7.3 liters (7.7 US qts, 6.4 lmp. qts)
A/T
8.3 liters (8.8 US qts, 7.3 lmp. qts)
2JZ±GTE
M/T
9.5 liters (10.0 US qts, 8.4 lmp. qts)
A/T
9.4 liters (9.9 US qts, 8.3 lmp. qts)
(b) Install the radiator cap.
(c) Start the engine, and bleed the cooling system.
(d) Refill the reservoir with coolant until it reaches the ºFULLº
line.
3. CHECK ENGINE COOLANT FOR LEAKS
± ENGINECOOLING SYSTEMEG±331
Page 1093 of 2543
(c) Check the valve lift.
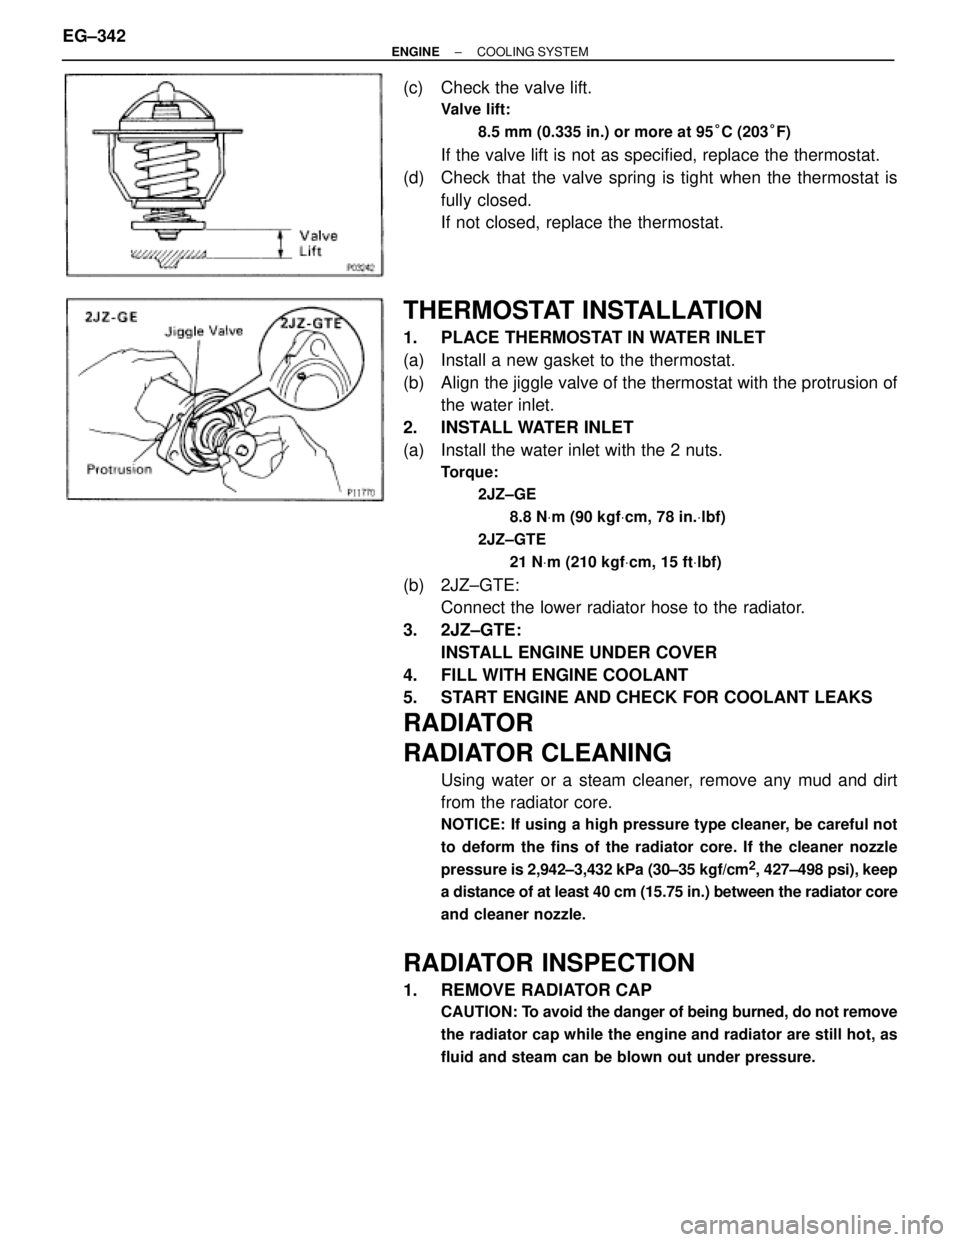
Valve lift:
8.5 mm (0.335 in.) or more at 95°C (203°F)
If the valve lift is not as specified, replace the thermostat.
(d) Check that the valve spring is tight when the thermostat is
fully closed.
If not closed, replace the thermostat.
THERMOSTAT INSTALLATION
1. PLACE THERMOSTAT IN WATER INLET
(a) Install a new gasket to the thermostat.
(b) Align the jiggle valve of the thermostat with the protrusion of
the water inlet.
2. INSTALL WATER INLET
(a) Install the water inlet with the 2 nuts.
Torque:
2JZ±GE
8.8 NVm (90 kgfVcm, 78 in.Vlbf)
2JZ±GTE
21 NVm (210 kgfVcm, 15 ftVlbf)
(b) 2JZ±GTE:
Connect the lower radiator hose to the radiator.
3. 2JZ±GTE:
INSTALL ENGINE UNDER COVER
4. FILL WITH ENGINE COOLANT
5. START ENGINE AND CHECK FOR COOLANT LEAKS
RADIATOR
RADIATOR CLEANING
Using water or a steam cleaner, remove any mud and dirt
from the radiator core.
NOTICE: If using a high pressure type cleaner, be careful not
to deform the fins of the radiator core. If the cleaner nozzle
pressure is 2,942±3,432 kPa (30±35 kgf/cm
2, 427±498 psi), keep
a distance of at least 40 cm (15.75 in.) between the radiator core
and cleaner nozzle.
RADIATOR INSPECTION
1. REMOVE RADIATOR CAP
CAUTION: To avoid the danger of being burned, do not remove
the radiator cap while the engine and radiator are still hot, as
fluid and steam can be blown out under pressure.
EG±342± ENGINECOOLING SYSTEM
Page 1094 of 2543
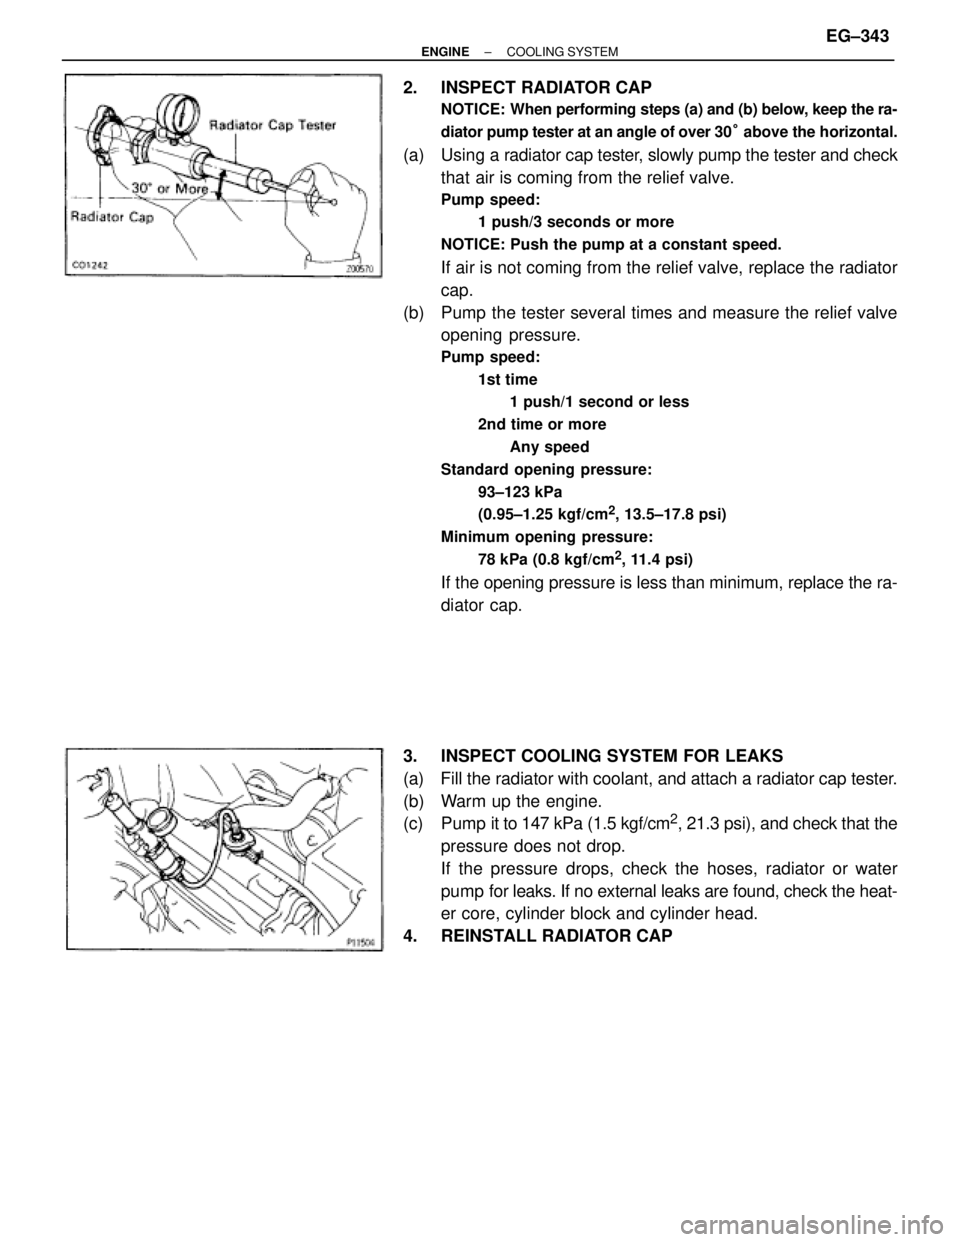
2. INSPECT RADIATOR CAP
NOTICE: When performing steps (a) and (b) below, keep the ra-
diator pump tester at an angle of over 30° above the horizontal.
(a) Using a radiator cap tester, slowly pump the tester and check
that air is coming from the relief valve.
Pump speed:
1 push/3 seconds or more
NOTICE: Push the pump at a constant speed.
If air is not coming from the relief valve, replace the radiator
cap.
(b) Pump the tester several times and measure the relief valve
opening pressure.
Pump speed:
1st time
1 push/1 second or less
2nd time or more
Any speed
Standard opening pressure:
93±123 kPa
(0.95±1.25 kgf/cm
2, 13.5±17.8 psi)
Minimum opening pressure:
78 kPa (0.8 kgf/cm
2, 11.4 psi)
If the opening pressure is less than minimum, replace the ra-
diator cap.
3. INSPECT COOLING SYSTEM FOR LEAKS
(a) Fill the radiator with coolant, and attach a radiator cap tester.
(b) Warm up the engine.
(c) Pump it to 147 kPa (1.5 kgf/cm
2, 21.3 psi), and check that the
pressure does not drop.
If the pressure drops, check the hoses, radiator or water
pump for leaks. If no external leaks are found, check the heat-
er core, cylinder block and cylinder head.
4. REINSTALL RADIATOR CAP
± ENGINECOOLING SYSTEMEG±343
Page 1103 of 2543
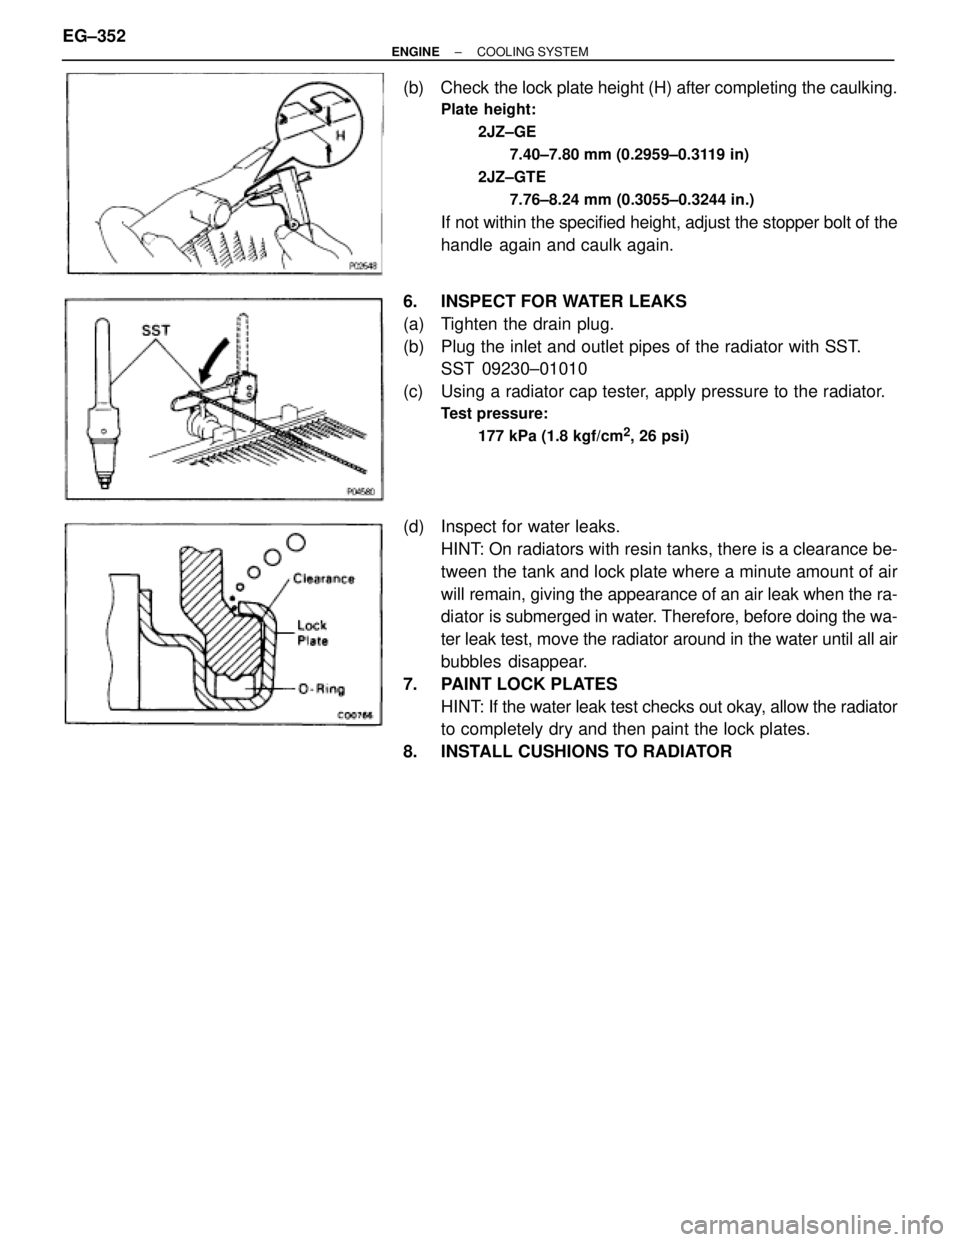
(b) Check the lock plate height (H) after completing the caulking.
Plate height:
2JZ±GE
7.40±7.80 mm (0.2959±0.3119 in)
2JZ±GTE
7.76±8.24 mm (0.3055±0.3244 in.)
If not within the specified height, adjust the stopper bolt of the
handle again and caulk again.
6. INSPECT FOR WATER LEAKS
(a) Tighten the drain plug.
(b) Plug the inlet and outlet pipes of the radiator with SST.
SST 09230±01010
(c) Using a radiator cap tester, apply pressure to the radiator.
Test pressure:
177 kPa (1.8 kgf/cm
2, 26 psi)
(d) Inspect for water leaks.
HINT: On radiators with resin tanks, there is a clearance be-
tween the tank and lock plate where a minute amount of air
will remain, giving the appearance of an air leak when the ra-
diator is submerged in water. Therefore, before doing the wa-
ter leak test, move the radiator around in the water until all air
bubbles disappear.
7. PAINT LOCK PLATES
HINT: If the water leak test checks out okay, allow the radiator
to completely dry and then paint the lock plates.
8. INSTALL CUSHIONS TO RADIATOR EG±352
± ENGINECOOLING SYSTEM