Page 1733 of 4087
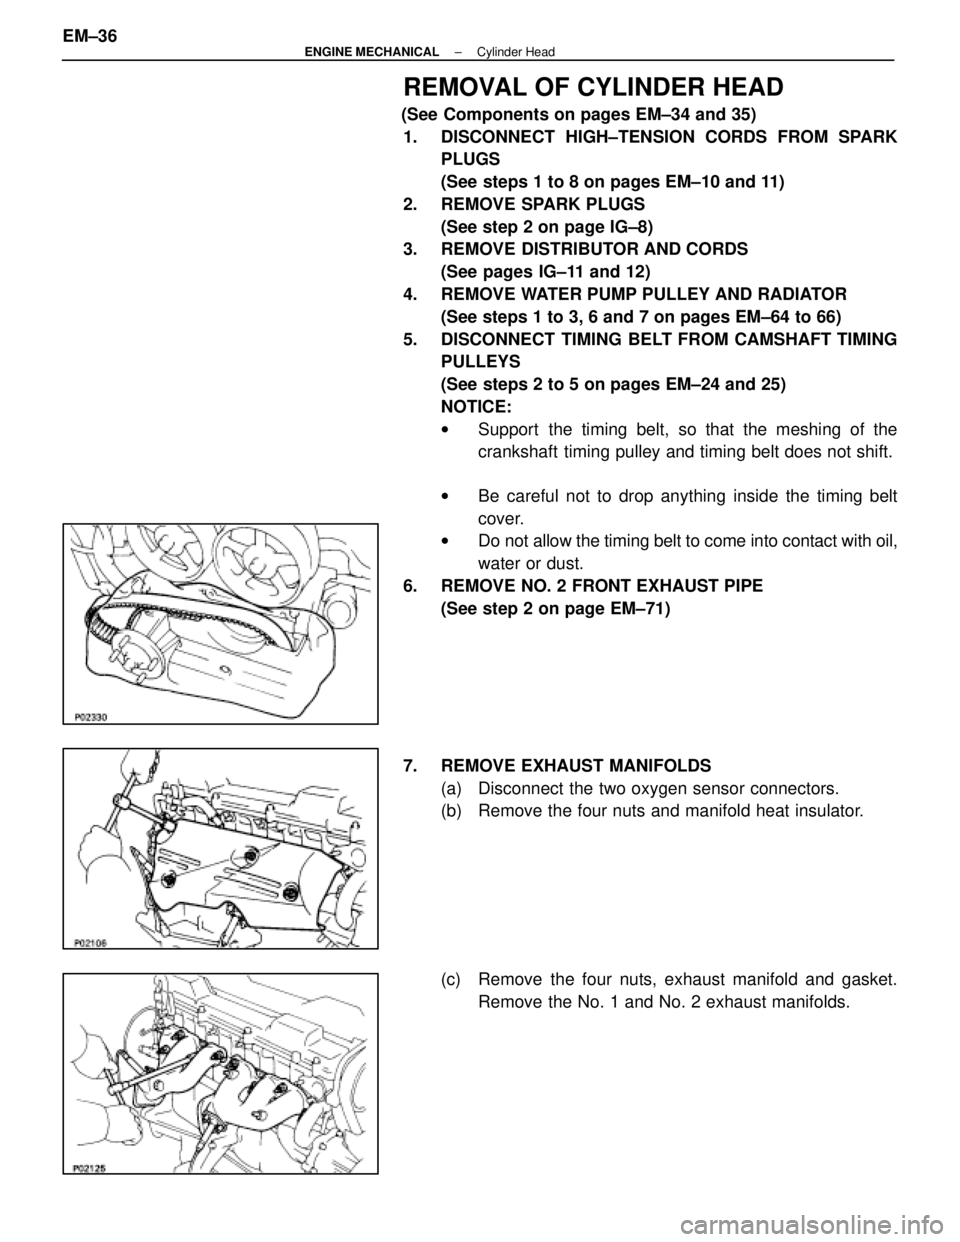
REMOVAL OF CYLINDER HEAD
(See Components on pages EM±34 and 35)1. DISCONNECT HIGH±TENSION CORDS FROM SPARK PLUGS
(See steps 1 to 8 on pages EM±10 and 11)
2. REMOVE SPARK PLUGS (See step 2 on page IG±8)
3. REMOVE DISTRIBUTOR AND CORDS
(See pages IG±11 and 12)
4. REMOVE WATER PUMP PULLEY AND RADIATOR (See steps 1 to 3, 6 and 7 on pages EM±64 to 66)
5. DISCONNECT TIMING BELT FROM CAMSHAFT TIMING PULLEYS
(See steps 2 to 5 on pages EM±24 and 25)
NOTICE:
wSupport the timing belt, so that the meshing of the
crankshaft timing pulley and timing belt does not shift.
w Be careful not to drop anything inside the timing belt
cover.
w Do not allow the timing belt to come into contact with oil,
water or dust.
6. REMOVE NO. 2 FRONT EXHAUST PIPE (See step 2 on page EM±71)
7. REMOVE EXHAUST MANIFOLDS (a) Disconnect the two oxygen sensor connectors.
(b) Remove the four nuts and manifold heat insulator.
(c) Remove the four nuts, exhaust manifold and gasket.Remove the No. 1 and No. 2 exhaust manifolds.
EM±36
±
ENGINE MECHANICAL Cylinder Head
WhereEverybodyKnowsYourName
Page 1758 of 4087
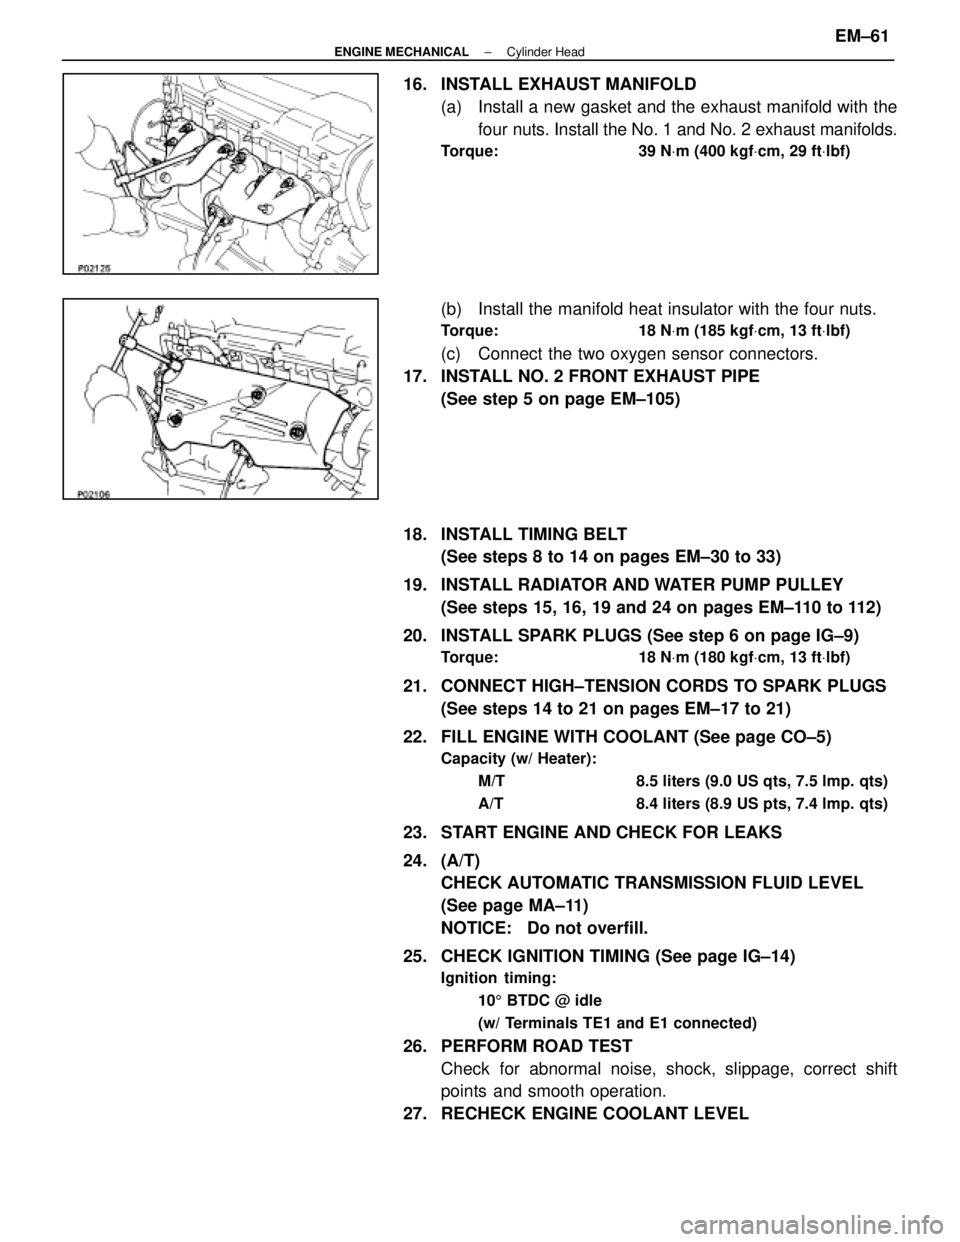
16. INSTALL EXHAUST MANIFOLD(a) Install a new gasket and the exhaust manifold with thefour nuts. Install the No. 1 and No. 2 exhaust manifolds.
Torque: 39 N Vm (400 kgf Vcm, 29 ft Vlbf)
(b) Install the manifold heat insulator with the four nuts.
Torque: 18 N Vm (185 kgf Vcm, 13 ft Vlbf)
(c) Connect the two oxygen sensor connectors.
17. INSTALL NO. 2 FRONT EXHAUST PIPE (See step 5 on page EM±105)
18. INSTALL TIMING BELT (See steps 8 to 14 on pages EM±30 to 33)
19. INSTALL RADIATOR AND WATER PUMP PULLEY (See steps 15, 16, 19 and 24 on pages EM±110 to 112)
20. INSTALL SPARK PLUGS (See step 6 on page IG±9)
Torque: 18 N Vm (180 kgf Vcm, 13 ft Vlbf)
21. CONNECT HIGH±TENSION CORDS TO SPARK PLUGS
(See steps 14 to 21 on pages EM±17 to 21)
22. FILL ENGINE WITH COOLANT (See page CO±5)
Capacity (w/ Heater): M/T 8.5 liters (9.0 US qts, 7.5 lmp. qts)
A/T 8.4 liters (8.9 US pts, 7.4 lmp. qts)
23. START ENGINE AND CHECK FOR LEAKS
24. (A/T)CHECK AUTOMATIC TRANSMISSION FLUID LEVEL
(See page MA±11)
NOTICE: Do not overfill.
25. CHECK IGNITION TIMING (See page IG±14)
Ignition timing: 105 BTDC @ idle
(w/ Terminals TE1 and E1 connected)
26. PERFORM ROAD TEST Check for abnormal noise, shock, slippage, correct shift
points and smooth operation.
27. RECHECK ENGINE COOLANT LEVEL
±
ENGINE MECHANICAL Cylinder HeadEM±61
WhereEverybodyKnowsYourName
Page 1820 of 4087
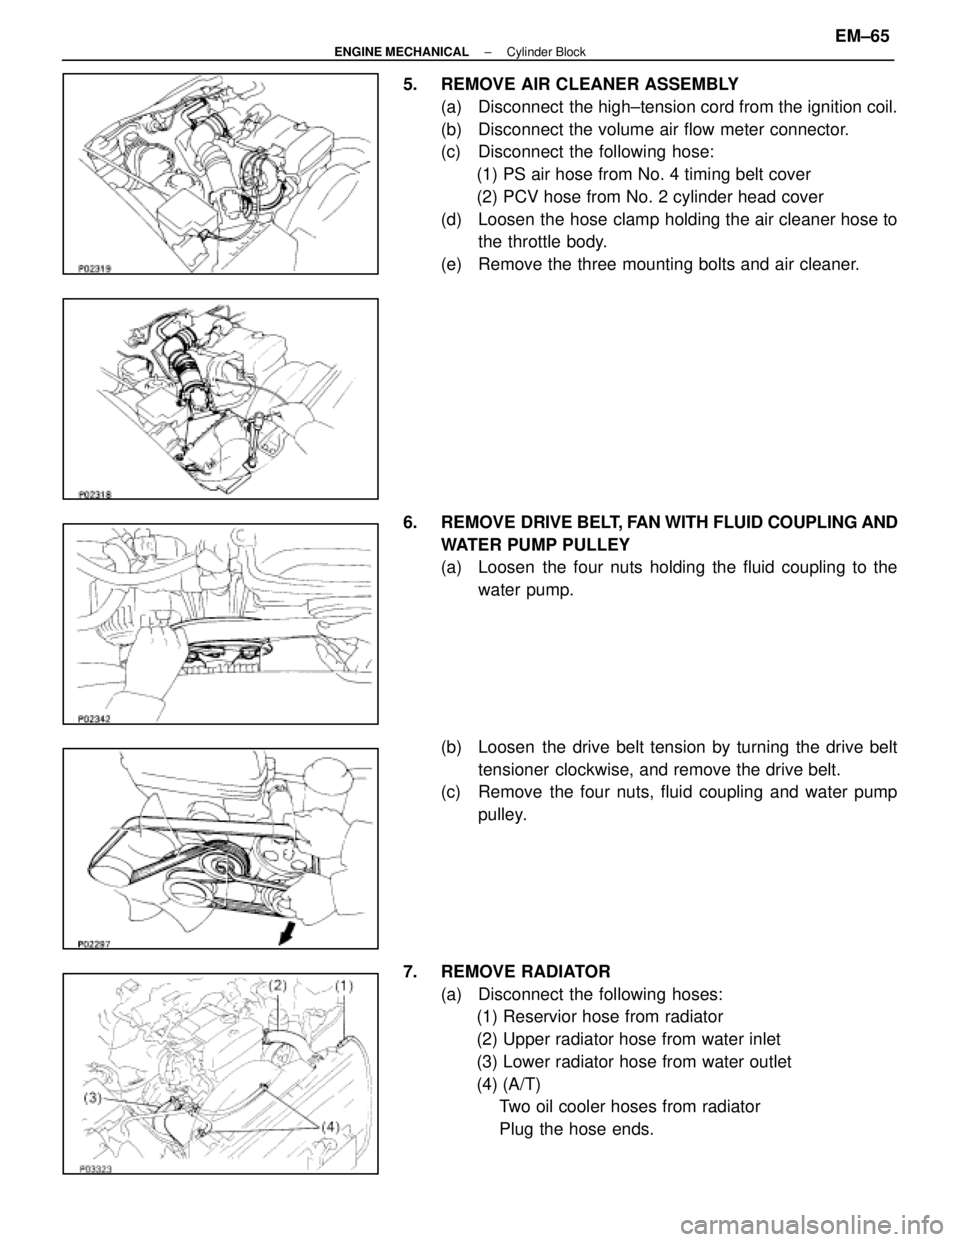
5. REMOVE AIR CLEANER ASSEMBLY(a) Disconnect the high±tension cord from the ignition coil.
(b) Disconnect the volume air flow meter connector.
(c) Disconnect the following hose:(1) PS air hose from No. 4 timing belt cover
(2) PCV hose from No. 2 cylinder head cover
(d) Loosen the hose clamp holding the air cleaner hose to the throttle body.
(e) Remove the three mounting bolts and air cleaner.
6. REMOVE DRIVE BELT, FAN WITH FLUID COUPLING AND
WATER PUMP PULLEY
(a) Loosen the four nuts holding the fluid coupling to the water pump.
(b) Loosen the drive belt tension by turning the drive belt tensioner clockwise, and remove the drive belt.
(c) Remove the four nuts, fluid coupling and water pump
pulley.
7. REMOVE RADIATOR (a) Disconnect the following hoses:(1) Reservior hose from radiator
(2) Upper radiator hose from water inlet
(3) Lower radiator hose from water outlet
(4) (A/T)Two oil cooler hoses from radiator
Plug the hose ends.
±
ENGINE MECHANICAL Cylinder BlockEM±65
WhereEverybodyKnowsYourName
Page 1821 of 4087
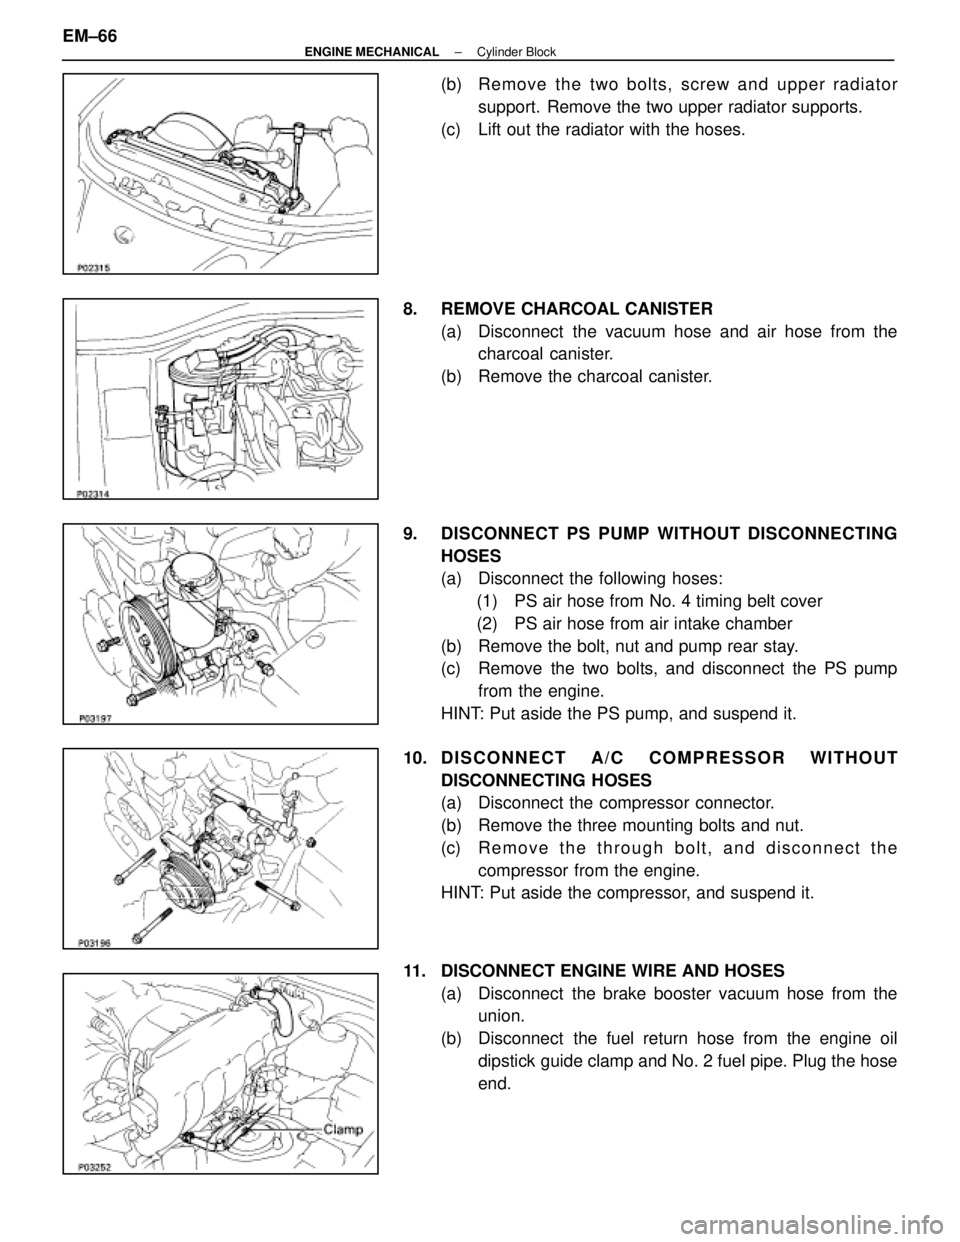
(b) Remove the two bolts, screw and upper radiatorsupport. Remove the two upper radiator supports.
(c) Lift out the radiator with the hoses.
8. REMOVE CHARCOAL CANISTER (a) Disconnect the vacuum hose and air hose from thecharcoal canister.
(b) Remove the charcoal canister.
9. DISCONNECT PS PUMP WITHOUT DISCONNECTING HOSES
(a) Disconnect the following hoses:(1) PS air hose from No. 4 timing belt cover
(2) PS air hose from air intake chamber
(b) Remove the bolt, nut and pump rear stay.
(c) Remove the two bolts, and disconnect the PS pump from the engine.
HINT: Put aside the PS pump, and suspend it.
10. D I S C O N N E C T A / C C O M P R ESSOR WITHOUT
DISCONNECTING HOSES
(a) Disconnect the compressor connector.
(b) Remove the three mounting bolts and nut.
(c) R e m o v e t h e t h r ough bolt, and disconnect the
compressor from the engine.
HINT: Put aside the compressor, and suspend it.
11. DISCONNECT ENGINE WIRE AND HOSES (a) Disconnect the brake booster vacuum hose from theunion.
(b) Disconnect the fuel return hose from the engine oil dipstick guide clamp and No. 2 fuel pipe. Plug the hose
end.
EM±66
±
ENGINE MECHANICAL Cylinder Block
WhereEverybodyKnowsYourName
Page 1865 of 4087
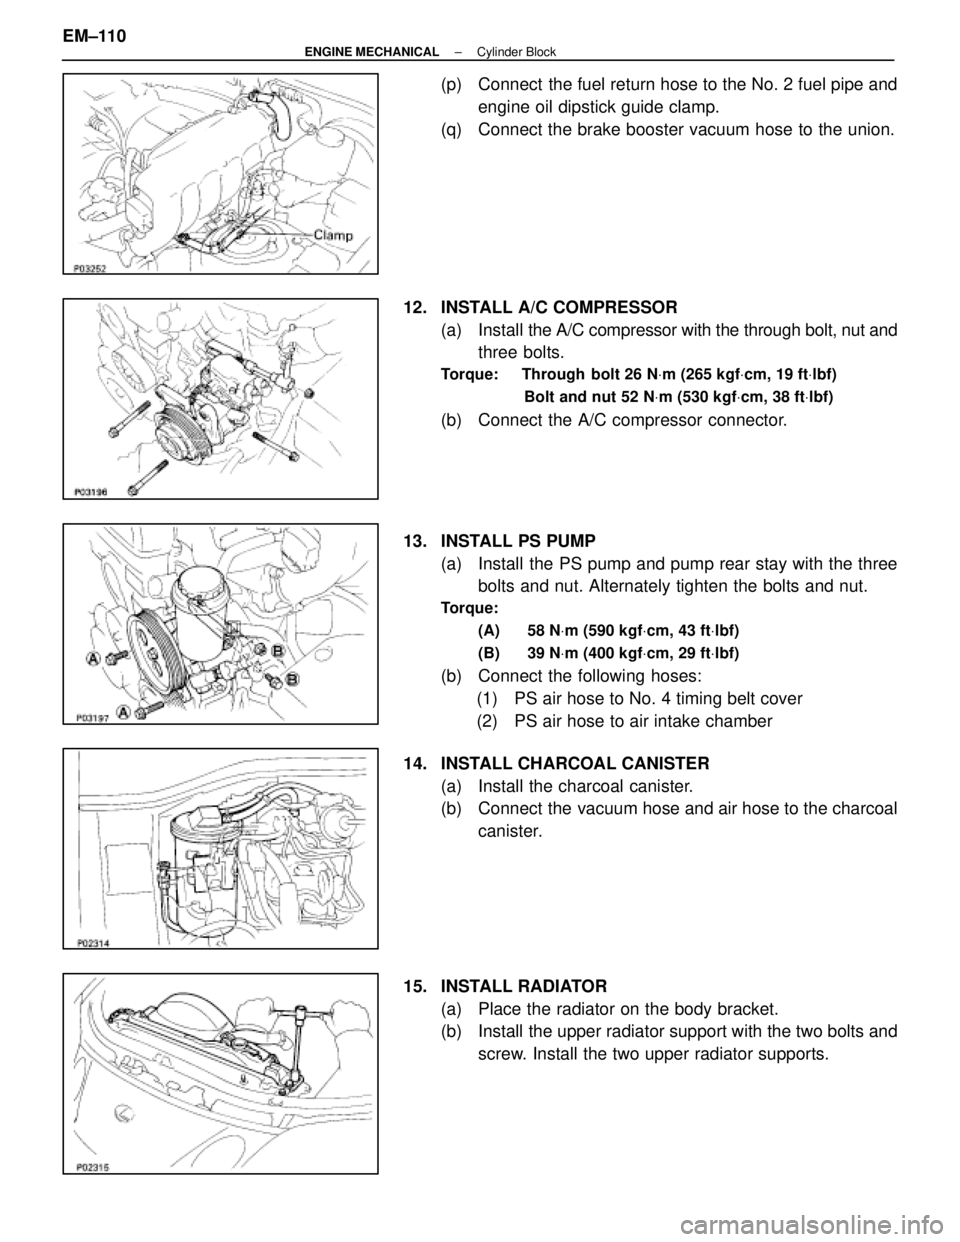
(p) Connect the fuel return hose to the No. 2 fuel pipe andengine oil dipstick guide clamp.
(q) Connect the brake booster vacuum hose to the union.
12. INSTALL A/C COMPRESSOR (a) Install the A/C compressor with the through bolt, nut and
three bolts.
Torque: Through bolt 26 N Vm (265 kgf Vcm, 19 ft Vlbf)
Bolt and nut 52 N Vm (530 kgf Vcm, 38 ft Vlbf)
(b) Connect the A/C compressor connector.
13. INSTALL PS PUMP (a) Install the PS pump and pump rear stay with the threebolts and nut. Alternately tighten the bolts and nut.
Torque:
(A) 58 N Vm (590 kgf Vcm, 43 ft Vlbf)
(B) 39 N Vm (400 kgf Vcm, 29 ft Vlbf)
(b) Connect the following hoses:
(1) PS air hose to No. 4 timing belt cover
(2) PS air hose to air intake chamber
14. INSTALL CHARCOAL CANISTER (a) Install the charcoal canister.
(b) Connect the vacuum hose and air hose to the charcoalcanister.
15. INSTALL RADIATOR (a) Place the radiator on the body bracket.
(b) Install the upper radiator support with the two bolts andscrew. Install the two upper radiator supports.
EM±110
±
ENGINE MECHANICAL Cylinder Block
WhereEverybodyKnowsYourName
Page 1866 of 4087
(c) Connect the following hoses:(1) Reservior hose to radiator
(2) Upper radiator hose to water inlet
(3) Lower radiator hose to water outlet
(4) (A/T)
Two oil cooler hoses to radiator
16. INS TALL WATE R PUMP PULLE Y, FAN WITH FLUID COUPLING AND DRIVE BELT
(a) Align the matchmarks, and install the water pump pulley
and fan with fluid coupling with the four nuts.
(b) Install the drive belt by turning the drive belt tensioner clockwise.
(c) Stretch the belt tight and tighten the four nuts.
Torque: 16 N Vm (165 kgf Vcm, 12 ft Vlbf)
17. INSTALL AIR CLEANER ASSEMBLY
(a) Connect the air cleaner hose to the throttle body.
(b) Install the air cl eaner case with the three mounting bolts.
±
ENGINE MECHANICAL Cylinder BlockEM±111
WhereEverybodyKnowsYourName
Page 1954 of 4087
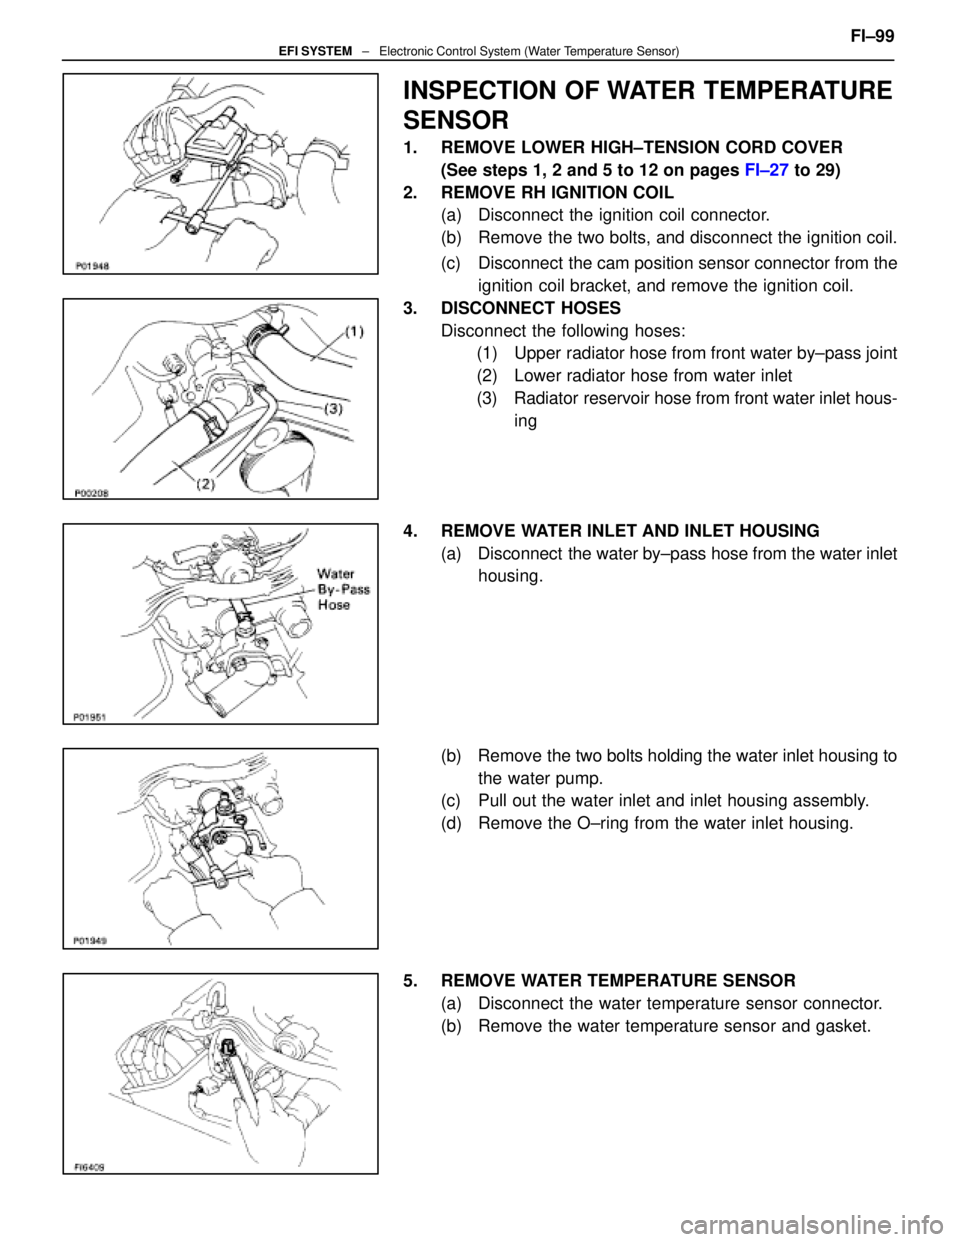
INSPECTION OF WATER TEMPERATURE
SENSOR
1. REMOVE LOWER HIGH±TENSION CORD COVER(See steps 1, 2 and 5 to 12 on pages FI±27 to 29)
2. REMOVE RH IGNITION COIL (a) Disconnect the ignition coil connector.
(b) Remove the two bolts, and disconnect the ignition coil.
(c) Disconnect the cam position sensor connector from the
ignition coil bracket, and remove the ignition coil.
3. DISCONNECT HOSES Disconnect the following hoses:(1) Upper radiator hose from front water by±pass joint
(2) Lower radiator hose from water inlet
(3) Radiator reservoir hose from front water inlet hous-
ing
4. REMOVE WATER INLET AND INLET HOUSING (a) Disconnect the water by±pass hose from the water inlethousing.
(b) Remove the two bolts holding the water inlet housing to the water pump.
(c) Pull out the water inlet and inlet housing assembly.
(d) Remove the O±ring from the water inlet housing.
5. REMOVE WATER TEMPERATURE SENSOR (a) Disconnect the water temperature sensor connector.
(b) Remove the water temperature sensor and gasket. FI±99
EFI SYSTEM
± Electronic Control System (Water Temperature Sensor)
WhereEverybodyKnowsYourName
Page 1956 of 4087
(e) Push in the water inlet housing end into the water pumphole.
(f) Install the water inlet and inlet housing assembly with
the two bolts. Alternately tighten the bolts.
Torque: 18 N Vm (185 kgf Vcm, 13 ft Vlbf)
(g) Connect the water by±pass hose to the water inlet
housing.
9. RECONNECT HOSES Connect the following hoses:(1) Upper radiator hose to front water by±pass joint
(2) Lower radiator hose to water inlet
(3) Radiator reservoir hose to front water inlet housing
10. REINSTALL RH IGNITION COIL (a) Install the ignition coil with the two bolts.
(b) Install the cam position sensor connector to the ignitioncoil bracket.
(c) Connect the ignition coil connector.
11. REINSTALL LOWER HIGH±TENSION CORD COVER (See steps 1 to 13 and 16 to 18 on pages FI±39 to 41)FI±101
EFI SYSTEM
± Electronic Control System (Water Temperature Sensor)
WhereEverybodyKnowsYourName