1990 MITSUBISHI SPYDER service
[x] Cancel search: servicePage 41 of 2103
GENERAL Maintenance Service
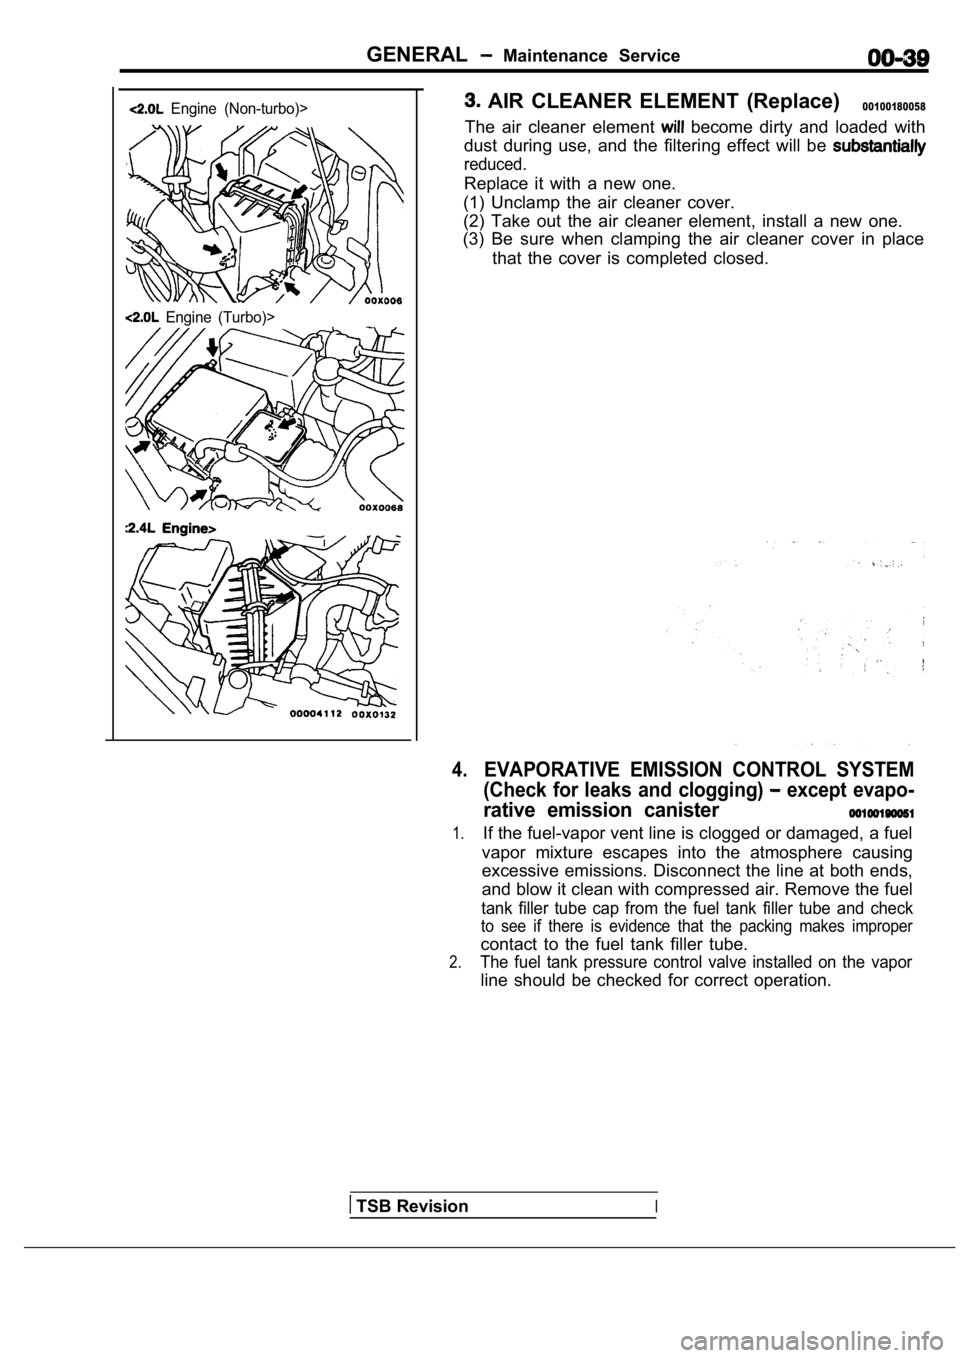
Engine (Non-turbo)>
Engine (Turbo)>
AIR CLEANER ELEMENT (Replace)00100180058
The air cleaner element become dirty and loaded with
dust during use, and the filtering effect will be
reduced.
Replace it with a new one.
(1) Unclamp the air cleaner cover.
(2) Take out the air cleaner element, install a new one.
(3) Be sure when clamping the air cleaner cover in place
that the cover is completed closed.
4.EVAPORATIVE EMISSION CONTROL SYSTEM
(Check for leaks and clogging)
except evapo-
rative emission canister
1.If the fuel-vapor vent line is clogged or damaged, a fuel
vapor mixture escapes into the atmosphere causing
excessive emissions. Disconnect the line at both en ds,
and blow it clean with compressed air. Remove the f uel
tank filler tube cap from the fuel tank filler tube and check
to see if there is evidence that the packing makes improper
contact to the fuel tank filler tube.
2.The fuel tank pressure control valve installed on the vapor
line should be checked for correct operation.
TSB RevisionI
Page 44 of 2103
GENERALMaintenanceService
Drain
Oil pan side
Engine
Engine (Turbo) and
TSB Revision
Engine (Non-turbo)>
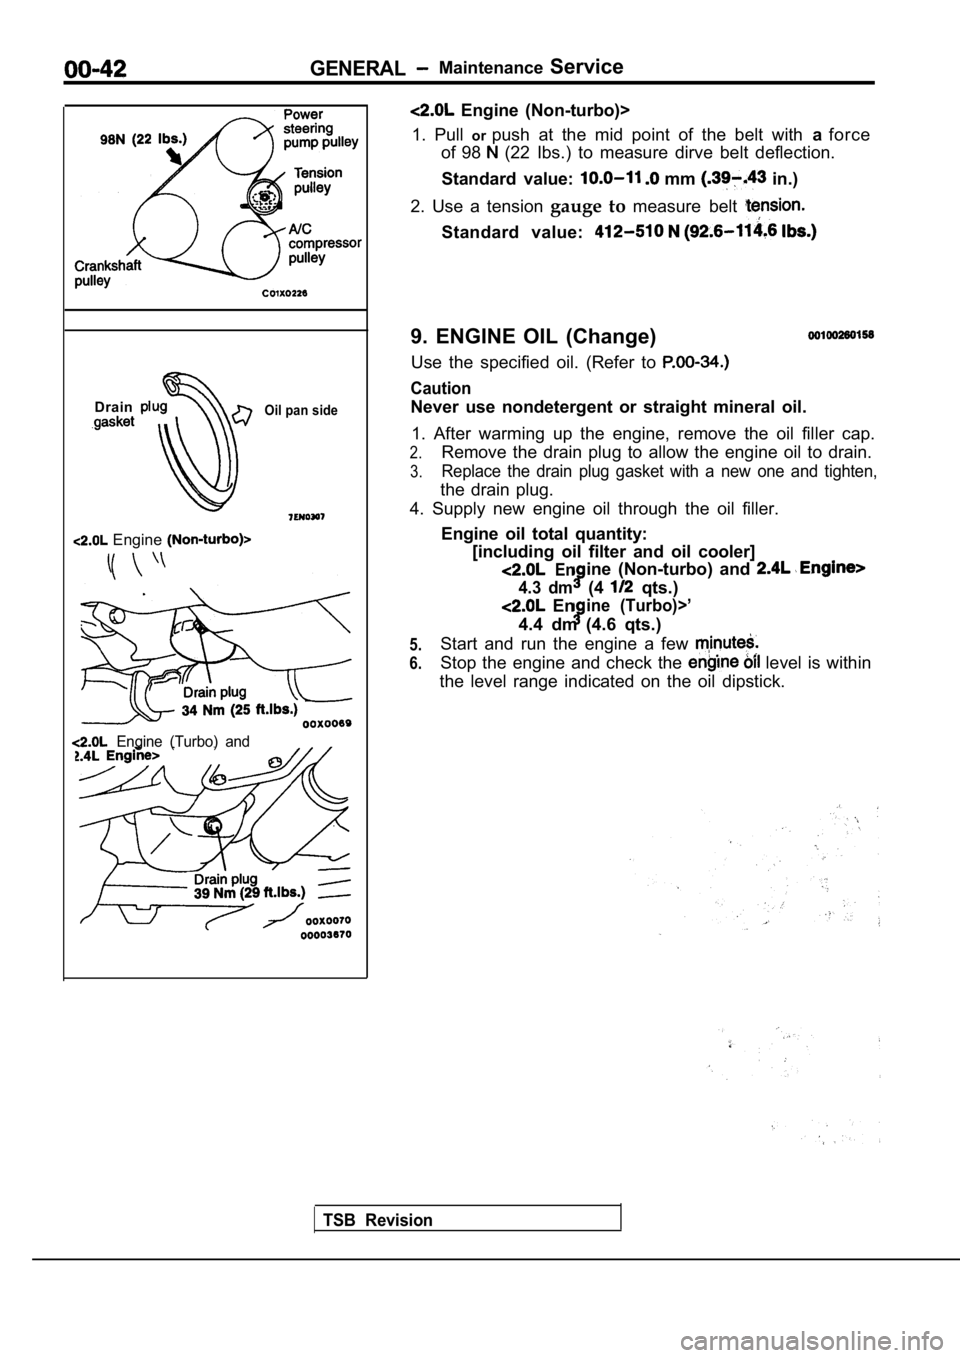
1. Pull orpush at the mid point of the belt with aforce
of 98
(22 Ibs.) to measure dirve belt deflection.
Standard value:
mm in.)
2. Use a tension gauge to measure belt
Standard value:
9. ENGINE OIL (Change)
Use the specified oil. (Refer to
Caution
Never use nondetergent or straight mineral oil.
1. After warming up the engine, remove the oil fill er cap.
2.Remove the drain plug to allow the engine oil to drain.
3.Replace the drain plug gasket with a new one and ti ghten,
the drain plug.
4. Supply new engine oil through the oil filler.
Engine oil total quantity:[including oil filter and oil cooler]
Enine (Non-turbo) and
4.3 dm(4 qts.)
Enine (Turbo)>’
4.4 dm (4.6 qts.)
Start and run the engine a few
Stop the engine and check the level is within
the level range indicated on the oil dipstick.
5.
6.
Page 45 of 2103
GENERAL Maintenance Service
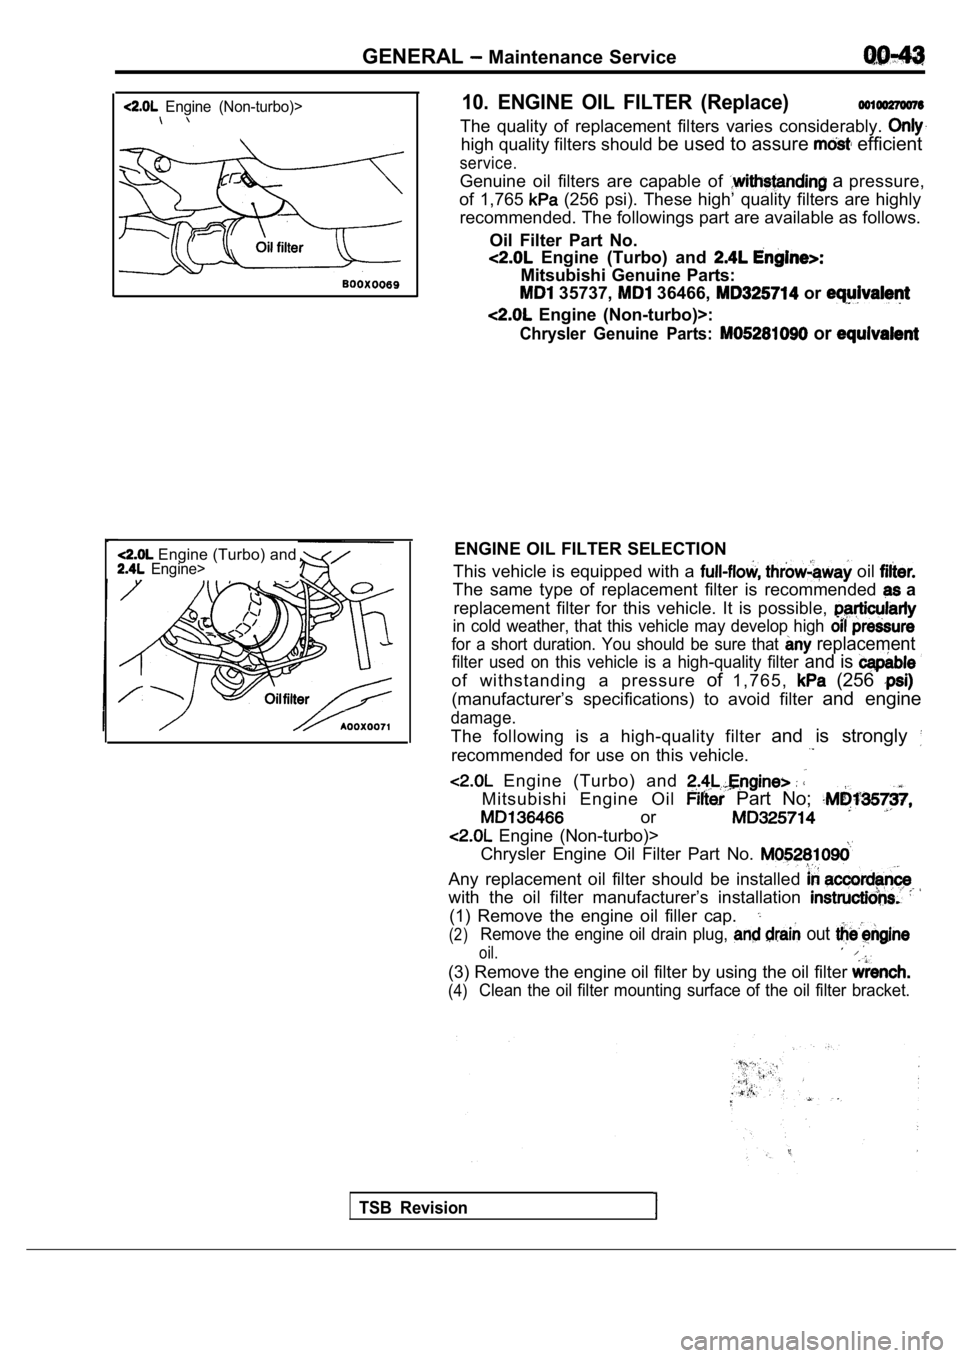
Engine (Non-turbo)>
Engine (Turbo) and Engine>
10. ENGINE OIL FILTER (Replace)
The quality of replacement filters varies considerably.
high quality filters should be used to assure efficient
service.
Genuine oil filters are capable of a pressure,
of 1,765
(256 psi). These high’ quality filters are highly
recommended. The followings part are available as f ollows.
Oil Filter Part No.
Engine (Turbo) and
Mitsubishi Genuine Parts:
35737, 36466, or
Engine (Non-turbo)>:
Chrysler Genuine Parts: or
ENGINE OIL FILTER SELECTION
This vehicle is equipped with a
oil
The same type of replacement filter is recommended a
replacement filter for this vehicle. It is possible ,
in cold weather, that this vehicle may develop high
for a short duration. You should be sure that replacement
filter used on this vehicle is a high-quality filter and is
of withstanding a pressure of1 , 7 6 5 , (256
(manufacturer’s specifications) to avoid filter and engine
damage.
The following is a high-quality filter and is strongly
recommended for use on this vehicle.
Engine (Turbo) and
Mitsubishi Engine Oil Part No;
or
Engine (Non-turbo)>
Chrysler Engine Oil Filter Part No.
Any replacement oil filter should be installed
with the oil filter manufacturer’s installation
(1) Remove the engine oil filler cap.
(2)Remove the engine oil drain plug, out
oil.
(3) Remove the engine oil filter by using the oil f ilter
(4)Clean the oil filter mounting surface of the oil filter bracket.
TSB Revision
Page 47 of 2103
GENERAL Maintenance, Service
5. Tighten filler plug to specified torque.
Specified torque:
Engine (Non-turbo)>30 Nm (22
Engine (Turbo) and Engine>
32 Nm (24
12. AUTOMATIC TRANSAXLE FLUID
(Check ‘fluid level)
Engine (Non-turbo)>
1. Position the vehicle on a level surface.
2. Start engine and allow to idle in PARK for at le ast 60
seconds. The warmer the transaxle fluid, the more
accurate the reading.
3.While sitting in driver seat, apply brakes and plac e gear
selector in each position. Return gear selector to PARK.
4. Raise hood and remove transaxle fluid level indi cator
(dipstick) and wipe clean with a suitable shop towe l.
5.
dipstick and verify it is seated in fill tube.
Caution
Do not overfill automatic transaxle, leakage or dam age
can result.
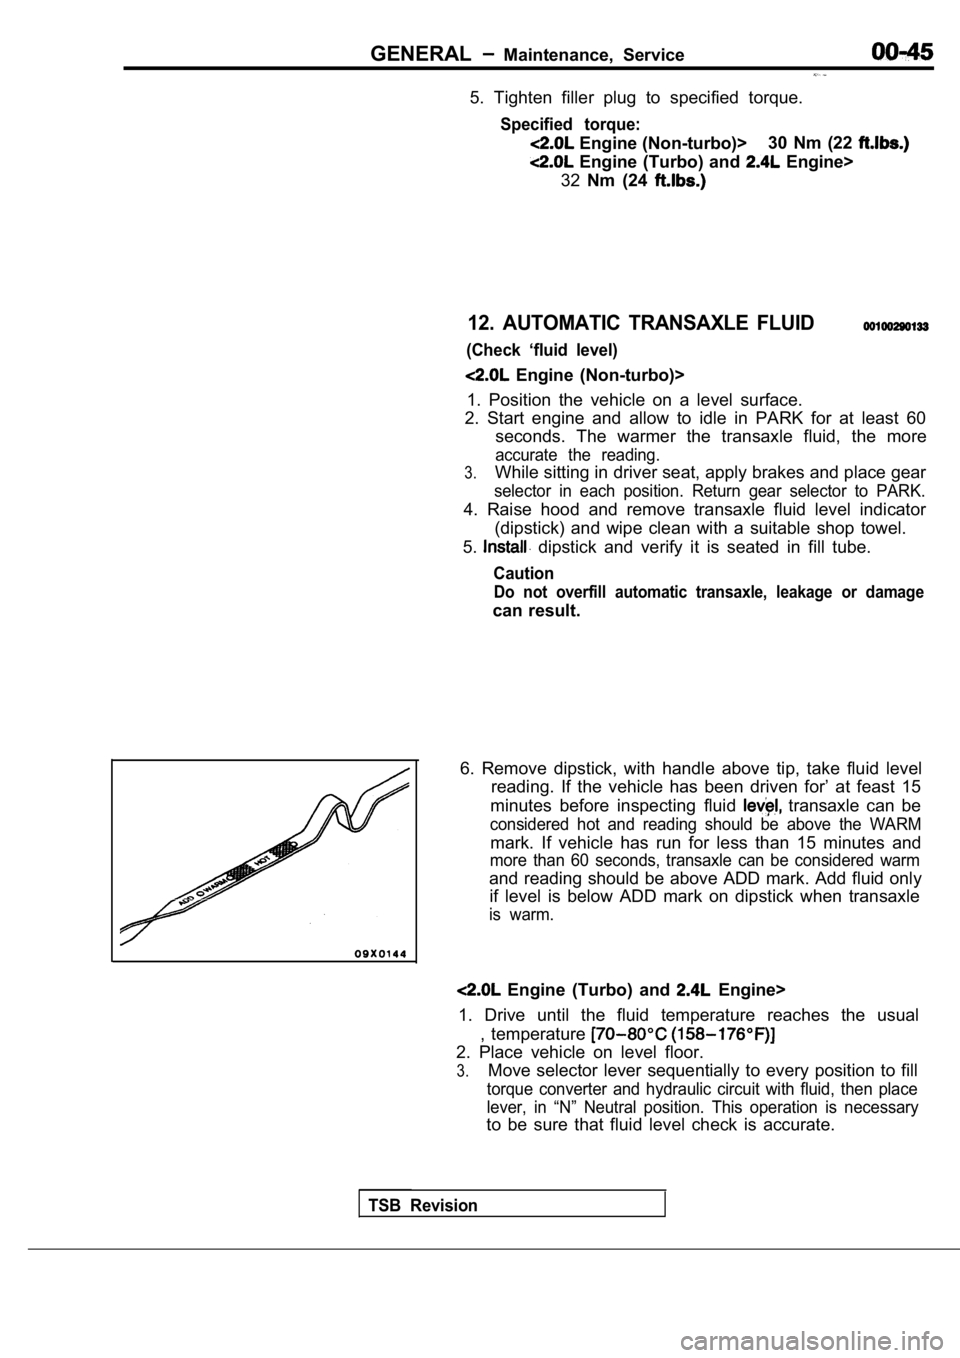
6. Remove dipstick, with handle above tip, take flu id level
reading. If the vehicle has been driven for’ at fea st 15
minutes before inspecting fluid
transaxle can be
considered hot and reading should be above the WARM
mark. If vehicle has run for less than 15 minutes a nd
more than 60 seconds, transaxle can be considered w arm
and reading should be above ADD mark. Add fluid onl y
if level is below ADD mark on dipstick when transax le
is warm.
Engine (Turbo) and Engine>
1. Drive until the fluid temperature reaches the us ual
, temperature
2. Place vehicle on level floor.
3.Move selector lever sequentially to every position to fill
torque converter and hydraulic circuit with fluid, then place
lever, in “N” Neutral position. This operation is n ecessary
to be sure that fluid level check is accurate.
TSB Revision
Page 49 of 2103
GENERALMaintenance Service
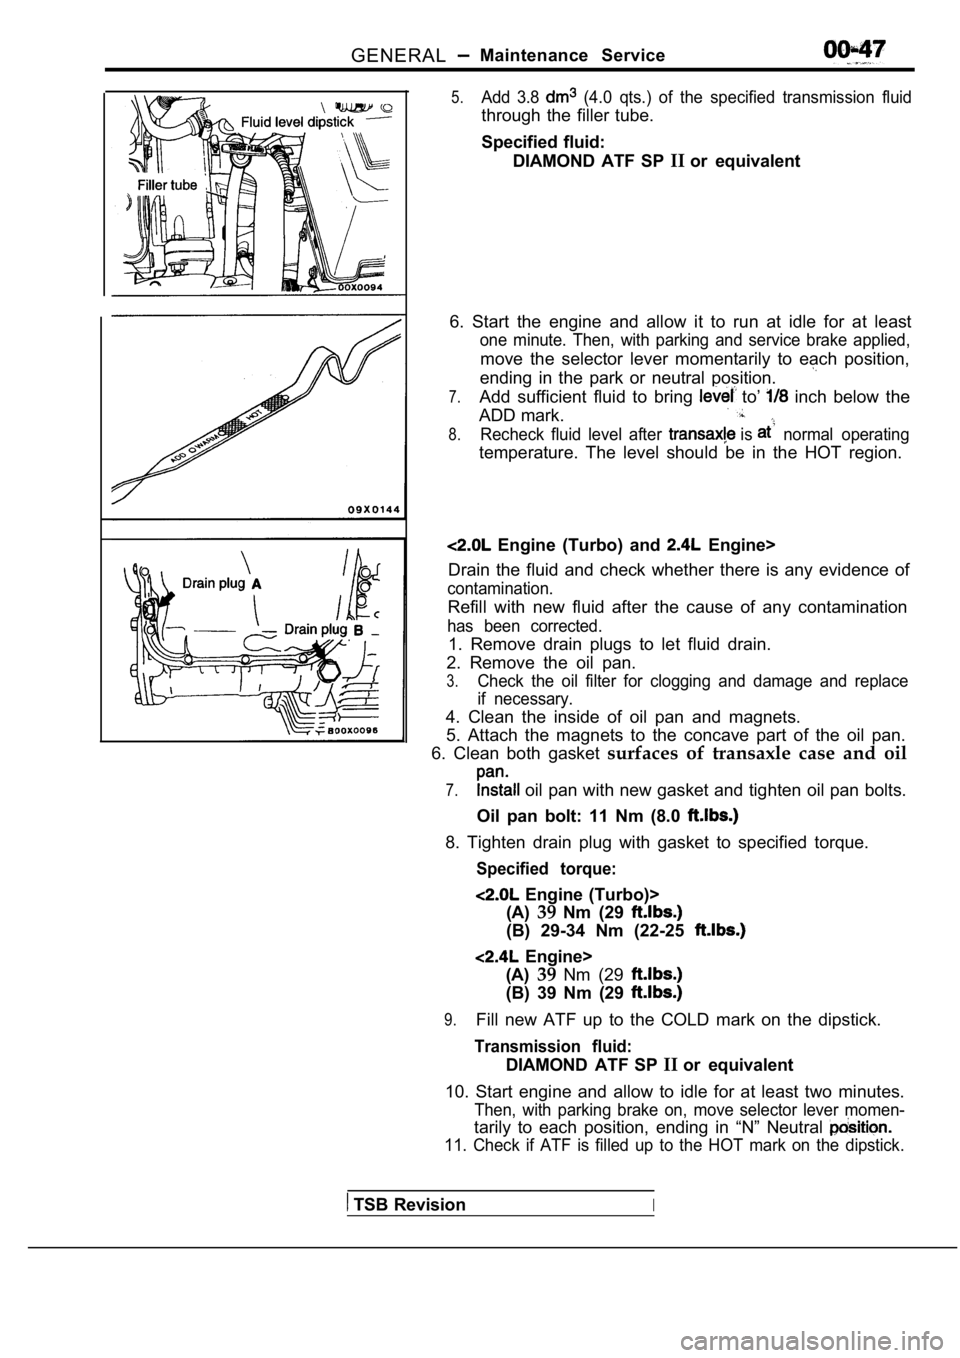
5.Add 3.8 (4.0 qts.) of the specified transmission fluid
through the filler tube.
Specified fluid:DIAMOND ATF SP IIor equivalent
6. Start the engine and allow it to run at idle for at least
one minute. Then, with parking and service brake ap plied,
move the selector lever momentarily to each positio n,
ending in the park or neutral position.
7.Add sufficient fluid to bring to’ inch below the
ADD mark.
8.Recheck fluid level after is normal operating
temperature. The level should be in the HOT region.
Engine (Turbo) and Engine>
Drain the fluid and check whether there is any evid ence of
contamination.
Refill with new fluid after the cause of any contam ination
has been corrected.
1. Remove drain plugs to let fluid drain.
2. Remove the oil pan.
3.Check the oil filter for clogging and damage and re place
if necessary.
4. Clean the inside of oil pan and magnets.
5. Attach the magnets to the concave part of the oi l pan.
6. Clean both gasket surfaces of transaxle case and oil
7. oil pan with new gasket and tighten oil pan bolts.
Oil pan bolt: 11 Nm (8.0
8. Tighten drain plug with gasket to specified torq ue.
Specified torque:
Engine (Turbo)>
(A) 39Nm (29
(B) 29-34 Nm (22-25
Engine>
(A) 39Nm (29
(B) 39 Nm (29
9.Fill new ATF up to the COLD mark on the dipstick.
Transmission fluid:
DIAMOND ATF SP IIor equivalent
10. Start engine and allow to idle for at least two minutes.
Then, with parking brake on, move selector lever mo men-
tarily to each position, ending in “N” Neutral
11. Check if ATF is filled up to the HOT mark on the dipstick.
TSB RevisionI
Page 50 of 2103
GENERAL Maintenance Service
,
Revision
Drain Plug
13. TRANSFER OIL
(Check oil level)
Check each component for evidence of leakage, and-check
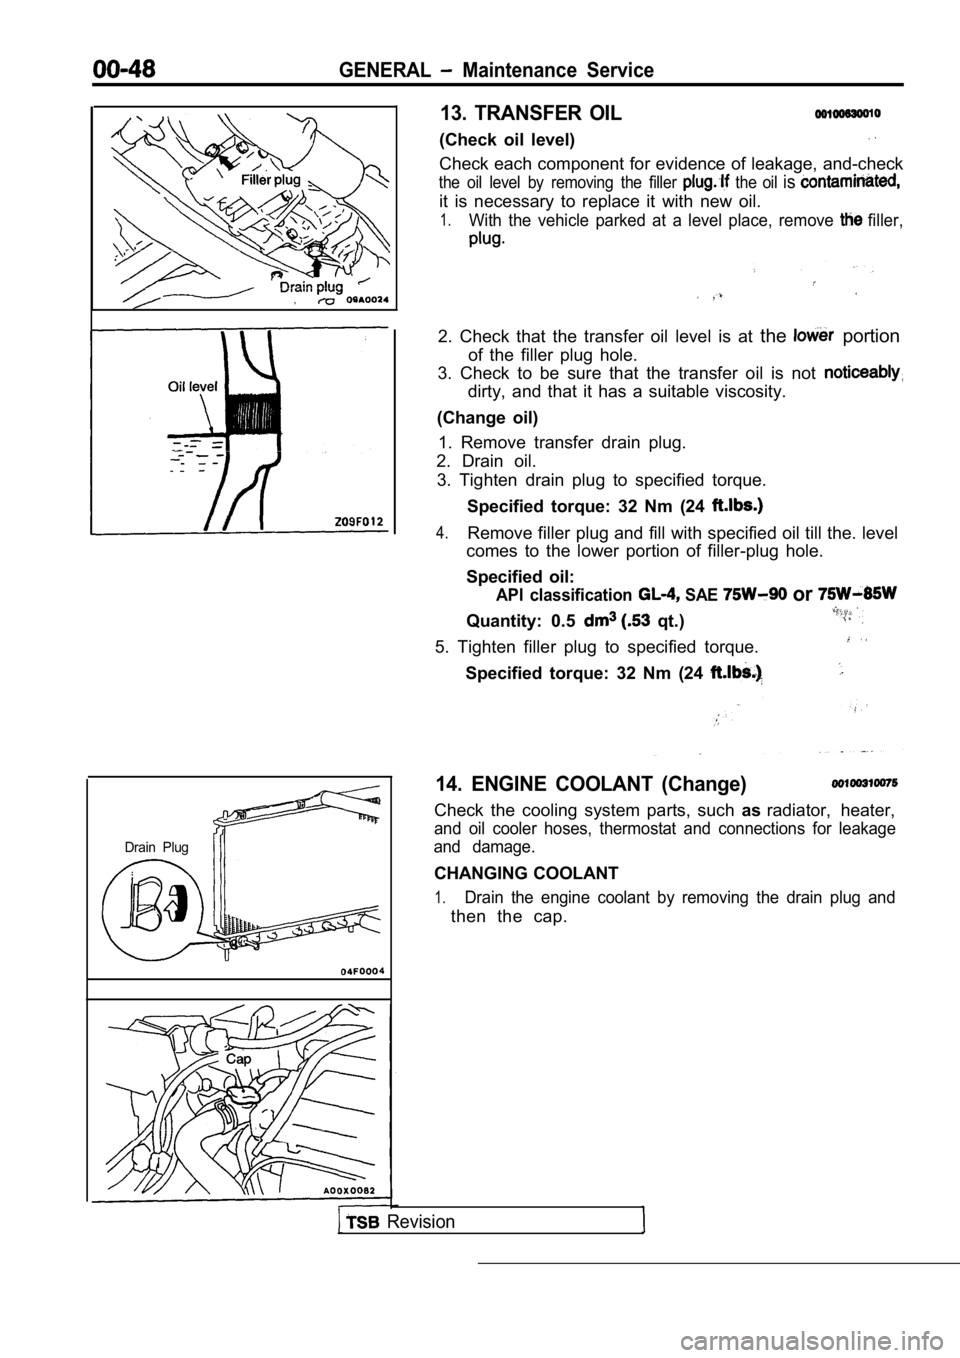
the oil level by removing the filler the oil is
it is necessary to replace it with new oil.
1.With the vehicle parked at a level place, remove filler,
2. Check that the transfer oil level is at the portion
of the filler plug hole.
3. Check to be sure that the transfer oil is not
dirty, and that it has a suitable viscosity.
(Change oil) 1. Remove transfer drain plug.
2. Drain oil.
3. Tighten drain plug to specified torque.
Specified torque: 32 Nm (24
4.Remove filler plug and fill with specified oil till the. level
comes to the lower portion of filler-plug hole.
Specified oil:
API classification SAE or
Quantity: 0.5 qt.)
5. Tighten filler plug to specified torque.
Specified torque: 32 Nm (24
14. ENGINE COOLANT (Change)
Check the cooling system parts, such asradiator, heater,
and oil cooler hoses, thermostat and connections fo r leakage
and damage.
CHANGING COOLANT
1.Drain the engine coolant by removing the drain plug and
then the cap.
Page 52 of 2103

GENERAL Maintenance Service
2.Check the wheel cylinder boots for evidence, a’ brake
fluid leak. Visually check the
boots for tears or
cracks. (A slight amount of fluid on the boot may not
be a leak, but may be preservative assembly.)
Caution
The shoes for the right and left be,
replaced at the same time.
Never split or intermix brake
sets.
All four shoes must be replaced as a set.
Thickness of lining
Limit: 1.0 mm in.)
17. BRAKE HOSES (Check for
leaks)
Check of brake hoses and tubing should be
brake service operations.
The hoses should be checked for:
1.Correct length, severe surface cracking, pulling, scuffing
or worn spots. (If the fabric casing of the hoses i s exposed
by cracks of abrasion in the rubber hose cover, the hoses
should be replaced. Eventual deterioration of may
occur with possible bursting failure.)
2. Faulty installation, casing twisting or interfer ence
wheel,’ tire or chassis.
18. BALL JOINT AND STEERING SEALS
(Check for grease leaks damage)
1. These components, which are permanently lubricat ed
at the factory, do not require periodic lubrication. Damaged
seals and boots should be replaced to prevent leakage
or contamination of the grease.
2.Check the dust cover and boots for proper sealing, leakage
and damage. Replace them if defective.
19. DRIVE SHAFT BOOTS (Check for leaks
and damage)
1. These components, which are permanently lubricat ed
at the factory, do not require periodic Damaged
boots should be replaced to prevent leakage or contamina-
tion of the grease.
2.Check the boots for proper sealing, leakage and damage.
Replace it if defective.
AXLE OIL (Check oil level)-AWD
Remove the filler plug and check the oil level at bottom of
filler hole. If the oil level is slightly below the filler hole, it
is in satisfactory condition.
Page 54 of 2103
GENERAL Maintenance Service
0 0 0 0 0 1 6 7
Inflator case
CHECK
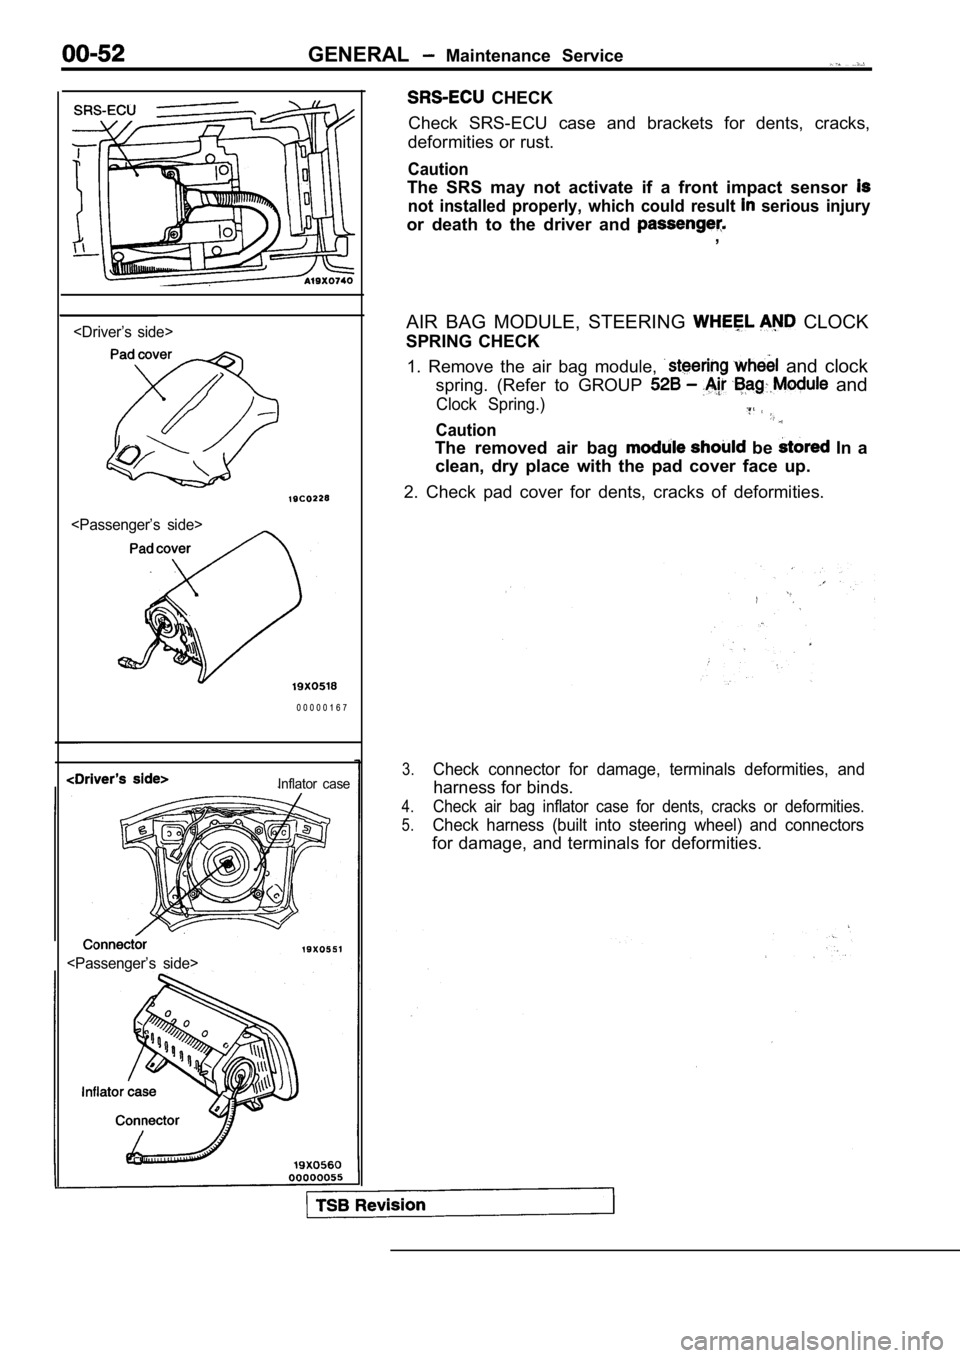
Check SRS-ECU case and brackets for dents, cracks,
deformities or rust.
Caution
The SRS may not activate if a front impact sensor
not installed properly, which could result serious injury
or death to the driver and ,
AIR BAG MODULE, STEERING
CLOCK
SPRING CHECK
1. Remove the air bag module,
and clock
spring. (Refer to GROUP
and
Clock Spring.)
Caution
The removed air bag be In a
clean, dry place with the pad cover face up.
2. Check pad cover for dents, cracks of deformities .
3.Check connector for damage, terminals deformities, and
harness for binds.
4.Check air bag inflator case for dents, cracks or deformities.
5.Check harness (built into steering wheel) and conne ctors
for damage, and terminals for deformities.