1988 PONTIAC FIERO transmission oil
[x] Cancel search: transmission oilPage 8 of 1825
GENERAL INFORMATION OA-5
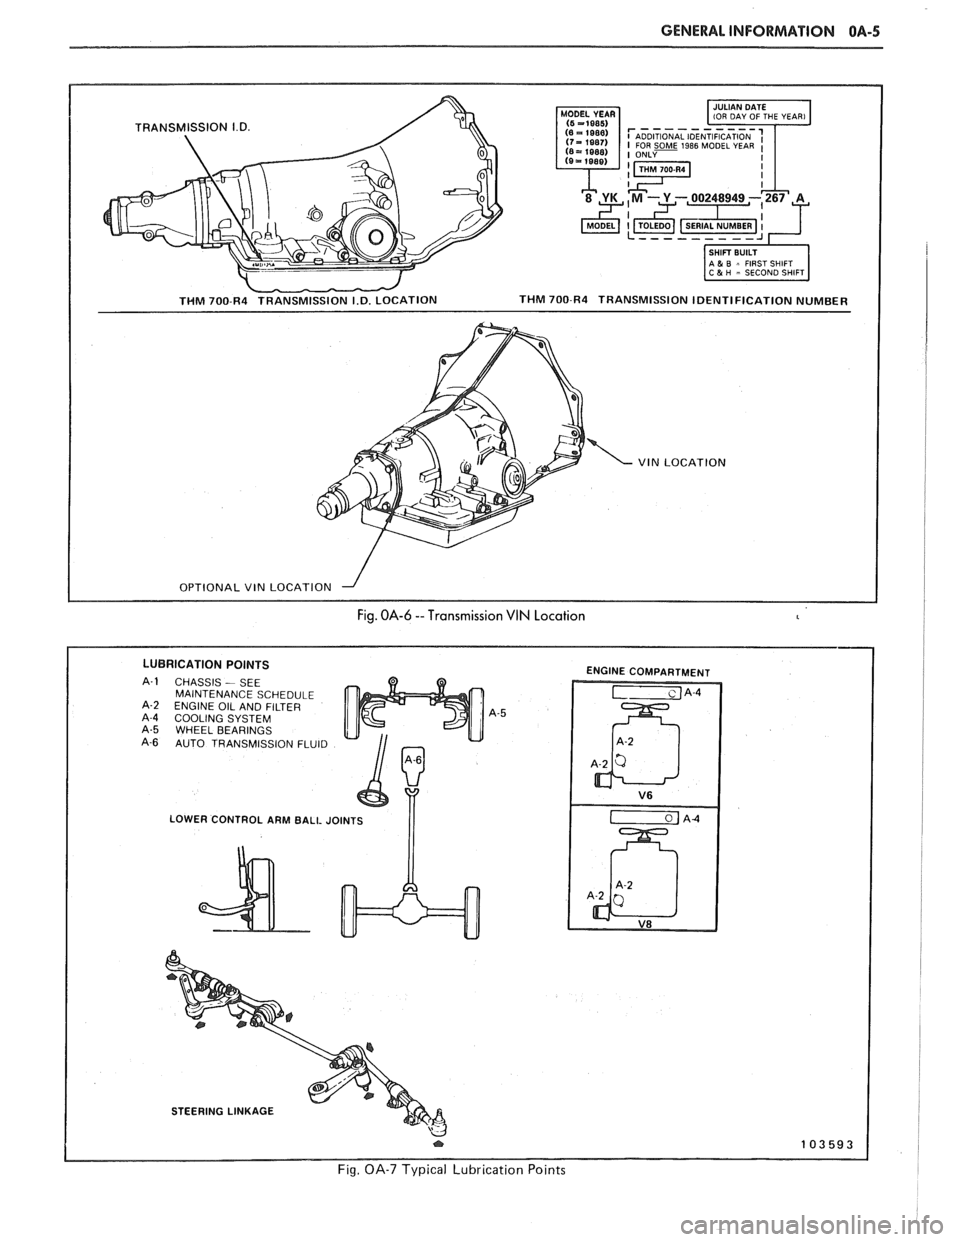
- THM 700-R4 TRANSMISSION I.D. LOCATION
1-1 IOU DAY OF THE YEAR1
I SHIFT BUILT 1 1 A & B = FIRST SHIFT 1 C 5 H - SECOND SHIFT
THM 700-R4 TRANSMISSION IDENTIFICATION NUMBER
VIN LOCATION
I OPTIONAL VIN LOCATION --I I
Fig. OA-6 --Transmission VIN Location
LUBRICATION POINTS
CHASSIS - SEE
MAINTENANCE SCHEDULE
ENGINE OIL AND FILTER
COOLING SYSTEM WHEEL BEARINGS
AUTO TRANSMISSION FLUID
LOWER CONTROL ARM BALL JOINTS
I I
ENGINE COMPARTMENT
STEERING LINKAGE
Fig. OA-7 Typical Lubrication Points
Page 18 of 1825
MAINTENANCE AND LUBRICATION OB-1
SECTION OB
NTENANCE AND LUBR
CONTENTS
Maintenance Schedule, Gasoline .............................................. OB-l
Maintenance Schedules I and 11 .............................................. OB-2
Owner Inspections
......................................................... OB-3
Recommended Fluids and Lubricants ......................................... OB-6
PASSENGER CAR MAINTENANCE SCHEDULE
VEHICLES
WITH GASOLINE ENGINE
NORMAL CAR USE ITEM 4
The maintenance services contained in Schedules I Carburetor or Throttle Body Mounting Bolt
and 11 are based on the assumption that your car will be Torque* used as designed:
Check torque of mounting bolts and/or nuts. @ To carry passengers and cargo within the limits
shown on the Tire Placard located on the edge of the ITEM 5 driver's door.
@ On reasonable road surfaces within legal driving Engine Idle Speed Adjustment*
limits. (Engines
without Idle Speed Control or Idle Air
Control) - Adjust to specifications shown on the under- @ On unleaded gasoline.
hood label. If no specifications are shown on the label, no
adjustment is necessary. Calibrated test equipment must
EXPLANATION OF SCHEDULED MAINTENANCE be used. SERVICES
The services listed in Maintenance Scheduies I and ITEM 6
11 are further explained below. When the following main- ~i~~ and wheel aotation tenance services are performed, make sure all parts are
replaced and all necessary repairs are done before driving To equalize wear and obtain maximum tire life,
your car. Be sure to use the proper fluid and lubricants as rotate in accordance with patterns shown in Owner's
shown in Figure OB-2. Manual.
ITEM 1
Engine Oil and Oil Filter Change*
ALWAYS USE SFICC OR SF/CD ENERGY CON-
SERVING OILS OF PROPER VISCOSITY
- Also.
always change oil and filter as soon as possible after
driving in a dust storm. See your Owner's Manual for
further details.
ITEM 2
Chassis Lubrication
Lubricate all grease fittings in suspension and steer-
ing linkage. Lubricate
transmissionltransaxle shift
linkage, parking brake cable guides, underbody contact
points and linkage. Also lubricate clutch cross shaft lever
every
30,000 miles (50 000 km) on rear-wheel-drive cars
only.
ITEM 3
Carburetor Choke and Hoses*
If your car is equipped with a carburetor, verify that
choke and vacuum break work properly and are within
specifications. Correct any binding caused by damage or
gum on the choke shaft. Inspect hoses for proper hookup,
cracks, chafing or decay. Correct as necessary.
Vacuum or A.I.R. Pump Drive Belt Inspection*
When a separate belt is used to drive the vacuum or
A.I.R.
pump, inspect it for cracks, fraying, wear and
proper tension. Adjust or replace as needed.
ITEM 8
Cooling System Service*
Drain, flush and refill system with new coolant. See
your Owner's Manual
for further details.
ITEM 9
Wheel Bearing Repack (Rear-Wheel-Drive Cars
Only Except Corvette)
Clean and repack front wheel bearings at each brake
relining or 15,000 miles
(25 000 km), whichever comes
first, when car is used in such service as police, taxi or
door-to-door delivery. If you do not use your car in such
service, clean and repack bearings at each brake relining
or 30,000 miles
(50 000 km), whichever comes first.
Corvette models do not require wheel bearing repack.
Page 21 of 1825
OB-4 MAINTENANCE AND LUBRICATION
Tire and wheel operation - Be alert to a vibra-
tion of the steering wheel or seat at normal highway
speeds. This may mean a wheel balance is needed. Also, a
pull right or left on a straight, level road may show the
need for
a tire pressure adjustment or wheel alignment.
Steering system operation - Be alert to
changes in steering action. An inspection is needed when
the steering wheel is harder to turn or has too much free
play or if unusual sounds are noted when turning or
parking.
Headlight aim operation - Take note of light
pattern occasionally. If beam aim doesn't look right,
headlights should be adjusted.
AT EACH FUEL FILL
Engine oil level check - Check engine oil level
and add if necessary. See your Owner's
Manual for further
details.
NOTICE: A large loss in this system may indicate a
problem. Have it inspected and repaired at once.
Engine coolant level and condition - Check
engine coolant level in coolant reservoir tank and add if
necessary. Replace if dirty or rusty. See your Owner's
Manual for further details.
NOTICE: A large loss in this system may indicate a
problem. Have it inspected and repaired at once.
Windshield washer fluid level check -- Check
washer fluid level in container and add if necessary.
Hood latch operation - When opening hood on
cars equipped with hoods that open from the front, note
the operation of secondary latch. It should keep hood from
opening all the way when primary latch is released. Make
sure that hood closes firmly.
AT LEAST MONTI-ILY
Tire and wheel inspection and pressure
check--
Check tires for abnormal wear or damage. Also,
check for damaged wheels. Keep pressures as shown on
Tire Placard on the driver's door (include spare unless it is
a stowaway). Pressure should b\: checked when tires are
"cold". See "Tires" in Owner's Manual for further
infomation.
Light operation check - Check operation of
license plate light, side-marker lights, headlights includ-
ing high beams, parking lights, taillights, brake lights.
turn signals, backup lights, instrument panel and interior
lights and hazard warning flashers.
Fluid leak check - After the car has been parked
for a while, inspect the surface beneath the car for water,
oil, fuel or other fluids. Water dripping from the air
conditioning system after use is normal. If you notice fuel
leaks or fumes, the cause should be found and corrected at
once.
AT LEAST TWICE A YEAR (FOR EXAMPLE,
EVERY SPRING AND FALL)
Power steering pump fluid level check --
Check power steering pump fluid level in accordance with
Owner's Manual instructions and keep at proper level.
NOTICE: A large loss in this system may indicate a
problem. Have it inspected and repaired at once.
Brake master cylinder reservoir fluid level
check ---- Check fluid and keep at proper level. Note: It is
normal for the brake fluid level to go down slightly as the
brake pads wear
- so be sure to keep reservoir filled.
NOTICE: A large loss in this system may indicate a
problem. Have
it inspected and repaired at once.
Clutch system service --- manual transmis-
sionltransaxle --- For cars equipped with hydraulic
clutch system, check the reservoir fluid level and add fluid
as required. All others, check clutch pedal free travel and
adjust as necessary. See your Owner's Manual for further
details.
~
NOTICE: A large loss in this system may indicate a
problem. Have it inspected and repaired at once.
Weatherstrip Lubrication - Clean surface and
then apply a thin film of silicone grease with a clean cloth.
EACH TIME OIL IS CHANGED
Automatic and manual transmissionltrans-
axle fluid level check - Check transmission/transaxle
fluid level and add as required. (Corvette only) if equipped
with manual transmission
- check fluid in the overdrive
unit and add as required.
NOTICE: A large loss in this system may indicate a
problem. Have
it inspected and repaired at once.
Brake systems inspection - For convenience,
the following should be done when wheels are removed
for rotation: Inspect lines and hoses for proper hookup,
binding, leaks, cracks, chafing, etc. Inspect disc brake
pads for wear and rotors for surface condition. Also in-
spect drum brake linings for wear and cracks. Inspect
other brake parts, including drums, wheel cylinders, park-
ing brake, etc. at the same time. Check parking brake
adjustment.
INSPECT BRAKES MORE OFTEN IF DRIVING
HABITS OR CONDITIONS RESULT IN FREQUENT
BRAKING.
Steering, suspension and front drive axle
boot and seal inspection
- Inspect front and rear
suspension and steering system for damaged, loose or
missing parts, signs of wear or lack of lubrication. Inspect
power steering lines and hoses for proper hookup, bind-
ing, leaks, cracks, chafing, etc. (On cars equipped with
manual steering gear, check for seal leakage.) On
front-
wheel-drive cars, clean then inspect drive axle boot seals
for damage, tears or leakage. Replace seals if necessary.
Exhaust system inspection - Inspect complete
system. Inspect body near the exhaust system. Look for
broken, damaged, missing or out-of-position parts as well
as open seams, holes, loose connections or other condi-
tions which could cause a heat buildup in the tloor pan or
could let exhaust fumes seep into the trunk or passenger
compartment.
Page 22 of 1825
MAINTENANCE AND LUBRICATION OB-5
Throttle linkage inspection -- Inspect for inter-
ference, binding, damaged or missing parts.
Engine drive belts inspection - Inspect all
belts for cracks, fraying and wear. Adjust or replace as
needed.
Rear axle service (if equipped) - Check gear
lubricant level and add if needed. For cars equipped with a
limited slip rear axle, fluid does not require changing
(except Caprice and Corvette
- change fluid and required
additive at first
7,500 miles (12 500 km). See your
Owner's Manual or "Recommended Fluids
& Lubricants
Chart" in this section.
IF YOU USE YOUR GAR TO PULL A TRAILER,
CHANGE GEAR LUBRICANT EVERY 7,500 MILES
(12 500 KM).
NOTICE: A large loss in this system may indicate a
problem. Have it inspected and repaired at once.
Power antenna - Clean and then lubricate power
antenna mast. The proper lubricant as shown in Figure
OB-2 should be used.
AT LEAST ONCE A YEAR
Lap and shoulder belts condition and opera-
tion
- Inspect belt system, including webbing, buckles,
latch plates, retractors, guide loops and anchors.
Moveable head restraint operation - On cars
with moveable restraints, make sure restraints stay in the
desired position. (See adjustment instructions in your
Owner's Manual.)
Seatback latch and recliner operation on
cars equipped
with recliner seat --- Be sure seat-
backs latch on those cars with folding seats using mechan-
ical latches. Make sure the recliner is holding by pushing
and pulling on the top of the
seatback while it is reclined.
See your Owner's Manual for seat operating information.
Spare tire and jack storage- Be alert to rattles
in rear of car. Make sure the space tire, all jacking equip-
ment, any tire inflator and any covers or doors are securely
stowed at all times. Oil jack ratchet or screw mechanism
after each use.
Key lock service - Lubricate key lock cylinder at
least annually.
Body lubrication service - Lubricate all body
door hinges including the tailgate or hatchback lid (if
equipped). Also lubricate the body hood, fuel door and
rear compartment hinges and latches including interior
glove box and counsel doors, and any folding seat
hardware.
"Fansmissionltransaxle neutral or clutch
starl switch operation
CAUnON: Before pedorming the follow-
ing safety switch check, be sure to have
enough room around the car. Then, firmly
apply both the parking brake (see your
Owner's Manual for procedure) and the
regular brakes. Do not use the accelerator pedal.
If the engine
starls, be ready to turn
off the ignition promptly. Take these pre-
cautions because the car could move
without warning and possibly cause per-
sonal injury or properly damage. On auto-
matic transmissionltransaxle cars, try to
starl the engine in each gear. The starler
should crank only in "Park" or "Neutral."
On manual transmissionltransaxle cars,
place the
shiR lever in "Neutral," push the
clutch halfway and try to starl. The starler
should crank only when the clutch is fully
depressed.
Steering column lock operation
- While
parked, try to turn key to "Lock" in each gear range. The
key should turn to "Lock" only when gear is in "Park" on
automatic or "Reverse" on manual
transmissionltransax-
le. On cars with key release lever, try to turn key toULock"
without depressing the lever. The key should turn to
"Lock" only with the key lever depressed. On all vehicles,
the key should come out only in "Lock."
Parking brake and transmissionltransaxle
"Park" mechanism operation
CAUT1ON:Before checking the holding
ability of the parking brake and automatic
transmissionltransaxle "Park" mecha-
nism, park on a fairly steep hill with
enough room for movement in the down-
hill direction. To reduce the risk of person-
al injury or property damage, be prepared
to apply the regular brakes promptly if the
car begins to move.
To check the parking brake, with the engine running and
transmission/transaxle in "Neutral." slowly remove foot
pressure from the regular brake pedal (until the car is held
by only the parking brake).
To check the automatic transmissionltransaxle "Park"
mechanism holding ability, release all brakes after shift-
ing the transmissionltransaxle to "Park."
ljnderbody flushing - At least every spring,
tlush from the underbody with plain water any corrosive
materials used for ice and snow removal and dust control.
Take care to thoroughly clean any areas where mud and
other debris can collect.
Sediment packed in closed areas
of the vehicle should be loosened before being flushed.
Engine cooling system service - Inspect
coolant and freeze protection. If dirty or rusty, drain, flush
and refill with new coolant. Keep coolant
at the proper
mixture as specified in your Owner's Manual. This pro-
vides proper freeze protection. corrosion inhibitor level
and engine operating temperature. Inspect hoses and re-
place if cracked. swollen or deteriorated. Tighten hose
clamps. Clean outside of radiator and air conditioning
condensor. Wash radiator filler cap and neck.
To help
ensure proper operation. a pressure test of both the cooling
system and cap is also recommended. (See maintenance
schedule charts in Figure
OB-l for the recommended
coolant change interval.)
Page 222 of 1825
REAR SUSPENSION 30.1
SECTION 3D
REAR SUSPENS
NOTICE: All rear suspension fasteners are important attaching parts in that they could affect the
performance of vital parts and systems, and/or could result in major repair expense. They must be replaced with
one of the same part number or with an equivalent part if replacement becomes necessary. Do not use
a
replacement part of lesser quality or substitute design. Torque values must be used as specified during reassembly
to assure proper retention of all parts. There is to be no welding as it may result in extensive damage and weakening
of the metal.
CONTENTS
General Information ................................ 3D- 1 Rear Lower Control Arm ............................ 3D-4
Qn-Car Service ............................ .. .......... 3D- 1 Bushing (Rear Lower Control Arm) ........... 3D-4
Shock Absorbers ........................................ 3D- 1 Torque Arm .............................................. 3D-5
Coil Springs and Insulators ......................... 3D- 1 Rear Stabilizer Shaft .................................. 3D-6
Track Bar ................................................... 3D-3 Bumper (Rubber) ....................................... 3D-6
Track Bar Brace ................... .. ................. 3D-3 Torque Specifications .................................. 3D-9
GENERAL INFORMATION
The rear axle assembly is attached to the vehicle
through a link type suspension system. The axle
housing is connected to the body by two lower control
arms and a track bar. A single torque arm is used in
place of upper control arms. It is rigidly mounted to the
rear axle housing at the rear and through a rubber
bushing to the transmission at the front. Coil springs
are used to support the weight of the car, and ride
control is provided by shock absorbers mounted to the
rear of the axle housing. A stabilizer shaft is optional.
The shock absorbers are mounted at the bottom
with a bolt and nut to brackets welded to the axle
housing, and at the top to the reinforced body area with
a nut. The only service the shock absorbers require is
replacement if they
have lost tllcir resistance, are
danaged, or are leaking flldd.
ON-CAR SERVICE
SI-IOCK ABSORBERS
Fig. 602
Remove or Disconnect
1. Hoist car and support rear axle.
2. From above, pull back carpeting and remove
shock absorber upper mounting nut.
NOTICE: Axle assembly must be supported
before removing upper shock absorber nut to avoid
possible damage to brake lines, track bar and prop
shaft.
3. Loosen and remove shock absorber lower
mounting nut from shock absorber. Remove
shock.
Install or Connect
NOTICE: See NOTICE on Page 3D-1 of this
section.
1. Position shock absorber through body mounting
hole and loosely install the lower shock absorber
mounting nut.
2. From above, install the upper shock absorber
retainer and nut. Torque nut.
3. Torque lower shock absorber nut.
4. Remove rear axle support and lower car.
COIL SPRINGS AND INSULATORS
Fig. 603
Remove or Disconnect
1. Hoist car on non twin post-type hoist and support
rear axle assembly with an adjustable lifting
device.
2. Track bar mounting bolt at axle assembly.
Loosen track bar bolt at body brace.
3. Rear brake hose clip at underbody to allow
additional axle drop.
4. Right and left shock absorber lower attaching
nuts.
5. Carefully lower rear axle and remove spring(s)
and or insulator(s).
NOTICE: DO NOT suspend rear axle by brake
hose. Damage to hose could result.
Install or Connect
NOTICE: See NOTICE on Page 3D-1 of this
section.
Page 243 of 1825
4A-2 PROPELLER SHAFT
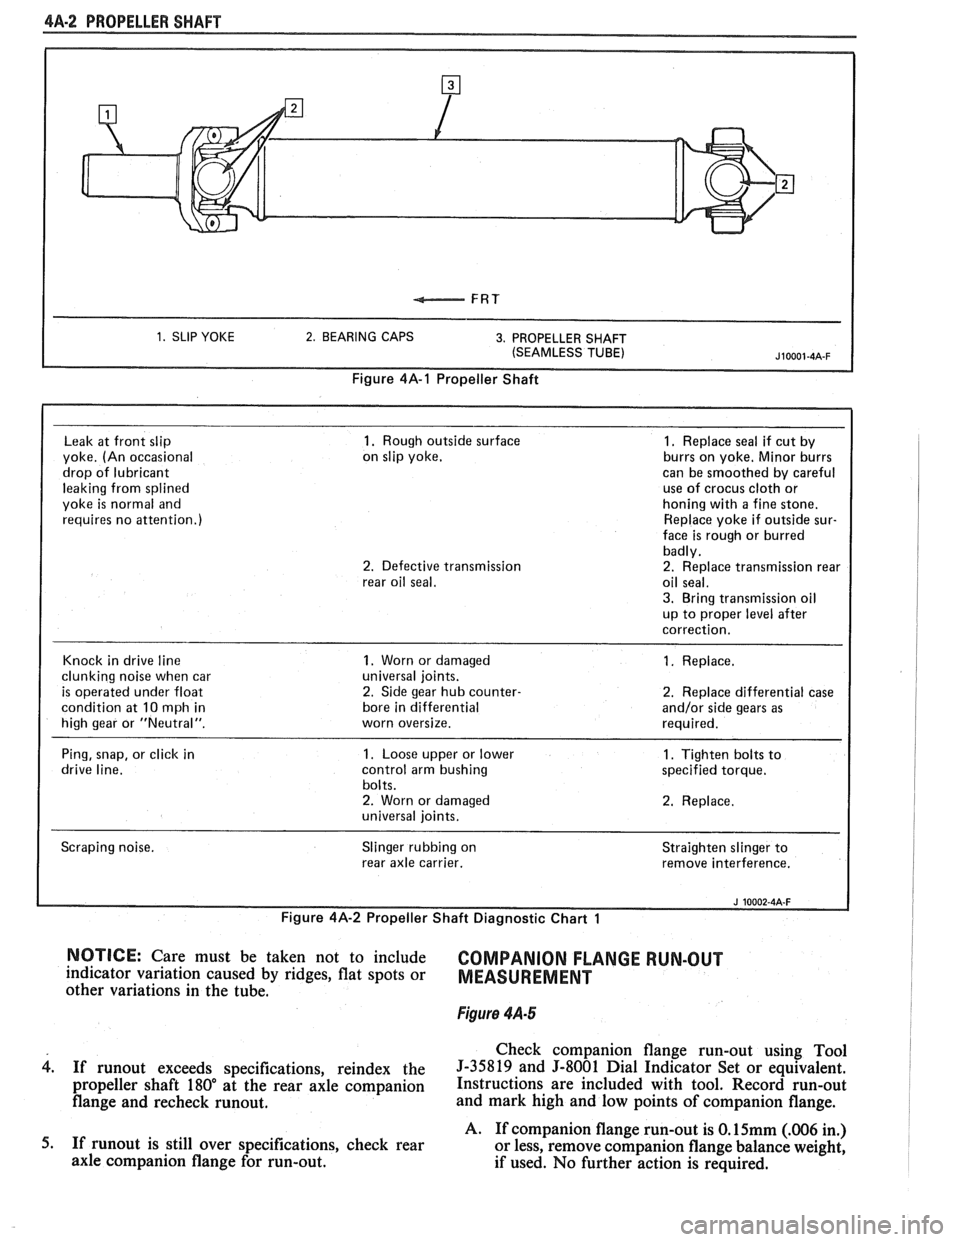
1. SLIP YOKE 2. BEARING CAPS 3. PROPELLER SHAFT
(SEAMLESS TUBE)
Figure 4A-1 Propeller Shaft
Leak
at front slip 1. Rough outside surface 1. Replace seal if cut by
yoke. (An occasional on
slip yoke. burrs on yoke.
Minor burrs
drop of lubricant can
be smoothed by careful
leaking from splined use
of crocus
cloth or
yoke
is normal and honing
with a fine stone.
requires no attention.) Replace
yoke if outside sur-
face is rough or burred
badly.
2. Defective transmission 2. Replace transmission rear
rear oil seal. oil seal.
3. Bring transmission oil
up to proper level after
correction.
Knock in drive line
1. Worn or damaged 1. Replace.
clunking noise when car universal
joints.
is operated under float 2. Side gear hub counter- 2. Replace differential case
condition at
10 mph in bore
in differential and/or side gears as
high gear or "Neutral". worn oversize. required.
Ping, snap, or click in
1. Loose upper or lower 1. Tighten bolts to
drive line. control arm bushing specified torque.
bolts.
2. Worn or damaged 2. Replace.
universal joints.
Scraping noise. Slinger
rubbing on
rear axle carrier. Straighten
slinger to
remove interference.
I
Figure 4A-2 Propeller Shaft Diagnostic Chart 1 I i
NOTICE: Care must be taken not to include COMPANION FLANGE RUN-OUT indicator variation caused by ridges, flat spots or MEASUREMENT other variations in the tube.
Figure 4.4-5
Check companion flange run-out using Tool
4. If runout exceeds specifications, reindex the 5-35819 and 5-8001 Dial Indicator Set or equivalent.
propeller shaft 180" at the rear axle companion Instructions are included with tool. Record run-out
flange and recheck runout. and mark high and low points of companion flange.
A. If companion flange run-out is
O.15mm (.006 in.)
5. If
runout is still over specifications, check rear
or less, remove companion flange balance weight,
axle companion flange for run-out.
if used. No further action is required.
Page 271 of 1825
484-18 REAR AXLE
4. With transmission in park and both wheels and
tires clear of ground, (wheels will r~tate in opp-
osite directions), measure torque required to
rotateaxle shafts with a torque
wrenchattached
to J 2619-1. If the torque reading is less than
48 N.m (35 1b.ft.) the unit should be disassembled
and repaired as required.
5. Reinstall wheel and tire assembly.
Disassemble
Limited Slip Differential.
1. Remove ring gear bolts.
NOTICE: Left hand threaded ring gear bolts.
2. Tap
ring gear off differential housing with soft
face hammer.
NOTICE: Mark differential case halves with
alignment mark before disassembly because they
could be assembled
180" off from original position.
3. Remove 8 screws holding differential housing
halves together and separate halves. 4.
Remove pinion shaft, 4 differential pinions,
thrust washers side gears, side gear shims
(if
required), spring plates, and compression springs
from housing. Discard compression springs. New
springs are required for assembly.
5. Mark each cone during disassembly to ensure
that the same brake cone will be assembled with
the same case as originally assembled. If shims
are used they must be marked so that they will be
assembled in original case half.
6. If differential bearings are damaged remove with
tool J-22888-D. (Fig. 15).
Inspect
Disassemble
The inspection procedures for the positraction
differential are the same as those for the standard
rear axle except for the side gear positioning
shims. The side gear positioning shims are used
to control case size.
1. The shims should be free of cracks, nicks, or
burrs.
2. Assemble brake cones in case and measure to
determine correct shim size. Measure the
distance from case mating surface to flat surface
on brake cone when fully seated. Select shim size
from chart below.
DISASSEMBLY INSPECTION CHART
Distance Measured mm (ins) Size
Shim Required
29.51/29.34 (1.162/1/155) no shim required.
29.64/29.54 (1.167/1.163) 0.13 (.005) shim required.
29.77D9.67 (1.172/1.168) 0.25 (.010) shim required.
Assemble
Limited Slip Differential
1.
Lubricate both sides of pinion thrust washers,
pinion bores and differential pinion shafts with
specified rear axle lube before assembling.
2. Install the 4 pinions and spherical thrust washers.
3. Replace original brake cone, shim if required, and
side gear in cap half of differential case. For shim
selection, if needed, refer to Disassembly
Inspection Chart. Apply mixture of molybdenum
disulphide and specified axle oil to face of side
gear.
NOTICE: Do not 1.eplace cone or case
independently. They must be replaced as a unit
together.
4. Install spring
plate on side gear with convex side
towards flange half.
5. Assemble differential pinion shaft, pinions, and
spherical thrust washers into cap half of
differential case with pinions meshing with side
gear. 6.
Install three new concentric thrust springs
through the center of the pinion shaft spider.
7. Assemble second spring plate and springs with
cgnvex side towards springs.
8. Coat other side gear face with molybdenum
disulphide and axle lubricant and install side gear
shim if required. Install brake cone on spring
plate.
9. Install
flange half of case on top of assembly with
oil channels aligned.
10. Install
two bolts through cases
180" apart and
tighten finger tight.
11. Axle shafts are used to align the side gear and
brake cone splines. Put a clamp on one axle shaft
so 75 mm (3 inches) extends beyond clamp.
Install differential housing onto axle shaft splines,
flanged half first.
12. Install other axle shaft through cap side of
differential case and align side gear and cone
splines.
13. Install remaining
bolts and tighten to specified
torque.
14. Install
ring gear and tighten bolts to specified
torque.
Page 274 of 1825
REAR AXLE 4B-1
SECTION 4B
REAR AXLE
NOTICE: All rear axle attaching fasteners are an necessary.
Do not use a replacement part of lesser
important part in that they could affect the quality
or substitute design. Torque values must
performance of vital parts and systems, and/or be
used as specified during reassembly to assure
could result in major repair expense. They must proper retention
of all parts. (There is to be no
be replaced with one of the same part number or welding
as it may result in extensive damage and
with an equivalent part if replacement becomes weakening
of the metal.)
CONTENTS
General Description .................................. 4B-1
Standard Rear Axle ................... .. ............ 4B- 1
Diagnosis and Testing ............................... 4B-1
Axle Noises ......................... .. ................ 4B-3
Gear Noise ...................... .. .................. 4B-3
Bearing Noise ........................................ 4B-3
Rear Wheel Bearing Noise ....................... 4B-3
Knock at Low Speeds ............................. 4B-3
Backlash Clunk ...................................... 4B-3
Rear Axle Standard and Limited Slip .......... 4B-3
Pre-Repair Investigation and Trouble
Diagnosis
................................................. 4B-4
Gear Tooth Nomenclature ....................... 4B-4
Tooth Contact Pattern Test ..................... 4B-4
Effects of Increasing Load on
Teeth Contact Pattern
.......................... 4B-4
Adjustments Affecting Tooth
Contact
.................................................. 4B-6
Effects of Pinion Position on Tooth
Pattern
................... ... .................... 4B-6
General information ....................... .. ..... 4B-8
Limited-Slip Rear Axle ............................... 4B-8
On-Vehicle Service ............................. .. ....... 4B-8
Carrier Cover and Gasket .......................... 4B-8
............................................. Axle Shaft 4B-8
Oil Seal and/or Bearing (With
Axle Shaft Removed)
............................. 4B-9
........................................ Pinion Oil Seal 4B-9
........................................... Pinion Flange 4B- 10
..................................... Rear Wheel Bolt 4B- 1 1
.................................................... Unit Repair 4B-1 1
..................................... Rear Axle Assembly 4B- 1 1
Disassembly of Rear Axle
............................................... Assembly 4B- 1 1
.. ..................................... Case Assembly ... 4B- 12
Drive Pinion, Bearing and Races ............. 4B- 12
............................... Bearing Replacement 4B- 12
...................... Setting Drive Pinion Depth 4B- 13
........................................ Rear Axle Case 4B- 14
Side Bearing Preload Adjustment ............ 4B- 15
.................................................. Drive Pinion 4B- 16
Rear Axle Backlash Adjustment .............. 4B- 17
........... Limited Slip Rear Axle (Cone Type) 4B-17
...................................... Auburn Cone Type 4B- 18
.............................................. Specifications 4B- 19
.............................................. Special Tools 4B-20
GENERAL DESCRIPTION
STANDARD REAR AXLE Operation
The rear axle assembly is of the semi-floating type
in which the car weight is carried on the axle housing.
The rear axle assembly is designed for use with an open
drive line and coil springs. The rear axle has a
hypoid
type ring gear and pinion with the centerline of the
pinion gear below the centerline of the ring gear.
All parts necessary to transmit power from the
propeller shaft to the rear wheels are enclosed in a When
the vehicle turns a corner, the outer rear
wheel must turn faster than the inner wheel. The inner
wheel, turning slower than the outer wheel, slows its
differential side gear (as the axle shaft is splined to the
side gear) and the differential pinion gears will roll
around the slowed differential side gear, driving the
other differential side gear and wheel faster.
DIAGNOSIS AND "TESTING
salisbury type axle housing (a carrier casting with tubes Many
noises reported as coming from the rear
pressed and welded into the carrier to form a complete axle assembly actually
originate from other sources
carrier and tube assembly). A removable steel cover such as
tires, road surfaces, wheel bearings, engine,
bolted to the rear of the carrier permits service of the transmission,
muffler or body drumming. A thorough
rear axle without removing the entire assembly from and
careful check should be made to determine the
the car. source
of the noise before disassembling the rear axle.