Page 1965 of 2389
37. INSTALL LOCK NUT
(a) Engage the gear double meshing.
(b) Install and torque the nut.
Torque: 1,250 kg±cm (90 ft±lb, 123 N±m)
HINT: The lock nut has LH threads.
(c) Disengage the gear double meshing.
(d) Stake the lock nut.
(d) Install No. 1 shift inner lever with the shift fork lock
plate.
HINT: One of the spline teeth of the shift and select
lever shaft has been eliminated. Therefore, be cer-
tain to correctly align this portion to the matching
portions on the parts during assembly. 38. ASSEMBLE SHIFT AND SELECT LEVER ASSEMBLY
(a) Apply ATF to the shaft.
(b) Install the E±ring.
(e) Using a pin punch and hammer, drive i n the slotted
spring pin. (c) Install shift interlock plate and
spring.
± MANUAL TRANSAXLES51 TransmissionMT±34
Page 1966 of 2389
39. INSTALL SHIFT AND SELECT LEVER ASSEMBLY
(a) Apply seal packing to the underside of the flanged portion of
the control shaft cover.
Seal packing: Part No. 08826±00090, THREE BOND
1281 or equivalent
(b) Install the shift and select lever assembly and torque the con-
trol shaft cover. ._
Torque: 375 kg±cm (27 ft±Ib, 37 N±m)
(h) Install the control shaft cover and dust boot.
HINT: Make sure to install the boot in correct direction.
Position the air bleed of the boot downward. (f) Install No. 2 shift inner lever, spring and reverse
restrict pin holder.
Install the control shift lever and insert the lever lock
pin to the lever. Install the washer and lock nut.(g) Install the E±ring.
± MANUAL TRANSAXLES51 TransmissionMT±35
Page 1967 of 2389

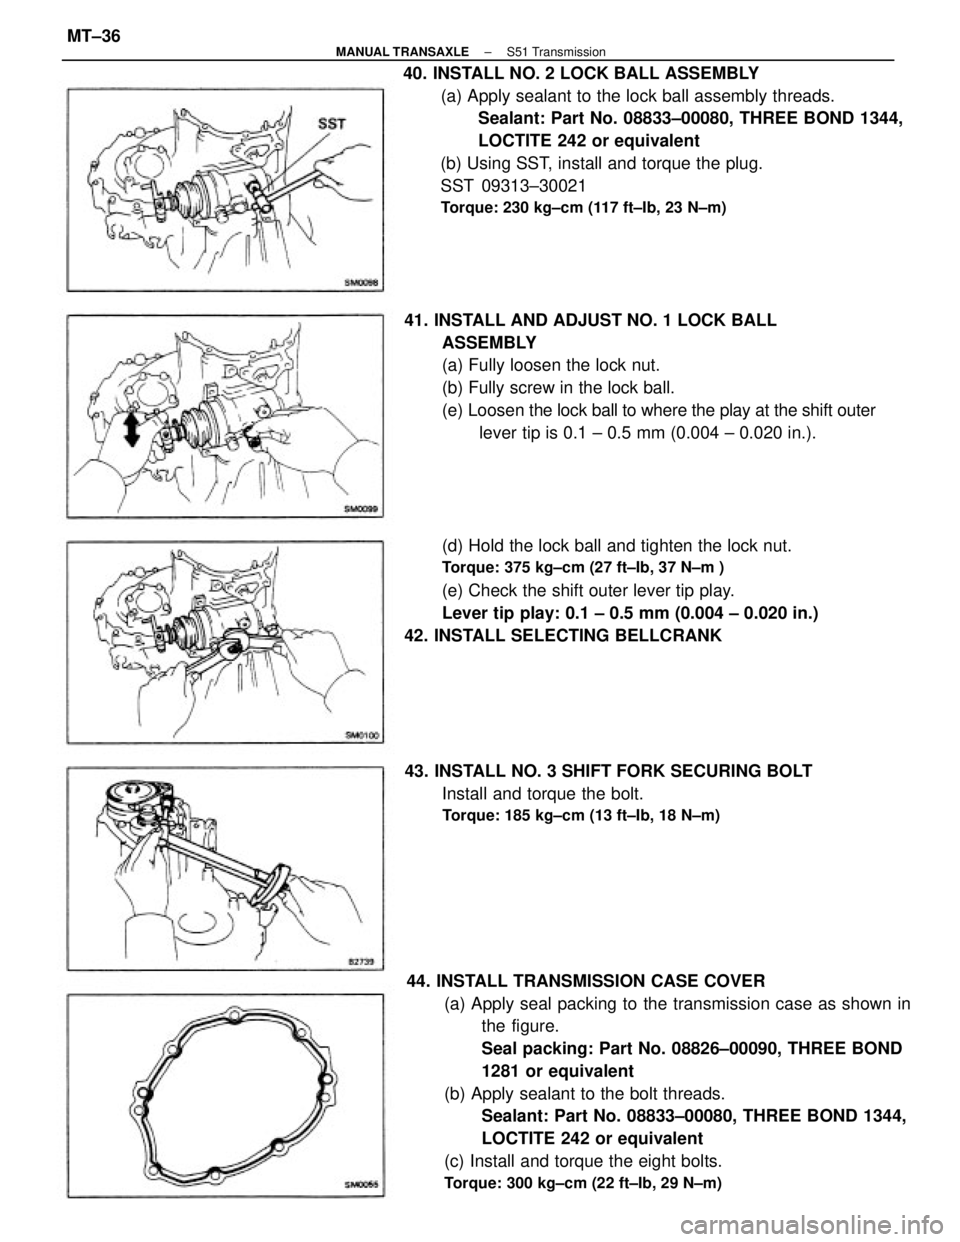
44. INSTALL TRANSMISSION CASE COVER
(a) Apply seal packing to the transmission case as shown in
the figure.
Seal packing: Part No. 08826±00090, THREE BOND
1281 or equivalent
(b) Apply sealant to the bolt threads.
Sealant: Part No. 08833±00080, THREE BOND 1344,
LOCTITE 242 or equivalent
(c) Install and torque the eight bolts.
Torque: 300 kg±cm (22 ft±Ib, 29 N±m)
40. INSTALL NO. 2 LOCK BALL ASSEMBLY
(a) Apply sealant to the lock ball assembly threads.
Sealant: Part No. 08833±00080, THREE BOND 1344,
LOCTITE 242 or equivalent
(b) Using SST, install and torque the plug.
SST 09313±30021
Torque: 230 kg±cm (117 ft±Ib, 23 N±m)
41. INSTALL AND ADJUST NO. 1 LOCK BALL
ASSEMBLY
(a) Fully loosen the lock nut.
(b) Fully screw in the lock ball.
(e) Loosen the lock ball to where the play at the shift outer
lever tip is 0.1 ± 0.5 mm (0.004 ± 0.020 in.).
(d) Hold the lock ball and tighten the lock nut.
Torque: 375 kg±cm (27 ft±Ib, 37 N±m )
(e) Check the shift outer lever tip play.
Lever tip play: 0.1 ± 0.5 mm (0.004 ± 0.020 in.)
42. INSTALL SELECTING BELLCRANK
43. INSTALL NO. 3 SHIFT FORK SECURING BOLT
Install and torque the bolt.
Torque: 185 kg±cm (13 ft±Ib, 18 N±m)
± MANUAL TRANSAXLES51 TransmissionMT±36
Page 1968 of 2389
46. INSTALL RELEASE FORK AND BEARING
(a) Apply molybdenum disulphide lithium base grease to
the following parts:
wRelease bearing hub inside groove
wInput shaft spline
wRelease fork contact surface
(b) Apply MP grease to the front surface of the release
bearing.
47. INSTALL BACK±UP LIGHT SWITCH
Torque: 450 kg±cm (33 ft±Ib, 44 N±m)
48. INSTALL SPEEDOMETER DRIVEN GEAR45. INSTALL RELEASE BEARING RETAINER
Torque: 75 kg±cm (65 in.±Ib, 7.4 N±m)
± MANUAL TRANSAXLES51 TransmissionMT±37
Page 1972 of 2389

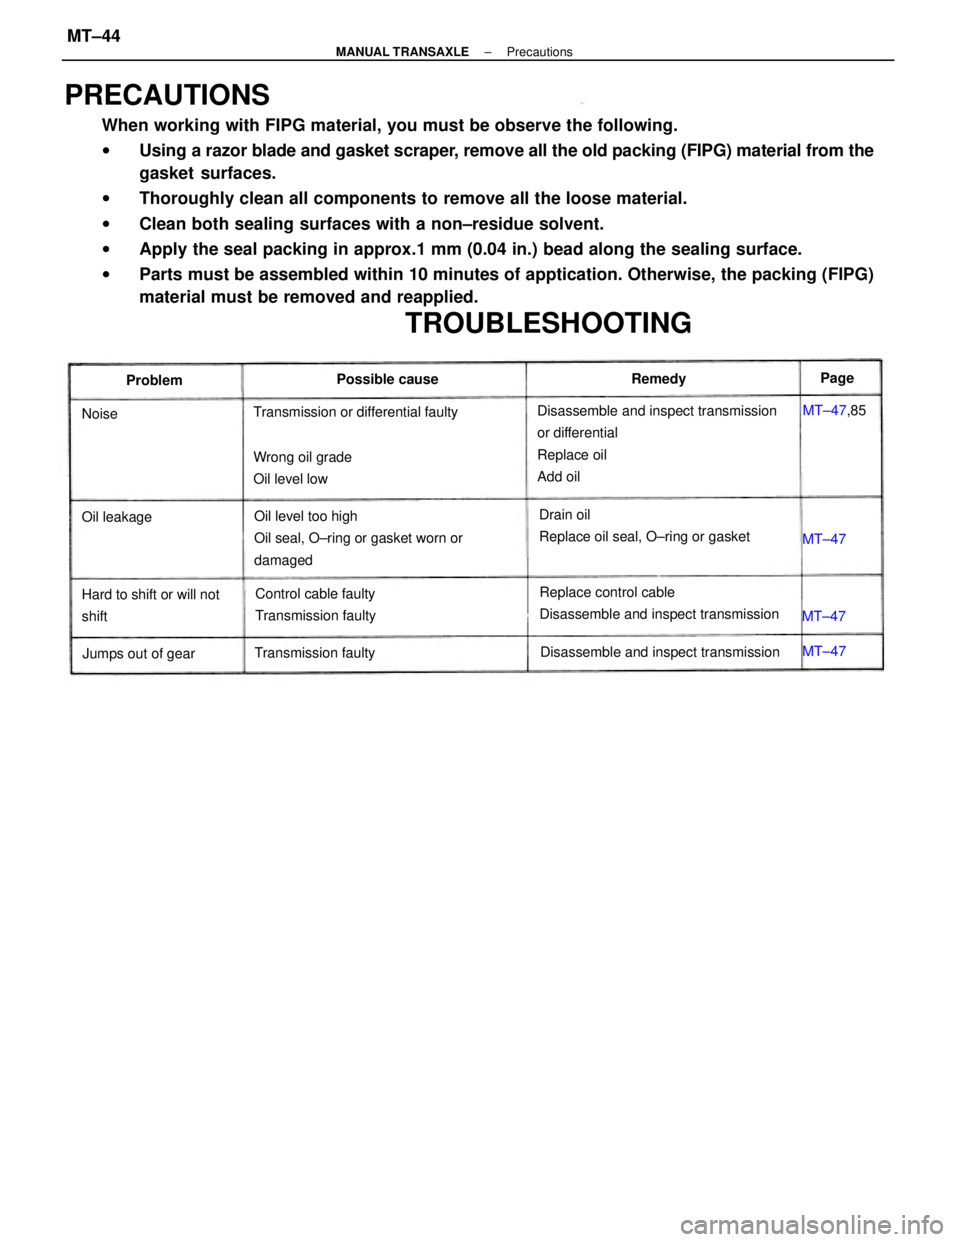
PRECAUTIONS
When working with FIPG material, you must be observe the following.
wUsing a razor blade and gasket scraper, remove all the old packing (FIPG) material from the
gasket surfaces.
wThoroughly clean all components to remove all the loose material.
wClean both sealing surfaces with a non±residue solvent.
wApply the seal packing in approx.1 mm (0.04 in.) bead along the sealing surface.
wParts must be assembled within 10 minutes of apptication. Otherwise, the packing (FIPG)
material must be removed and reapplied.
Disassemble and inspect transmission
or differential
Replace oil
Add oil
Oil level too high
Oil seal, O±ring or gasket worn or
damaged
Replace control cable
Disassemble and inspect transmission Drain oil
Replace oil seal, O±ring or gasket
TROUBLESHOOTING
Control cable faulty
Transmission faulty
Disassemble and inspect transmission Transmission or differential faulty
Hard to shift or will not
shiftWrong oil grade
Oil level low
Transmission faulty
Jumps out of gearPossible cause
Oil leakageMT±47,85 ProblemRemedy
MT±47 MT±47MT±47 NoisePage
± MANUAL TRANSAXLEPrecautionsMT±44
Page 1973 of 2389

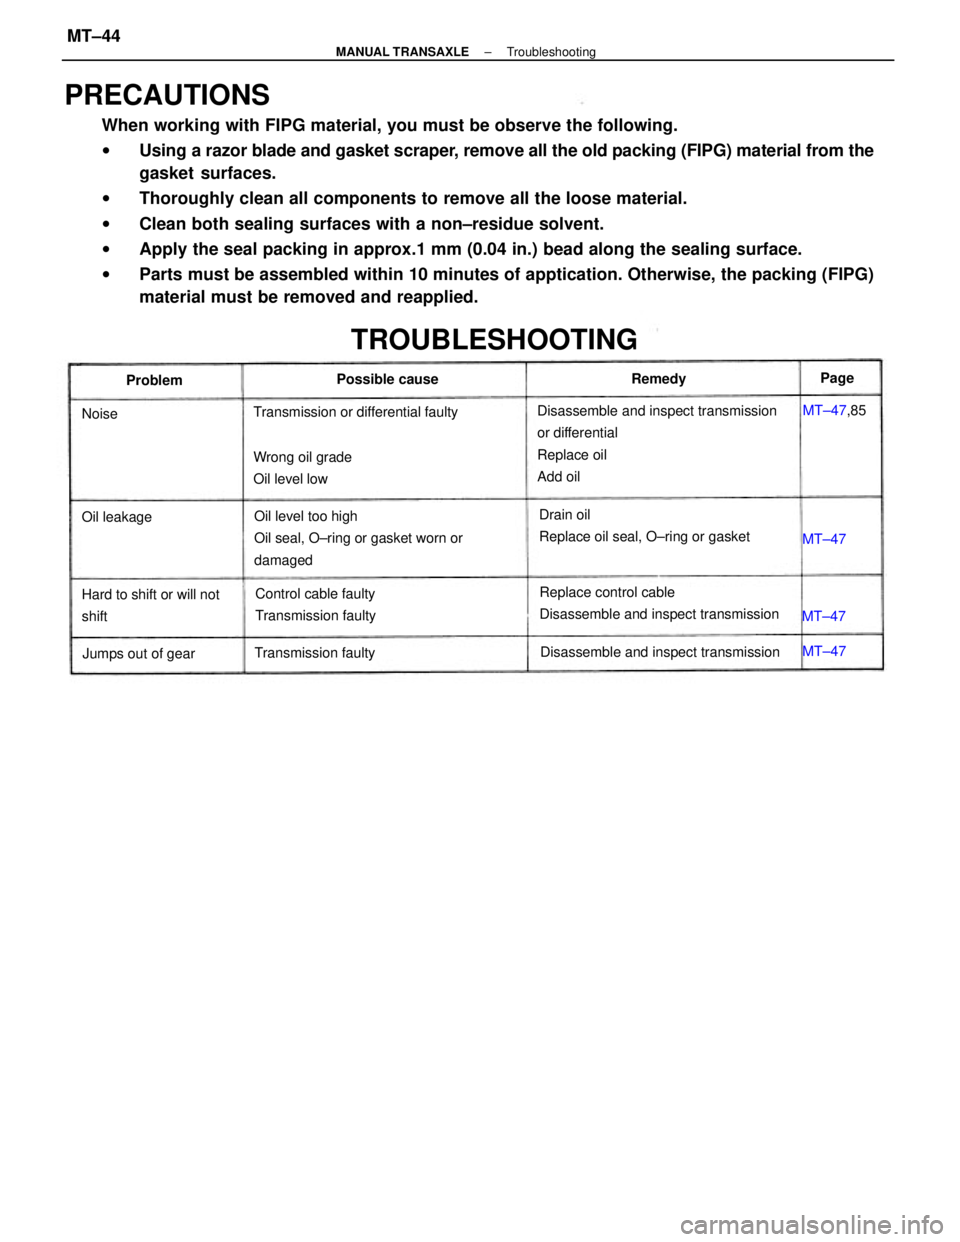
PRECAUTIONS
When working with FIPG material, you must be observe the following.
wUsing a razor blade and gasket scraper, remove all the old packing (FIPG) material from the
gasket surfaces.
wThoroughly clean all components to remove all the loose material.
wClean both sealing surfaces with a non±residue solvent.
wApply the seal packing in approx.1 mm (0.04 in.) bead along the sealing surface.
wParts must be assembled within 10 minutes of apptication. Otherwise, the packing (FIPG)
material must be removed and reapplied.
Disassemble and inspect transmission
or differential
Replace oil
Add oil
Oil level too high
Oil seal, O±ring or gasket worn or
damaged
Replace control cable
Disassemble and inspect transmission Drain oil
Replace oil seal, O±ring or gasket
TROUBLESHOOTING
Control cable faulty
Transmission faulty
Disassemble and inspect transmission Transmission or differential faulty
Hard to shift or will not
shiftWrong oil grade
Oil level low
Transmission faulty
Jumps out of gearPossible cause
Oil leakageMT±47,85 ProblemRemedy
MT±47 MT±47MT±47 NoisePage
± MANUAL TRANSAXLETroubleshootingMT±44
Page 1986 of 2389
9. REMOVE FIFTH DRIVEN GEAR
Using SST, remove the 5th driven gear.
SST 09310±17010 (09310±07010, 09310±07020,
09310±07040, 09310±07050) 8. REMOVE NO.3 HUB SLEEVE AND NO.3 SHIFT FORK
(a) Remove the No.3 shift fork set bolt.
(b) Remove the No.3 hub sleeve and No±3 shift fork. 7. REMOVE LOCK NUT
(a) Unstake the lock nut.
(b) Engage the gear double meshing.
(c) Remove the lock nut.
(d) Disengage the gear double meshing. 6. REMOVE TRANSMISSION CASE COVER
± MANUAL TRANSAXLERemoval of Component PartsMT±51
Page 1988 of 2389
15. REMOVE PLUG, SEAT, SPRING AND LOCKING BALL
(a) Using SST, remove the plug.
SST 09313±30021
(b) Using a magnetic finger, remove the seat, spring and
locking ball.
17. REMOVE TRANSMISSION CASE
(a) Remove the fourteen bolts from the transmission case
side. (b) Using two screwdrivers and a hammer, remove
the three snap rings. 14. REMOVE SNAP RING
(a) Using snap ring pliers, remove the snap ring.
16. REMOVE REVERSE IDLER GEAR SHAFT RETAINING
BOLT
± MANUAL TRANSAXLERemoval of Component PartsMT±53