Page 336 of 513

EMISSION
CONTROL
AND
TUNE
UP
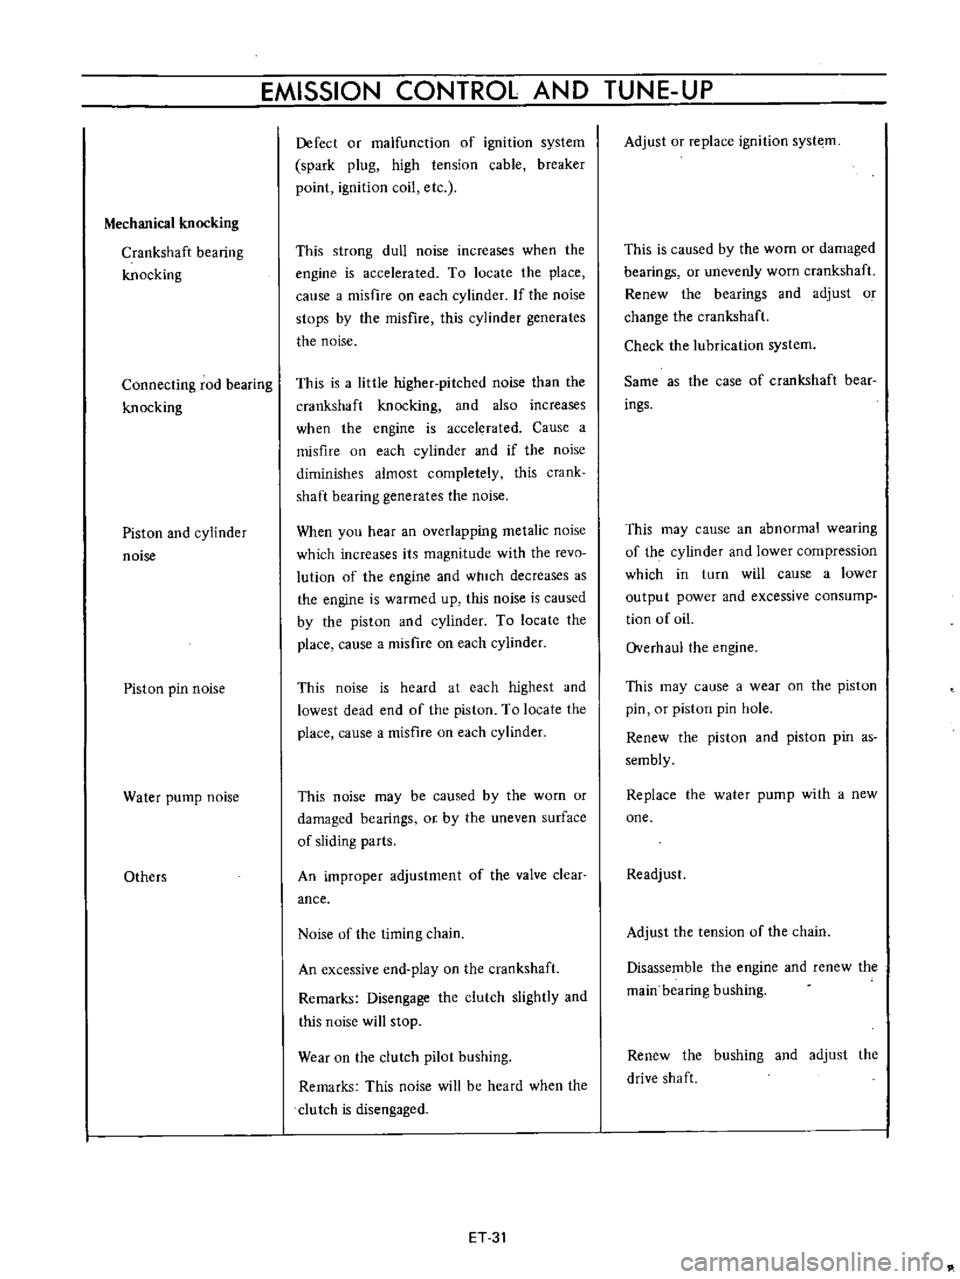
Mechanical
knocking
Crankshaft
bearing
knocking
Connecting
rod
bearing
knocking
Piston
and
cylinder
noise
Piston
pin
noise
Water
pump
noise
Others
Defect
or
malfunction
of
ignition
system
spark
plug
high
tension
cable
breaker
point
ignition
coil
etc
This
strong
dull
noise
increases
when
the
engine
is
accelerated
To
locate
the
place
calise
a
misfire
on
each
cylinder
If
the
noise
stops
by
the
misfire
this
cylinder
generates
the
noise
This
is
a
little
higher
pitched
noise
than
the
crankshaft
knocking
and
also
increases
when
the
engine
is
accelerated
Cause
a
misfire
on
each
cylinder
and
if
the
noise
diminishes
almost
completely
this
crank
shaft
bearing
generates
the
noise
When
you
hear
an
overlapping
metalic
noise
which
increases
its
magnitude
with
the
revo
lution
of
the
engine
and
which
decreases
as
the
engine
is
warmed
up
this
noise
is
caused
by
the
piston
and
cylinder
To
locate
the
place
cause
a
misfire
on
each
cylinder
This
noise
is
heard
at
each
highest
and
lowest
dead
end
of
the
piston
To
locate
the
place
cause
a
misfire
on
each
cylinder
This
noise
may
be
caused
by
the
worn
or
damaged
bearings
or
by
the
uneven
surface
of
sliding
parts
An
improper
adjustment
of
the
valve
clear
ance
Noise
of
the
timing
chain
An
excessive
end
play
on
the
crankshaft
Remarks
Disengage
the
clutch
slightly
and
this
noise
will
stop
Wear
on
the
clutch
pilot
bushing
Remarks
This
noise
will
be
heard
when
the
clutch
is
disengaged
ET
31
Adjust
or
replace
ignition
syste
m
This
is
caused
by
the
wom
or
damaged
bearings
or
unevenly
worn
crankshaft
Renew
the
bearings
and
adjust
o
change
the
crankshaft
Check
the
lubrication
system
Same
as
the
case
of
crankshaft
bear
ings
This
may
cause
an
abnormal
wearing
of
the
cylinder
and
lower
compression
which
in
turn
will
cause
a
lower
output
power
and
excessive
consump
tion
of
oiL
Overhaul
the
engine
This
may
cause
a
wear
on
the
piston
pin
or
piston
pin
hole
Renew
the
piston
and
piston
pin
as
sembly
Replace
the
water
pump
with
a
new
one
Readjust
Adjust
the
tension
of
the
chain
Disassemble
the
engine
and
renew
the
main
bearing
bushing
Renew
the
bushing
and
adjust
the
drive
shaft
Page 338 of 513

EMISSION
CONTROL
AND
TUNE
UP
Othm
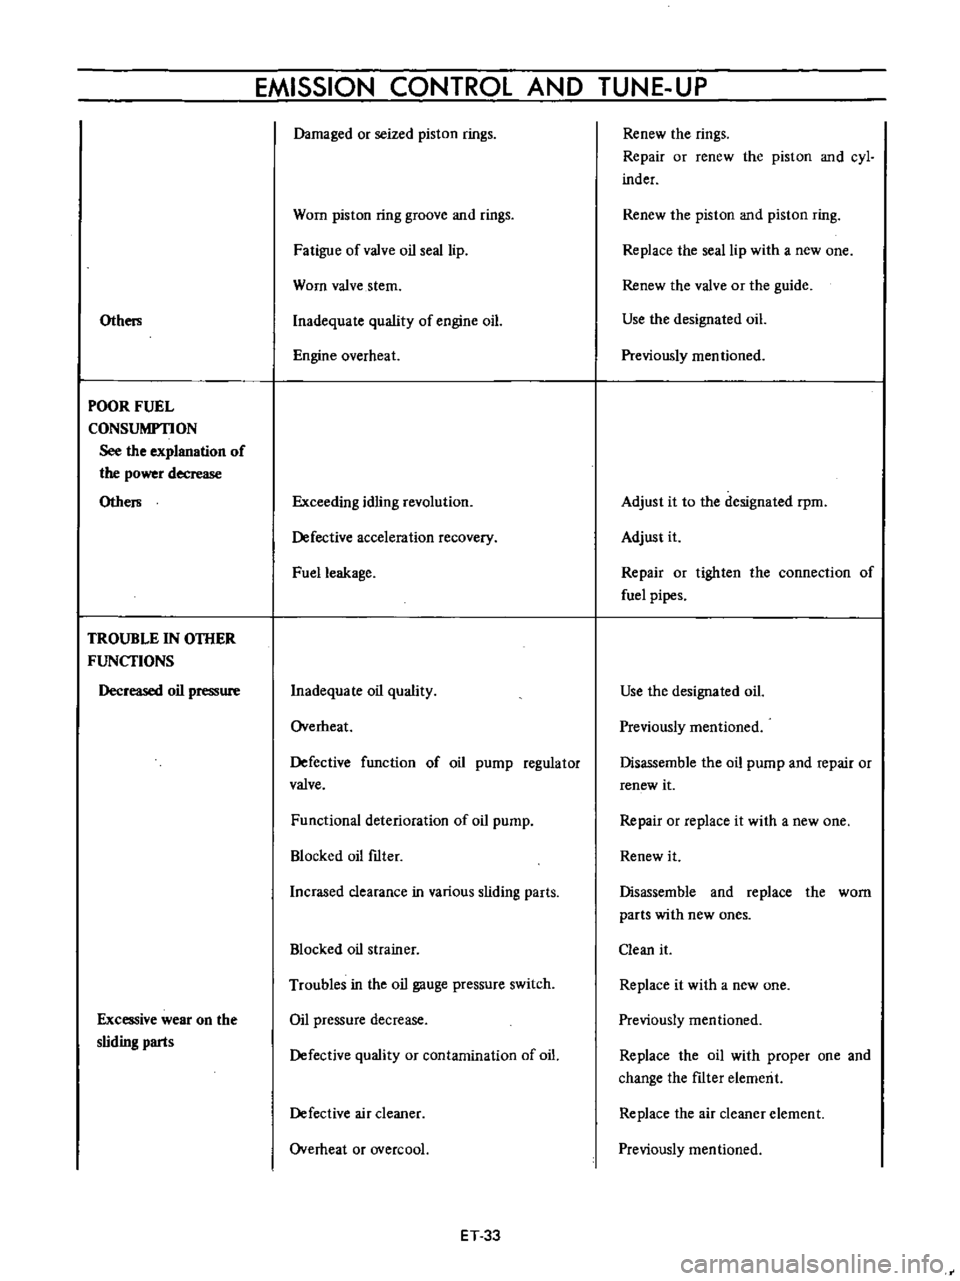
POOR
FUEL
CONSUMPTION
See
the
explanation
of
the
power
decrease
Othe
TROUBLE
IN
OTHER
FUNCfIONS
Decreased
oil
pressure
Excessive
wear
on
the
sliding
parts
Damaged
or
seized
piston
rings
Worn
piston
ring
groove
and
rings
Fatigue
ofvalve
oil
seal
lip
Worn
valve
stem
Inadequate
quality
of
engine
oiL
Engine
overheat
Exceeding
idling
revolution
Defective
acceleration
recovery
Fuel
leakage
Inadequa
Ie
oil
quality
Overheat
Defective
function
of
oil
pump
regulator
valve
Functional
deterioration
of
oil
pump
Blocked
oil
ftIter
nerased
clearance
in
various
sliding
parts
Blocked
oil
strainer
Troubles
in
the
oil
gauge
pressure
switch
Oil
pressure
decrease
Defective
quality
or
contamination
of
oil
Defective
air
cleaner
Overheat
or
overcoal
ET
33
Renew
the
rings
Repair
or
renew
the
piston
and
cyl
inder
Renew
the
piston
and
piston
ring
Replace
the
seal
lip
with
a
new
one
Renew
the
valve
or
the
guide
Use
the
designated
oiL
Previously
mentioned
Adjust
it
to
the
designated
rpm
Adjust
it
Repair
or
tighten
the
connection
of
fuel
pipes
Use
the
designated
oil
Previously
mentioned
Disassemble
the
oil
pump
and
repair
or
renew
it
Repair
or
replace
it
with
a
new
one
Renew
it
Disassemble
and
replace
the
worn
parts
with
new
ones
Clean
it
Replace
it
with
a
new
one
Previously
mentioned
Replace
the
oil
with
proper
one
and
change
the
ftIter
elemerit
Replace
the
air
cleaner
element
Previously
mentioned
Page 366 of 513

ENGINE
ST130300
1
EM156
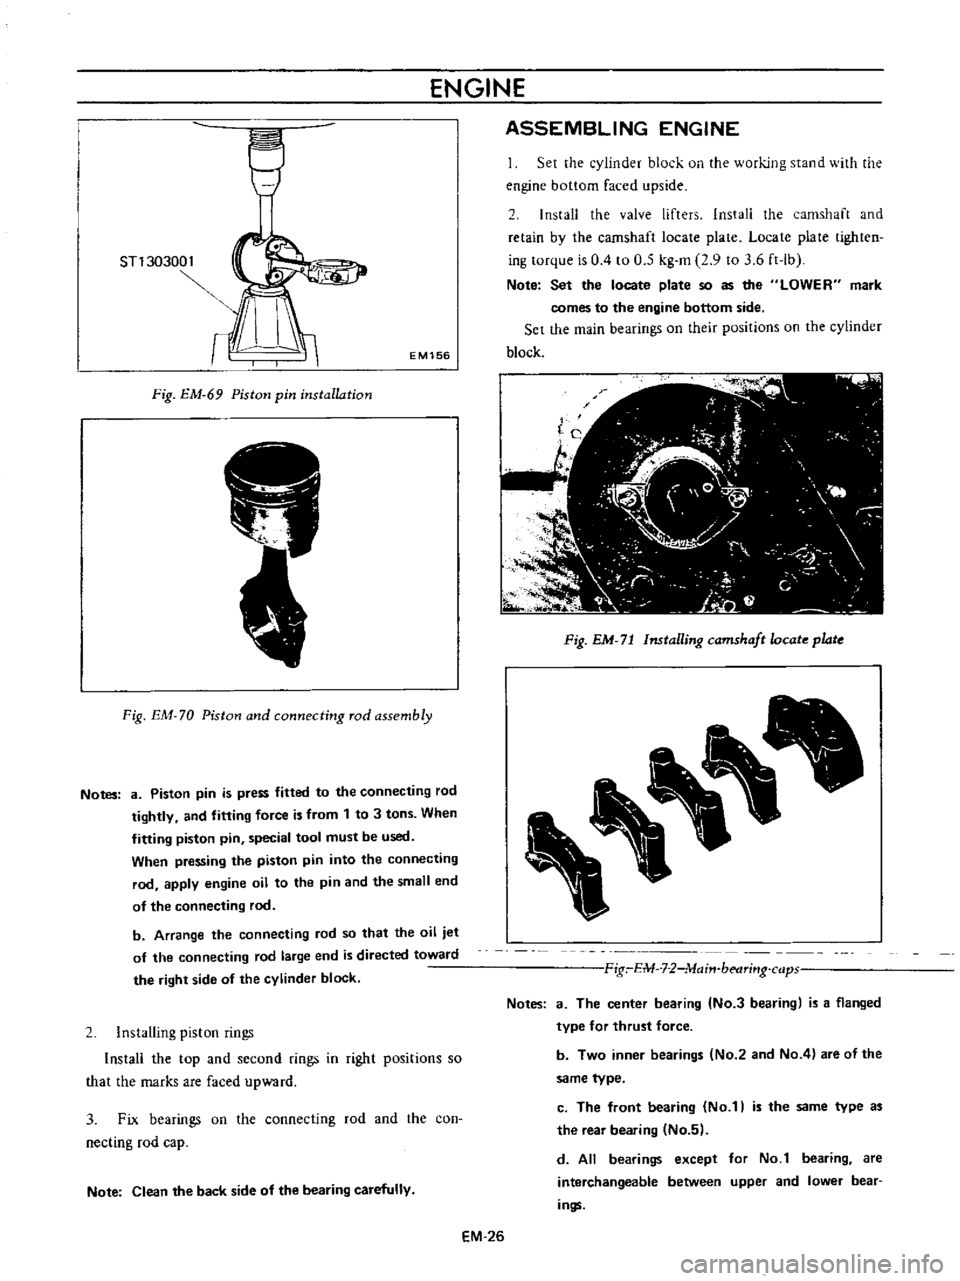
Fig
EM
69
Piston
pin
installation
Fig
EM
70
Piston
and
connecting
rod
assembly
Notes
8
Piston
pin
is
press
fitted
to
the
connecting
rod
tightly
and
fitting
force
is
from
1
to
3
tons
When
fitting
piston
pin
special
tool
must
be
used
When
pressing
the
piston
pin
into
the
connecting
rod
apply
engine
oil
to
the
pin
and
the
small
end
of
the
connecting
rod
b
Arrange
the
connecting
rod
so
that
the
oil
jet
of
the
connecting
rod
large
end
is
directed
toward
the
right
side
of
the
cylinder
block
2
Installing
piston
rings
Install
the
top
and
second
fings
in
right
positions
so
that
the
marks
are
faced
upward
3
Fix
bearings
on
the
connecting
rod
and
the
con
necting
rod
cap
Note
Clean
the
back
side
of
the
bearing
carefully
ASSEMBLING
ENGINE
Set
the
cylinder
block
on
the
working
stand
with
the
engine
bottom
faced
upside
2
Install
the
valve
lifters
Install
the
camshaft
and
retain
by
the
camshaft
locate
plate
Locate
plate
tighten
ing
torque
is
0
4
to
0
5
kg
m
2
9
to
3
6
ft
lb
Note
Set
the
locate
plate
so
as
the
LOWER
mark
comes
to
the
engine
bottom
side
Set
the
main
bearings
on
their
positions
on
the
cylinder
block
Fig
EM
71
Installing
camshaft
ocate
plate
Fig
E1U
7
2
lvlajn
betlrj
lg
cap
Notes
a
The
center
bearing
No
3
bearing
is
a
flanged
type
for
thrust
force
b
Two
inner
bearings
No
2
and
No
4
are
of
the
same
type
c
The
front
bearing
No
1
is
the
same
type
a
the
rear
bearing
No
5
d
All
bearings
except
for
No
1
bearing
are
interchangeable
between
upper
and
lower
bear
ings
EM
26
Page:
< prev 1-8 9-16 17-24