Page 153 of 556
1534-4. Adjusting the steering wheel and mirrors
Owners Manual_USA_M62084_en
4
Before driving
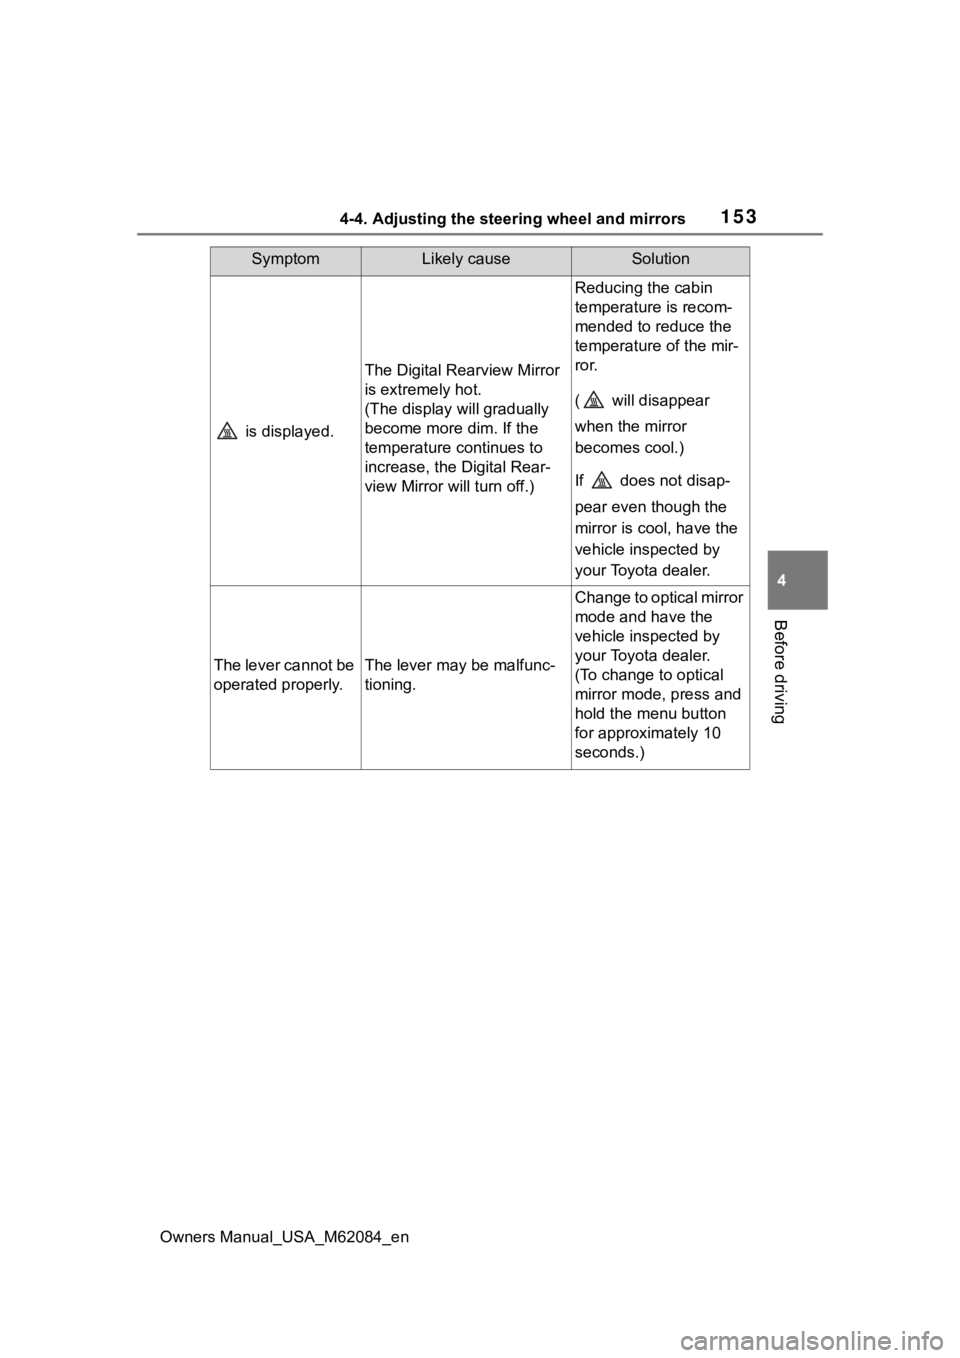
is displayed.
The Digital Rearview Mirror
is extremely hot.
(The display will gradually
become more dim. If the
temperature continues to
increase, the Digital Rear-
view Mirror will turn off.)
Reducing the cabin
temperature is recom-
mended to reduce the
temperature of the mir-
ror.
( will disappear
when the mirror
becomes cool.)
If does not disap-
pear even though the
mirror is cool, have the
vehicle inspected by
your Toyota dealer.
The lever cannot be
operated properly.The lever may be malfunc-
tioning.
Change to optical mirror
mode and have the
vehicle inspected by
your Toyota dealer.
(To change to optical
mirror mode, press and
hold the menu button
for approximately 10
seconds.)
SymptomLikely causeSolution
Page 154 of 556

1544-4. Adjusting the steering wheel and mirrors
Owners Manual_USA_M62084_en
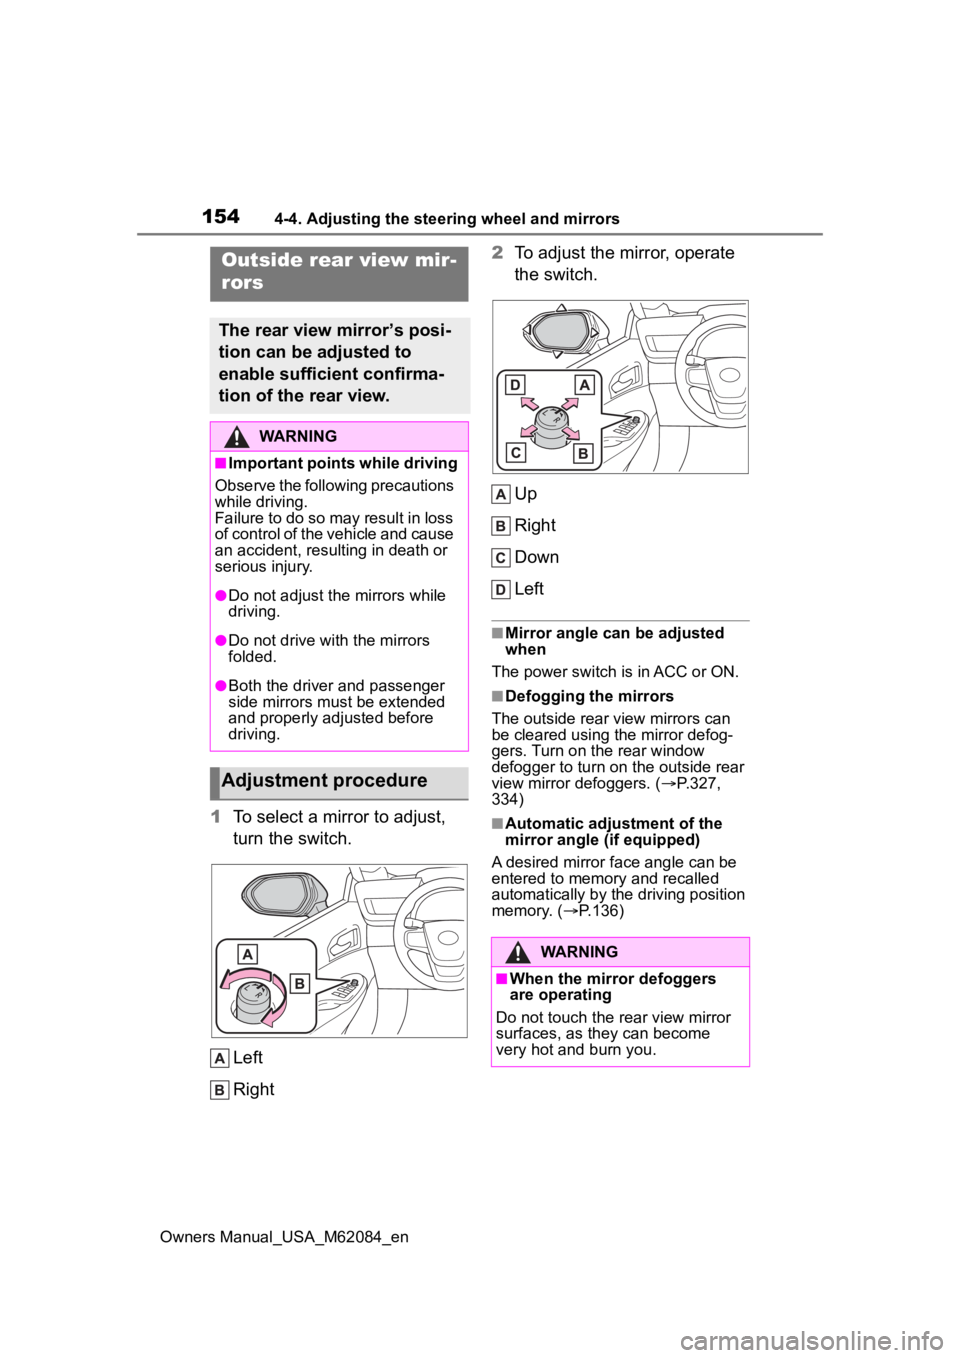
1To select a mirror to adjust,
turn the switch.
Left
Right 2
To adjust the mirror, operate
the switch.
Up
Right
Down
Left
■Mirror angle can be adjusted
when
The power switch is in ACC or ON.
■Defogging the mirrors
The outside rear view mirrors can
be cleared using the mirror defog-
gers. Turn on the rear window
defogger to turn on the outside rear
view mirror defoggers. ( P.327,
334)
■Automatic adjustment of the
mirror angle (if equipped)
A desired mirror face angle can be
entered to memory and recalled
automatically by the driving position
memory. ( P.136)
Outside rear view mir-
rors
The rear view mirror’s posi-
tion can be adjusted to
enable sufficient confirma-
tion of the rear view.
WARNING
■Important points while driving
Observe the following precautions
while driving.
Failure to do so may result in loss
of control of the vehicle and cause
an accident, resul ting in death or
serious injury.
●Do not adjust the mirrors while
driving.
●Do not drive with the mirrors
folded.
●Both the driver and passenger
side mirrors must be extended
and properly adjusted before
driving.
Adjustment procedure
WARNING
■When the mirror defoggers
are operating
Do not touch the rear view mirror
surfaces, as they can become
very hot and burn you.
Page 155 of 556

1554-4. Adjusting the steering wheel and mirrors
Owners Manual_USA_M62084_en
4
Before driving
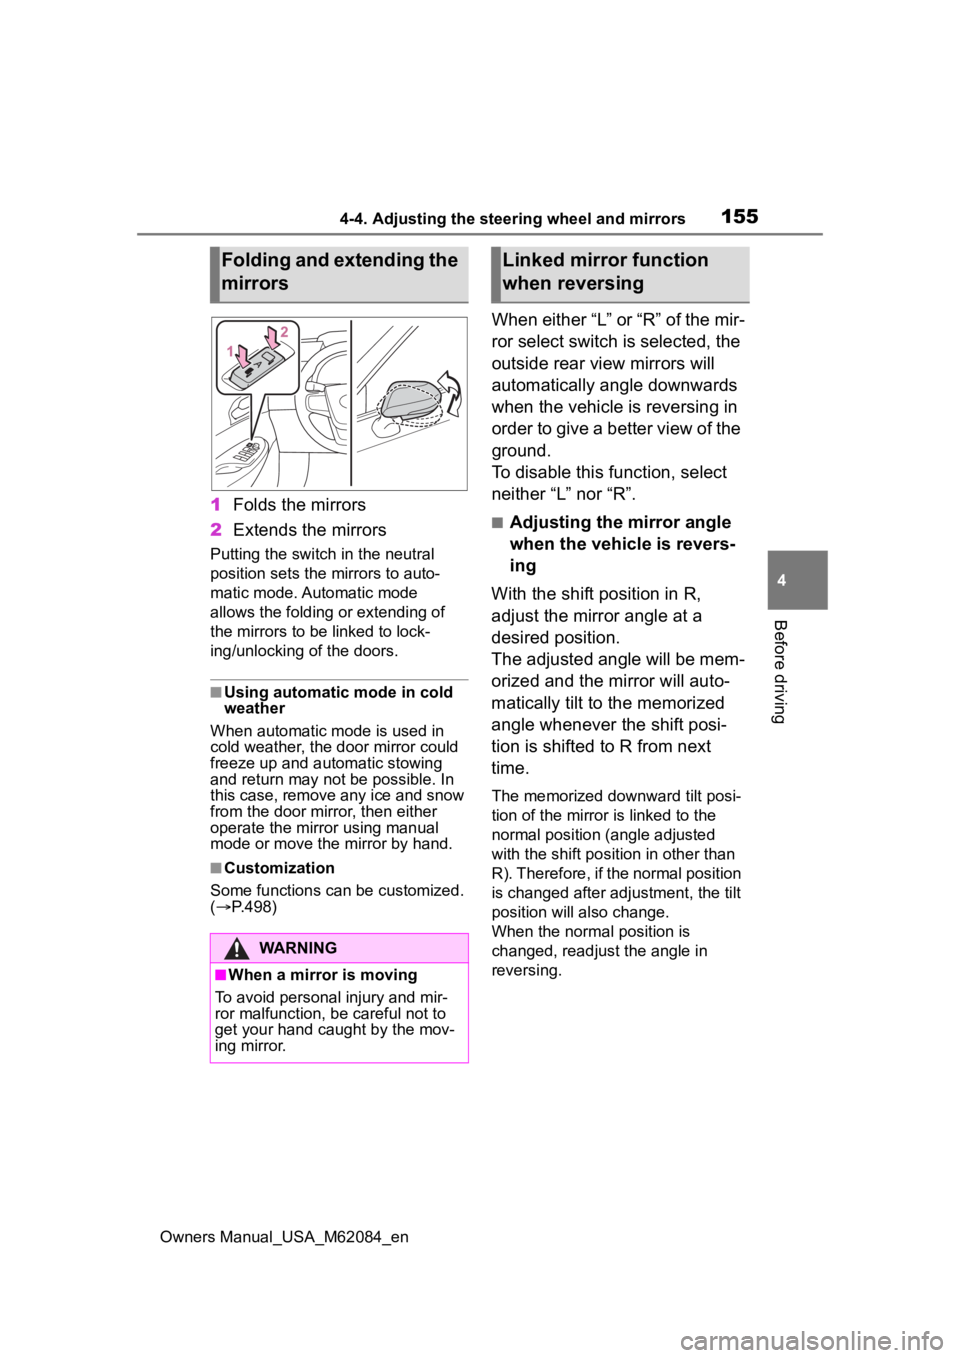
1 Folds the mirrors
2 Extends the mirrors
Putting the switch in the neutral
position sets the mirrors to auto-
matic mode. Automatic mode
allows the folding or extending of
the mirrors to be linked to lock-
ing/unlocking of the doors.
■Using automatic mode in cold
weather
When automatic mode is used in
cold weather, the door mirror could
freeze up and aut omatic stowing
and return may not be possible. In
this case, remove any ice and snow
from the door mirror, then either
operate the mirror using manual
mode or move the mirror by hand.
■Customization
Some functions can be customized.
( P.498)
When either “L” or “R” of the mir-
ror select switch is selected, the
outside rear view mirrors will
automatically angle downwards
when the vehicle is reversing in
order to give a better view of the
ground.
To disable this function, select
neither “L” nor “R”.
■Adjusting the mirror angle
when the vehicle is revers-
ing
With the shift position in R,
adjust the mirror angle at a
desired position.
The adjusted angle will be mem-
orized and the mirror will auto-
matically tilt to the memorized
angle whenever the shift posi-
tion is shifted to R from next
time.
The memorized downward tilt posi-
tion of the mirror is linked to the
normal position (angle adjusted
with the shift posit ion in other than
R). Therefore, if the normal position
is changed after adjustment, the tilt
position will also change.
When the normal position is
changed, readjust the angle in
reversing.
Folding and extending the
mirrors
WARNING
■When a mirror is moving
To avoid personal injury and mir-
ror malfunction, be careful not to
get your hand caught by the mov-
ing mirror.
Linked mirror function
when reversing
Page 156 of 556

1564-5. Opening, closing the windows
Owners Manual_USA_M62084_en
4-5.Opening, closing the windows
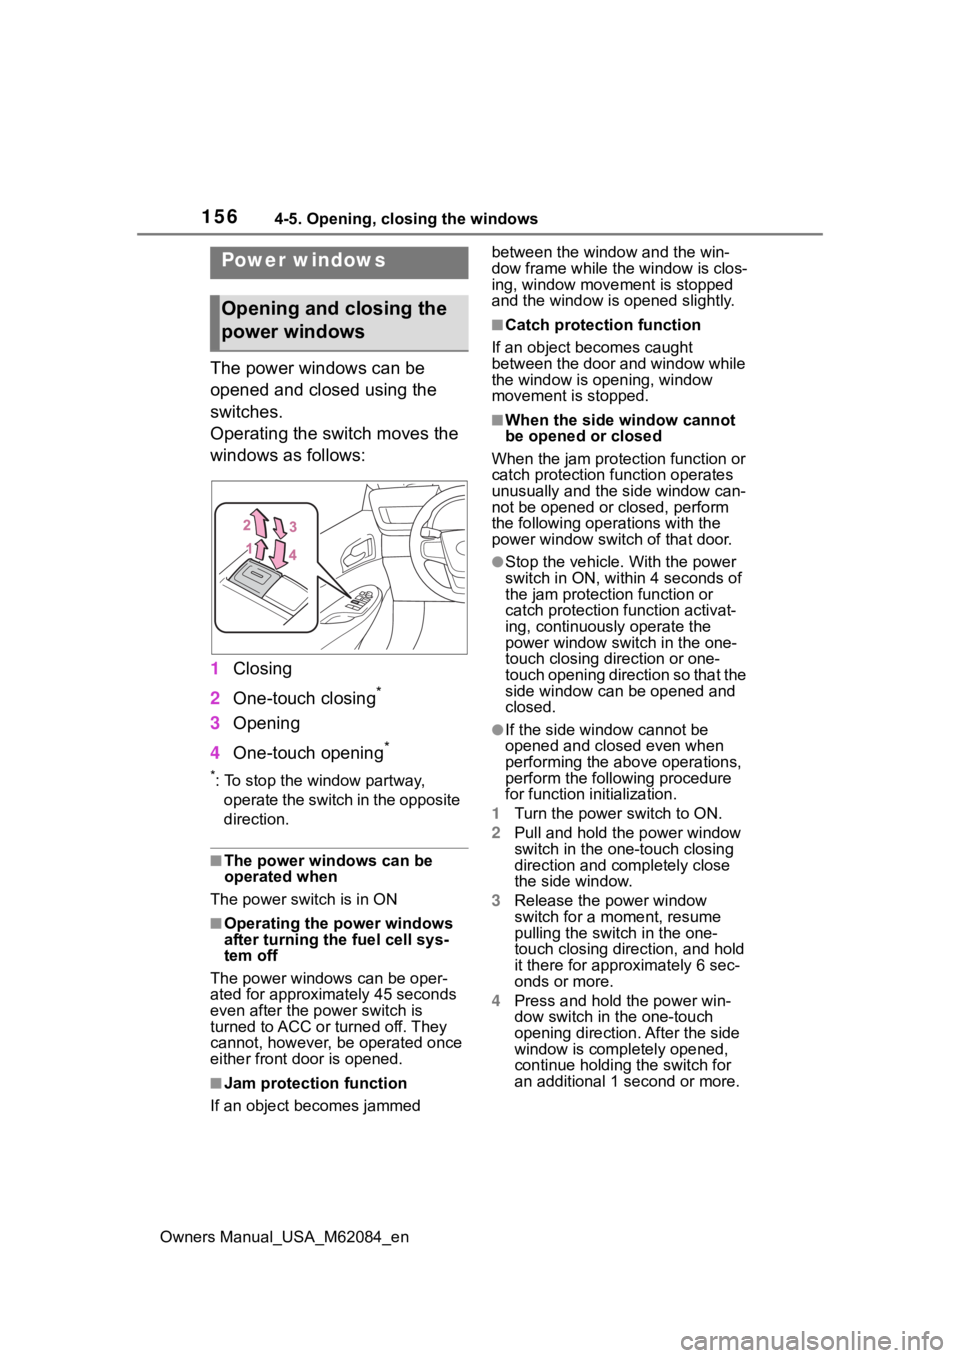
The power windows can be
opened and closed using the
switches.
Operating the switch moves the
windows as follows:
1Closing
2 One-touch closing
*
3Opening
4 One-touch opening
*
*: To stop the window partway,
operate the switch in the opposite
direction.
■The power windows can be
operated when
The power swit ch is in ON
■Operating the power windows
after turning the fuel cell sys-
tem off
The power windows can be oper-
ated for approximately 45 seconds
even after the power switch is
turned to ACC or turned off. They
cannot, however, be operated once
either front door is opened.
■Jam protection function
If an object becomes jammed between the window and the win-
dow frame while the
window is clos-
ing, window move ment is stopped
and the window is opened slightly.
■Catch protection function
If an object becomes caught
between the door and window while
the window is opening, window
movement is stopped.
■When the side window cannot
be opened or closed
When the jam protection function or
catch protection function operates
unusually and the side window can-
not be opened or closed, perform
the following operations with the
power window swit ch of that door.
●Stop the vehicle. With the power
switch in ON, within 4 seconds of
the jam protection function or
catch protection f unction activat-
ing, continuously operate the
power window switch in the one-
touch closing direction or one-
touch opening direction so that the
side window can be opened and
closed.
●If the side window cannot be
opened and closed even when
performing the above operations,
perform the follo wing procedure
for function initialization.
1 Turn the power switch to ON.
2 Pull and hold the power window
switch in the on e-touch closing
direction and completely close
the side window.
3 Release the power window
switch for a m oment, resume
pulling the switch in the one-
touch closing direction, and hold
it there for approximately 6 sec-
onds or more.
4 Press and hold the power win-
dow switch in the one-touch
opening direction. After the side
window is completely opened,
continue holding the switch for
an additional 1 second or more.
Power windows
Opening and closing the
power windows
Page 157 of 556

1574-5. Opening, closing the windows
Owners Manual_USA_M62084_en
4
Before driving
5 Release the power window
switch for a m oment, resume
pushing the switch in the one-
touch opening direction, and
hold it there for a pproximately 4
seconds or more.
6 Pull and hold the power window
switch in the one-touch closing
direction again. After the side
window is completely closed,
continue holding the switch for a
further 1 second or more.
If you release the switch while the
window is moving, start again from
the beginning.
If the window reverses and cannot
be fully closed or opened, have the
vehicle inspected by your Toyota
dealer.
■Door lock linked window opera-
tion
●The power windows can be
opened and closed using the
mechanical key.
* ( P.469)
●The power windows can be
opened using the wireless remote
control.
* ( P.121)
*: These settings must be custom-
ized at your Toyota dealer.
■Power windows open warning
buzzer
A buzzer sounds and a message is
shown on the multi -information dis-
play in the instrument cluster when
the power switch is turned off and
the driver’s door is opened with the
power windows open.
■Customization
Some functions can be customized.
( P.498)
WARNING
Observe the following precau-
tions.
Failure to do so m ay result in
death or serious injury.
■Closing the windows
●The driver is responsible for all
the power window operations,
including the operation for the
passengers. In order to prevent
accidental operation, especially
by a child, do not let a child
operate the power windows. It is
possible for children and other
passengers to have body parts
caught in the power window.
Also, when ridin g with a child, it
is recommended to use the win-
dow lock switch. ( P.158)
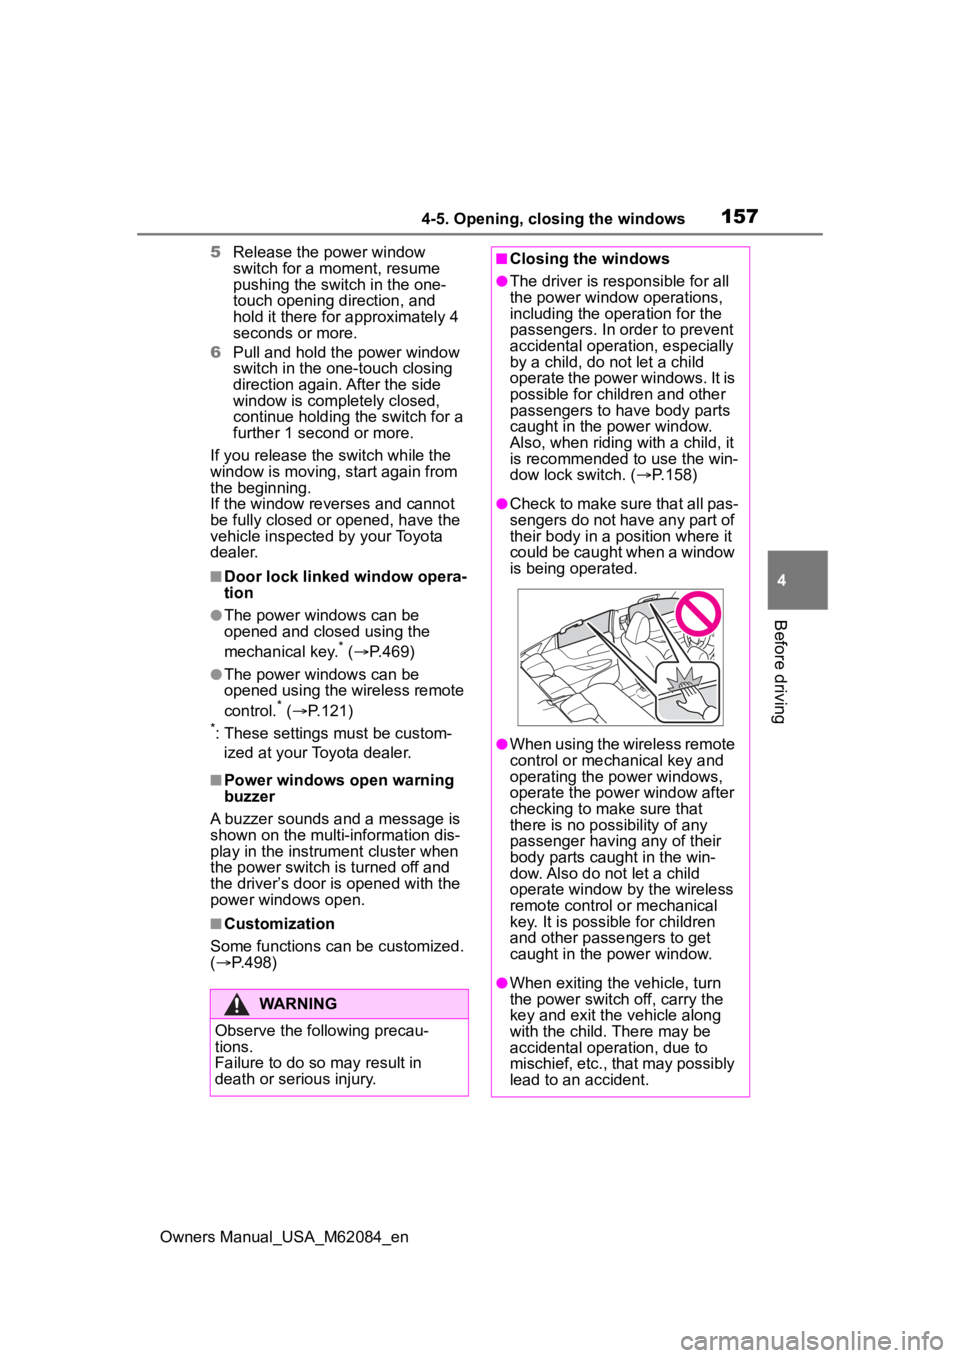
●Check to make sure that all pas-
sengers do not have any part of
their body in a position where it
could be caught when a window
is being operated.
●When using the wireless remote
control or mechanical key and
operating the power windows,
operate the power window after
checking to make sure that
there is no possibility of any
passenger having any of their
body parts caug ht in the win-
dow. Also do not let a child
operate window by the wireless
remote control or mechanical
key. It is possib le for children
and other passengers to get
caught in the power window.
●When exiting the vehicle, turn
the power switch off, carry the
key and exit the vehicle along
with the child. There may be
accidental operation, due to
mischief, etc., that may possibly
lead to an accident.
Page 158 of 556

1584-5. Opening, closing the windows
Owners Manual_USA_M62084_en
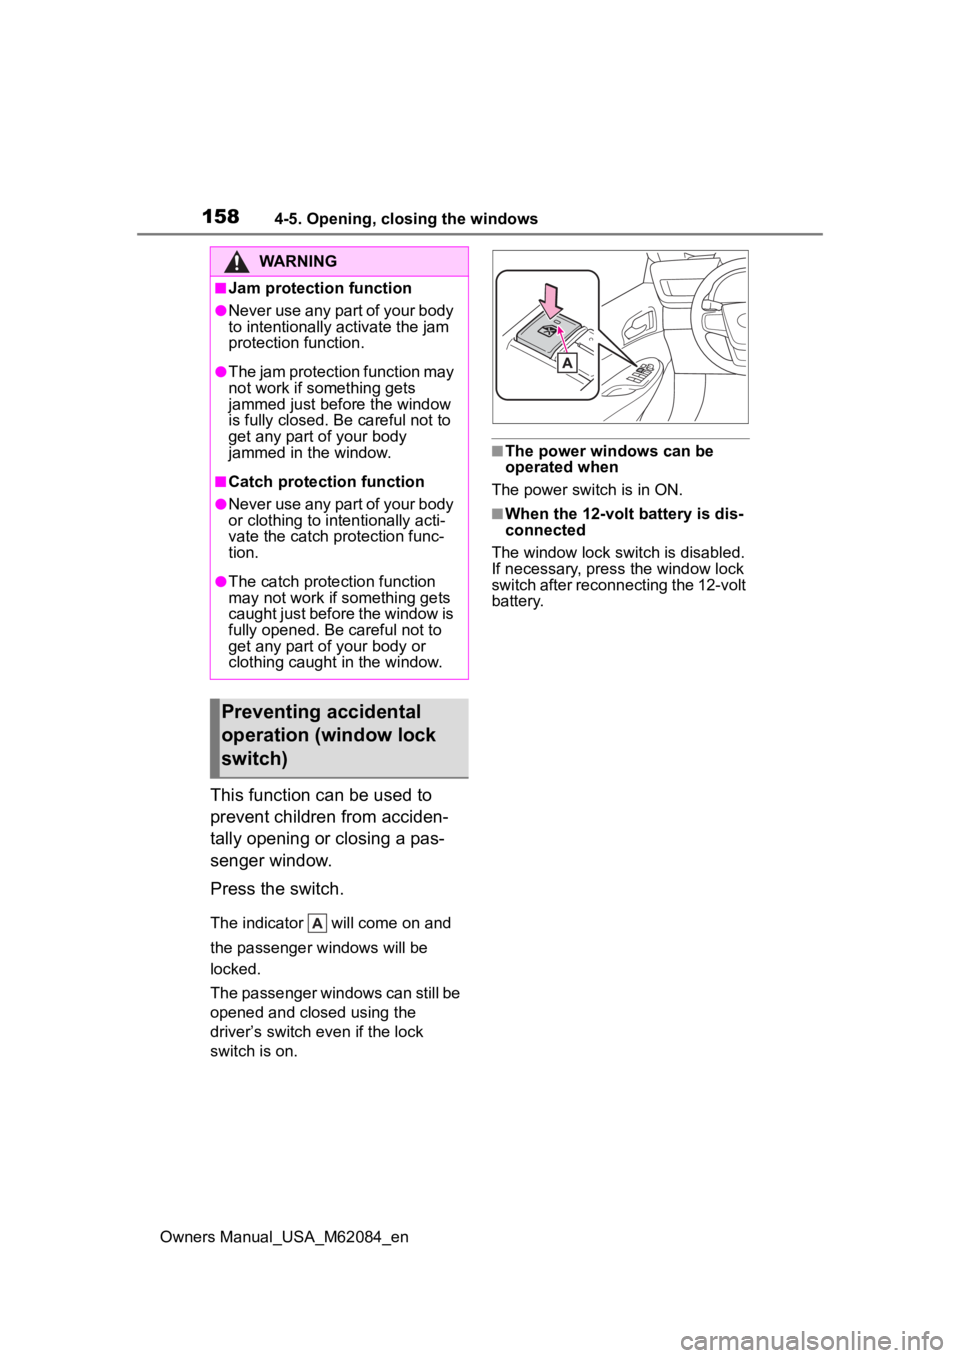
This function can be used to
prevent children from acciden-
tally opening or closing a pas-
senger window.
Press the switch.
The indicator will come on and
the passenger windows will be
locked.
The passenger windows can still be
opened and closed using the
driver’s switch even if the lock
switch is on.
■The power windows can be
operated when
The power switch is in ON.
■When the 12-volt battery is dis-
connected
The window lock switch is disabled.
If necessary, press the window lock
switch after reconnecting the 12-volt
battery.
WARNING
■Jam protection function
●Never use any part of your body
to intentionally a ctivate the jam
protection function.
●The jam protection function may
not work if something gets
jammed just before the window
is fully closed. Be careful not to
get any part of your body
jammed in the window.
■Catch protection function
●Never use any part of your body
or clothing to intentionally acti-
vate the catch p rotection func-
tion.
●The catch protection function
may not work if something gets
caught just before the window is
fully opened. Be careful not to
get any part of your body or
clothing caught in the window.
Preventing accidental
operation (window lock
switch)
Page 159 of 556

159
Owners Manual_USA_M62084_en
5
5
Driving
Driving
5-1. Before drivingDriving the vehicle....... 161
Cargo and luggage ..... 167
Vehicle load limits ....... 170
Trailer towing............... 171
Dinghy towing ............. 171
5-2. Driving procedures Power switch ............... 172
Shift position ............... 177
Turn signal lever.......... 182
Parking brake .............. 183
Brake Hold .................. 186
ASC (Active Sound Control) .................................. 188
Water release (H
2O switch)
.................................. 189
5-3. Operating the lights and wipers
Headlight switch .......... 191
AHB (Automatic High Beam)........................ 193
Windshield wipers and washer....................... 197
5-4. Refueling Opening the fuel door . 2035-5. Using the dr
iving support
systems
Toyota Safety Sense 2.5 + .................................. 207
PCS (Pre-Collision System) .................................. 212
LTA (Lane Tracing Assist) .................................. 223
RSA (Road Sign Assist) .................................. 234
Dynamic radar cruise con- trol with full-speed range
.................................. 237
BSM (Blind Spot Monitor) .................................. 249
Intuitive parking assist . 254
RCTA (Rear Cross Traffic Alert) .......................... 263
RCD (Rear Camera Detec- tion) ........................... 269
PKSB (Parking Support Brake) ........................ 273
Parking Support Brake func- tion (static objects) .... 278
Parking Support Brake func- tion (rear-crossing vehi-
cles) ........................... 280
Parking Support Brake func- tion (rear pedestrians) 282
Toyota Teammate Advanced Park ........................... 284
Driving mode select switch .................................. 313
Page 160 of 556
160
Owners Manual_USA_M62084_en
Snow mode .................314
Driving assist systems 315
5-6. Driving tips Winter driving tips ....... 320