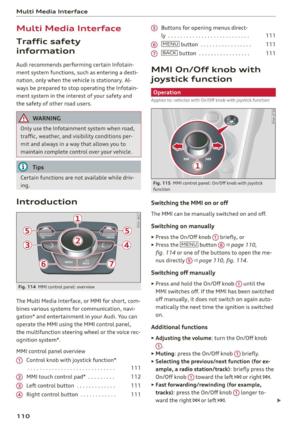
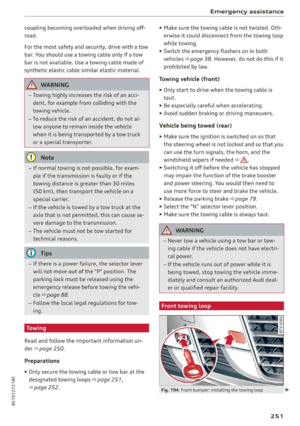
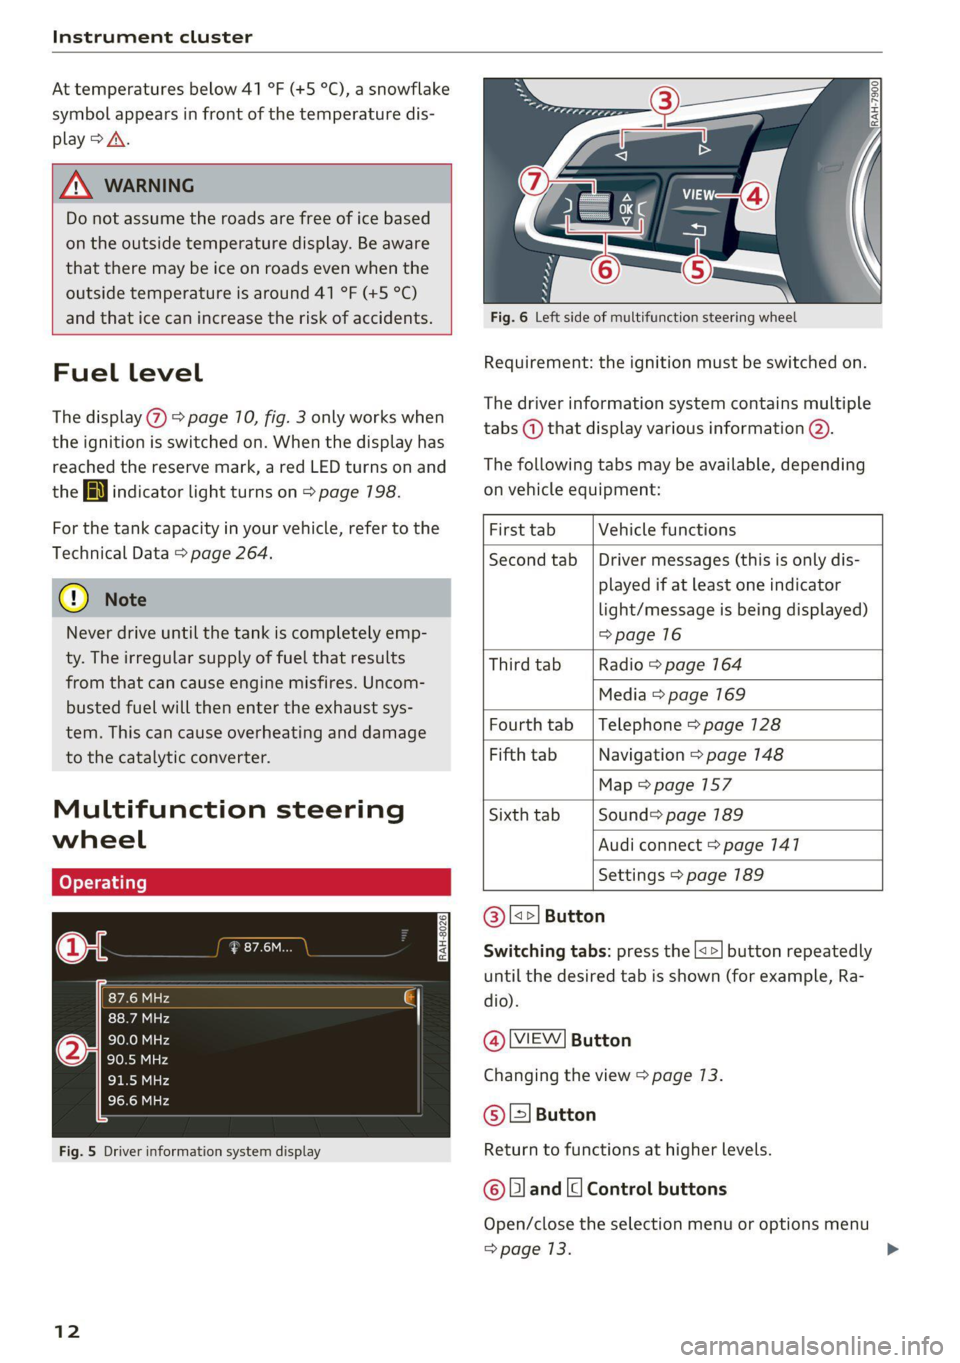
Page 9 of 280

8S1012721BE
Quick access
©
©8080
QOOD®D
OOOOOOO®D
OO
O
Side assist display ..............
Door handle
Central locking switch ...........
Air vent with seat heating controls
Lever for:
—Turn signals and high beams ....
Multifunction steering wheel with:
— Horn be
— Driver's@irbag . ccis ss ewan sens
— Buttons for the virtual instrument
cluster, including the driver infor-
mation system, audio/video, tele-
phone, navigation and voice rec-
ognition system
—[START ENGINE STOP] button ...
— Audi drive select ..............
— Shift paddles ................
Audi virtual cockpit (instrument
cluster) ........ 2... ee eee eee ee
Windshield washer system lever ..
Starting the engine if there is a
malfunction ..............-0005
Adjustable steering column ......
Cruise controllever .............
Instrument illumination .........
Hood release ............--.00-
Headlight control switch ........
Power exterior mirror adjustment .
Power windows ................
Air vent including climate control
system controls ..............-.
Lockable glove compartment
Drives for CD, DVD, SIM/SD cards .
Front passenger's airbag ........
Rear window defogger button
Depending on equipment, buttons
for:
—drive select ..................
— Electronic Stabilization Control
(ESO) « ss mews ¢ x news 8 x eis eo es
—Emergency flashers ...........
— Retractable rear spoiler ........
Depending on equipment, center
console with:
— Audi music interface ..........
93
23
37
52 7S
96
85
10
41
77
48
89
39
200
36 39 27 69
170
52
96
104
38
108 176
— Audi phone box ............... 130
@ Infotainment system on/off button . 110
@5) Infotainment system unit ........ 110
@8 Wind deflector button .......... 33
@ Depending on equipment:
— Storage compartment
—Cup holder ...............0.. 63
@8 Power top button .............. 31
@9 Parking brake ................. 79
G0) Depending on equipment:
—[START ENGINE STOP] button ... 75
— Engine sound button
@) Selector lever (S tronic).......... 81
@) Tips
Some the equipment listed here is only instal-
led in certain models or is available as an op-
tion.
Indicator lights overview
The indicator lights in the instrument cluster
blink or turn on. They indicate functions or mal-
functions. Some warning and indicator lights
turn on when you switch the ignition on and must
turn off when the drive system is switched on or
while driving.
With some indicator lights, messages may ap-
pear and warning signals may sound. The indica-
tor lights and messages may be covered by other
displays. To show them again, select the second
tab for messages with the multifunction steering
wheel > page 72.
Some indicator lights in the display can display in
several colors.
OMe ile Lins
If the A or A indicator light turns on, check the
message in the instrument cluster.
COAT
The following indicator lights may be available,
depending on the vehicle equipment:
Page 10 of 280

Quick access
Red indicator lights
Central indicator light
> page 7,
Instrument cluster
=>page 10
Cooling system
=> page 10,
=> page 207,
=> page 207
Electromechanical parking brake
=> page 16,
=> page 79
Electromechanical parking brake
=> page 16,
=> page 79
Steering lock
=> page 16
Engine start system
> page 16
Engine stop
=>page 17
Safety belt
=>page 57
Transmission
=> page 83,
=> page 87
Brake system
=> page 107,
=> page 209
Brake system
=> page 107,
=> page 209
Steering
=> page 107
Rear spoiler
=> page 108
Hood
=> page 202
Engine oil pressure
=> page 204
Electrical system
=> page 209
Yellow indicator lights
Central indicator light
=> page 7
Engine speed limitation
=>page 11
Engine speed limitation
=>page 11,
Drive system
=>page 17
Tank system
> page 12,
=>page 198
Electromechanical parking brake
=>page 16
Steering lock
=> page 16
Engine start system
=> page 16
Electronic Stabilization Control
(ESC)
=> page 17,
=> page 104,
=> page 107
Electronic Stabilization Control
(ESC)
=> page 17,
=> page 105
Anti-lock braking system (ABS)
=> page 717,
=> page 107
Anti-lock braking system (ABS)
=> page 17,
=> page 107
Suspension control
=> page 17
Battery in remote control key
=> page 20
Bulb failure indicator
=> page 38
Adaptive light
> page 38
Light/rain sensor
> page 38,
=> page 43
Page 11 of 280

8S1012721BE
Quick access
Headlight range control system
> page 38
Windshield wipers
=> page 43
Safety systems
=> page 53
Convenience key
=> page 76
Transmission
> page 83,
=> page 87
Electronic Stabilization Control
(ESC)
=> page 105
Steering
=> page 107
Rear spoiler
=> page 108
Tank system
=> page 198
Malfunction Indicator Lamp (MIL)
=> page 200,
Engine oil level (MIN)
=> page 204
Engine oil sensor
=> page 204
Engine warm-up request
=> page 204
Electrical system
=> page 209
Washer fluid level
=> page 212
Tire pressure
=> page 232,
> page 232,
=> page 234,
=> page 235,
=> page 235
Tire pressure
> page 232,
> page 235
Other indicator lights
Turn signals
=> page 37,
=> page 38
Turn signals
=> page 37,
=> page 38
Start/Stop system
> page 77
Cruise control system
=> page 90
Cruise control system
=> page 90
High beam headlights
=> page 37
Electromechanical parking brake
=> page 16
VL
Electromechanical parking brake
=>page 16
Convenience key
=> page 76
Start/Stop system
=> page 77
Start/Stop system
=> page 78
Transmission
=> page 87
Speed warning system
=> page 89
Speed warning system
=> page 89
Cruise control system
eau > page 90,
=> page 90
Cruise control system
=> page 90,
= page 90
Side assist
=>page 95
Page 12 of 280

Instrument cluster
Instrument cluster
Instrument cluster overview
The instrument cluster is the central information center for the driver.
3:50™
12/5/2018
elo
a
Fig. 3 Instrument cluster overview (Audi virtual cockpit)
Engine coolant temperature ~E ... 10
Left dial
—Tachometer ..........-...00- 11
Tab area
Central area
Status line (one or two lines)
Right dial
— Convenience display
Fdel level A « « esas x + exes ¢ s exes 12
Right additional display with speed-
ometer
Left additional display with:
SIGCSE iss sucsins & sewers wn ora we 81
— Audi drive select mode ......... 96
©8
CHO
OO
©
ZA\ WARNING
If there is a severe malfunction in the instru-
ment cluster, the display may turn off. The A
indicator light may also turn on. Stop the ve-
hicle safely. See an authorized Audi dealer or
authorized Audi Service Facility for assistance.
G) Tips
— You can select the units used for tempera-
ture, speed and other measurements in the
Infotainment system.
10
— Speeds are displayed in mph (miles per
hour) or km/h (kilometers per hour).
— If there is a malfunction in the instrument
cluster, DEF will appear in the trip odometer
display. Have the malfunction corrected as
soon as possible.
Coolant temperature
indicator
The coolant temperature indicator @) > page 10,
fig. 3 only operates when the ignition is switched
on. To reduce the risk of engine damage, please
observe the following notes about the tempera-
ture ranges.
Cold range
If only the LEDs at the bottom of the gauge turn
on, the engine has not reached operating tem-
perature yet. Avoid high engine speeds, full ac-
celerating and heavy engine loads.
Normal range
The engine has reached its operating tempera-
ture once the LEDs up to the center of the gauge
turn on. If the |_| indicator light in the instru-
ment cluster display turns on, the coolant tem-
perature is too high > page 207.
Page 13 of 280

8S1012721BE
Instrument cluster
@) Note
— Auxiliary headlights and other accessories in
front of the air intake impair the cooling ef-
fect of the coolant. This increases the risk of
the engine overheating during high outside
temperatures and heavy engine load.
— The front spoiler also helps to distribute
cooling air correctly while driving. If the
spoiler is damaged, the cooling effect will
be impaired and the risk of the engine over-
heating will increase. See an authorized
Audi dealer or authorized Audi Service Fa-
cility for assistance.
Tachometer
The tachometer (2) > page 10, fig. 3 displays the
engine speed in revolutions per minute (RPM).
The beginning of the red zone in the tachometer
indicates the maximum permissible engine speed
for all gears once the engine has been broken in.
Before reaching the red zone, you should shift in-
to the next higher gear, choose the "D" or "S" se-
lector lever position, or remove your foot from
the accelerator pedal.
Engine speed limitation
Applies to: vehicles with center armrest
If the BB indicator light turns on, the engine will
be automatically limited to the RPM displayed in
the instrument cluster. This will protect the en-
gine components, for example during a cold start
or from overheating.
The engine speed limitation deactivates once the
engine is no longer in the critical temperature
range and you have released the accelerator ped-
al once.
If the engine speed limitation was activated by an
engine control malfunction, the B§ indicator
light also turns on. Make sure the engine speed
does not go above the speed displayed, for exam-
ple when downshifting. Drive to an authorized
Audi dealer or authorized Audi Service Facility im-
mediately to have the malfunction corrected.
CG) Note
The needle in the tachometer may only be in
the red area of the gauge for a short period of
time before there is a risk of damaging the
engine. The location where the red zone be-
gins varies depending on the engine.
Odometer
11:30"
Fig. 4 Instrument cluster: odometer and reset button
The trip odometer and odometer are displayed in
the status line ©) > page 10, fig. 3.
The trip odometer shows the distance driven
since it was last reset. It can be used to measure
short distances. The odometer shows the total
distance that the vehicle has been driven.
Resetting the trip odometer
> Press the reset button [0-0] on the instrument
cluster. The trip odometer will be reset to zero.
(i) Tips
Distances are displayed in mi (miles) or km
(kilometers).
Outside temperature
display
The outside temperature is displayed in the sta-
tus line ©) > page 10, fig. 3.
If your vehicle is stationary or if you are driving at
very low speeds, the temperature displayed in
the instrument cluster may be slightly higher
than the actual temperature outside due to heat
radiating from the motor.
11
Page 14 of 280

Instrument cluster
At temperatures below 41 °F (+5 °C), a snowflake
symbol appears in front of the temperature dis-
play > A.
ZA WARNING
Do not assume the roads are free of ice based
on the outside temperature display. Be aware
that there may be ice on roads even when the
outside temperature is around 41 °F (+5 °C)
and that ice can increase the risk of accidents.
Fuel level
The display @ > page 10, fig. 3 only works when
the ignition is switched on. When the display has
reached the reserve mark, a red LED turns on and
the iy indicator light turns on > page 198.
For the tank capacity in your vehicle, refer to the
Technical Data > page 264.
@) Note
Never drive until the tank is completely emp-
ty. The irregular supply of fuel that results
from that can cause engine misfires. Uncom-
busted fuel will then enter the exhaust sys-
tem. This can cause overheating and damage
to the catalytic converter.
Multifunction steering
wheel
87.6 MHz
cS BAL
90.0 MHz
90.5 MHz
91.5 MHz
TRON Lard
Fig. 5 Driver information system display
12
Fig. 6 Left side of multifunction steering wheel
Requirement: the ignition must be switched on.
The driver information system contains multiple
tabs (—) that display various information @).
The following tabs may be available, depending
on vehicle equipment:
First tab Vehicle functions
Second tab | Driver messages (this is only dis-
played if at least one indicator
light/message is being displayed)
=>page 16
Third tab Radio > page 164
Media > page 169
Fourth tab | Telephone > page 128
Fifth tab Navigation > page 148
Map > page 157
Sixth tab Sound> page 189
Audi connect > page 141
Settings > page 189
@|s=] Button
Switching tabs: press the [<>] button repeatedly
until the desired tab is shown (for example, Ra-
dio).
@ MEW] Button
Changing the view > page 13.
© [=] Button
Return to functions at higher levels.
© and [| Control buttons
Open/close the selection menu or options menu
=> page 13.
Page 15 of 280

8S1012721BE
Instrument cluster
@ Left thumbwheel ing the left thumbwheel (for example, sound
— Selecting a function in a menu/lList: turn the settings).
left thumbwheel to the desired function ina
menu or list (such as selecting a station, Lap Baas
times*).
— Confirming a selection: press the left thumb-
wheel (for example, confirm the station).
— Zooming in or out on the map: when a map is
displayed, turn the left thumbwheel up/down
to zoom in/out on the map. E 3:50"
2/17/2019
RAH-8025|
SO
PATTIE
es
Pes
era
tte
2/17/2019
Fig. 7 Opening the selection and options menu
Fig. 9 Enhanced view
Left trol butt
ens contro’ purron Switching the view
— Opening and closing the selection menu: press
the respective left control button on the steer-
ing wheel > fig. 7. You can now select and con-
firm a function in the selection menu using the
left thumbwheel (for example, selecting a fre-
quency band).
> Press the [VIEW] button @) > page 12, fig. 6 to
switch from the default view > fig. 8 to the en-
hanced view © fig. 9.
> To return to the default view, press the [VIEW
button again.
Setting the default view
Right control button . " .
Applies to: vehicles with sport view
— Opening and closing the options menu: press
the respective right control button on the
steering wheel > fig. 7. You can now adjust any
context-dependent functions and settings us-
Depending on the vehicle equipment, you can
choose between the classic and the sport view. >
13
Page 16 of 280
![AUDI TT 2021 Owner´s Manual Instrument cluster
> Open the first vehicle functions tab using the
[<>] button on the multifunction steering
wheel.
> Select on the multifunction steering wheel: left
control button > Layout AUDI TT 2021 Owner´s Manual Instrument cluster
> Open the first vehicle functions tab using the
[<>] button on the multifunction steering
wheel.
> Select on the multifunction steering wheel: left
control button > Layout](/manual-img/6/40287/w960_40287-15.png)
Instrument cluster
> Open the first vehicle functions tab using the
[<>] button on the multifunction steering
wheel.
> Select on the multifunction steering wheel: left
control button > Layout > Sport layout or Clas-
sic layout.
Adjusting the additional display
Depending on the vehicle equipment, the addi-
tional displays that can be selected may vary.
> Open the first vehicle functions tab using the
[<>] button on the multifunction steering
wheel.
> Select on the multifunction steering wheel:
right control button > Additional display.
>» Select the desired additional display.
@) Tips
Applies to: vehicles with sport view
Always set the desired default view before
driving, because the display functions will not
be available for several seconds.
Preset buttons
Fig. 10 Multifunction steering wheel, right side
@ |e] Button
— Accepting a call: press the |¢] button when
there is an incoming call.
— Ending a call: press the [¢] button during a
phone call to end the call.
— Opening the call list: if no phone call is in prog-
ress and there are no incoming calls, press the
[4] button.
14
@ [2] Button
— Switching the voice recognition system on:
briefly press the [2] button. Say the desired
command after the Beep.
— Switching the voice recognition system off:
press and hold the |®| button. Or: say the com-
mand Cancel.
For more information about the voice recognition
system, see > page 122, Voice recognition sys-
tem.
@ Right thumbwheel
You can adjust the volume of an audio source or a
system message (for example, from the voice
recognition system) when the sound is playing.
— Increasing or decreasing the volume: turn the
right thumbwheel up or down.
— Muting or pausing: turn the right thumbwheel
down. Or: press the right thumbwheel.
—Unmuting or resuming: turn the right thumb-
wheel up. Or: press the right thumbwheel.
@ [ks] button [b>
— Selecting the previous/next track or station:
press the button.
— Fast forwarding/rewinding audio files: press
and hold the button until the desired
location in the file is reached.
kid] or [DDI
k<] or [D>
© [|] Button
— Programmable steering wheel button - open-
ing a function: press the |*] button.
— Programmable steering wheel button - re-
questing a function: press and hold the [*] but-
ton.
— Programmable steering wheel button - chang-
ing a function: select the first tab > Vehicle
settings > Steering wheel button assignment.
© [s«] Button
— Repeating the last navigation prompt: press
the [| button when route guidance is active.
— Changing the voice guidance volume: when
route guidance is active, turn the right thumb-
wheel upward or downward during a navigation
prompt.