Page 97 of 280

8S1012721BE
Assist systems
— If vehicles are approaching or being left
behind very quickly. The display may not
turn on in time.
— In poor weather conditions such as heavy
rain, snow or heavy mist.
— On very wide lanes, in tight curves, or if
there is a rise in the road surface. Vehicles
in the adjacent lane may not be detected
because they are outside of the sensor
range.
() Note
The sensors can be displaced by impacts or
damage to the bumper, wheel housing and
underbody. This can impair the system. Have
an authorized Audi dealer or authorized Audi
Service Facility check their function.
@ Tips
— If the window glass in the driver's door or
front passenger's door has been tinted, the
display in the exterior mirror may be incor-
rect:
—The system complies with United States FCC
regulations and ISED regulations
=> page 261.
Sic Rema
Applies to: vehicles with Audi side assist
MENU > Select in the Infotainment system: but-
ton > Vehicle > left control button >Driver as-
sistance > Audi side assist
If the system is activated, the displays in the ex-
terior mirrors will turn on briefly when the igni-
tion is switched on.
Adjusting the display brightness
Applies to: vehicles with Audi side assist
The display brightness can be adjusted in the In-
fotainment system.
MENU > Select in the Infotainment system: but-
ton > Vehicle > left control button >Driver as-
sistance > Audi side assist
The display brightness adjusts automatically to
the brightness of the surroundings, both in the
information and in the warning stage. In very
dark or very bright surroundings, the automatic
adjustment will set the display to the minimum
or maximum level. In such cases, you may notice
no change when adjusting the brightness, or the
change may only be noticeable once the sur-
roundings change.
Adjust the brightness to a level where the display
in the information stage will not disrupt your
view
ahead. If you change the brightness, the dis-
play in the exterior mirror will briefly show the
brightness level in the information stage. The
brightness of the warning stage is linked to the
brightness in the information stage and is adjust-
ed along with the information stage.
(i) Tips
— Side assist is not active while you are mak-
ing the adjustment.
— Your settings are automatically stored and
assigned to the remote control key being
used.
Messages
Applies to: vehicles with Audi side assist
If the side assist switches off automatically, a
message appears in the Infotainment system dis-
play.
& Audi side assist: currently unavailable. Sen-
sor vision restricted due to surroundings. See
owner's manual
The radar sensor vision is impaired. Do not cover
the area in front of the sensors with bike wheels,
stickers, dirt or other objects. Clean the area cov-
ering the sensors, if necessary > page 94,
fig. 107.
Audi side assist: currently unavailable. See
owner's manual
Side assist cannot be switched on at this time be-
cause there is a malfunction (for example, the
battery charge level may be too low).
Audi side assist: malfunction! Please contact
Service
95
>
Page 98 of 280

Assist systems
The system cannot guarantee that it will detect
vehicles correctly and it has switched off. The
sensors have been moved or are faulty. Have the
system checked by an authorized Audi dealer or
authorized Audi Service Facility soon.
Audi drive select (drive
settings)
Introduction
Applies to: vehicles with Audi drive select
Drive select makes it possible to experience dif-
ferent types of vehicle characteristics in one vehi-
cle. With different driving modes, the driver can
switch the setting, for example from sporty to
comfortable. In the Individual mode, the set-
tings can be adjusted to your personal preferen-
ces. This makes it possible to combine settings
such as a sporty drivetrain setting with comforta-
ble steering.
Using Audi drive select incorrectly can lead to
collisions, other accidents and serious inju-
ries.
Applies to: vehicles with Audi drive select
The vehicle setup in each mode depends on the
vehicle's features.
Engine and automatic transmission
Depending on the mode, the engine and auto-
matic transmission respond more quickly or ina
more balanced manner to accelerator pedal
movements.
Suspension control (Audi magnetic ride)*
The suspension control uses sensors to record in-
formation regarding steering movements, brak-
ing and acceleration operations by the driver, as
well as information about the road surface, driv-
ing speed, and load. With drive select, you can
adjust the suspension control to sporty (dynam-
ic), comfortable (comfort) or balanced (auto).
96
Steering
The power steering adapts. Indirect steering that
moves easily as in comfort mode is especially
suited to long drives on a highway. The dynamic
mode provides sporty, direct steering.
Engine sound*
The engine sound adapts to the current mode
and can be subtle to sporty.
— Certain vehicle settings will be reset when
the ignition is switched off.
— In some models, the maximum vehicle
speed can only be reached in the auto and
dynamic modes.
Selecting the driving mode
Applies to: vehicles with Audi drive select
You can choose between comfort, auto, dynamic
and individual.
BFV-0307
drive
select
Fig. 102 Center console: drive select button
BFV-0308
Applies to: TT RS
Fig. 103 Steering wheel: drive select button
> Press the ste button repeatedly until the de-
sired drive mode is displayed in the instrument
cluster/Infotainment system display. Or
Page 99 of 280
![AUDI TT 2021 Owner´s Manual 8S1012721BE
Assist systems
> Select in the Infotainment system: [MENU] but-
ton > Vehicle > left control button > Audi drive
select.
> Select and confirm the desired setting.
You c](/manual-img/6/40287/w960_40287-98.png "AUDI TT 2021 Owner´s Manual 8S1012721BE
Assist systems
> Select in the Infotainment system: [MENU] but-
ton > Vehicle > left control button > Audi drive
select.
> Select and confirm the desired setting.
You c")
8S1012721BE
Assist systems
> Select in the Infotainment system: [MENU] but-
ton > Vehicle > left control button > Audi drive
select.
> Select and confirm the desired setting.
You can change the driving mode when the vehi-
cle is stationary or while driving. If traffic per-
mits, briefly remove your foot from the accelera-
tor pedal after changing modes so that the mode
you have selected will be activated for the en-
gine.
Comfort - Results in a comfort-oriented vehicle
calibration
Auto - Provides an overall comfortable yet dy-
namic driving feel and is suited for everyday use.
Dynamic - Gives the driver a sporty driving feel
and is suited to a sporty driving style.
Individual - > page 97.
Adjusting the Individual mode
Applies to: vehicles with Audi drive select
You can adjust the vehicle settings to your personal preferences.
> Press the sis@ button > Individual > right control
button, or
> Select in the Infotainment system: [MENU] but-
ton > Vehicle > left control button>Audi drive
select > Individual > right control button
After you have closed the settings, you will auto-
matically drive in the Individual* mode.
The equipment in your vehicle will determine
which settings you can adjust. The following ta-
ble gives an overview of the characteristics.
Systems Comfort Auto Dynamic
Engine/trans. comfortable balanced sporty
Steering comfortable balanced sporty
Suspension control* comfortable balanced sporty
Engine sound* subtle balanced sporty
quattro* balanced balanced sporty
Applies to: TT RS: quattro balanced neutral sporty
97
Page 100 of 280

Parking aid
Parking aid
Introduction
Applies to: vehicles with rear parking system/parking system
plus
Depending on the vehicle equipment, various
parking aids will help you when parking and ma-
neuvering.
The rear parking system is an audible parking aid
that warns you of obstacles behind the vehicle
=> page 98.
The parking aid plus assists you while parking by
audibly and visually warning you of objects de-
tected in front of and behind the vehicle
=> page 99.
The rearview camera shows the area behind the
vehicle in the Infotainment system display. The
lines in the rearview camera image help you to
park or maneuver > page 700.
ZA WARNING
— Always look for traffic and check the area
around your vehicle by looking at it directly
as well. The systems cannot replace the
driver's attention. The driver is always re-
sponsible when entering or exiting a parking
space and during similar maneuvers.
— Please note that some surfaces, such as
clothing, are not detected by the system.
— Sensors and cameras have blind spots in
which people and objects cannot be detect-
ed. Be especially cautious of small children
and animals.
— The sensors can be displaced by impacts or
damage to the radiator grille, bumper,
wheel housing and the underbody. The park-
ing aid may be impaired as a result. Have an
authorized Audi dealer or authorized Audi
Service Facility check their function.
— Make sure the sensors are not obstructed by
stickers, deposits or other materials. If they
are, the sensor function could be impaired.
For additional information on cleaning, see
> page 236.
98
@) Note
— Some objects are not detected or displayed
by the system under certain circumstances:
— objects such as barrier chains, trailer draw
bars, vertical poles or fences
— objects above the sensors such as wall ex-
tensions
— objects with certain surfaces or structures
such as chain link fences or powder snow
— If you continue driving closer to a low ob-
ject, it may disappear from the sensor
range. Note that you will no Longer be
warned about this obstacle.
— Maintain enough distance from the curb to
reduce the risk of damage to the rims.
@) Tips
— The system may provide a warning even
though there are no obstacles in the cover-
age area in some situations, such as:
— certain road surfaces or when there is tall
grass
— external ultrasonic sources such as from
cleaning vehicles
—in heavy rain, snow, or thick vehicle ex-
haust
— Audi recommends practicing parking ina
traffic-free location or parking lot to be-
come familiar with the systems. Practice
parking in good light and weather condi-
tions.
— You can change the volume of the signals.
— What appears in the display is slightly de-
layed.
— The sensors must be kept clean and free of
snow and ice for the parking aid to operate.
Rear parking system
Applies to: vehicles with rear parking system
The rear parking system is an audible aid.
Description
There is a sensor in the rear bumper cover. If
these detect an obstacle, audible signals warn
you.
Page 101 of 280

8S1012721BE
Parking aid
Make sure the sensors are not covered by stick-
ers, deposits or any other obstructions as it may
impair the sensor function. For information on
cleaning, see > page 236.
The range at which the sensors begin to measure
is approximately:
Side 3 feet
(0.90 m)
Rear
Center 5.2 feet
(1.60 m)
The closer you get to the obstacle, the shorter
the interval between the audible signals. A con-
tinuous tone sounds when the obstacle is less
than approximately 1 foot (0.30 meters) away.
Do not continue backing up > A in Introduction
on page 98, > © in Introduction on page 98!
If the distance to an obstacle remains constant,
the volume of the distance warning gradually
drops after about four seconds (this does not ap-
ply in the continuous tone range).
Activating
The rear parking assist activates automatically
when the reverse gear is engaged. A brief tone
will sound.
Parking system plus
Description
Applies to: vehicles with parking aid plus
Parking system plus provides audio and visual
signals when parking.
BFV-0262
Fig. 104 Principle of operation
Sensors are located in the front and rear bump-
ers. If these detect an obstacle, audible and visu-
al signals warn you.
Make sure the sensors are not covered by stick-
ers, deposits or any other obstructions as it may
impair the sensor function. For information on
cleaning, see > page 236.
The display field begins approximately at:
@ 4 feet (1.20 m)
@ 3 feet (0.90 m)
® 5.2 feet (1.60 m)
@ 3 feet (0.90 m)
The closer you get to the obstacle, the shorter
the interval between the audible signals. A con-
tinuous tone sounds when the obstacle is less
than approximately 1 foot (0.30 meters) away.
Do not continue driving forward or in reverse
=> A in Introduction on page 98, >@ in Introduc-
tion on page 98!
If the distance to an obstacle remains constant,
the volume of the distance warning gradually
drops after about four seconds (this does not ap-
ply in the continuous tone range).
99
Page 102 of 280

Parking aid
Siedler lie Rela
Applies to: vehicles with parking aid plus
BFV-0209
Fig. 105 Center console: parking aid button
Fig. 106 Optical distance display
Switching on
> Shift into reverse, or
> Press the P~ button in the center console
> fig. 105. A short confirmation tone sounds
and the LED in the button turns on.
Switching off
> Drive faster than 6 mph (10 km/h), or
> Press the P button, or
> Switch the ignition off.
Activating automatically
The parking aid is activated automatically at
speeds less than 6 mph (10 km/h) and when ap-
proaching an obstacle from approximately
3.1 feet (95 cm) away. There are audible signals
when approximately 1.6 feet (50 cm) away from
the obstacle. If you press the Pa button to switch
the parking aid off, it can only be reactivated au-
tomatically when one of the following conditions
is met:
— The vehicle speed exceeds 6 mph (10 km/h)
— The ignition is switched off and back on again
— The parking brake is set and then released
100
— The selector lever must be in the "P" position.
Segments in the visual display
The segments in front of and behind the vehicle
(vehicles with parking system plus*) > fig. 106
help you to determine the distance between your
vehicle and an obstacle. The red lines mark the
expected direction of travel according to the
steering angle. A white segment indicates an
identified obstacle that is outside of the vehicle's
path. Red segments show identified obstacles
that are in your vehicle's path. As your vehicle
comes closer to the obstacle, the segments move
closer to the vehicle. The collision area has been
reached when the next to last segment is dis-
played. Obstacles in the collision area, including
those outside of the vehicle's path, are shown in
red. Do not continue driving forward or in reverse
= A in Introduction on page 98, >@ in Introduc-
tion on page 98!
Rearview camera
Introduction
Applies to: vehicles with rearview camera
B8V-0629
Fig. 107 Diagram: lines to aid in parking
The rearview camera helps you to park or maneu-
ver using the orientation lines.
Page 103 of 280
 and area not covered @)
by the rearview camera.")
8S1012721BE
Parking aid
General infor ion
Applies to: vehicles with rearview camera
© © 3 g
S £ 0
Fig. 108 Diagram: area covered (@) and area not covered @)
by the rearview camera.
Fig. 109 Luggage compartment lid: location of the rear-
view camera
The rearview camera is located above the rear li-
cense plate bracket. Make sure that the lens for
the parking system > fig. 709 is not covered by
deposits or any other obstructions because this
can impair the function of the parking system.
For information on cleaning, see > page 236.
The rearview camera coverage area includes (1)
=> fig. 108. Only this area is shown in the Info-
tainment display. Objects that are in area (2),
which is not covered, are not displayed.
ZA\ WARNING
— Always read and follow the applicable warn-
ings > A\ in Introduction on page 98.
— If the position and the installation angle of
the rearview camera was changed, for exam-
ple after a collision, do not continue to use
the system for safety reasons. Have it
checked by an authorized Audi dealer or au-
thorized Audi Service Facility.
— Only use the rearview camera to assist you if
it shows a good, clear picture. For example,
the image may be affected by the sun shin-
ing into the lens, dirt on the lens, or if there
is a malfunction.
— Use the rearview camera only if the luggage
compartment lid is completely closed. Make
sure any objects you may have mounted on
the luggage compartment lid do not block
the rearview camera.
— The camera lens enlarges and distorts the
field of vision. The object appears both al-
tered and inaccurate on the screen.
—Incertain situations, people or objects in the
display appear closer or farther away:
— For objects that do not touch the ground,
such as the bumper of a parked vehicle, a
trailer hitch or the rear of a truck. Do not
use
the orientation lines in this case.
— If driven from a level surface onto an in-
cline, or a downward slope.
— If driven toward protruding objects.
— If the vehicle is carrying too much load in
the rear.
CG) Note
— Always read and follow the applicable warn-
ings >@ in Introduction on page 98.
— The orange-colored orientation lines in the
Infotainment display show the vehicle path
based on the steering wheel angle. The
front
of the vehicle swings out more than
the rear of the vehicle. Maintain plenty of
distance so that an exterior mirror or a cor-
ner of the vehicle does not collide with any
obstacles.
Sica Re moll
Applies to: vehicles with rearview camera
Switching on
> Shift into reverse, or
> Press the P button in the center console
=> page 100, fig. 105. A short confirmation
tone sounds and the LED in the button turns
on.
Switching off
> Drive faster than 6 mph (10 km/h), or
> Press the P button, or
101
Page 104 of 280
 Tips
— The visual display in the left part of the dis-
play should help you detect the critical vehi-
cle areas.
— You can change the volume of")
Parking aid
> Switch the ignition off.
iG) Tips
— The visual display in the left part of the dis-
play should help you detect the critical vehi-
cle areas.
— You can change the volume of the signals
and the display > page 102.
Perpendicular parking
Applies to: vehicles with rearview camera
This view may be used when parking in a garage
or ina parking space.
4. Look! Safe to move?
Fig. 110 Infotainment system: aiming at a parking space
ds. Look! Safe to move?
Fig. 111 Infotainment system: aligning the vehicle
> Turn the Infotainment system on and shift into
reverse gear.
> The orange orientation lines @) show the vehi-
cle's direction of travel. Turn the steering wheel
until the orange orientation lines align with the
parking space > fig. 710. Use the markings @)
to help you estimate the distance to an obsta-
cle. Each marking represents approximately 3
feet (1 meter). The blue surface is a static dis-
play and represents an extension of the vehicle
perimeter to the rear.
102
> While driving in reverse gear, adjust the steer-
ing wheel angle to fit the parking space using
the orange orientation lines for assistance > /\.
in General information on page 101, >@)in
General information on page 107. Area @) rep-
resents the rear bumper. At the very latest,
stop the vehicle when the red orientation line
@ borders an object.
Adjusting the display
and the warning tones
Applies to: vehicles with parking aid plus
The display and warning tones can be adjusted in
the Infotainment.
> Select in the Infotainment system: [MENU] but-
ton > Vehicle > left control button > Driver as-
sistance > Parking aid.
Signal tones
Front volume - Volume for the front area
Rear volume - Volume for the rear area
Entertainment fader - The volume of the audio/
video source is lowered when the parking system
is turned on
@ Tips
— The settings are automatically stored and
assigned to the remote control key that is in
use.
— The new level is demonstrated briefly* when
the volume is adjusted.
Error messages
Applies to: vehicles with rear parking system/parking system
plus
Rear parking aid: malfunction! Obstacles cannot
be detected
Parking aid: malfunction! Obstacles cannot be
detected
There is a system malfunction if the LED in the
Pva button blinks when switching on the system.
If the error is not corrected before you switch off
the ignition, the LED in the P button will blink
the
next time you switch on the parking system
by shifting into reverse. As long as the error is >
 1
1 2
2 3
3 4
4 5
5 6
6 7
7 8
8 9
9 10
10 11
11 12
12 13
13 14
14 15
15 16
16 17
17 18
18 19
19 20
20 21
21 22
22 23
23 24
24 25
25 26
26 27
27 28
28 29
29 30
30 31
31 32
32 33
33 34
34 35
35 36
36 37
37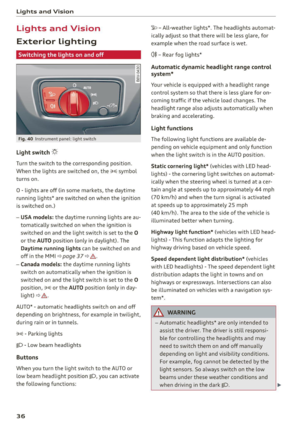 38
38 39
39 40
40 41
41 42
42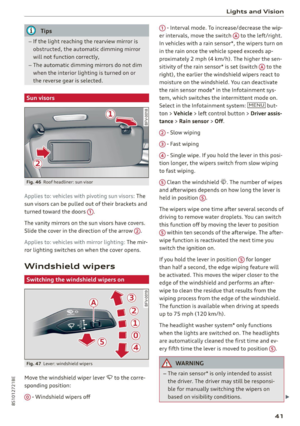 43
43 44
44 45
45 46
46 47
47 48
48 49
49 50
50 51
51 52
52 53
53 54
54 55
55 56
56 57
57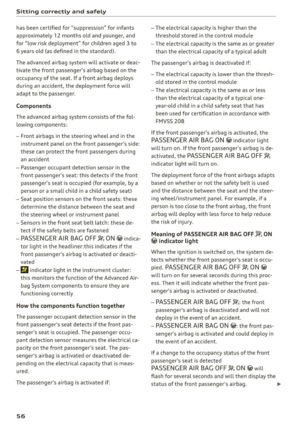 58
58 59
59 60
60 61
61 62
62 63
63 64
64 65
65 66
66 67
67 68
68 69
69 70
70 71
71 72
72 73
73 74
74 75
75 76
76 77
77 78
78 79
79 80
80 81
81 82
82 83
83 84
84 85
85 86
86 87
87 88
88 89
89 90
90 91
91 92
92 93
93 94
94 95
95 96
96 97
97 98
98 99
99 100
100 101
101 102
102 103
103 104
104 105
105 106
106 107
107 108
108 109
109 110
110 111
111 112
112 113
113 114
114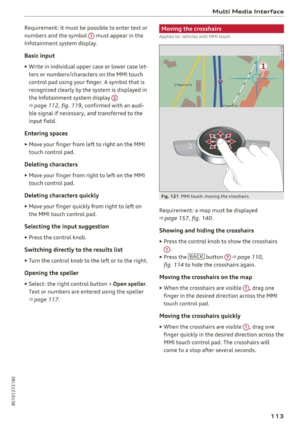 115
115 116
116 117
117 118
118 119
119 120
120 121
121 122
122 123
123 124
124 125
125 126
126 127
127 128
128 129
129 130
130 131
131 132
132 133
133 134
134 135
135 136
136 137
137 138
138 139
139 140
140 141
141 142
142 143
143 144
144 145
145 146
146 147
147 148
148 149
149 150
150 151
151 152
152 153
153 154
154 155
155 156
156 157
157 158
158 159
159 160
160 161
161 162
162 163
163 164
164 165
165 166
166 167
167 168
168 169
169 170
170 171
171 172
172 173
173 174
174 175
175 176
176 177
177 178
178 179
179 180
180 181
181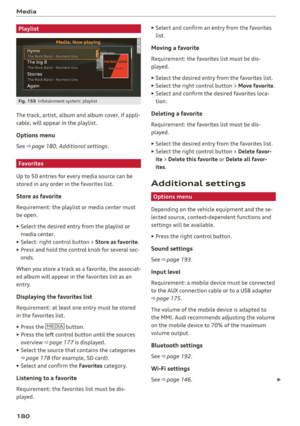 182
182 183
183 184
184 185
185 186
186 187
187 188
188 189
189 190
190 191
191 192
192 193
193 194
194 195
195 196
196 197
197 198
198 199
199 200
200 201
201 202
202 203
203 204
204 205
205 206
206 207
207 208
208 209
209 210
210 211
211 212
212 213
213 214
214 215
215 216
216 217
217 218
218 219
219 220
220 221
221 222
222 223
223 224
224 225
225 226
226 227
227 228
228 229
229 230
230 231
231 232
232 233
233 234
234 235
235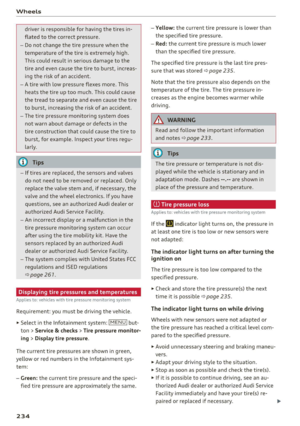 236
236 237
237 238
238 239
239 240
240 241
241 242
242 243
243 244
244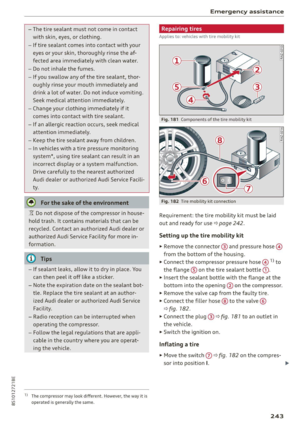 245
245 246
246 247
247 248
248 249
249 250
250 251
251 252
252 253
253 254
254 255
255 256
256 257
257 258
258 259
259 260
260 261
261 262
262 263
263 264
264 265
265 266
266 267
267 268
268 269
269 270
270 271
271 272
272 273
273 274
274 275
275 276
276 277
277 278
278 279
279