Page 145 of 268

143
108_en_Chap07_info-pratiques_ed01-2016
the fitting of electrical equipment or
accessories which are not recommended
by P
e
uge
Ot
may result in a failure of
your vehicle's electronic system and
excessive electrical consumption.
Contact a P
e
uge
Ot
dealer
for information on the range of
recommended equipment and
accessories.
Installation of radio
communication
transmitters
Before installing any after-market radio
communication transmitter, you can
contact a P
e
uge
Ot
dealer for the
specification of transmitters which can
be fitted (frequency, maximum power,
aerial position, specific installation
requirements), in line with the Vehicle
el
ectromagnetic Compatibility
Directive
(2004/104/
eC
). Depending on the legislation in force in
the country, certain safety equipment
may be compulsory: high visibility
safety vests, warning triangles,
breathalyzers, spare bulbs, spare fuses,
fire extinguisher, first aid kit, mud flaps
at the rear of the vehicle.
7
Practical information
Page 146 of 268

144
108_en_Chap07_info-pratiques_ed01-2016
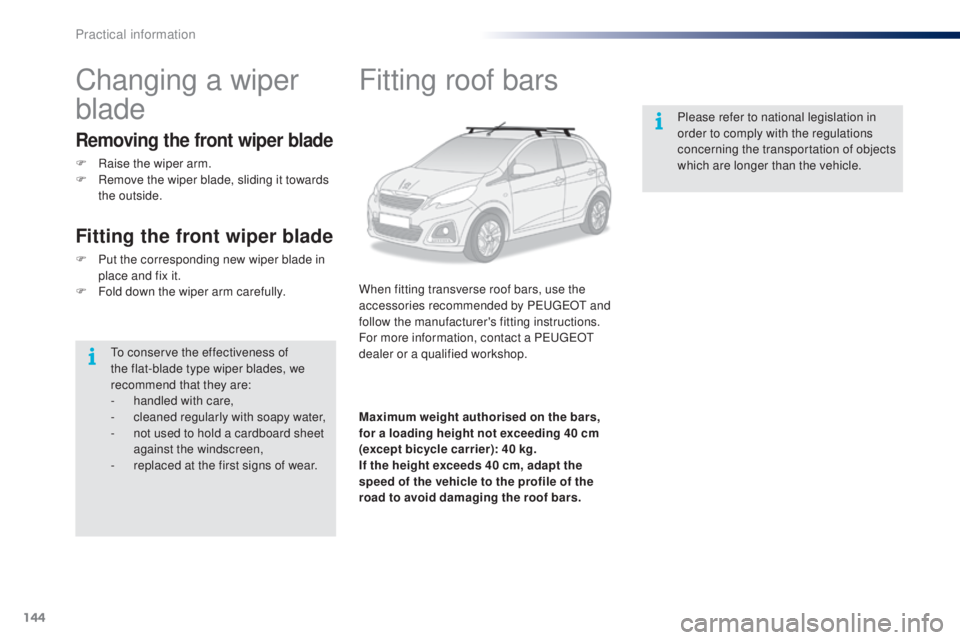
Fitting roof bars
When fitting transverse roof bars, use the
accessories recommended by PeugeOt and
follow the manufacturer's fitting instructions.
For more information, contact a P
e
uge
Ot
dealer or a qualified workshop. Please refer to national legislation in
order to comply with the regulations
concerning the transportation of objects
which are longer than the vehicle.
Maximum weight authorised on the bars,
for a loading height not exceeding 40 cm
(except bicycle carrier): 40 kg.
If the height exceeds 40 cm, adapt the
speed of the vehicle to the profile of the
road to avoid damaging the roof bars.
Changing a wiper
blade
Removing the front wiper blade
F Raise the wiper arm.
F R emove the wiper blade, sliding it towards
the outside.
Fitting the front wiper blade
F Put the corresponding new wiper blade in place and fix it.
F
F
old down the wiper arm carefully.
to c
onserve the effectiveness of
the flat-blade type wiper blades, we
recommend that they are:
-
han
dled with care,
-
c
leaned regularly with soapy water,
-
n
ot used to hold a cardboard sheet
against the windscreen,
-
r
eplaced at the first signs of wear.
Practical information
Page 147 of 268
108_en_Chap07_info-pratiques_ed01-2016
Peugeot & totA L,
A PARtNe RSHIP to D eL IVe R
B
e
tte
R
P
eR
F
oR
MANC
e!
2015 was marked by PEUGEOT's return to Rally-Raid,
one of the most difficult motorsport disciplines in the
world. To obtain the best performance in these trials,
PEUGEOT Sport chose TOTAL QUARTZ for the
PEUGEOT 2008 DKR, a lubricant of high technology
which protects the engine in the most severe
conditions.
totAL QuARtZ p rotects your engine against the effects
of time.
ReCoMMe NDS
TOTAL QUARTZ Ineo First is a high performance lubricant,
the result of work done together by PEUGEOT and TOTAL
R&D. Specially formulated for the engines in PEUGEOT
vehicles, its innovative technology significantly reduces CO
2
emissions and keeps your engine clean.
Page 148 of 268
146
108_en_Chap07_info-pratiques_ed01-2016
Bonnet
Do not open the bonnet when there is a
very strong wind.
When the engine is hot, handle the
exterior safety catch and the stay with
care (risk of burns).
F
P
ush the exterior safety catch to the left
and raise the bonnet. F u
n
clip the bonnet stay from its housing.
F
F
ix the stay in the notch to hold the bonnet
open.
opening
F Pull towards you the interior release lever, located in the lower dashboard.
th
e cooling fan may star t after
switching off the engine: take care
with articles and clothing that might
be caught by the fan blades.
Closing
F take the stay out of the support notch.
F C lip the stay in its housing.
F
L
ower the bonnet and release it near the
end of its travel.
F
P
ull on the bonnet to check that it is fully
latched.
Because of the presence of electrical
equipment under the bonnet, it is
recommended that exposure to water
(rain, washing, ...) be limited.
Practical information
Page 149 of 268
147
108_en_Chap07_info-pratiques_ed01-2016
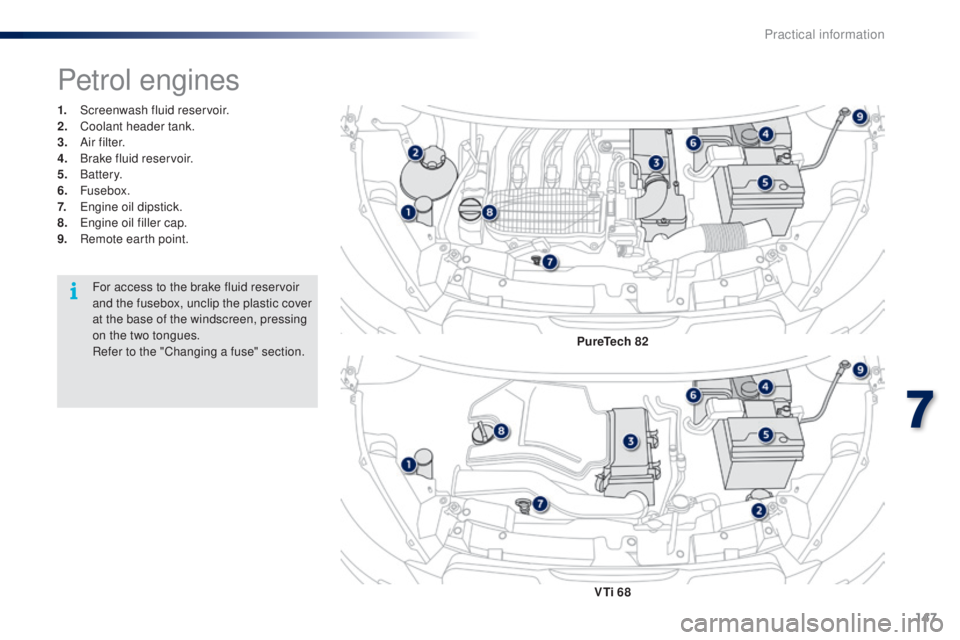
1. Screenwash fluid reservoir.
2. Coolant header tank.
3.
A
i r f i l t e r.
4.
B
rake fluid reservoir.
5.
Battery.
6.
Fusebox.
7.
e
n
gine oil dipstick.
8.
e
n
gine oil filler cap.
9.
R
emote earth point.
Petrol engines
Puretech 82
V
ti 6
8
For access to the brake fluid reservoir
and the fusebox, unclip the plastic cover
at the base of the windscreen, pressing
on the two tongues.
Refer to the "Changing a fuse" section.
7
Practical information
Page 150 of 268

148
108_en_Chap07_info-pratiques_ed01-2016
Checking levels
take care when working under the
bonnet, as certain areas of the engine
may be extremely hot (risk of burns) and
the cooling fan could start at any time
(even with the ignition off).
engine oil level
the check of the oil level is carried
out with the dipstick, located under
the bonnet. For the position of the
dipstick, refer to the under-bonnet
view on a previous page.
Checking with dipstick
Check all of these levels regularly, in line with the manufacturer's service schedule. top them up if necessary, unless other wise indicated.
If a level drops significantly, have the corresponding system checked by a Pe ugeOt dealer or a qualified workshop.
to e
nsure the accuracy of the reading,
your vehicle must be on a level
sur face, with the engine off for at least
30
minutes.
It is normal to top up the oil level between
two services (or oil changes). P
e
uge
Ot
recommends that you check the level, and top
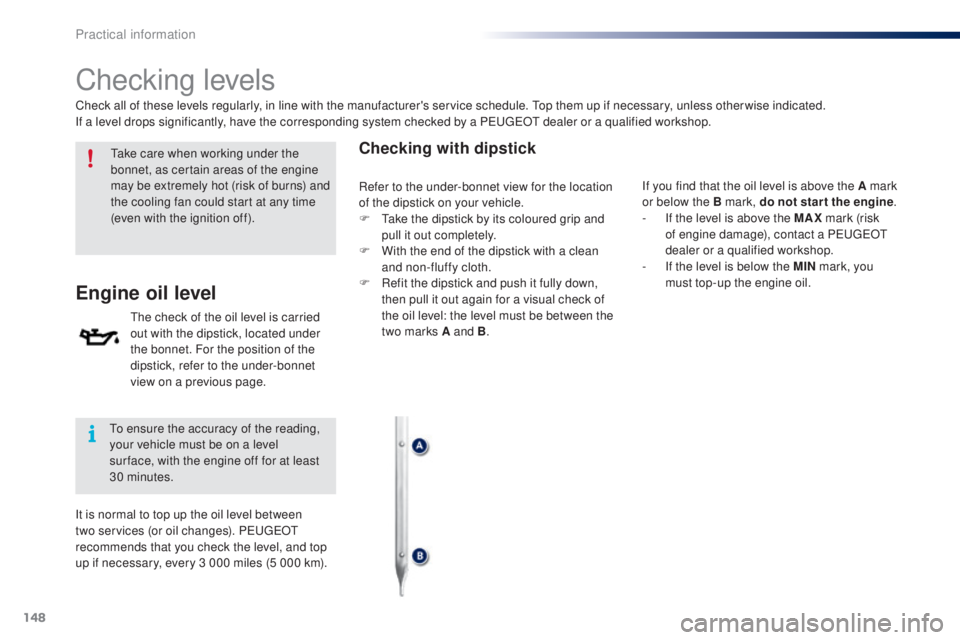
up if necessary, every 3 000 miles (5 000 km). If you find that the oil level is above the A mark
or below the B mark, do not star t the engine
.
-
I
f the level is above the MAX mark (risk
of engine damage), contact a P
e
uge
Ot
dealer or a qualified workshop.
-
I
f the level is below the MIN mark, you
must top-up the engine oil.
Refer to the under-bonnet view for the location
of the dipstick on your vehicle.
F
t
a
ke the dipstick by its coloured grip and
pull it out completely.
F
W
ith the end of the dipstick with a clean
and non-fluffy cloth.
F
R
efit the dipstick and push it fully down,
then pull it out again for a visual check of
the oil level: the level must be between the
two marks A and B .
Practical information
Page 151 of 268

149
108_en_Chap07_info-pratiques_ed01-2016
the brake fluid level should be close
to the "MA X" mark. If it is not, check
the brake pad wear.
Brake fluid level
Changing the fluid
Refer to the manufacturer's service schedule
for details of the interval for this operation.
Fluid specification
the brake fluid must conform to the
manufacturer's recommendations.
topping-up the engine oil
oil gradethe oil must be the correct grade for your
engine and conform to the manufacturer's
recommendations.
Refer to the under-bonnet view for the location
of the oil filler cap on your vehicle.
F
u
n
screw the filler cap for access to the
filler orifice.
F
P
our in the oil in small quantities, avoiding
spills onto the engine (risk of fire).
F
W
ait a few minutes before checking the
level again using the dipstick.
F
t
o
p-up again if necessary.
F
A
fter checking and topping up, carefully
refit the oil filler cap and the dipstick to its
housing.
engine oil change
Refer to the manufacturer's service schedule
for details of the interval for this operation.
In order to maintain the reliability of the engine
and emissions control system, never use
additives in the engine oil.
7
Practical information
Page 152 of 268

150
108_en_Chap07_info-pratiques_ed01-2016
Avoid prolonged contact of used oil or
fluids with the skin.
Most of these fluids are harmful to
health or indeed very corrosive.
Do not discard used oil or fluids into
sewers or onto the ground.
ta
ke used oil to a P
e
uge
Ot
dealer or
a qualified workshop (France) or to an
authorised waste disposal site.
used products
Fluid specification
For optimum cleaning and to avoid freezing,
this fluid must not be topped up or replaced
with plain water.
In wintry conditions, it is recommended that you
use an ethyl alcohol or methanol based fluid.
Screenwash fluid level
top up the level when necessary.
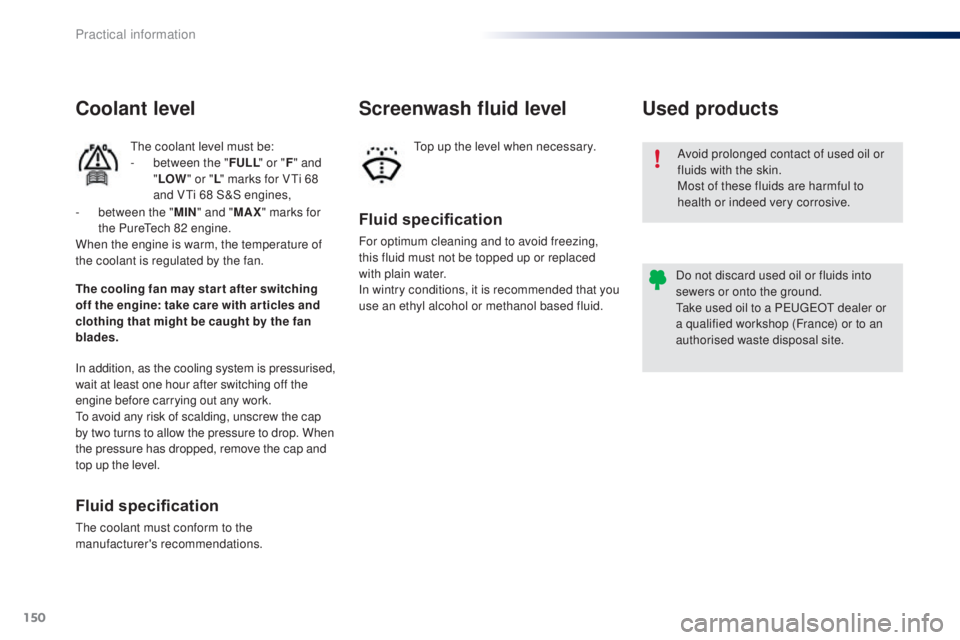
Coolant level
the coolant level must be:
- b etween the " F
uL L" or " F" and
" L
o
W" o
r "L" marks for V
ti 6
8
and V
ti 6
8 S&S engines,
In addition, as the cooling system is pressurised,
wait at least one hour after switching off the
engine before carrying out any work.
to a
void any risk of scalding, unscrew the cap
by two turns to allow the pressure to drop. When
the pressure has dropped, remove the cap and
top up the level.
Fluid specification
the coolant must conform to the
manufacturer's recommendations.
th
e cooling fan may star t after switching
off the engine: take care with ar ticles and
clothing that might be caught by the fan
blades. -
b
etween the "
MIN" and " MAX" marks for
the Pure
te
ch 82 engine.
When the engine is warm, the temperature of
the coolant is regulated by the fan.
Practical information