Page 49 of 261

Problems with automatic child seat recognition
Problem
Possible causes/consequences and
M
MSolutions The PASSENGER AIR
BAG OFF indicator lamp
on the centre console is
lit. As
pecia lMercedes-Benz child restraint system with atransponde rfor
automatic child sea trecognitio nhasbeen fitte dtothe front-
passenge rseat. The front-passenger front airba ghastherefore been
disabled as desired. G
WARNING
There is no child restraint syste mfitted to the front-passenge rseat.
Automatic child seat recognitio nismalfunctioning, for exampl edue to
electronic devices on the front-passenge rseat.
There is arisk of injury.
X Remove electroni cequipment from the front-passenge rseat, e.g.:
R laptop
R mobil ephone
R ac ard with atransponder, such as aski pass or access pass
If the PASSENGER AIR BAG OFF indicator lamp remains lit, the front- passenger seat may not be used.
X Consult aqualified specialist workshop. When you switch the
ignition on, the
6
restraint system warning lamp lights up and/or
the PASSENGER AIR
BAG OFF indicato rlamp
does not light up briefly. G
WARNING
Automati cchild seat recognitio nismalfunctioning.
Do not install achild restraint system on the front-passenge rseat.
It is recommende dthat you fit the child restraint system to asuitable
rear seat.
X Consult aqualified specialist workshop.
X Please alsor efer to the notes about the restraint system warning
lamp (Y page161). Suitable positioningoft
he child
restraint system
Introduction Only child restraint systems that are approved in
accordance with ECE standard ECE R44 are per-
mitted for use in the vehicle.
"Universal" category child restraint systems can
be recognised by their orange approval label and
the text "Universal". Example: approval label on the child restraint
system
"Universal "category child restraint system scan
be used on the seats indicated with UorL
according to the table s"Suitability of the seats
for attaching belte dchild restraint systems" or 46
Children in the vehicleSafety
Page 50 of 261

"Suitabilit
yoftheseat sfor attaching an ISOFIX
child restraint system".
Semi-universal child restraint systems are indi-
cated by th etext"semi-universal" on the
approval label. Thes ecan be used if th evehicle
and th eseat are listed in th echild restraint sys-
te mm anufacturer' svehicle model list .For more
information, contact th echild restraint system
manufacturer or visit their website.
Child restrain tsystem on th efront-
passenger seat – if it is absolutely necessary to
secure achild in achild restraint system on the
front-passenger seat:
X Always pay attentio ntotheinstruction sunder
"Child restraint system on th efront-
passenger seat "(Ypage 43).
Ther eyou will fin dinstruction sonhow to cor-
rectly rout ethe shoulder belt strap from the belt sash guide to the shoulder belt guide on
the child restraint syste
m(Ypage 45).
X Move the front-passenger seat as far back as
possible and int othe lowest position.
X Move the backrest to an almost vertical posi-
tion.
The entire base of the child restraint system
must always rest on the seat cushion of the
front-passenger seat. The backrest of a
forward-facin gchild restraint system must, as
far as possible, rest flat against the backrest
of the front-passenger seat. The child
restraint system must not touch the roof or be
put under strain by the head restraint .Adjust
the angle of the seat backrest and the head
restraint position accordingly. Also observe
the child restraint system manufacturer's
installation instructions.
Suitability of the seats for attaching belt-secured child restraint systems If you use
ababy car seat of category 0or0+orarearward-facing child restraint system of category
Ionar ear seat, you must adjust the driver's or front-passenger seat so that the seat does not touch
the child restraint system.
If you use acategory I, forward-facing child restraint system, you shouldr emove the head restraint
from the respective seat, if possible (Y page 70). The backrest of the child restraint system must,
as far as possible, lie flat against the backrest of the seat.
Make sure that the child's feet do not touch the front seat. If necessary ,move the front seat forward
slightly.
For certain child restraint systems in weight categories II or III, this can mean that the area of use
is restricted. The maximum size setting of the child restraint system may not be possible due to
possible contact with the roof.
Alwayso bserve the notes in the "Child restraint system" section (Y page 40) and the child restraint
system manufacturer's installation instructions.
When you remove the child restraint system, you must replace the head restraints again immedi-
ately (Y page 70). All vehicle occupants must adjust their head restraints correctly before begin-
ning the journey.
Legend for the table:
XS eat that is unsuitable for children in this weight category.
US uitable for child restraint systems in th e"Universal" categor ytha ta re approve dfor use in this
weigh tcategory.
LS uitable for child restraint systems as recommended; see th e"Recommended child restraint
systems "table (Y page 49). Children in th
evehicle
47Safety Z
Page 51 of 261

Weight category Front-passenger seat Rear seat
Front-
passenger
front airbag enabled Front-
passenger front airbag disa-
bled 1 Left, right
0
up to 10 kg X U U
0+
up to 13 kg X U U
I
9kgto18kg L U U
II
15 kg to 25 kg L U U
III
22 kg to 36 kg L U U
Suitability of the seat
sfor attaching ISOFIXc hild restraint systemsIf you use
ababy car seat of category 0or0+orarearward-facing child restraint system of category
Ionar ear seat, you must adjust the driver's or front-passenger seat so that the seat does not touch
the child restraint system.
If you use acategory I, forward-facing child restraint system, you shouldr emove the head restraint
from the respective seat, if possible (Y page 70). The backrest of the child restraint system must,
as far as possible, lie flat against the backrest of the seat.
Alwayso bserve the notes in the "Child restraint system" section (Y page 40) and the child restraint
system manufacturer's installation instructions.
Make sure that the child's feet do not touch the front seat. If necessary ,move the front seat forward
slightly.
For certain child restraint systems in weight categories II or III, this can mean that the area of use
is restricted. The maximum size setting of the child restraint system may not be possible due to
possible contact with the roof.
When you remove the child restraint system, you must replace the head restraints again immedi-
ately (Y page 70). All vehicle occupants must adjust their head restraints correctly before begin-
ning the journey.
Legend for the table:
XI SOFIX position that is not suitabl efor ISOFIX chil drestraint systems in this weight category
and/or size category.
IUF Suitable for forward-facing ISOFIX chil dseats ecuring systems that belong to the "Universal"
categor yand are approved for us einthis weight category.
IL Suitable for ISOFIX chil drestraint systems as recommended; see the following table of "Rec-
ommended chil drestraint systems "(Y page 49).
The chil drestraint system manufacturer will also recommend asuitabl eISOFIX chil drestraint
system. For this ,you rvehicl eand the sea tmustb elisted in the chil drestraint system manu-
facturer' smodel list. For more information, contac tthe chil drestraint system manufacturer or
visit thei rwebsite.
1 The vehicl eisequipped with automatic child seat recognition in the front-passenger seat. A"Universal"
category child restraint system with atransponder for automatic child seat recognition must be fitted. The
PASSENGER AIR BAG OFF indicator lamp must be lit. 48
Children in the vehicleSafety
Page 52 of 261

Weight category Size category Equip
ment Rear seat left,
right Carry cot
F ISO/L1 X
G ISO/L2 X
0
up to 10 kg
up to approximately
6months E ISO/R1 IL
0+
up to 13 kg
up to approximately 15 months E ISO/R1 IL
D ISO/R2 IL
C ISO/R3
IL
2 I
9to18kg
between approximately
9months
and 4years D ISO/R2 IL
C ISO/R3
IL
2 B ISO/F2 IUF
B1 ISO/F2X IUF
A ISO/F3 IUF
The chil
drestraint system must not touch the roof or be put under strain by the head restraints.
Adjust the head restraint position accordingly. Also observe the child restraint system manufac-
turer's installation instructions. Recommended child restrain
tsystems
General notes Alway
sobserve the informatio nin"Childrestraint system sonthe front-passenger seat" (Y page 43)
and in "Suitabl epositioni ng of the child restraint system "(Ypage 46).
Yo uc an obtai nfurthe rinformatio nabout the correct child restraint system from any Mercedes-Benz
Service Centre.
2 If you are usin gachild restraint system of size category C(ISO/R3), move the front seat to the highest position
and move the backrest to an upright position. Make sure that the front seat backrest does not rest against the child restraint system. Children in the vehicle
49Safety Z
Page 53 of 261
 Order num-
ber
(A 000 ...)
3 Automatic
childs
eat
recogni")
Recommende
dchild restraint systems for attaching with the vehicle seat belt Weight catego-
ries Manu-
facturer Type Approval num-
ber(E
1...) Order num-
ber
(A 000 ...)
3 Automatic
childs
eat
recognition Category 0:
up to 10 kg
up to approx-
imately
6months Britax
Römer BABY
SAFE
plus II 04 301146 97
02000
970 36 00 Yes
Categor
y0+:
up to 13 kg
up to approx-
imately 15 months Britax
Römer BABY
SAFE
plus II 04 301146 97
02000
970 36 00 Yes
Categor
yI:
9k gto18kg
between approx-
imately 9months
and 4years Britax
Römer DU
Op lus 03 301133 970 16 00 No
970 37 00 Yes
Categor
yII/III:
15 kg to 36 kg
between approx-
imately 4years and
12 years Britax
Römer KIDFIX 04 301198 97
01900 No
970 38 00 Yes
KIDFIX
XP 04 301304 970 61 00 Yes
Recommended "Universal" or "Semi-Universal" category ISOFIX child restraint
systems
Weight
categories Size cate-
gory Manufac-
turer Type Approval
number
(E1 ...) Order
number
3 Automatic
child seat
recogni-
tion Category
0+:
up to 13 kg
E Britax
Römer BABY-SAFE
plus
4 04 301146 B6
686
8224 No
Category I:
9kgto
18 kg
B1 Britax
Römer DU
Op lus 03 301133
04 301133 A0
00 970
16 00 No
04 301133 A0
00 970
37 00 Yes
3
Colour code 9H95.
4 Thec hild restraint system may onl ybefitted to th eleft-hand or right-han drear seat. 50
Children in th
evehicleSafety
Page 54 of 261

Child-proof locks
Important safety notes G
WARNING
If children ar etravelling in the vehicle, they
could:
R open doors, thus endangering other people
or road users
R exit the vehicl eand be caught by oncoming
traffic
R operate vehicl eequipment and become
trapped, for example
There is arisk of an accident and injury.
Always activate the child-proof locks and
overrid efeature if children are travelling in the
vehicle. When leaving the vehicle, alwayst ake
the key with you and lock the vehicle. Never
leave children unattended in the vehicle.
Child-proof locks for the rear doors
(Y page5 1).
Observe the important safety notes on the dou-
ble-lock function (Y page57). G
WARNING
If you leave children unattended in the vehi-
cle, they may be abletos et the vehiclein
motion if, for example, they:
R release the parking brake
R shift the automatic transmission out of park
position P
R start the engine
In addition, they may operate vehicl eequip-
ment and become trapped. There is arisk of
an accident and injury.
When leaving the vehicle, alwayst ake the key
with you and lock the vehicle. Never leave
children unattended in the vehicle. G
WARNING
If persons (particularly children) are exposed
to heatorc old foraprolonged period, there is
ar isk of serious or even fatal injuries. Never
leave persons (particularly children) unatten-
ded in the vehicle. G
WARNING
If the child restraint system is placed in direct sunlight, the parts coul dbecome very hot.
Childre ncouldbes uffer burns by touching
these parts, in particular on the metallic parts
of the child restraint system. There is arisk of
injury.
If you and yourc hild leave the vehicle, always
make sure that the child restraint system is
not in direct sunlight. Cove ritwithablanket,
for example. If the child restraint system has
been expose dtodirect sunlight, leave it to
cool downb efore securing the child in it.
Never leave children unattended in the vehi-
cle.
Child-proof locks for the rear side doors
and rear door You can secure eac
hdoor individually with the
child-proof lock sonthe rear doors .Adoor
secured with achild-proof lock cannot be
opene dfrom inside the vehicle. When the vehi-
cle is unlocked, the door can be opene dfrom the
outside. X
To activate: press thechild-proof lock lever
down in the direction of arrow ;.
X Make sure tha tthe child-proof lock is working
properly.
X To deactivate: press the child-proof lock
lever up in the direction of arrow :. Child
renint hevehicle
51Safety Z
Page 55 of 261

Pets in the vehicle
G
WARNING
If you leave animals unsupervised or unse-
cured in the vehicle, they may push abutton
or as witch, for example.
They could:
R activate vehicl eequipment and become
trapped, for example
R switch vehicl esystems on or off, thus
endangering other road users
In the event of an accident, sudden braking or
abrupt changes of direction, unsecured ani-
mals coul dbeflung around the vehicle, injur-
ing the vehicl eoccupants. There is arisk of an
accident and injury.
Never leave animals unattended in the vehi-
cle. Always secure animals correctly during a
journey ,e.g. in an anima ltransport box. Driving safe
tysystems Drivin
gsafet ys ystems overview
In this section ,you will fin dinformati on about
th ef ollowin gdrivin gsafet ysystems:
R AB S(Anti-lock Braking System)
(Y page 52)
R BA S(Brake Assist System) (Y page 53)
R Adaptive brake lights (Y page 53)
R ESP ®
(Electronic Stability Program)
(Y page 53)
R EB D( electronic brak eforce distributi on)
(Y page 55)
R ADAPTIV EBRAKE (Y page 56) Important safety notes
If you fail to adapt your driving style or if you are
inattentive, th edriving safet ysystems can nei-
ther reduce th eriskofana ccidentnor override
th el aws of physics .Drivin gs afet ysystems are
merely aids designed to assist driving .You are
responsible for maintainin gthe distanc etothe
vehicl einfront,for vehicl espeed, for braking in
goo dtime, and for staying in lane. Always adapt
your driving style to suit th eprevailing road and weather conditions and maintain
asafe distance
fro mt hevehicle in front .Drive carefully.
The driving safet ysystems described work as
effectively as possible only when there is ade-
quate contac tbetween th etyres and th eroad
surface. Pay particular attention to th einforma-
tio nr egarding tyres, recommended minimum
tyr etread depths etc .inthe"Wheels and tyres"
sectio n(Ypage 235).
In wintry driving conditions ,always use winter
tyres (M+S tyres) and, if necessary, snow
chains. Only in this way will th edriving safety
systems described in this sectio nwork as effec-
tively as possible. ABS (Anti-lock Braking System)
Genera linformation AB
Sregulate sbrake pressure in such awaythat
the wheels do not lock when yo ubrake. This
allows yo utocontinue steering the vehicl ewhen
braking.
The yellow !ABS warning lamp in the instru-
ment cluster lights up when the ignition is
switched on. It goe soutwhen the engine is run-
ning.
ABS works from aspeed of abou t8km/h,
regardless of road-surface conditions. ABS
works on slippery surfaces ,evenw heny ou
brake onl ygently.
Important safety notes i
Observ
ethe "Important safety notes" sec-
tion (Y page 52). G
WARNING
If ABS is faulty, the wheels could lock when
braking. The steerability and braking charac-
teristics may be severely impaired.A ddition-
ally, further driving safety systems are deac-
tivated. There is an increased dange rofskid-
ding and accidents.
Drive on carefully.H ave ABS checked imme-
diately at aqualified specialist workshop.
If ABS is malfunctioning, other systems ,includ-
ing driving safety systems ,willa lsob ecome
inoperative. Observe the information on the ABS warning lamp (Y page158) and display mes- 52
Driving safety systemsSafety
Page 56 of 261
.
Braking X
If ABS intervenes: continue to depress the
bra kepedal with force until th ebraking sit-
uatio niso ver.
X To make afullb rak")
sages which may be shown in the instrument
cluster (Y page 142).
Braking X
If ABS intervenes: continue to depress the
bra kepedal with force until th ebraking sit-
uatio niso ver.
X To make afullb rake application: depress
th eb rak epedal with full force.
If AB Sintervene swhen braking ,you will fee la
pulsin ginthebrak epedal.
The pulsating brak epedal can be an indication
of hazardous road conditions; this serves as a
reminder to tak eextra car ewhile driving.
Off-road ABS An ESP
®
syste mspecifically suite dtooff-road
terrain is activated automaticall yonce the off-
roa dprogra misa ctivated.
At speed sbelow 60 km/h ,the front wheels lock
cyclically during braking .The digging-i neffect
achieved in the proces sreduce sthe stopping
distance during off-roa ddriving .Thisl im its
steering capability. BAS (Brak
eAssis tSystem)
General information BAS operate
sinemergency braking situations.
If yo udepress the brake pedal quickly ,BAS
automaticall yboosts the braking force ,thus
shortening the stopping distance.
Important safety notes i
Observe the "Important safety notes" sec-
tion (Y page 52). G
WARNING
If BAS is malfunctioning, the braking distance
in an emergency braking situation is
increased. There is arisk of accident.
In an emergency braking situation, depress
the brake peda lwith full force. ABS prevents
the wheels from locking. Braking X
Keep the brake pedald epressed firmly until
the emergency braking situation is over.
ABS prevents the wheels from locking.
The brakes willf unction as usual once you
release the brake pedal. BAS is deactivated. Adaptiv
ebrake lights
The adaptive brak elights warn followin gtraffic
in an emergenc ybraking situation by:
R flashin gbrak elamps
R activating th ehazard warning lamps
If you brak esharply from aspee dofm oret han
50 km/h or if braking is assisted by BAS, the
brak elamp sflas hrapidly. In this way, traffic
travellin gbehind you is warned in an eve nmore
noticeable manner.
If you brak esharply from aspee dofm oret han
70 km/h to astandstill, th ehazard warning
lamp sare activated automatically. If th ebrakes
are applie dagain ,the brak elamp sligh tupc on-
tinuously. The hazard warning lamp sswitch off
automatically if you travel faste rtha n1 0k m/ h.
You can also switch off th ehazard warning
lamp susingthe hazard warning button
(Y page 76). ESP
®
(Electronic Stability Program)
General notes i
Observ
ethe "Important safety notes" sec-
tion (Y page 52).
ESP ®
monitors driving stability and traction, i.e.
power transmission between the tyres and the
road surface.
If ESP ®
detects that the vehicle is deviating from
the direction desired by the driver, one or more
wheels are braked to stabilise the vehicle. The
engine output is also modified to keep the vehi- cle on the desired course within physical limits.
ESP ®
assists the driver when pulling awayon
wet or slippery roads. ESP ®
can also stabilise
the vehicle during braking. Driving safe
tysystems
53Safety Z
 1
1 2
2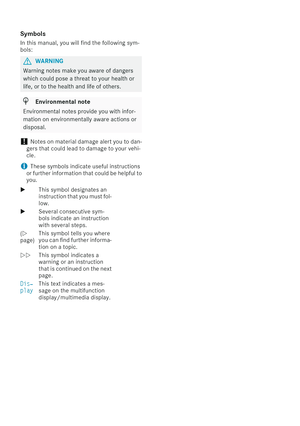 3
3 4
4 5
5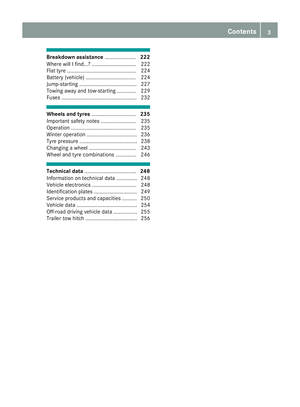 6
6 7
7 8
8 9
9 10
10 11
11 12
12 13
13 14
14 15
15 16
16 17
17 18
18 19
19 20
20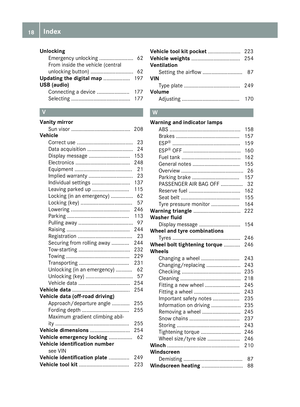 21
21 22
22 23
23 24
24 25
25 26
26 27
27 28
28 29
29 30
30 31
31 32
32 33
33 34
34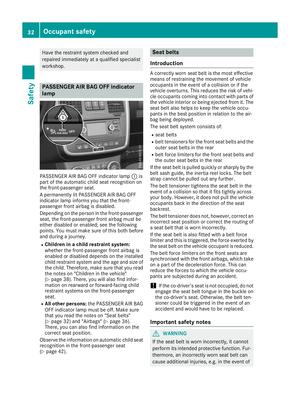 35
35 36
36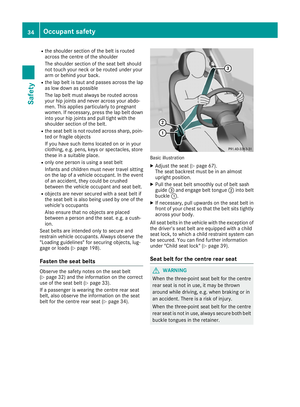 37
37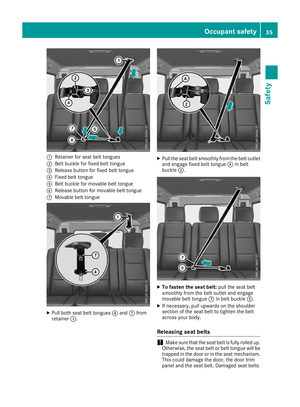 38
38 39
39 40
40 41
41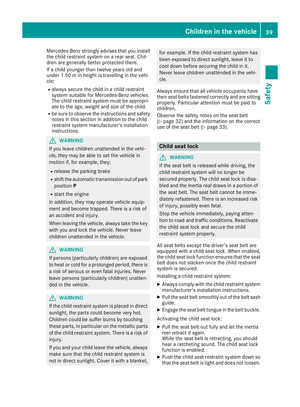 42
42 43
43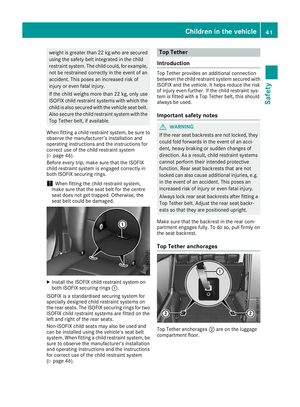 44
44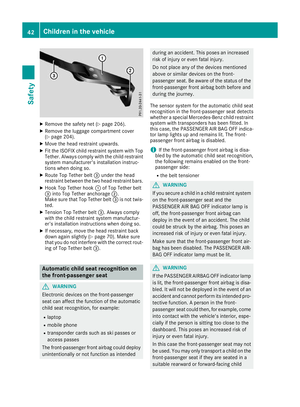 45
45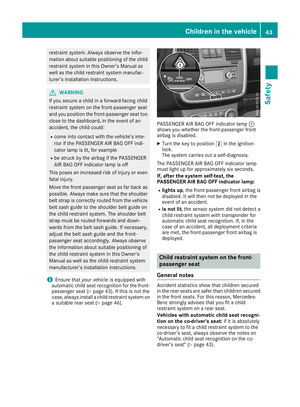 46
46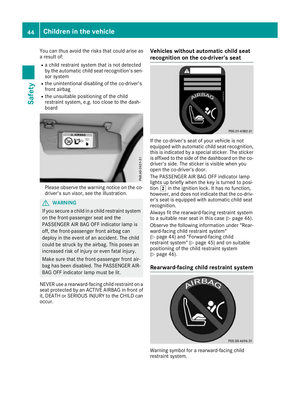 47
47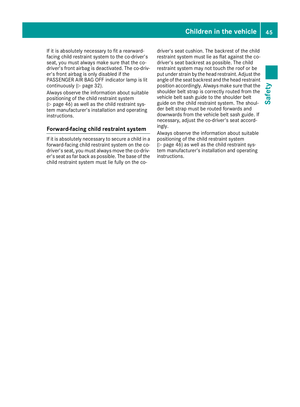 48
48 49
49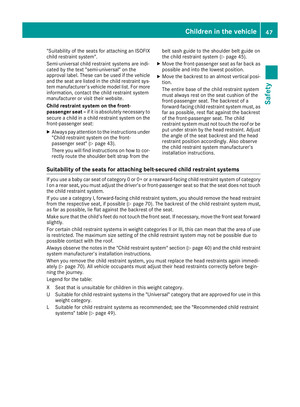 50
50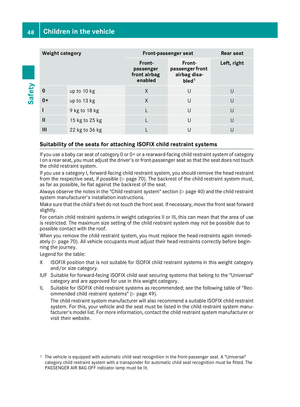 51
51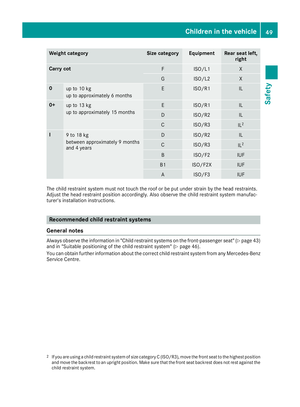 52
52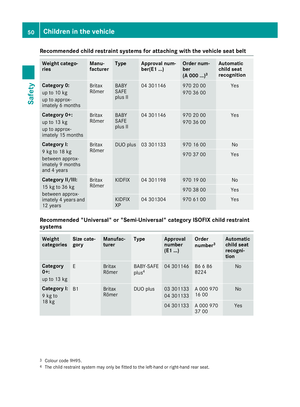 53
53 54
54 55
55 56
56 57
57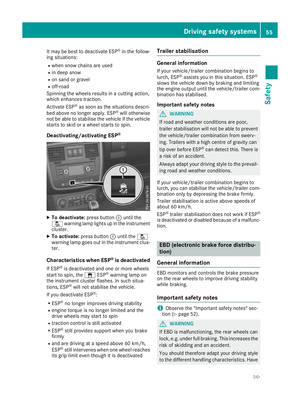 58
58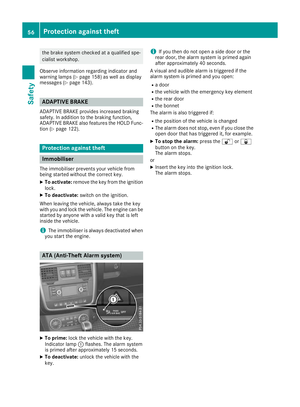 59
59 60
60 61
61 62
62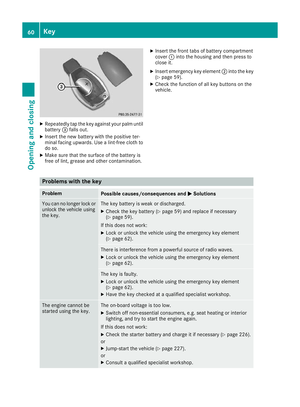 63
63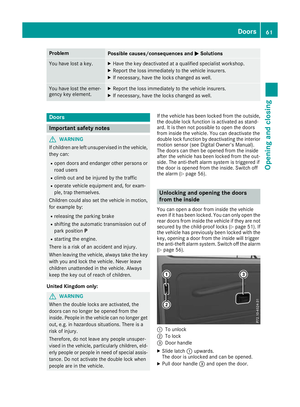 64
64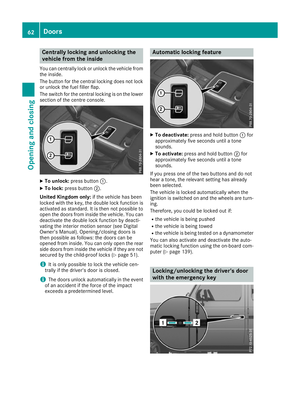 65
65 66
66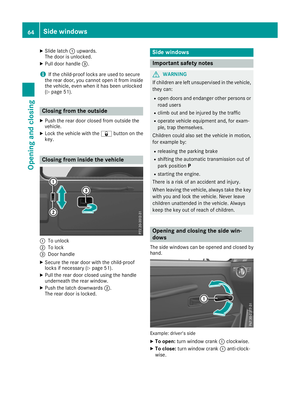 67
67 68
68 69
69 70
70 71
71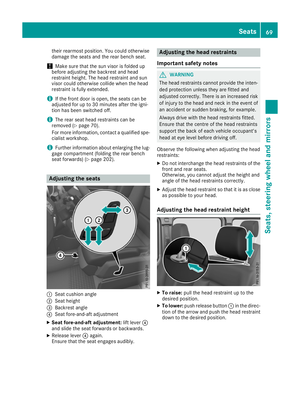 72
72 73
73 74
74 75
75 76
76 77
77 78
78 79
79 80
80 81
81 82
82 83
83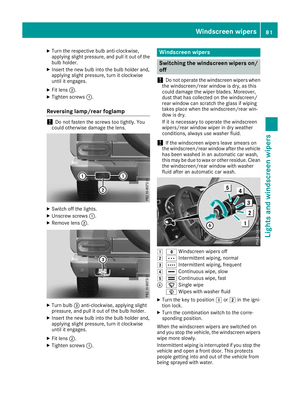 84
84 85
85 86
86 87
87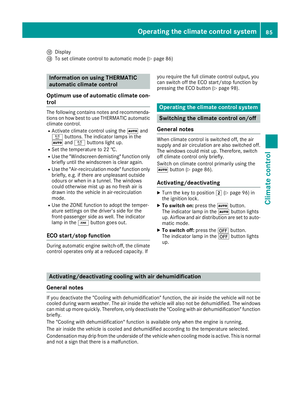 88
88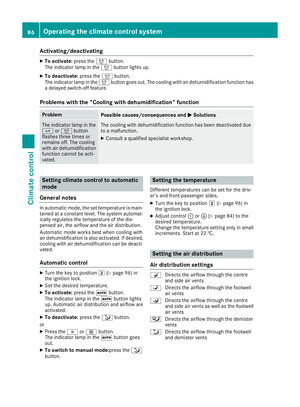 89
89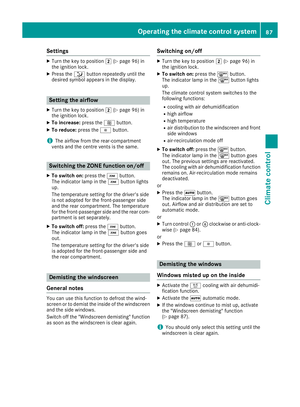 90
90 91
91 92
92 93
93 94
94 95
95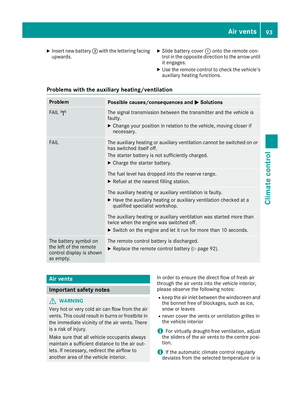 96
96 97
97 98
98 99
99 100
100 101
101 102
102 103
103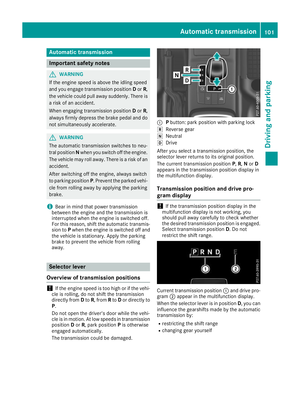 104
104 105
105 106
106 107
107 108
108 109
109 110
110 111
111 112
112 113
113 114
114 115
115 116
116 117
117 118
118 119
119 120
120 121
121 122
122 123
123 124
124 125
125 126
126 127
127 128
128 129
129 130
130 131
131 132
132 133
133 134
134 135
135 136
136 137
137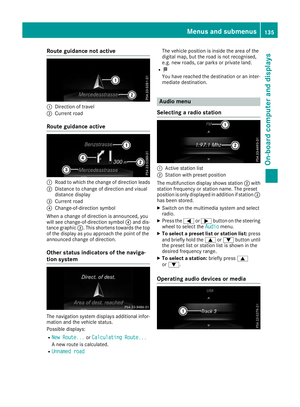 138
138 139
139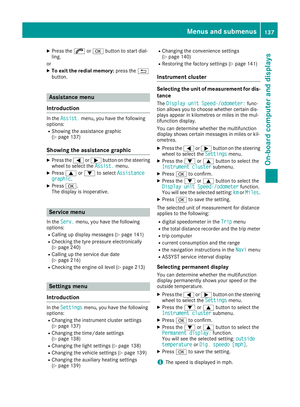 140
140 141
141 142
142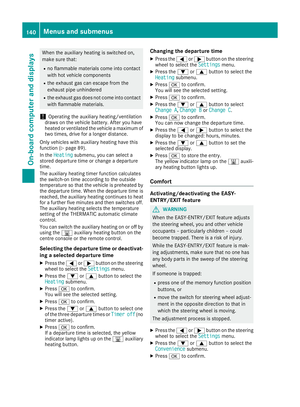 143
143 144
144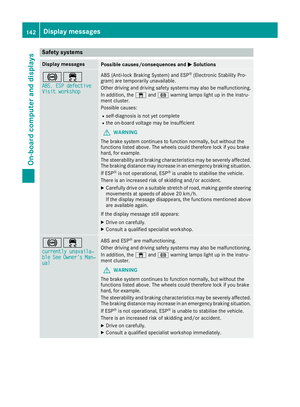 145
145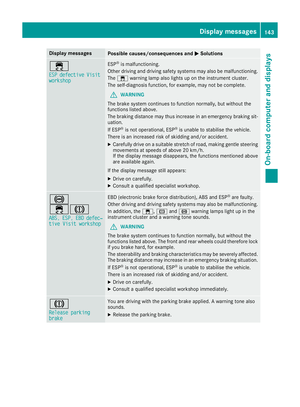 146
146 147
147 148
148 149
149 150
150 151
151 152
152 153
153 154
154 155
155 156
156 157
157 158
158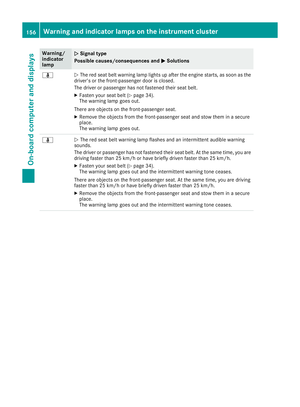 159
159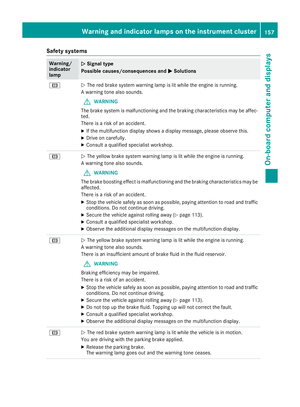 160
160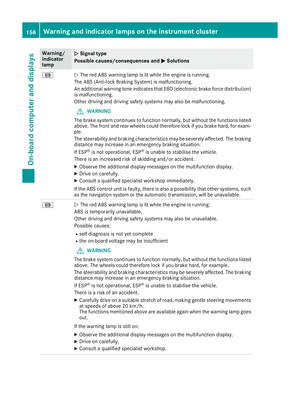 161
161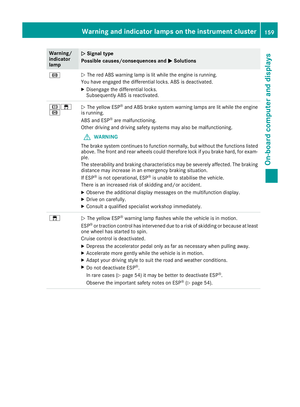 162
162 163
163 164
164 165
165 166
166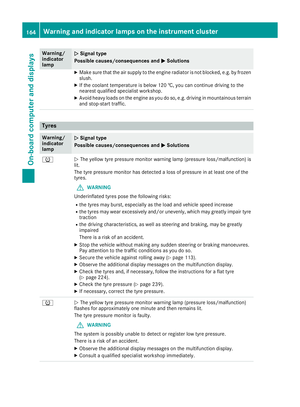 167
167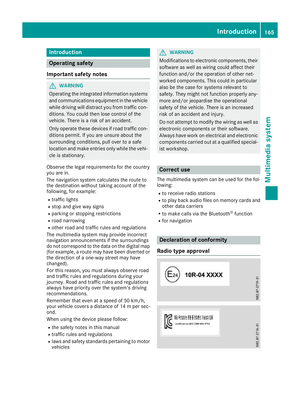 168
168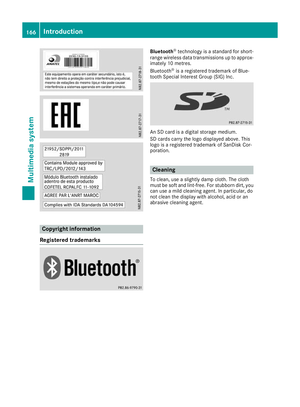 169
169 170
170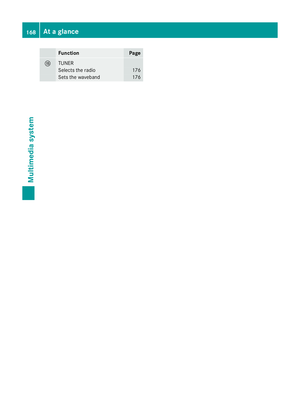 171
171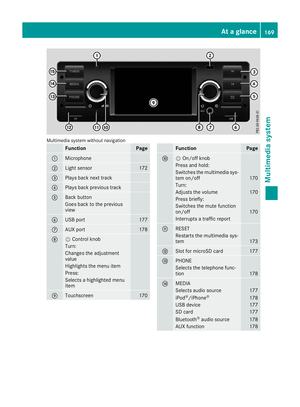 172
172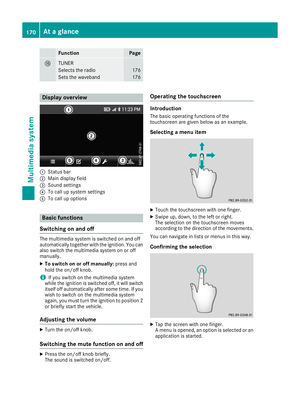 173
173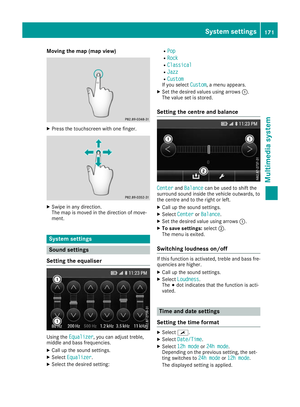 174
174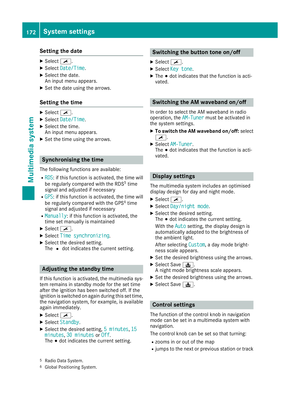 175
175 176
176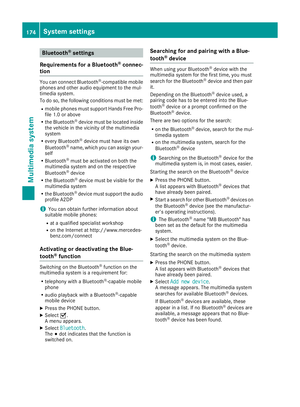 177
177 178
178 179
179 180
180 181
181 182
182 183
183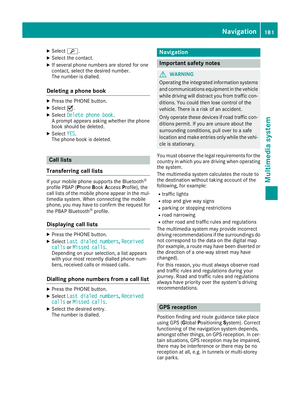 184
184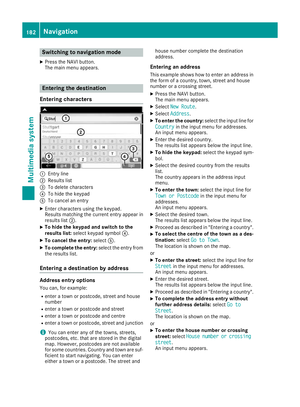 185
185 186
186 187
187 188
188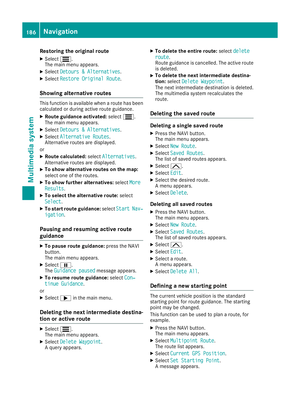 189
189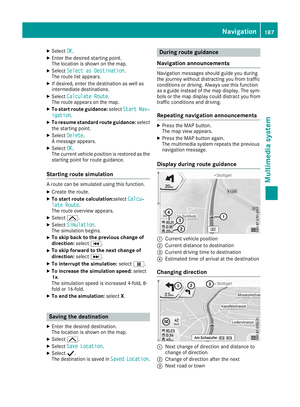 190
190 191
191 192
192 193
193 194
194 195
195 196
196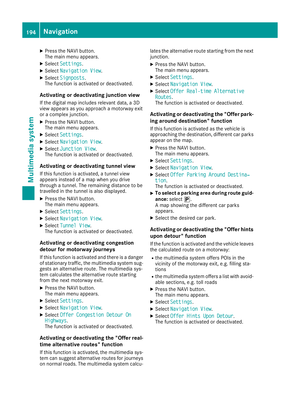 197
197 198
198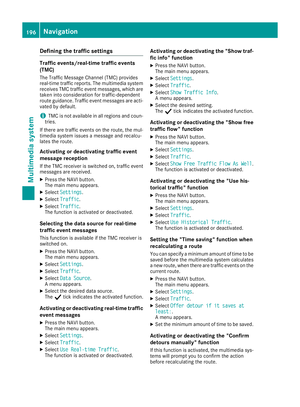 199
199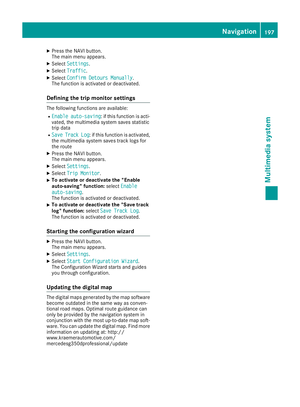 200
200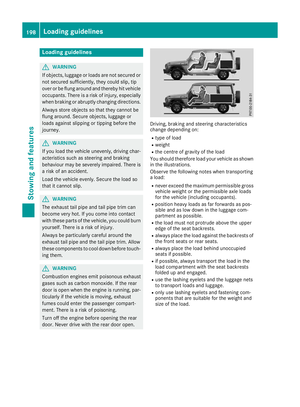 201
201 202
202 203
203 204
204 205
205 206
206 207
207 208
208 209
209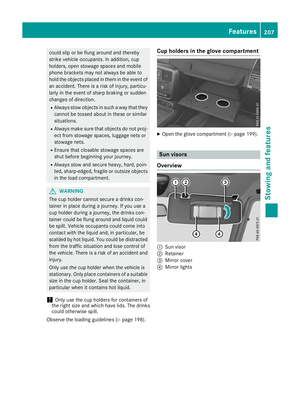 210
210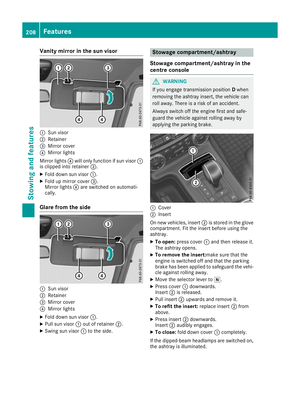 211
211 212
212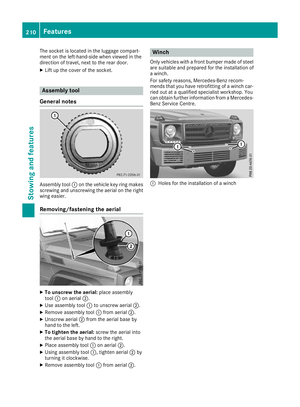 213
213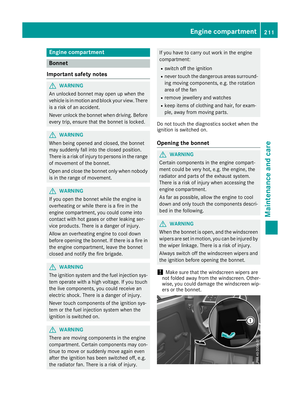 214
214 215
215 216
216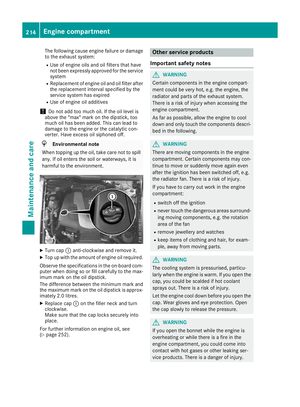 217
217 218
218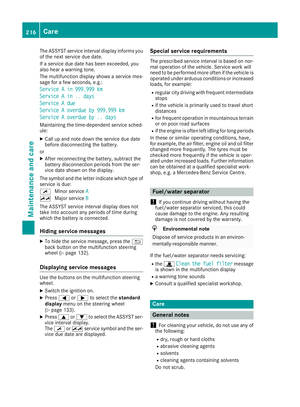 219
219 220
220 221
221 222
222 223
223 224
224 225
225 226
226 227
227 228
228 229
229 230
230 231
231 232
232 233
233 234
234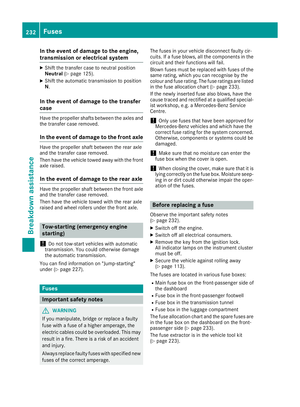 235
235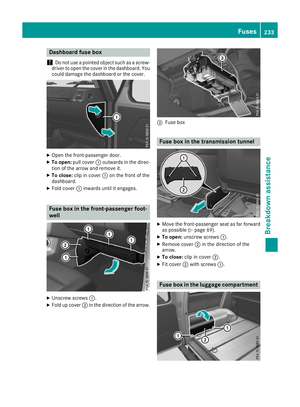 236
236 237
237 238
238 239
239 240
240 241
241 242
242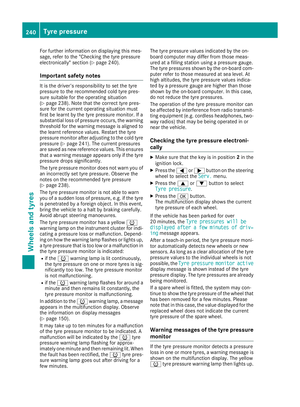 243
243 244
244 245
245 246
246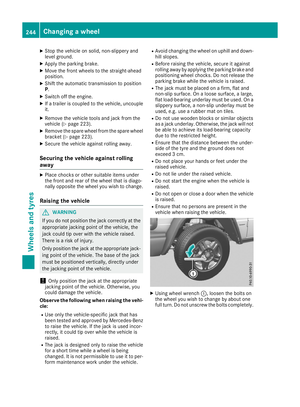 247
247 248
248 249
249 250
250 251
251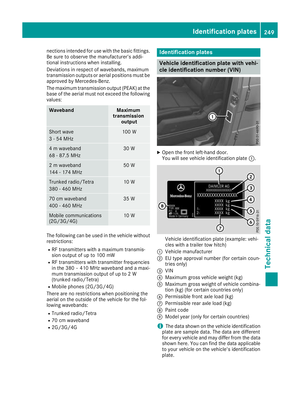 252
252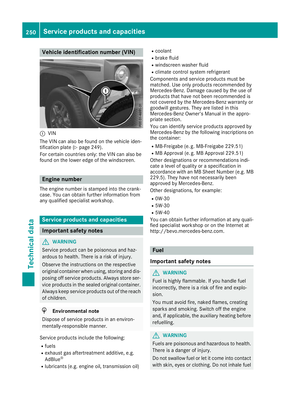 253
253 254
254 255
255 256
256 257
257 258
258 259
259 260
260