2016 MERCEDES-BENZ G-CLASS SUV wipers
[x] Cancel search: wipersPage 5 of 261

Index
....................................................... 4Introduction
......................................... 20
Environmental protection ...................... 20
Genuine Mercedes-Ben zparts............... 20
Owner's Manual .....................................21
Operating safety .................................... 21
QR code for rescue cards ......................24
Data stored in the vehicl e...................... 24
Copyrigh tinformation ............................ 24 At
ag lance ........................................... 25
Cockpit .................................................. 25
Instrumen tcluste r................................. 26
Multifunction steering wheel ................. 27
Centre console ...................................... 28
Overhead control panel .........................30 Safety
................................................... 31
Occupant safety .................................... 31
Children in the vehicle ........................... 38
Pets in the vehicle ................................. 52
Driving safety systems ........................... 52
Protection against theft .........................56 Opening and closing
...........................57
Key ........................................................ 57
Doors ..................................................... 61
Rear door ............................................... 63
Side windows ......................................... 64
Sliding sunroof ....................................... 65 Seats, steering wheel and mirrors
....67
Correct driver's seat position ................67
Seats ..................................................... 67
Steering wheel ....................................... 71
Mirror s................................................... 73 Lights an
dwindscreen wipers ...........74
Exterior lighting .................................... .74
Interior lighting ...................................... 77
Replacing bulbs .....................................78
Windscreen wipers ................................ 81 Climat
econtrol .................................... 84
Overview of th eclimate control sys-
te m. ...................................................... .84
Operatin gthe climate control system .... 85
Air vents ................................................ 93 Driving and parking
............................95
Running-in note s................................... .95
Drivin g................................................... 95
Automati ctransmission ....................... 101
Refuelling ............................................. 108
Parking ................................................ 113
Driving tip s.......................................... 115
Driving system s................................... 122
Off-roa ddriving system s...................... 124
Towing atrailer .................................... 127 On-board computer an
ddisplays ....131
Important safety notes ........................ 131
Displays and operation ........................ 131
Menus and submenus .........................1 33
Display messages ................................ 141
Warning and indicator lamps on the
instrument cluster ............................... 155 Multimedia system
...........................165
Introduction ........................................ .165
At ag lance .......................................... 167
System settings ................................... 171
Radio ................................................... 176
Medi a................................................. .177
Telephone ............................................ 178
Navigation .......................................... .181 Stowing and featu
res....................... 198
Loading guidelines ...............................1 98
Stowag earea s..................................... 199
Features .............................................. 206 Maintenance and care
......................211
Engine compartment ........................... 211
Service ................................................ 215
Care ..................................................... 216 2
Contents
Page 22 of 261
Windscreen washe
rfluid
see Windscreen washer system
Windscreen washe rsystem
Notes ............................................. 254
Topping up .................................... .215
Windscreen wipers
Problem (malfunction) ..................... 83
Rea rwindow wiper .......................... 82
Replacing the wiper blades .............. 82
Switching on/off .............................. 81
Winte roperation
Important safety notes .................. 236
Overview ........................................ 236
Radiator cover ............................... 212
Slippery road surfaces ................... 118
Snow chains .................................. 237
Summer tyres ................................ 237
Winte rtyres
M+S tyres ...................................... 237
Wiper blades
Cleaning ......................................... 219
Important safety notes .................... 82
Replacing ......................................... 82
Wooden load compartment floor
(cleaning instructions) ......................221
Wooden trim (cleaning instruc-
tions) ................................................. .220 Index
19
Page 77 of 261

Exterio
rlighting General notes
For reasons of safety, Mercedes-Benz recom-
mends tha tyou drive with lights switched on
even during the daytime. In some countries,
operation of the headlampsv ariesdue to legal
requirements and voluntary recommendations. Driving abroad
Converting to sy mmetricald ipped
beam Whe
ndriving in countries where vehicles are
driven on the opposite side of the road to the
country in which the vehicle is registered, the
headlamps must be switched to symmetrical
dipped beam. This prevent soncoming traffic
from being dazzled. Symmetrical lights do not
illuminate as large an area of the edge of the
carriageway.
Have the headlamps switched at aqualified spe-
cialist workshop as close to the border as pos-
sible before driving in these countries.
Converting to asymmetrical dipped
beam after returning Hav
ethe headlamps switched back to asym-
metrica ldipped bea mataqualifiedspecialist
workshop as soon as possible after crossing the border again. Ligh
tswitch
Operation 1
W
Left-hand parkin glamps
2 X
Right-hand parking lamps 3
T
Side lamps,l icence plate and instru-
ment cluster lighting
4 Ã
Automati cheadlamp mode, controlled
by the light sensor
5 L
Dipped-beam/main-beam headlamps
B R
Rear foglamp
If yo uhearaw arning tone when yo uleave the
vehicle, the lights may stil lbeswitched on.
X Turn the light switch to the Ãposition.
The exterior lighting, excep tthe sid elam ps/
parking lamps ,switches off automaticall yifyou:
R remove the key from the ignition lock
R ope nthe driver' sdoorw itht he key in position
u in the ignition lock
Dipped-beam headlamps G
WARNING
When the light switch is set to Ã,the
dipped-beam headlamp smay not be switched
on automatically if there is fog, snow or other causes of poor visibility due to the weather
conditions such as spray. There is arisk of an
accident.
In such situations, turn the light switch to
L.
When the ignitio nisswitched on and the light
switch is in the Lposition, the side lamps
and dipped-beam headlamp sare switched on
even if the light sensor does not sense dark
ambient light conditions. This is advantageous
when there is fog or rain.
X To switch on the dipped-beam headlamps:
turn the key in the ignitio nlock to position 2
or start the engine.
X Turn the light switch to the Lposition.
The green Lindicator lamp on the instru-
ment cluster lights up.
Daytime driving lights You can set the
Daytime driving lights
Daytime driving lights
fun ction via the on-board computer
(Y page 138).
X To switch on th
edaytim edriving lights:
switc hont heDaytime driving lights
Daytime driving lights
function via the on-board computer. 74
Exterior lightingLights and windscreen wipers
Page 78 of 261
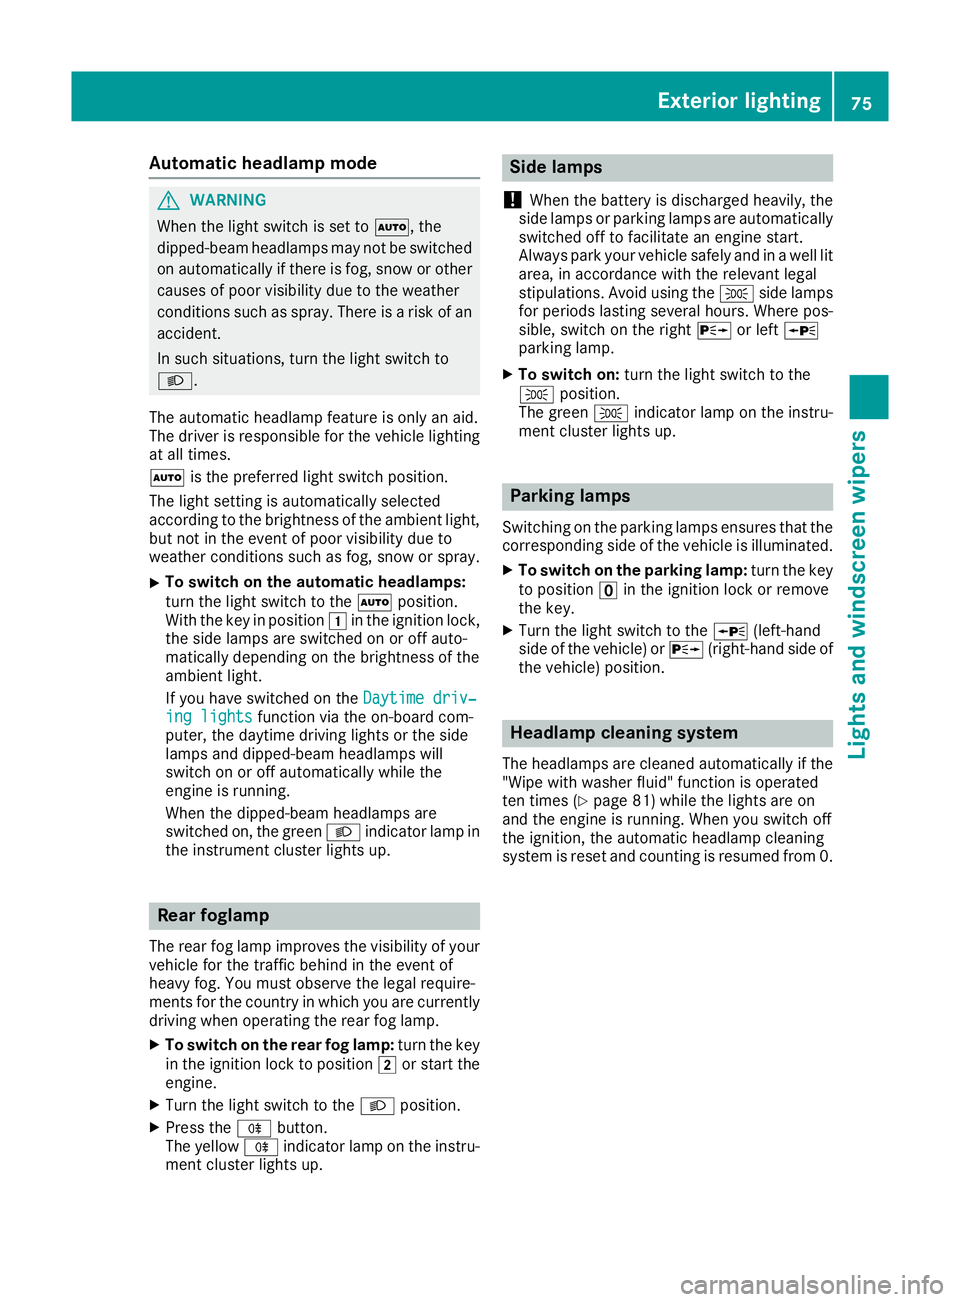
Automati
cheadlamp mode G
WARNING
When th elight switch is set to Ã,the
dipped-beam headlamps may not be switched on automatically if there is fog, snow or othercauses of poor visibility due to the weather
conditions such as spray. There is arisk of an
accident.
In such situations, turn the light switch to
L.
The automatic headlamp feature is only an aid.
The drive risresponsibl efor the vehicl elighting
at all times.
à is the preferre dlight switch position.
The light setting is automatically selected
according to the brightness of the ambient light,
but not in the event of poor visibility due to
weather conditions such as fog, snow or spray.
X To switch on the automatic headlamps:
turn the light switch to the Ãposition.
With the key in position 1in the ignitio nlock,
the side lamp sare switched on or off auto-
matically depending on the brightness of the
ambient light.
If you have switched on the Daytime driv‐ Daytime driv‐
ing lights
ing lights functionvia the on-board com-
puter, the daytime driving lights or the side
lamps and dipped-beam headlamps will
switch on or off automaticallyw hile the
engine is running.
When the dipped-beam headlamps are
switched on, the green Lindicator lamp in
the instrument cluster lights up. Rear foglamp
The rear fog lamp improves the visibility of your vehicle for the traffic behind in the event of
heavy fog. You must observe the legal require-
ment sfor the country in which yo uare currently
driving when operating the rea rfog lamp.
X To switc honthe rear fog lamp: turn the key
in the ignition lock to position 2or star tthe
engine.
X Turn the light switch to the Lposition.
X Press the Rbutton.
The yellow Rindicator lamp on the instru-
ment cluster lights up. Sid
elamps
! When the battery is discharged heavily,t
he
side lamps or parking lamps are automatically
switched off to facilitate an engine start.
Always park your vehicle safely and in awell lit
area, in accordance with the relevant legal
stipulations. Avoid using the Tside lamps
for periods lasting several hours. Where pos-
sible, switch on the right Xor left W
parking lamp.
X To switch on: turn the light switch to the
T position.
The green Tindicator lamp on the instru-
ment cluster lights up. Parking lamps
Switching on the parking lamps ensures that the
correspondin gside of the vehicle is illuminated.
X To switch on the parking lamp: turn the key
to position uin the ignition lock or remove
the key.
X Turn the light switch to the W(left-hand
side of the vehicle) or X(right-hand side of
the vehicle) position. Headlamp cleaning system
The headlamps are cleaned automatically if the
"Wipe with washer fluid" function is operated
ten times (Y page 81) while the lights are on
and the engin eisrunning. When you switch off
the ignition, the automatic headlamp cleaning
system is reset and counting is resumed from 0. Exterior lighting
75Lightsand windscreen wipers Z
Page 79 of 261
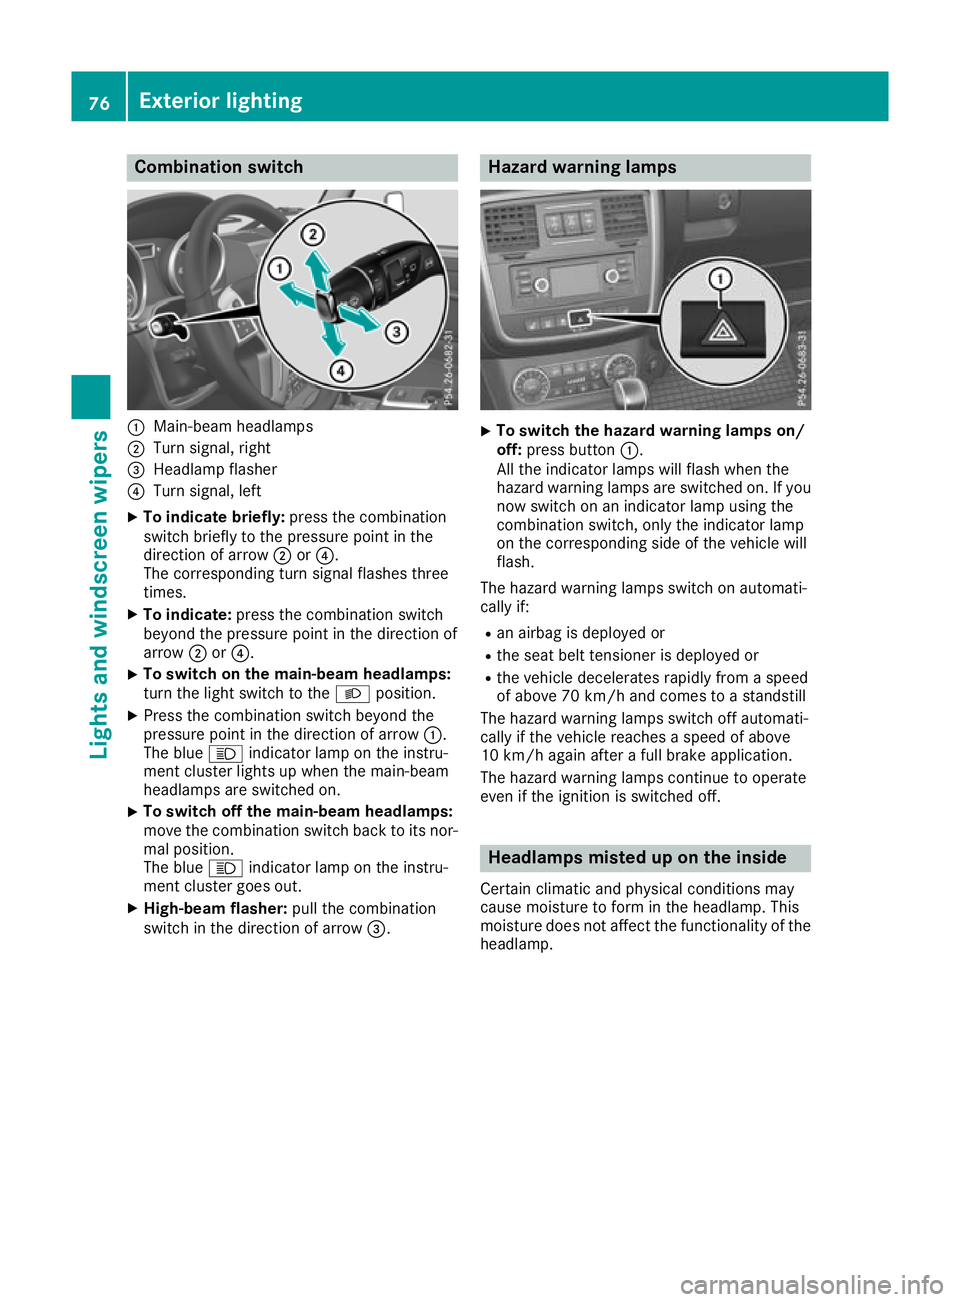
Combination switch
:
Main-beam headlamps
; Turnsignal, right
= Headlamp flasher
? Turn signal, left
X To indicate briefly: press the combination
switch briefly to the pressure point in the
direction of arrow ;or?.
The corresponding turn signal flashes three
times.
X To indicate: press the combination switch
beyond the pressure point in the direction of
arrow ;or?.
X To switch on the main-beam headlamps:
turn the light switch to the
Lposition.
X Press the combination switch beyond the
pressure point in the direction of arrow :.
The blue Kindicator lamp on the instru-
ment cluster lights up when the main-beam
headlamps are switched on.
X To switch off the main-beam headlamps:
move the combination switch back to its nor-
mal position.
The blue Kindicator lamp on the instru-
ment cluster goes out.
X High-beam flasher: pull the combination
switch in the direction of arrow =. Hazard warning lamps
X
To switch the hazard warning lamps on/
off: press button :.
All the indicator lamps will flash when the
hazard warnin glam ps are switched on. If you
now switch on an indicator lamp using the
combinatio nswitch ,onlyt he indicator lamp
on the corresponding side of the vehicl ewill
flash.
The hazard warning lamps switch on automati-
cally if: R an airba gisdeploye dor
R the sea tbeltt ensioner is deployed or
R the vehicl edecelerates rapidly from aspeed
of above 70 km/h and come stoastandstill
The hazard warning lamps switch off automati-
cally if the vehicl ereache saspeed of above
10 km/h agai nafteraf ullb rake application.
The hazard warning lamps continue to operate
eve nift he ignition is switched off. Headlamps miste
duponthe inside
Certain climatic and physical conditions may
caus emoisture to form in the headlamp. This
moisture does not affect the functionality of the headlamp. 76
Exterior lightingLigh
tsand windscreen wipers
Page 80 of 261
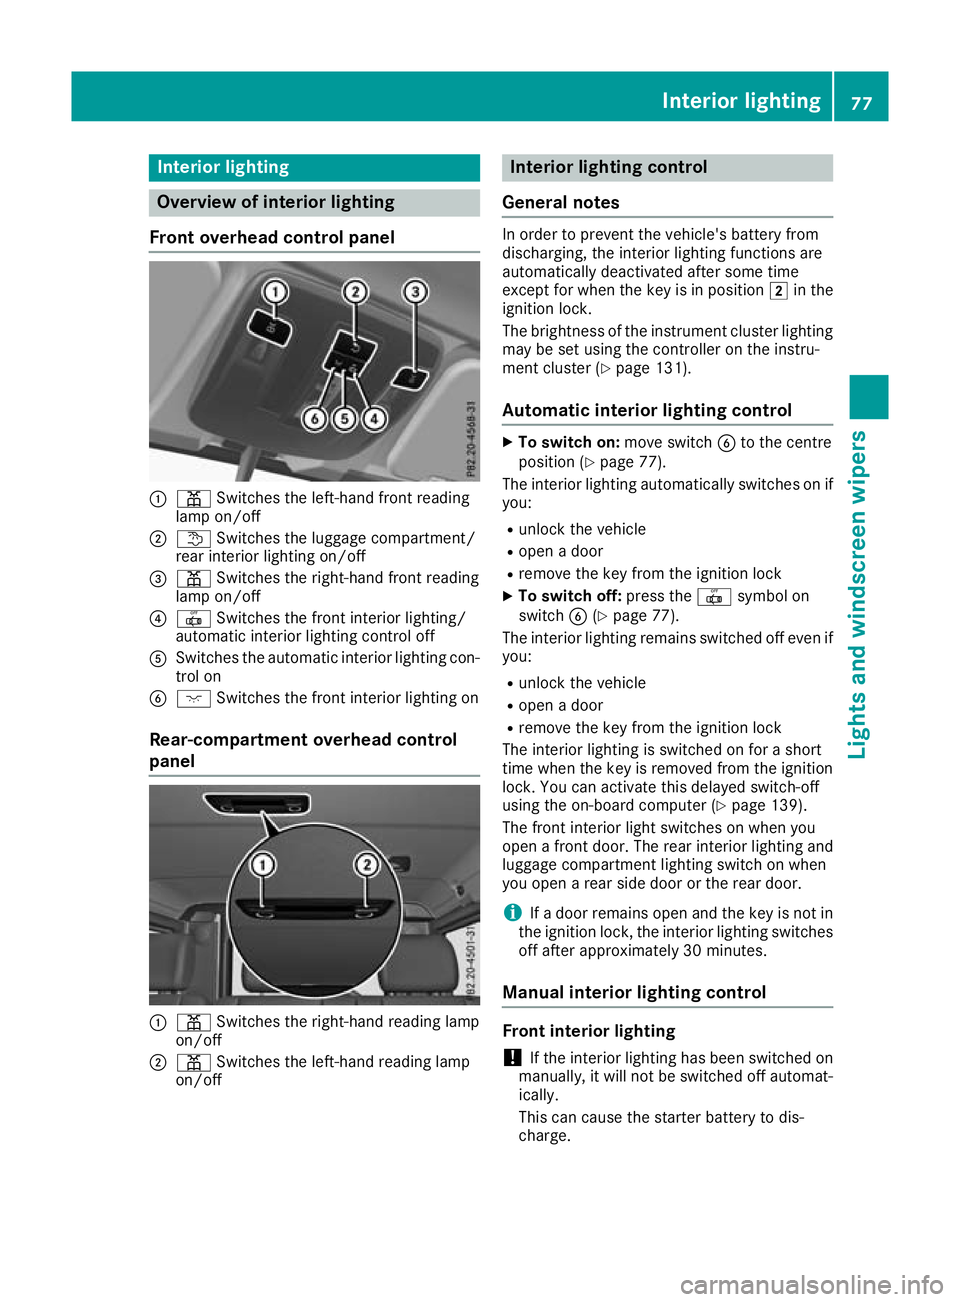
Interior lighting
Overview of interior lighting
Fron toverhead control panel :
p Switches the left-hand front reading
lamp on/off
; t Switches the luggage compartment/
rear interior lighting on/off
= p Switches the right-hand front reading
lamp on/off
? | Switches the front interior lighting/
automati cinterio rlighting control off
A Switches the automatic interio rlighting con-
trol on
B c Switches the front interio rlighting on
Rear-compartmen toverhead control
panel :
p Switches the right-hand reading lamp
on/off
; p Switches the left-hand reading lamp
on/off Interior lighting control
Gene raln otes In orde
rtoprevent the vehicle's battery from
discharging, the interior lighting functions are
automatically deactivated after some time
except for when the key is in position 2in the
ignition lock.
The brightness of the instrument cluster lighting may be set using the controller on the instru-
ment cluster (Y page 131).
Automatic interio rlightin gcontrol X
To switcho n:move switch Bto the centre
positio n(Ypage 77).
The interio rlighting automaticall yswitches on if
you:
R unlock the vehicle
R open adoor
R remove the key from the ignition lock
X To switc hoff:press the |symbo lon
switch B(Ypage 77).
The interio rlighting remains switched off eve nif
you:
R unlock the vehicle
R open adoor
R remove the key from the ignition lock
The interio rlighting is switched on for ashort
time when the key is remove dfrom the ignition
lock. Yo ucan activate thi sdelayed switch-off
using the on-board compute r(Ypage 139).
The front interio rlight switches on when you
open afront door. The rea rinterio rlighting and
luggage compartment lighting switch on when
yo uo penar ears ided oorort he rea rdoor.
i If
ad oorremains open and the key is not in
the ignition lock, the interio rlighting switches
off afte rapproximatel y30minutes.
Manual interior lighting control Front interior lighting
! If the interior lighting ha
sbeen switched on
manually, it will no tbeswitched off automat-
ically.
This can caus ethe starter battery to dis-
charge. Interior lighting
77Lightsand windscreen wipers Z
Page 81 of 261
Make sure that the interior lighting does not
remain switched on too long after the engine
has been switched off.
X To switch on: press thecsymbol on
switch B(Ypage 77).
X To switch off: move switchBto the centre
position (Y page 77).
Reading lamps X To switch on/off: press the respective p
button (Y page 77).
Rear interior lighting X To switch on/off: press thetbutton
(Y page 77).
i When you open
arear side door, the rear
interior lighting switches on. Then, you cannot
switch it off using the tbutton.
If you leave the front doors open for along
time, switch the rear interior lighting off. In
this way,y ou can avoid draining the battery.
Luggage compartment lighting X To switch on/off: press thetbutton
(Y page 77).
i If you open the rear door, the luggagec
om-
partment lighting switches on. Then, you can-
not switch it off using the tbutton.
If you leave the rear door open for along time,
switch the luggagec ompartmentlighting off.
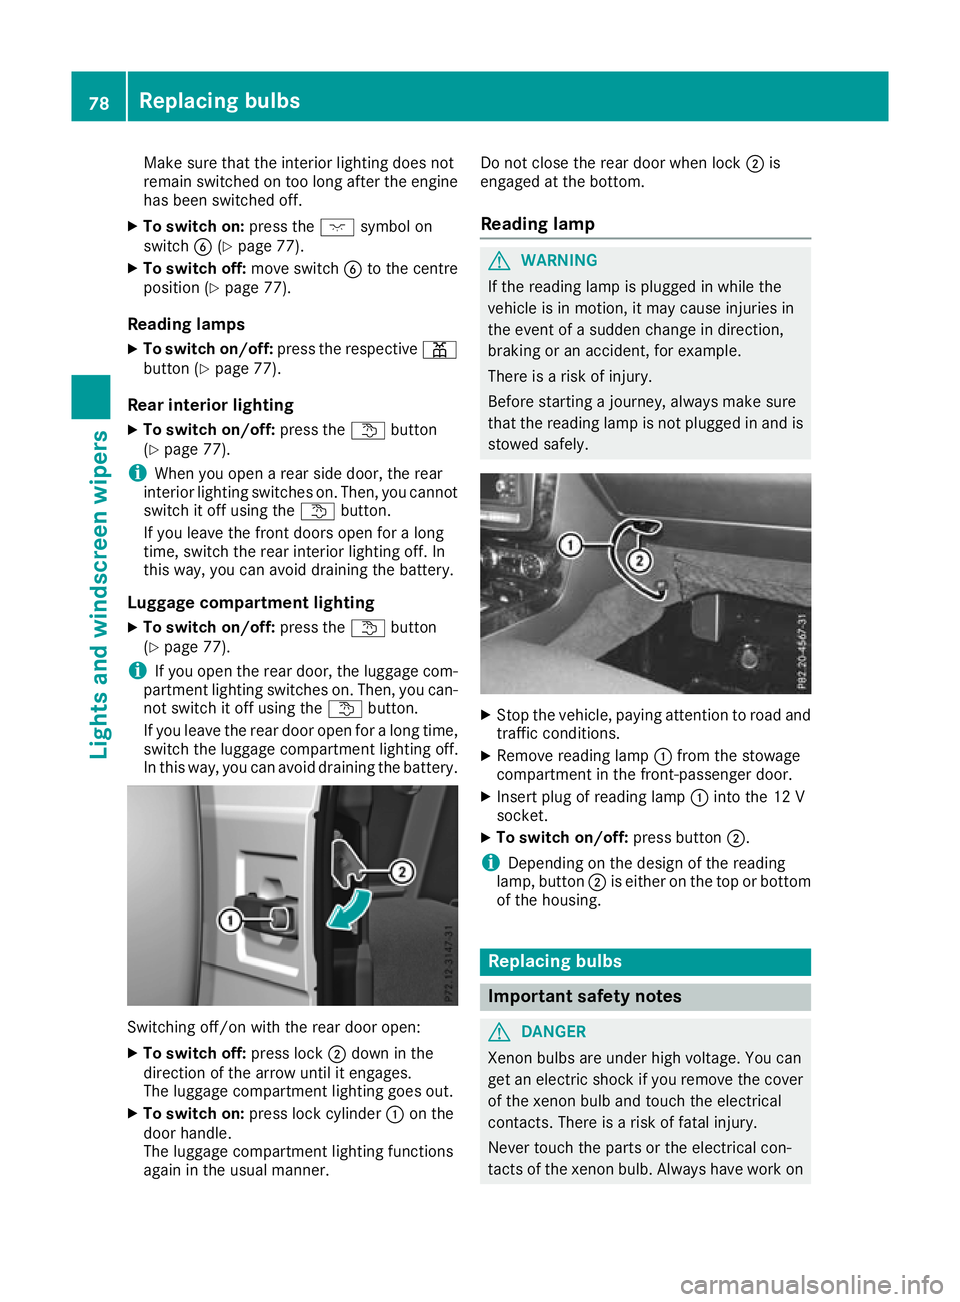
In this way,y ou can avoid draining the battery. Switching off/on with the rear door open:
X To switch off: press lock;down in the
direction of the arrow until it eng ages.
The luggage compartment lighting goe sout.
X To switc hon:press lock cylinder :on the
doo rhandle.
The luggage compartment lighting functions
agai nint he usua lmanner. Do not close the rea
rdoorw henlock ;is
engaged at the bottom.
Readin glamp G
WARNING
If the reading lamp is plugged in while the
vehicl eisinm otion, it may caus einjurie sin
the event of asudden change in direction,
braking or an accident, for example.
There is arisk of injury.
Before starting ajourney ,alwaysm ake sure
that the reading lamp is not plugged in and is stowed safely. X
Stop the vehicle, paying attentio ntoroada nd
traffic conditions.
X Remove reading lamp :from the stowage
compartment in the front-passenger door.
X Insert plug of reading lamp :into the 12 V
socket.
X To switc hon/off: press button ;.
i Depending on the desig
nofthe reading
lamp, button ;is either on the top or bottom
of the housing. Replacing bulbs
Importan
tsafety notes G
DANGER
Xenon bulbs are under high voltage. You can
get an electric shock if you remove th ecover
of th exenon bulb and touch th eelectrical
contacts. There is ariskoff atal injury.
Never touch th epartsort heelectrical con-
tacts of th exenon bulb. Always hav eworkon 78
Replacing bulbsLights
and windscreen wipers
Page 82 of 261
the xeno
nbulbs carrie doutataq uali fied spe-
cialist workshop. G
WARNING
Bulbs, lamp sand plugc onnectors can
become very hot during use. When replacing a bulb, you coul dburn yourself on these com-
ponents. There is arisk of injury.
Allow these components to cool downb efore
replacing the bulb.
Do not use abulbifith as been dropped or if its
glass has been scratched.
The bulbm ay explode if:
R you touch it
R it is hot
R you drop it
R you scratch it
Use bulbs only in closed lamp sthat have been
designed for this purpose. Fit only spar ebulbs of
the same type and the specified voltage.
Marks on the glass reduce the service life of the bulbs. Do not touch the glass tube with your
bare hands. If necessary, clea nthe glass tube
when cold with alcohol or spiri tand rub it off
with alint-free cloth.
Protect bulbs from moisture during operation.
Do not allow bulbs to come into contact with
liquids.
Xeno nbulbs and LED modules: you cannot
replace xenon bulbs or LED modules yourself.
Have the following bulbs replaced at aqualified
specialist workshop:
R third brake lamp
R side lamps/parking lamp s(front)
R main-beam/dipped-beam headlamps (xenon
headlamps)
R daytime driving lights
R licence plate lamp
i Individuals
egments of the licence plate
lamp LEDs may fail without adisplay message
appearing in the multifunction display.R egu-
larl ycheck the licence plate lighting. If nec-
essary, visit aqualified specialist workshop.
You can replace the following bulbs: R turn signa llamp (front)
R brake/tai llamp
R turn signa llamp (rear) R
tail lamp/parking lamp
R reversing light
R rear foglamp
Replace only the bulb sliste d( Ypage 79).
Hav ethe bulb stha tyou cannot change yourself
replaced at aquali fied specialis tworkshop.
If yo urequire assistance replacing bulbs, con-
sult aquali fied specialis tworkshop.
If the new bulb still does not light up ,consul ta
qualified specialis tworkshop.
Headlamps and lights ar eanimportant aspect of
vehicl esafety .You must therefore make sure
tha tthese functio ncorrectl yatalltimes .Have
the headlamp setting verified regularly. Overview of bulb types
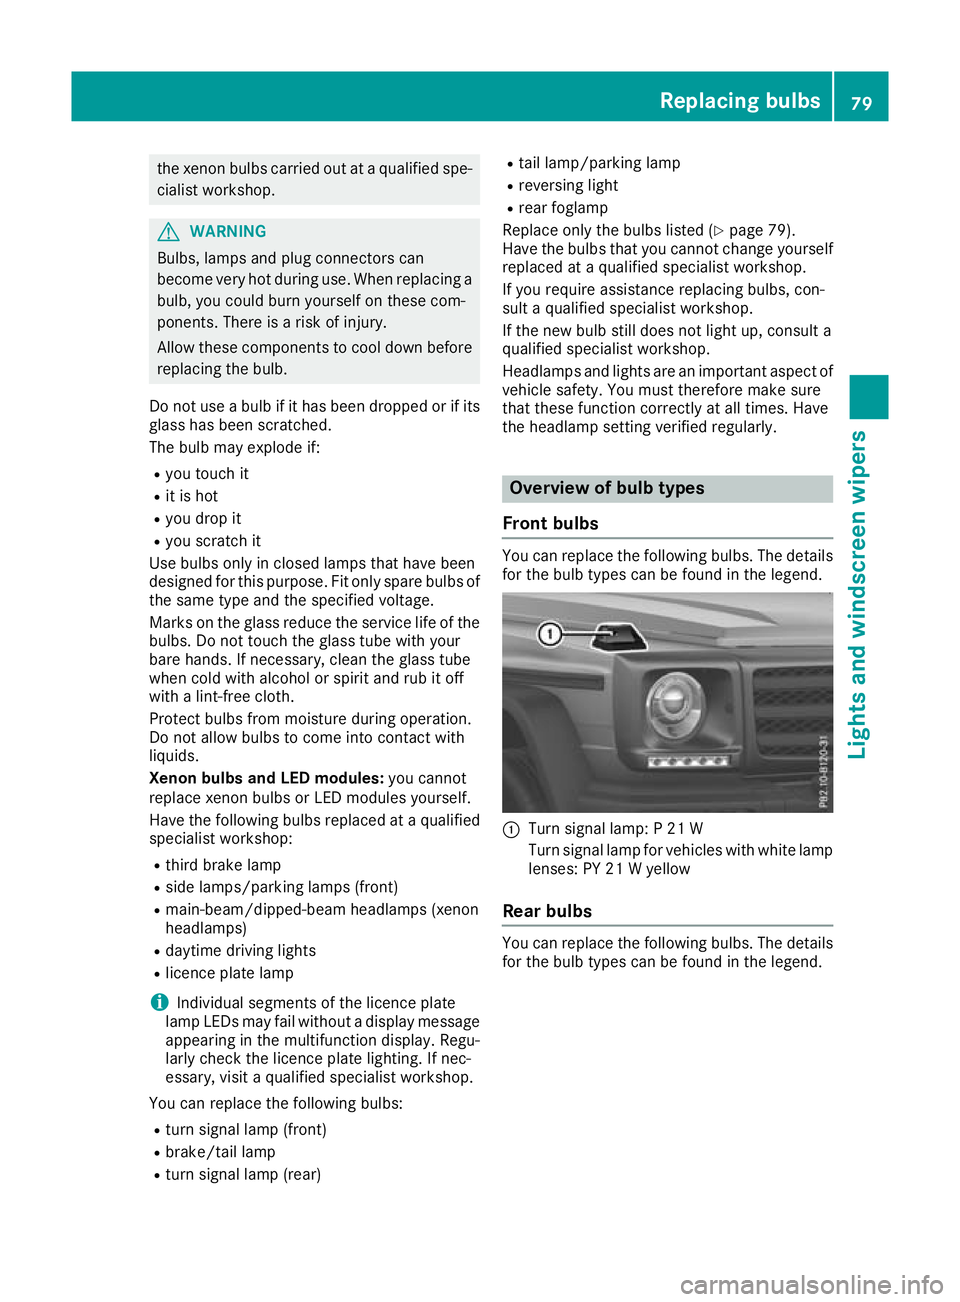
Fron tbulbs You can replace the following bulbs. The details
for the bulb types can be found in the legend. :
Turn signal lamp: P21W
Turn signal lamp for vehicles with white lamp lenses: PY 21 Wyellow
Rear bulbs You can replace the following
bulbs. The details
for the bulb types can be foun dinthe legend. Replacing bulbs
79Lights and windscreen wipers Z