2016 MERCEDES-BENZ G-CLASS SUV brake pads
[x] Cancel search: brake padsPage 11 of 261
Door
Automati clocking (on-boar dcom-
puter) ............................................ .139
Automatic locking (switch) .............. .62
Central locking/unlocking (key) ...... 57
Display message ............................ 153
Emergency lockin g........................... 62
Emergenc yunlocking ....................... 62
Important safety note s.................... 61
Opening (fro mthe inside )................ 61
Doors
Overview .......................................... 61
Drive program
Displa y........................................... 101
Drive programs
Automati ctransmissio n................. 104
Driver's door
see Door
Driver's seat
Displa ymessage ............................ 154
Drivin gabroad
Symmetrical dipped beam ............... 74
Drivin gdownhill ................................ 122
Drivin ginm ountainous terrain
Approach/departure angle ............ 121
Driving downhil l............................. 122
Gradient-climbing capability
(maximum) ..................................... 122
Drivin goff-road
Driving downhil l............................. 122
see Off-road driving
Drivin gonfloodedroads .................. 117
Drivin gsafety system
EBD (electroni cbrake force distri-
bution) ............................................. 55
Drivin gsafety systems
ABS (Anti-lock Braking System) ....... 52
ADAPTIV EBRAK E............................. 56
Adaptive brake lights ....................... 53
BAS (Brake Assist System) .............. 53
ESP ®
(Electronic Stability Pro-
gram) ............................................... 53
Important safety guideline s............. 52
Overview .......................................... 52
Drivin gsystems
Displa ymessage ............................ 149
HOLD function ............................... 122 Driving tips
Aquaplaning ................................... 117
Automatic transmi ssion ................. 103
Brakes .......................................... .115
Downhill gradient ........................... 116
Driving abroad ................................. 74
Driving in winter ............................ .118
Driving on flooded road s................ 117
Driving on sand .............................. 121
Driving on wet road s...................... 117
Driving ove robstacles ................... 121
Fue l................................................ 115
Genera l.......................................... 115
Gravel roads .................................. 121
Icy roa dsurfaces ........................... 118
Important safety notes .................... 95
Limite dbraking efficiency on sal-
ted roads ....................................... 116
New brake disks ............................ 116
New brake pads/linings ................ 116
Off-road driving .............................. 119
Off-road fording ............................. 117
Pulling away on slippery surfaces .. 117
Running-i ntips. ................................ 95
Snow chains .................................. 237
Subjecting brakes to aloa d. .......... 116
Symmetrical dipped beam ............... 74
The first 1500 km ............................ 95
Towing atraile r.............................. 128
Travelling uphill .............................. 121
Tyre ruts ........................................ 121
Wet roa dsurface ........................... 116 E
EASY-ENTRY feature Activating/deactivatin g................. 140
Function/notes ................................ 72
EASY-EXI Tfeature
Function/notes ................................ 72
Switching on/off ........................... 140
EBD (electronic brake force distri-
bution)
Display message ............................ 143
Function/notes ................................ 55
ECOs tart/stop function
Deactivating/activating ................... 98
General information ......................... 97 8
Index
Page 98 of 261

Running-i
nnotes Importan
tsafety notes
In certain driving and driving safet ysystems ,the
sensor sadjust automatically while acertai ndis-
tance is bein gdriven after th evehicl ehas been
delivere dorafter repairs .Full system effective-
ness is no treached until th eend of this teach-in
process.
Brake pads/lining sand disc stha teither are new
or have been replace dachiev eoptimum braking
effec tonlya fter several hundre dkilometres of
driving .Compensat efor th ereduce dbraking
effec tbya pplyin ggreate rforce to th ebrake
pedal. Th
ef irs t1 500km
The mor eyou trea tthe engine with sufficient
car eatt he start, the mor esatisfie dyou will be
with the engine performance later on.
R Driv eatv aryingvehicl espeeds and engine
speeds for the first 1500 km
R Avoi doverstraining the vehicl eduringt his
period, e.g .drivin gatf ullt hrottle
R When shifting gear smanually, shift up in good
time ,befor et he rev counter needl ereaches
Ô of the wa ytothe red area of the rev counter
display
R Do not shift down agearm anuall yino rder to
brake
R Try to avoi ddepressing the accelerator pedal
beyond the pressure point (kickdown)
After 1500 km ,you maygradually bring the
vehicl euptof ullr oa da nd engine speeds.
Yo us houl dalsoo bserve these note sonrunning-
in if the engine or parts of the drive train on your vehicl ehaveb eenr eplaced.
Alway sobserve the maximum permissible
speed. Driving
Importan
tsafety notes G
WARNING
Objectsint he driver's footwel lcan impede
peda ltravel or block apeda lwhich is depressed. This jeopardises safe operatio
nof
the vehicle. There is arisk of an accident.
Stow all objects in the vehicle safely, so that
they cannot reach the driver' sfootwell. Make
sure the floormat sand carpet sare properly
secured so that they cannot slip and obstruct the pedals. Do not lay several floormat sor
carpet sontop of one another. G
WARNING
Unsuitable footwear can hinder correct usage of the pedals, e.g.:
R shoe swith thick soles
R shoes with high heels
R slippers
There is arisk of an accident.
Wears uitable footwea rtoensure correct
usage of the pedals. G
WARNING
If you switch off the ignitio nwhile driving,
safety-relevant functions are only available
with limitations, or not at all.T his couldaffect,
for example, the power steering and the brake
boosting effect. You willr equire considerably
more effort to steer and brake. There is arisk
of an accident.
Do not switch off the ignitio nwhile driving. G
WARNING
If the parking brake has not been fully
released when driving, the parking brake can:
R overheat and caus eafire
R lose its hold function.
There is arisk of fire and an accident. Release
the parking brake full ybefore driving off.
! Warm up the engine quickly. Do not use the
engine's full performance until it has reached operating temperature.
Only set the automatic transmission to the
respective drive positions when the vehicl eis
stationary.
Where possible,a voids pinning the drive
wheels when pulling awayons lippery roads.
Otherwise, you coul ddamage the drive train. Driving
95Drivingand parking Z
Page 119 of 261
G
WARNING
If you select the LOW RANGE off-road gearon as lippery road surface, the wheels coul dlose
traction:
R if you release the accelerator peda lwhen
the vehicl eisinmotion
R if Off-road ABS intervenes when braking
If the wheels lose traction, it willnol onger be
possible to steer the vehicle. This increases
the risk of skidding and having an accident.
Never select the LOW RANGE off-road gear
when driving on slippery road surfaces.
Information on the parking brake (Y page114).
Downhill gradients Shift to
alower gearing oodt ime on long and
stee pdownhil lgradients.
Take particula rnote of this when driving alad en
vehicl eand when towing atrailer.
Thi sw illu se the braking effect of the engine, so
less braking will be required to maintai nthe
vehicl espeed. Thi srelieves the load on the
brake system and prevents the brakes from
overheating and wearing too quickly.
Heav yand light loads G
WARNING
The braking system can overheat if you leave you rfoot on the brake peda lwhile driving.
This increases the braking distance and could
even caus ethe braking system to fail .There is
ar isk of an accident.
Never use the brake peda lasafootrest. Do
not simultaneously depress both the brake
peda land the accelerator peda lwhile driving.
! Depressing the brake peda
lconstantly
results in excessive and premature wearto
the brake pads.
If heavy demands are made on the brakes ,do
not park the vehicl eimmediately. Drive on for a
short while. This allows the airflow to cool the
brakes more quickly.
If the brakes have been used only moderately,
you should occasionall ytest their effectiveness.
To do this, brake more firmly from ahigher speed while paying attention to the traffic con-
ditions .This improves the grip of the brakes.
Wet road surfaces If driving in heavy rain for
aprolonge dperiod of
time withou tbraking, there may be adelayed
reaction from the brakes when braking for the
first time. This may also occur after the vehicle
has been washed.
You have to depres sthe brake pedalm ore
firmly .Maintai nagreater distance from the
vehicle in front.
After driving on awet road or having the vehicle
washed, brake firmly whilep aying attention to
the traffic conditions. This willw arm up the
brake discs, thereby drying them more quickly
and protecting them against corrosion.
Limited braking performance on salt-
treated roads If you drive on salt-treated roads,
alayer of salt
may form on the brake discs and pads.T his can
increase the braking distance considerably.
R In order to prevent any salt build-up,a pplythe
brakes occasionally whilep aying attention to
the traffic conditions.
R Carefullyd epressthe brake pedalatt he end
of the journey and when starting the next
journey.
R Maintai namuch greater distance to the vehi-
cle in front.
New brake discs and brake pads/
linings Brake pads/linings and discs that either are new
or have been replaced achieve optimum braking
effect only after several hundred kilometres of
driving. Compensate for the reduced braking
effect by applying greater force to the brake
pedal.
For safety reasons, Mercedes-Benz recom-
mends only fittingt he following brake discs and
brake pads/linings:
R brake discs that hav ebeena pproved by
Mercedes-Benz
R brake pads/linings that hav ebeena pproved
by Mercedes-Benz or that are of an equivalent
standard of quality
Other brake discs or brake pads/linings can
compromise the safety of your vehicle. 116
Drivin
gtipsDriving and parking
Page 120 of 261
Alway
sreplace al lbrake discs and brake pads/
lining sonana xleatt he same time .Alway sfit
new brake pads/lining swhenr eplacing brake
discs.
The vehicl eisequippe dwithl ightweight brake
discs to which the whee lassembl ywithr im and
threaded connectio nism atched.
The us eofbrake discs othe rtha nt hose
approved by Mercedes-Benz ma yalter track
width and is subject to approval, if applicable.
Whe nhandling the brake discs, shock-type
load ssuchast hoseexperience dwhenc hanging
wheels ,can lead to areduction in comfort when
driving with lightweight brake discs. Avoid
shock-typ eloads on the lightweight brake discs,
particularly on the brake plate. Driving on slippe
rysurfaces
! Where possible, avoid spinnin
gthe drive
wheels when pulling away on slipper yroads.
You could otherwise damage th edrive train.
Thi stypeofd amage is no tcovered by the
term soft heMercedes-Ben zwarranty.
X Engage th edifferential locks if necessary
(Y page 126). Drivin
gonw et roads
Aquaplaning If wate
rhas accumulated to acertain depth on
the road surface, there is adanger of aquaplan-
ing occurring, even if:
R you are driving at low speeds
R the tyres have adequate tread depth
For this reason, drive in the following manner in the event of heavy rain or in conditions in which
aquaplaning can occur:
R lowery ours peed
R avoid tyre ruts
R avoid sudden steering movements
R brake carefully
Drivin gonflooded roads !
Bear in mind that vehicles travelling in front
or in the opposite direction create waves. This may cause the maximum permissibl ewater
depth to be exceeded. These notes must be observed under all cir-
cumstances. You could otherwise damage
the engine, the electronics or the transmis-
sion.
If you must drive on stretches of road on which
water has collected, please bear in mind that:
R in the case of standing water, the water level
must be no higher than the lower edge of the
vehicle body
R you should drive no faster than walking pace
Off-road fording !
Under no circumstances should you accel-
erate before entering the water. The bow
wave could cause water to enter and damage
the engine and neighbouring assemblies.
! Do not open any of the vehicle's doors while
fording. Otherwise, water could get into the
vehicle interior and damage the vehicle's
electronics and interior equipment.
i You may only drive through fresh water.
R Observe the safety notes (Y page 119) and
general notes (Y page 119) on driving off-
road
R Establish how deep the water is and the char-
acteristics of the body of water before fording
R Switch off automatic climate control
R Vehicles with auxiliary heating/ventila-
tion: switch the auxiliary heating/ventilation
off
R Shift the transfer case to the LOW RANGE
off-road driving position (Y page 124)
R Engage the differential locks if necessary
(Y page 119)
R Avoid high engine speeds
R Enter and exit the water at aflat place and at
as teady walking pace
R Drive slowly and at aconstant speed through
the water
R Ensure that abow wave does not form as you
drive
R Do not stop and do not switch off the engine.
Water offers ahigh degree of resistance, the
ground is slippery and, in some cases, unsta- ble. Therefore, it is difficult and dangerous to pull awayinw ater
R Cleana ny mud from the tyre tread after ford-
ing
R Apply the brakes to dry them after fording Driving tips
117Driving and parking Z
Page 124 of 261
X
Clean th ewheels, wheel arches and th evehi-
cle underside wit hawaterjet;c he ck for any
foreign object sand damage.
X Chec kwhether twigs or other part sofplants
have become trapped. Thes eincreas ethe risk
of fir eand can damag efuel pipes ,brake
hoses or th erubbe rbellows of th eaxle joints
and propeller shafts.
X Afte rthe trip, examin ewithout fail th eentire
undercarriage, wheels, tyres, bodywork struc- ture, brakes, steering ,cha ssis and exhaust
system for damage.
X Afte rdriving in sand, mud, gravel, wate ror
similar dirt yconditions ,have th efollowing
checked and cleaned:
R brak ediscs
R wheels
R brak epads
R axle joints
X If you notic estron gv ibrations after off-road
driving ,che ck for foreign object sinthe
wheel sand driv etrain and ,ifnecessary,
remove them. Foreign object scan disturb the
balance and caus evibrations.
Driving on sand Observ
ethe following rules when driving on
sand:
R shift the transfer case to the LOW RANGEoff-
road driving position (Y page 124).
R avoid high engine speeds.
R Shift the automatic transmission to alow
gear.
R drive quickly to overcome the rolling resist-
ance. Otherwise, the vehicle could dig itself
into the sand.
R drive in the tracks of other vehicles if possible.
When doing so, make sure that:
- the tyre ruts are not too deep
- the sand is firm enough
- your vehicle has sufficient ground clear-
ance
Tyre rutsa nd unpaved roads !
Check that the ruts are not too deep and
that your vehicle has sufficient clearance.
Otherwise, your vehicle could be damaged or bottom out and get stuck. Observe the following rules when driving along
ruts in off-road terrain or on roads with loose
gravel:
R shift the transfer case to the LOW RANGEoff-
road driving position (Y page 124)
R avoid high engine speeds
R observe the safety notes (Y page 119) and the
general notes (Y page 119) on off-road driving
R shift the automatic transmission to alow gear
R drive slowly
R where ruts are too deep, drive with the wheels
on one side on the middle section of turf if
possible
Driving over obstacles !
Obstacles could damage the floor of the
vehicle or componentsoft he chassis. Ask
passengers for guidance when driving over
large obstacles. Any damage to the vehicle
always increases the risk of an accident.
! Drive with particular care when driving over
an obstacle while driving up or down asteep
slope.
The vehicle could otherwise tilt and slide side- waysort ip over.
Observe the following rules when driving over
tree stumps, large stones and other obstacles:
R observe the safety notes (Y page 119) and the
general notes (Y page 119) on off-road driving
R shift the transfer case to the LOW RANGEoff-
road driving position (Y page 124)
R avoid high engine speeds
R shift the automatic transmission to alow gear
R make sure that you have enough ground
clearance before driving across an obstacle
R drive very slowly
R try to drive straight over the centreofo bsta-
cles: front wheel first, then rear wheel Travelling uphill
Approach/departure angle G
WARNING
If you drive on asteep incline at an angle or
turn on asteep incline, the vehicl ecoulds lip
sideways, tip and overturn. There is arisk of
an accident. Drivingt
ips
121Driving an dparking
Z
Page 147 of 261
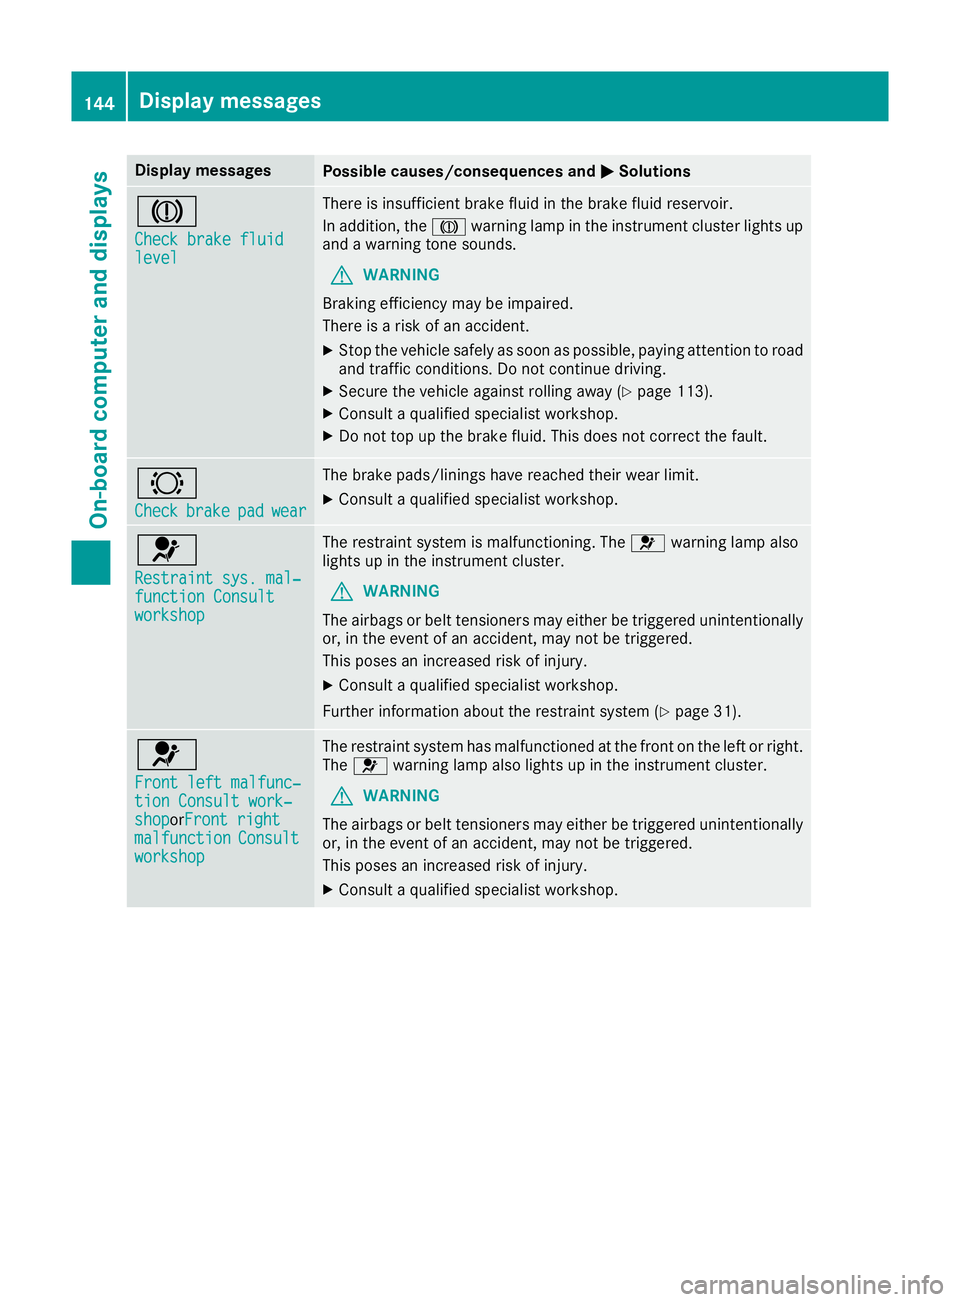
Display messages
Possible causes/consequence
sand M
MSolutions J
Check brake fluid Check brake fluid
level level There is insufficient brake fluid in the brake fluid reservoir.
In addition, the Jwarning lamp in the instrument cluster lights up
and awarning tones ounds.
G WARNING
Brakin gefficienc ymay be impaired.
There is arisk of an accident.
X Stop the vehicle safely as soon as possible, paying attention to road
and traffic conditions. Do not continue driving.
X Secure the vehicle against rolling away (Y page 113).
X Consult aqualified specialist workshop.
X Do not top up the brake fluid. This does not correc tthe fault. #
Check Check
brake
brakepad
padwear
wear The brake pads/linings have reached their wear limit.
X Consult aqualified specialist workshop. 6
Restraint sys. mal‐ Restraint sys. mal‐
function Consult function Consult
workshop workshop The restraint system is malfunctioning. The
6warning lamp also
lights up in the instrument cluster.
G WARNING
The airbags or belt tensioners may either be triggered unintentionally or, in the event of an accident ,may not be triggered.
This poses an increased risk of injury.
X Consult aqualified specialist workshop.
Further information about the restraint system (Y page 31).6
Front left malfunc‐ Front left malfunc‐
tion Consult work‐ tion Consult work‐
shop shoporFront right
Front right
malfunction
malfunction Consult
Consult
workshop
workshop The restraint system has malfunctioned at the front on the left or right.
The 6 warning lamp also lights up in the instrument cluster.
G WARNING
The airbags or belt tensioners may either be triggered unintentionally or, in the event of an accident ,may not be triggered.
This poses an increased risk of injury.
X Consult aqualified specialist workshop. 144
Display messagesOn-board computer and displays
Page 220 of 261
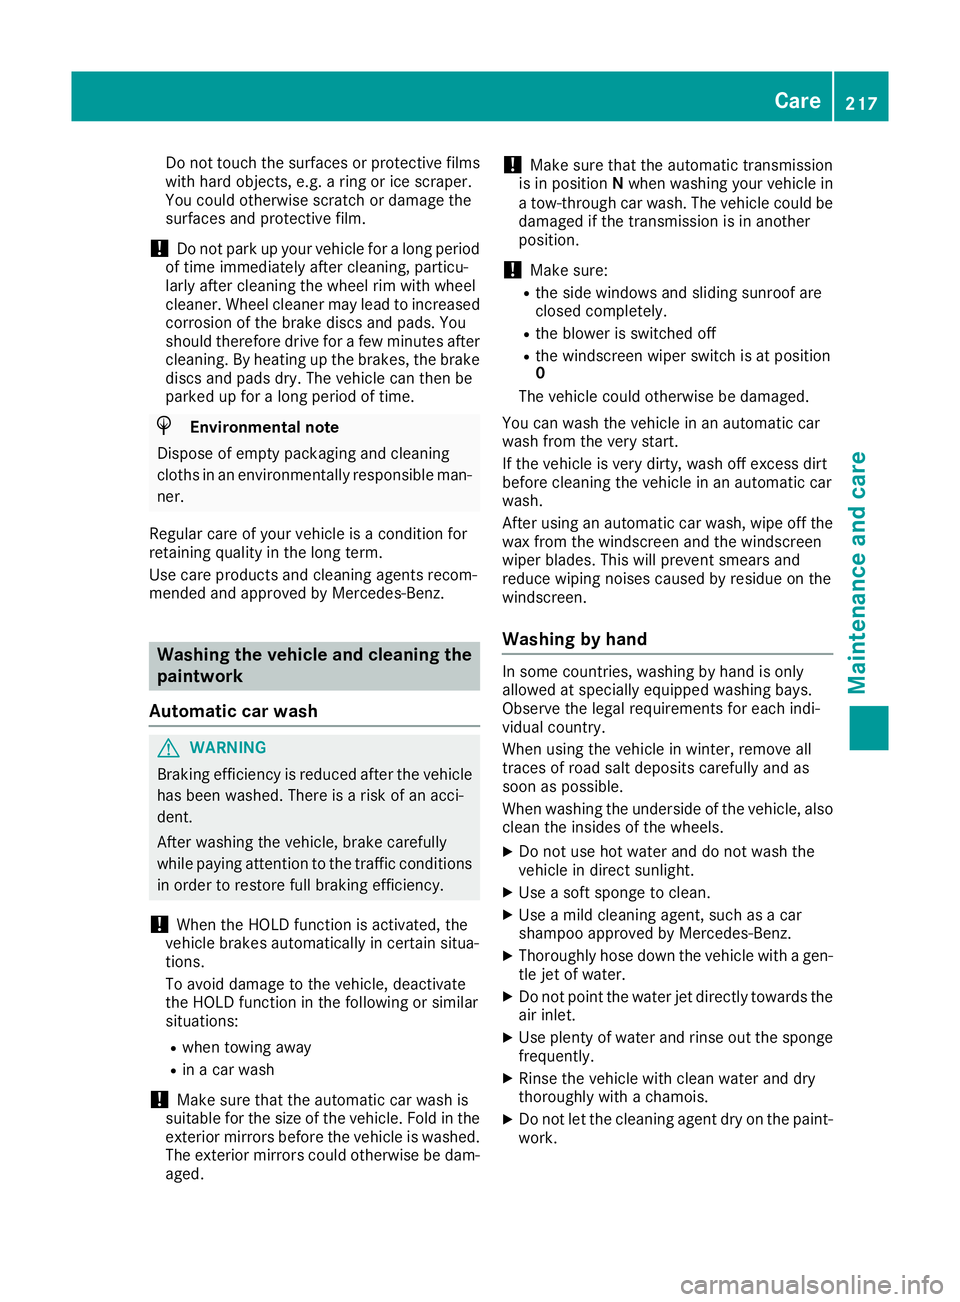
Do not touch the surfaces or protective films
with hard objects ,e.g.ar ingori ce scraper.
Yo uc ould otherwis escratch or damage the
surfaces and protective film.
! Do not park up your vehicl
efor alon gp eriod
of time immediatel yafter cleaning, particu-
larly after cleaning the whee lrim with wheel
cleaner. Whee lcleane rmaylead to increased
corrosion of the brake discs and pads .You
shoul dtherefore drive for afew minute safter
cleaning. By heating up the brakes ,the brake
discs and pads dry .The vehicl ecan the nbe
parked up for alon gp eriodoft ime. H
Environmental note
Dispose of empty packaging an dcleaning
cloths in an environmentally responsible man- ner.
Regular car eofyour vehicle is acondition for
retainin gqualit yint helongterm.
Use car eproduct sand cleaning agents recom-
mended and approved by Mercedes-Benz. Washin
gthe vehiclea nd cleaning the
paintwork
Automatic car wash G
WARNING
Braking efficiency is reduced after the vehicle has been washed. There is arisk of an acci-
dent.
After washing the vehicle, brake carefully
while paying attention to the traffic conditions in order to restore full braking efficiency.
! When the HOLD function is activated, the
vehicl ebrakes automatically in certain situa-
tions.
To avoi ddamage to the vehicle, deactivate
the HOLD function in the following or similar
situations:
R when towing away
R in ac ar wash
! Make sure that the automatic car washis
suitable for the size of the vehicle. Fold in the exterior mirrors before the vehicl eiswashed.
The exterior mirrors coul dotherwise be dam-
aged. !
Make sure that the automatic transmission
is in position Nwhen washing your vehicle in
at ow-through car wash. The vehicle could be
damagedift he transmission is in another
position.
! Make sure:
R the side windows and sliding sunroof are
closed completely.
R the blower is switched off
R the windscreen wiper switch is at position
0
The vehicle could otherwise be damaged.
You can wash the vehicle in an automatic car
wash from the very start.
If the vehicle is very dirty, wash off excess dirt
before cleaning the vehicle in an automatic car
wash.
After using an automatic car wash, wipe off the
wax from the windscreen and the windscreen
wiper blades. This will prevent smears and
reduce wiping noises caused by residue on the
windscreen.
Washing by hand In some countries, washing by hand is only
allowed at specially equipped washing bays.
Observe the legal requirements for each indi-
vidual country.
When using the vehicle in winter, remove all
traces of road salt deposits carefully and as
soon as possible.
When washing the underside of the vehicle, also
clean the insides of the wheels.
X Do not use hot water and do not wash the
vehicle in direct sunlight.
X Use asoft sponge to clean.
X Use amild cleaning agent, such as acar
shampo oapproved by Mercedes-Benz.
X Thoroughly hose down the vehicle with agen-
tle jet of water.
X Do not point the water jet directly towards the
air inlet.
X Use plenty of water and rinse out the sponge
frequently.
X Rinse the vehicle with clean water and dry
thoroughl ywithachamois.
X Do not let the cleaning agent dry on the paint-
work. Ca
re
217Maintenance an dcare Z
Page 221 of 261
High-pressure cleaner
G
WARNING
The wate rjet of circular-jet nozzles (dirt grind-
ers) can caus edamage not visible from the
outside to tyres or chassi scomponents. Com-
ponents damaged in this way can unexpect-
edlyf ail.There is arisk of an accident.
Do not use high-pressure cleaners with circu-
lar-jet nozzles to clea nthe vehicle. Have dam-
agedt yres or chassi scomponents replaced
immediately.
! Always maintai
nadistance of at least 30 cm
between the vehicl eand the high-pressure
cleaner nozzle. Information about the correct
distance is available from the equipment
manufacturer.
Move the high-pressure cleaner nozzle
around when cleaning yourv ehicle.
Do not aim directly at any of the following:
R tyres
R door gaps, roof gaps, joints etc.
R electrica lcomponents
R battery
R plugc onnectors
R lamps
R seals
R trim elements
R ventilation slots
Damag etosealsore lectrica lcomponents
can leadtol eaks or failures.
! Vehicles with decorative film: parts of your
vehicl eare covered with adecorative film.
Maintain adistance of at least 70 cm between
the parts of the vehicl ecovered with the film
and the nozzle of the high pressure cleaner.
Information about the correct distance is
available from the equipment manufacturer.
Move the high-pressure cleaner nozzle
around whilst cleaning.
Cleaning the paintwork !
Do not affix:
R stickers
R films
R magneti cplates or similari tems to painted surfaces. You could oth
erwise
damage the paintwork.
Scratches, corrosive deposits, area saffecte dby
corrosion and damage cause dbyinadequate
car ecannot always be completel yrepaired .In
such cases ,visit aquali fied specialis tworkshop.
X Remov eimpuri ties immediately, where pos-
sible, whilst avoiding rubbing too hard.
X Soa kinsect remains with insect remove rand
rinse off the treated area safterwards.
X Soa kbirdd ropping swithw ater and rinse off
the treated area safterwards.
X Remov ecoolant, brake fluid ,tree resins ,oils,
fuel sand greases by rubbing gently with a
cloth soaked in petroleu mether or lighter
fluid.
X Use tar remove rtoremove tar stains.
X Use silicone remove rtoremove wax. Cleanin
gvehicle parts
Cleaning th ewheels G
WARNING
Th ew ater jet of circular-jet nozzles (dirt grind-
ers) can caus edamage not visible from the
outside to tyres or chassi scomponents. Com-
ponents damaged in this way can unexpect-
edlyf ail.There is arisk of an accident.
Do not use high-pressure cleaners with circu-
lar-jet nozzles to clea nthe vehicle. Have dam-
agedt yres or chassi scomponents replaced
immediately.
! Do not use acidic whee
lcleaning products
to remove brake dust. This coul ddamage
whee lbolts and brake components.
! Do not park up yourv
ehiclefor along period
of time immediatel yafter cleaning, particu-
larl yafter cleaning the whee lrim with wheel
cleaner. Whee lcleaner may leadtoi ncreased
corrosio nofthe brake discs and pads. You
should therefore drive for afew minutes after
cleaning. By heating up the brakes ,the brake
discs and padsd ry. The vehiclecan then be
parked up for along period of time. 218
CareMaintenanc
eand care