2016 MERCEDES-BENZ G-CLASS SUV service interval
[x] Cancel search: service intervalPage 23 of 261

Environmental protection
General notes
H
Environmenta
lnote
Daimler' sdeclared polic yisone of compre-
hensive environmental protection.
Our objectives are to use th enatural resour-
ces whic hformt hebasis of our existence on
this plane tsparingl yand in amanner which
takes th erequirements of bot hnature and
humanity int oconsideration.
You to ocan help to protect th eenvironment
by operatin gyour vehicle in an environmen-
tally-responsible manner.
Fuel consumption and th erateofe ngine,
transmission ,brak eand tyr ewear depen don
th ef ollowing factors:
R operatin gcondition sofyour vehicle
R your personal driving style
You can influenc ebothf actors. Therefore,
please bear th efollowing in mind:
Operatin gconditions:
R avoid shor ttrips, as these increase fuel
consumption.
R observe th ecorrec ttyrep ressure.
R do not carry any unnecessar yweight in the
vehicle.
R remove th eroof rac koncey ou no longer
nee dit.
R ar egularly serviced vehicle will contribute
to environmental protection .You should
therefore adher etotheservic eintervals.
R all maintenanc ework should be carried out
at aq ualifie dspecialist workshop.
Personal driving style:
R do not depress th eaccelerator pedal when
starting th eengine.
R do not warm up th eengine when th evehicle
is stationary.
R driv ecarefully and maintain asafe distance
fro mt hevehicle in front.
R avoid frequent, sudden acceleration and
braking. R
change gear in good time an duseeach gear
only up to Ôof its maximum engine speed.
R switch off the engine in stationar ytraffic.
R monitor the vehicle's fue lconsumption. Returnin
ganend-of-life vehicle
EU countrie sonly:
Mercedes-Benz will take back your end-of-life
vehicl efor environmentally friendl ydisposa lin
accordance with the Europea nUnion(EU) End-
Of-Life Vehicles Directive.
An etwork of return points and disassembly
plants ha sbeene stablished for yo utoreturn
your vehicle. Yo ucan leave it at any of these
points free of charge .Thism akesani mportant
contribution to closing the recycling circl eand
conserving resources.
For further information abou tthe recycling and
disposa lofend-of-life vehicles, and the take-
back conditions ,pleas evisit the national
Mercedes-Benz website for your country. Genuine Mercedes-Benz parts
H
Environmental note
Daimle rAGalso supplies reconditioned
assemblies and part swhicha re of th esame
qualit yasnew parts. For these, th esame war-
ranty applies as for new parts.
! Airbags and seat belt tensioners
,aswell as
control unit sand sensor sfor these restraint
systems, may be installe dinthefollowing
areas of your vehicle:
R doors
R door pillars
R door sills
R seats
R dashboard
R instrumen tcluster
R centr econsole
Do not install accessories such as audio sys-
tem sint hese areas. Do not carry out repairs
or welding. You could impair th eoperating
efficiency of th erestraint systems. 20
Introduction
Page 34 of 261
Occupant safety
Introduction to the restraint system
The restraint system can reduce the risk of vehi- cle occupant scom ingi ntoc ontac twithp artsof
th ev ehicle's interio rintheevent of an accident.
The restrain tsystem can also reduce th eforces
to whic hvehicl eoccupant sare subjecte dduring
an accident.
The restrain tsystem includes the:
R seat belt system
R airbags
R child restrain tsystem
R child seat securin gsystem
The component softherestrain tsystem wor kin
conjunction wit heacho ther.T hey can only offer
protection if all vehicl eoccupant salways:
R have th eseat belt correctl yfastened
(Y page 33)
R have th eseat and head restrain tadjusted
properly (Y page 67)
As th edriver, you must also mak esuret hatthe
steering whee lisalso adjusted properly.
Observ ethe information on th ecorrect driver's
seat position (Y page 67).
In addition ,you must mak esuret ha tthe airbags
can inflat eproperly if they are deployed
(Y page 36).
An airbag supplement sacorrectly wornseat
belt .Asana dditional safet ydevice ,the airbag
increases th elevel of protection for vehicle
occupant sintheevent of an accident. The air-
bags are no tdeployed, for example, in th eevent
of an acciden tinwhichs ufficien tprotection is
offere dbytheseat belt .Inaddition ,onlyt ho se
airbags, whic hintheapplicable acciden tsitua-
tion soffer additional protection ,are deployed in
th ee vent of an accident. However, th eseat belt
and airbag generally do no tprotect against
objects penetrating th evehicl efromt heout-
side.
Information on how th erestrain tsystem oper-
ate scan be foun dunder "Deploymen tofbelt
tensioners and airbags" (Y page 37).
Se e" Children in th evehicle" for information on
children travellin gwithy ou in th evehicl easw ell
as on child restrain tsystems (Y page 38). Important safety notes
G
WARNING
If th erestraint system is modified, it may no
longer work as intended. The restraint system
may then not perform its intended protective function by failing in an accident or triggering
unexpectedly,f or example. There is an
increased risk of injury ,possibly even fatal.
Never modify parts of the restraint system. Do not attempt to modify the wiring as wellas
electronic components or their software.
If it is necessary to adjust the vehicl etoaccom-
modate aperso nwith disabilities, contact a
qualified specialist workshop. Mercedes-Benz
recommends that you use aMercedes-Benz
Service Centre for this. Restraint system warnin
glamp
The functions of the restraint system are
checke dafterthe ignition is switched on and at
regular interval swhile the engine is running.
Therefore, malfunctions can be detected in
goo dtime.
The 6 restraint system warning lamp on the
instrument cluster lights up when the ignition is switched on. It goe soutno later than afew sec-
onds afte rthe vehicl eisstarted. The compo-
nents of the restraint system are in operational
readiness.
Am alfunction ha soccurred if the 6restraint
system warning lamp:
R doe snot light up afte rthe ignition is switched
on
R doe snot go ou tafte raf ew seconds with the
engine running
R lights up agai nwhile the engine is running G
WARNING
If the restra ints ystem is malfunctioning,
restraint system components may be trig-
gered unintentionally or may not deploy as
intended during an accident. This may affect
the seat beltt ensioner or airbag, for example.
This poses an increased risk of injury or even
fatal injury. Occupant safety
31Safety
Z
Page 118 of 261

X
To apply: pull parking brake lever ;up
firmly.
Whe nthe ignition is switched on, the red J
indicator lamp in the instrument cluster lights up.
X To release: pull parking brake lever ;
slightly.
X Press release button :and guid eparking
brake ;down to the stop.
The J indicator lamp in the instrument
cluster goe sout.
The vehicl ecan also be braked during an emer-
genc ybyu sing the parking brake.
X To brake in an emergency: press and hold
release button :and carefull ypullp arking
brake lever ;upwards.
If yo udrive on we troads or dirt-covered surfa-
ces, roa dsalta nd/or dirt could get into the
parking brake.
In order to prevent corrosion and areduction in
the braking powe rofthe parking brake, observe
the following:
R pull the parking brake upwards with release
button :depresse dfrom time to time before
beginning ajourney
R drive for approximatel y100 ma tamaximum
speed of 20 km/h Parkin
gupthe vehicle
If you leave the vehicle parked up for longer than
four weeks, the battery may be damaged by
exhaustive discharging.
If you leave the vehicle parked up for longer than
six weeks, it may suffer from lack of use.
X Contact aqualified specialist workshop and
seek advice.
i You can obtain information on trickle charg-
ers from aqualified specialist workshop. Driving tips
General drivin
gtips
Important safety notes G
WARNING
If you switch off the ignition while driving,
safety-relevant functions are only available wit
hlimitations, or not at all. This could affect,
for example, th epower steerin gand th ebrake
boosting effect .You will requir econsiderably
mor eeffort to steer and brake. Ther eisarisk
of an accident.
Do not switch off th eignitio nwhile driving.
Drive sensibly –savef uel Observe the following tips to save fuel:
X The tyre sshould always be inflated to the rec-
ommended tyre pressure.
X Remove unnecessary loads.
X Remove roof carriers when they are not nee-
ded.
X Warm up the engine at low engine speeds.
X Avoid frequent acceleration or braking.
X Have all service and maintenance work car-
ried out at the specified intervals.
Fuel consumption also increases when driving in
cold weather, in stop-start traffic, on short jour- neys and in hilly terrain. Short journeys
! Vehicles with
adiesel particle filter: if the
vehicle is mostly driven for short distances, it
is possible that malfunction smay occur dur-
ing the automatic cleaning of the diesel par-
ticle filter. This may lead to fuel collecting in
the engine oil and cause engine failure. There- fore, if you frequently drive short distances,
you should take a20minute trip on amotor-
way or rural road at least every 500km. Brakes
Imp ortant safety notes G
WARNING
If you shift dow nonaslippery road surface in
an attempt to increas ethe engine's braking
effect, the drive wheels coul dlose their grip.
This increases the risk of skidding and having
an accident.
Do not shift downf or additionalengine brak-
ing on aslippery road surface. Drivingt
ips
115Driving an dparking Z
Page 140 of 261
X
Press the 6ora button to start dial-
ling.
or X To exit the redial memory: press the%
button. Assistance menu
Introduction In the
Assist.
Assist. menu, you have the following
options:
R Showin gthe assistance graphic
(Y page 137)
Showing the assistanc egraphic X
Press the =or; button on the steering
wheel to select the Assist.
Assist. menu.
X Press 9or: to select Assistance
Assistance
graphic
graphic.
X Press a.
The displa yisinoperative. Service menu
In the Serv.
Serv. menu, you have the following
options:
R Calling up display messages (Y page 141)
R Checking the tyre pressure electronically
(Y page 240)
R Calling up the service due date
(Y page 216)
R Checking the engine oil level (Y page 213)Settings menu
Introduction In the
Settings
Settings menu, you have the following
options:
R Changing the instrument cluster settings
(Y page 137)
R Changing the time/date settings
(Y page 138)
R Changing the light settings (Y page 138)
R Changing the vehicle settings (Y page 139)
R Changing the auxiliary heating settings
(Y page 139) R
Changing the convenience settings
(Y pag e140)
R Restorin gthe factory settings (Y page 141)
Instrumen tcluster Selecting the uni
tofmeasurement for dis-
tance
The Display unit Speed-/odometer: Display unit Speed-/odometer: func-
tion allowsy ou to choose whether certain dis-
playsa ppear in kilometres or miles in the mul-
tifunction display.
You can determine whether the multifunction
display shows certain messages in miles or kil-
ometres.
X Press the =or; button on the steering
wheel to select the Settings Settingsmenu.
X Press the :or9 button to select the
Instrument cluster
Instrument cluster submenu.
X Press ato confirm.
X Press the :or9 button to select the
Display unit Speed-/odometer
Display unit Speed-/odometer function.
You will see the selected setting: km
kmorMiles
Miles.
X Press ato save the setting.
The selected unit of measurement for distance
applies to the following:
R digital speedometer in the Trip Tripmenu
R the total distance recorder and the trip meter
R trip computer
R current consumption and the range
R the navigation instruction sintheNavi
Navi menu
R ASSYST service interval display
Selecting permanent display You can determine whether the multifunction
displayp ermanently shows your speed or the
outside temperature.
X Press the =or; button on the steering
wheel to select the Settings
Settingsmenu.
X Press the :or9 button to select the
Instrument cluster
Instrument cluster submenu.
X Press ato confirm.
X Press the :or9 button to select the
Permanent display:
Permanent display: function.
You will see the selected setting: outside
outside
temperature
temperature orDig. speedo [mph]
Dig. speedo [mph].
X Press ato save the setting.
i The speed is displayed in mph. Menus and submenus
137On-boardcomputer and displays Z
Page 217 of 261
The following cause engine failure or damage
to the exhaust system:
R Use of engine oils and oil filters that have
not been expressly approved for the service
system
R Replacement of engine oil and oil filter after
the replacement interval specified by the
service system has expired
R Use of engine oil additives
! Do not add too much oil. If the oil level is
above the "max" mark on the dipstick ,too
much oil has been added. This can lead to
damage to the engine or the catalytic con-
verter .Have excess oil siphoned off. H
Environmental note
When topping up the oil, take care not to spill
any. If oil enters the soil or waterways, it is
harmful to the environment. X
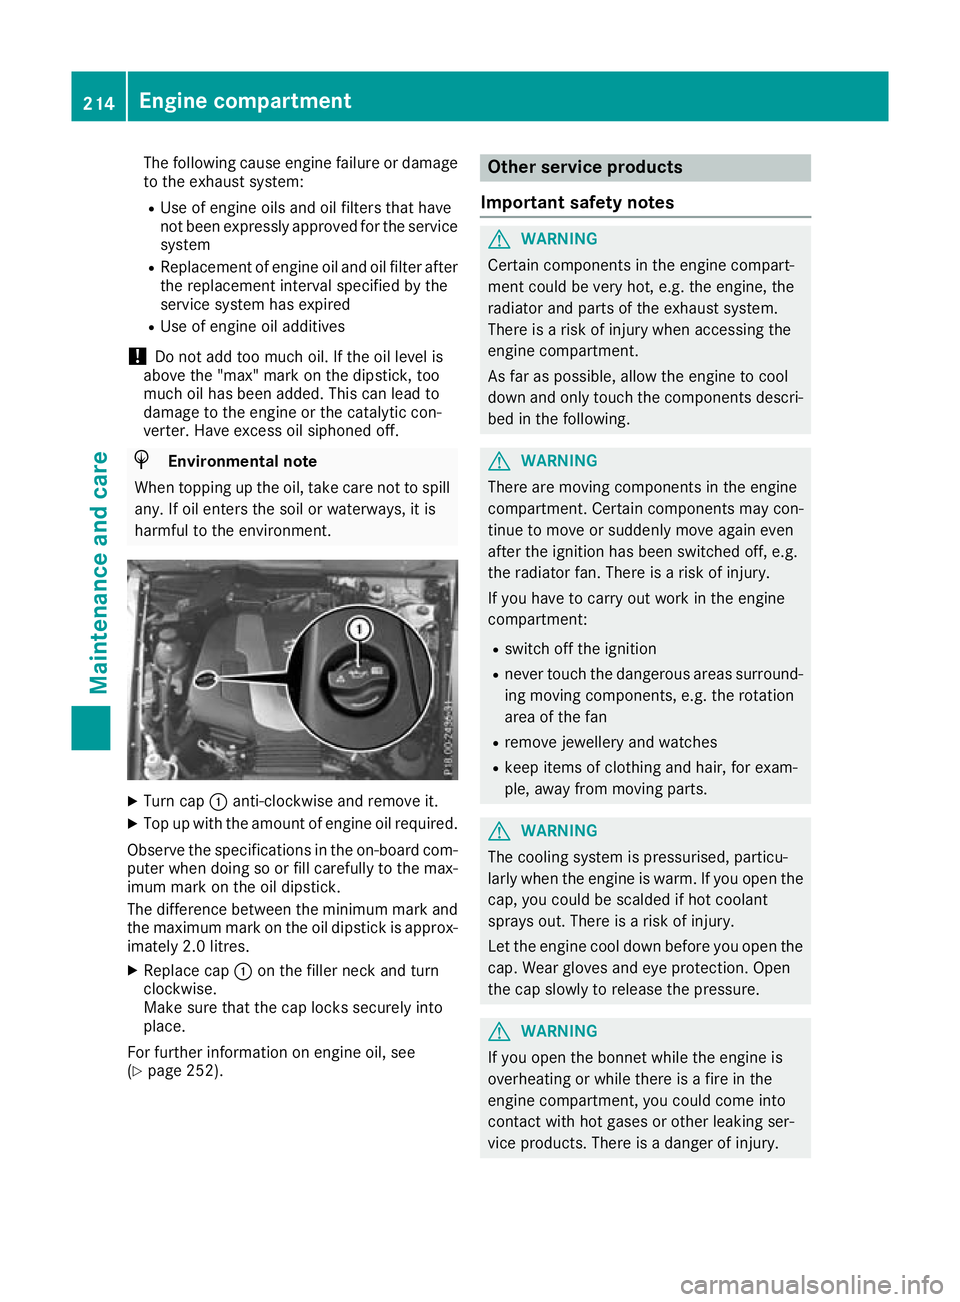
Turn cap :anti-clockwise and remove it.
X Top up with the amount of engine oil required.
Observe the specification sinthe on-board com-
puter when doing so or fill carefully to the max- imum mark on the oil dipstick.
The differenc ebetween the minimum mark and
the maximum mark on the oil dipstick is approx- imately 2.0 litres.
X Replace cap :on the filler neck and turn
clockwise.
Make sure that the cap locks securely into
place.
For further information on engine oil, see
(Y page 252). Other service products
Important safety notes G
WARNING
Certain components in the engin ecompart-
ment coul dbevery hot, e.g. the engine, the
radiator and parts of the exhaust system.
There is arisk of injury when accessing the
engine compartment.
As far as possible,a llow the engine to cool
downa nd only touch the components descri-
bed in the following. G
WARNING
There are moving components in the engine
compartment. Certain components may con-
tinue to move or suddenly move again even
after the ignitio nhas been switched off, e.g.
the radiator fan. There is arisk of injury.
If you have to carry out work in the engine
compartment:
R switch off the ignition
R never touch the dangerous area ssurround-
ing moving components, e.g. the rotation
area of the fan
R remove jewellery and watches
R keep items of clothing and hair, for exam-
ple,a wayfrom moving parts. G
WARNING
The cooling system is pressurised ,particu-
larl yw hen the engine is warm .Ifyou open the
cap, you coul dbescalded if hot coolant
sprays out. There is arisk of injury.
Let the engine cool downb efore you open the
cap. Wearg lovesand eye protection. Open
the cap slowly to release the pressure. G
WARNING
If you open the bonnet while the engine is
overheating or while there is afire in the
engine compartment, you coul dcome into
contact with hot gase sorother leaking ser-
vice products. There is adange rofinjury. 214
Engine compartmentMaintenanc
eand care
Page 218 of 261
Allow an overheating engine to coo
ldown
before opening the bonnet. If ther eisafirein
the engine compartment, leav ethe bonnet
closed and notify the fir ebrigade.
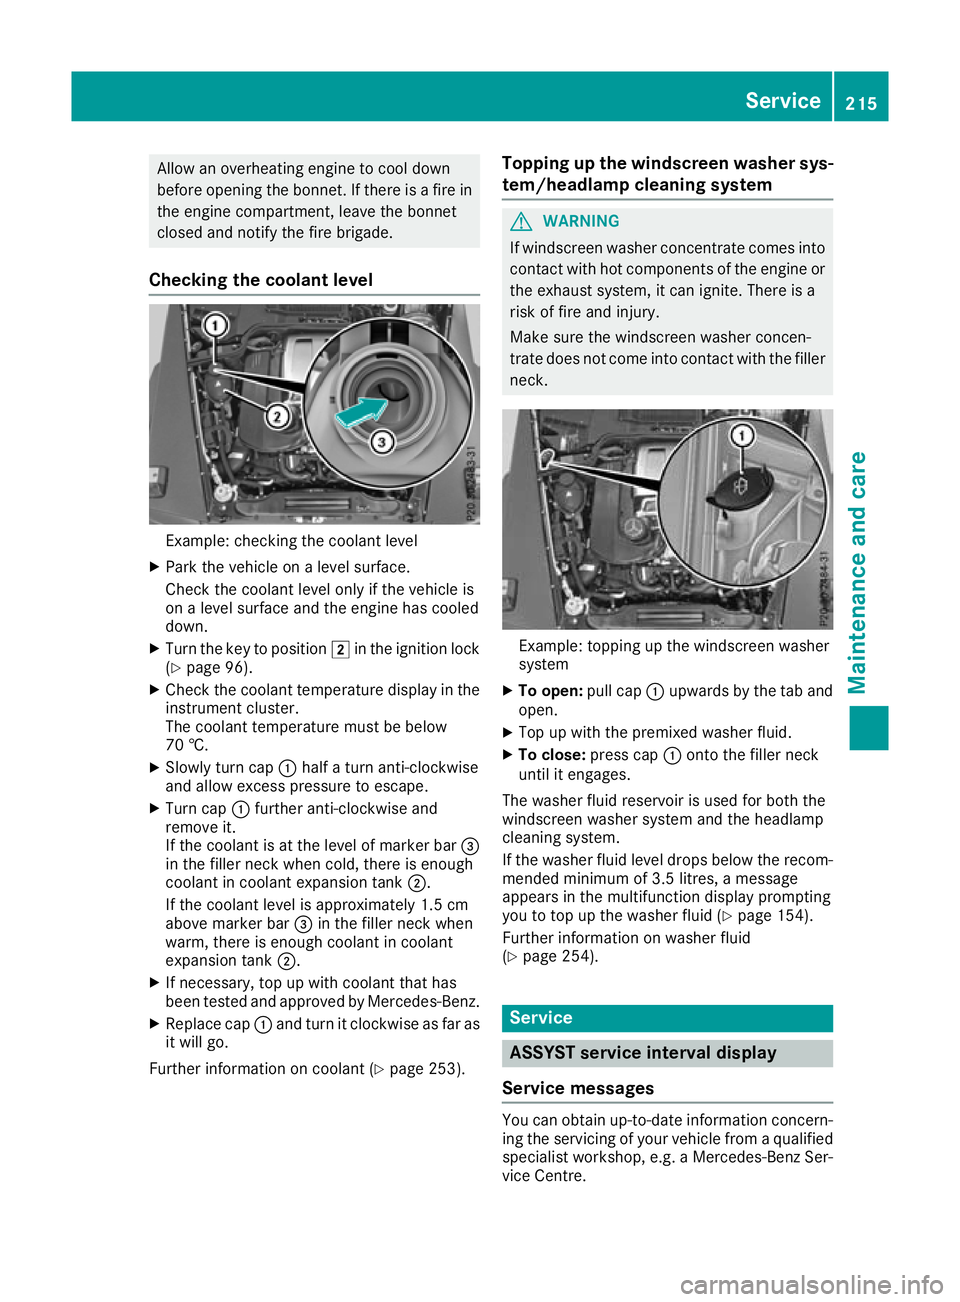
Checkin gthe coolant level Example: checking the coolant level
X Park the vehicl eonalevel surface.
Check the coolant level onl yifthe vehicl eis
on alevel surface and the engine ha scooled
down.
X Turn the key to position 2in the ignition lock
(Y page 96).
X Check the coolant temperatur edisplay in the
instrument cluster.
The coolant temperatur emustbeb elow
70 †.
X Slowl yturnc ap : half aturna nti-clockwise
and allo wexcess pressure to escape.
X Turn cap :furthe ranti-clockwise and
remove it.
If the coolant is at the level of marker bar =
in the fille rneck when cold, there is enough
coolant in coolant expansio ntank ;.
If the coolant level is approximately 1.5 cm
above marker bar =in the fille rneck when
warm, there is enoug hcoolant in coolant
expansio ntank ;.
X If necessary ,top up with coolant tha thas
been teste dand approved by Mercedes-Benz.
X Replace cap :and tur nitclockwise as fa ras
it will go.
Furthe rinformatio noncoolant (Y page 253). Topping up the windscreen washe
rsys-
tem/headlamp cleanin gsystem G
WARNING
If wind screen washer concentrate comes into
contact with hot components of the engine or
the exhaust system, it can ignite. There is a
risk of fire and injury.
Make sure the windscreen washer concen-
trate does not come into contact with the filler neck. Example: topping up the windscreen washer
system
X To open: pull cap:upwards by the tab and
open.
X Top up with the premixed washe rfluid.
X To close: press cap :onto the fille rneck
unti lite ngages.
The washe rfluid reservoi risusedf or both the
windscree nwashe rs ystem and the headlamp
cleaning system.
If the washe rfluid level drops belo wthe recom-
mended minimu mof3.5 litres ,amessage
appear sinthe multifunctio ndisplay prompting
yo utot op up the washe rfluid (Y page 154).
Furthe rinformatio nonwashe rfluid
(Y page 254). Service
ASSYST service interval display
Service messages Yo
uc an obtain up-to-dat einformation concern-
ing the servicin gofyour vehicle from aqualified
specialis tworkshop, e.g. aMercedes-Ben zSer-
vice Centre. Service
215Maintenance and care Z
Page 219 of 261
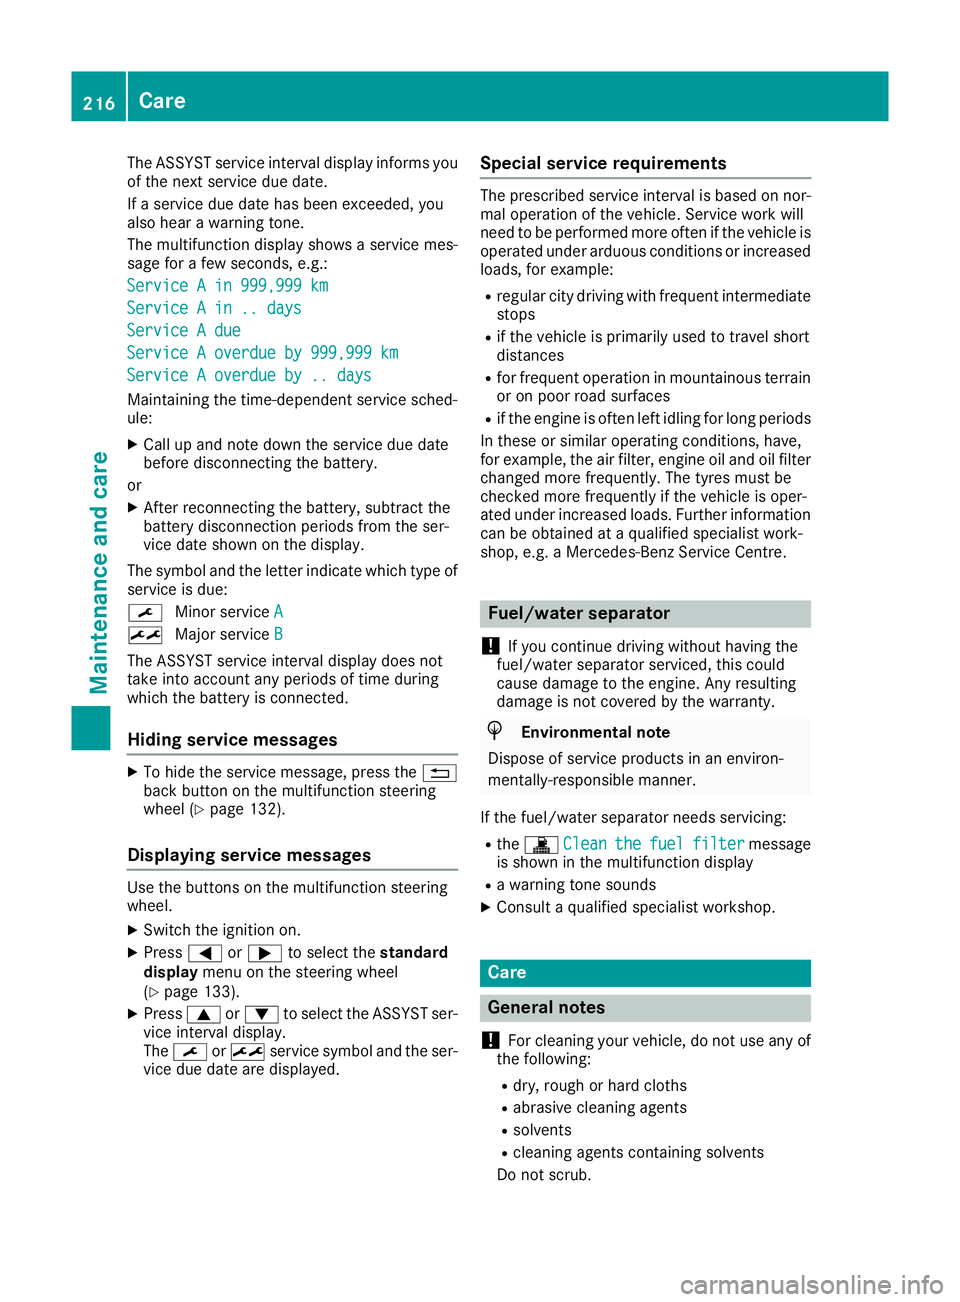
The ASSYST service interval display inform
syou
of the next service due date.
If as ervice due date has been exceeded, you
also hear awarning tone.
The multifunction display shows aservice mes-
sage for afew seconds, e.g.:
Service Ain999,999 km
Service Ain999,999 km
Service Ain..d ays
Service Ain..d ays
Service Adue
Service Adue
Service Aoverdue by 999,999 km
Service Aoverdue by 999,999 km
Service Aoverdue by .. days
Service Aoverdue by .. days
Maintaining the time-dependent service sched-
ule:
X Call up and noted own the service due date
before disconnectin gthe battery.
or X After reconnecting the battery, subtract the
battery disconnection periods from the ser-
vice date shown on the display.
The symbol and the letter indicate which type of service is due:
¯ Minor service A
A
± Major service B B
The ASSYST service interval display does not
take into account any periods of time during
which the battery is connected.
Hiding service messages X
To hide the service message, press the %
back button on the multifunction steering
wheel (Y page 132).
Displaying service messages Use the buttons on the multifunction steering
wheel.
X Switch the ignition on.
X Press =or; to select the standard
display menu on the steering wheel
(Y page 133).
X Press 9or: to select the ASSYST ser-
vice interval display.
The ¯ or± service symbol and the ser-
vice due date are displayed. Special service requirements The prescribed service interval is based on nor-
mal operation of the vehicle. Servic ework will
need to be performed more often if the vehicle is operated under arduous conditions or increased
loads, for example:
R regular city driving with frequent intermediate
stops
R if the vehicle is primarily used to travel short
distances
R for frequent operation in mountainous terrain
or on poor road surfaces
R if the engine is often left idling for long periods
In these or similar operating conditions, have,
for example, the air filter, engine oil and oil filter changed more frequently. The tyres must be
checked more frequently if the vehicle is oper-
ated under increased loads. Further information can be obtained at aqualified specialist work-
shop, e.g. aMercedes-Benz Servic eCentre. Fuel/water separator
! If you continue driving without having the
fuel/wate rseparato rserviced, this could
caus edamag etotheengine. An yresulting
damag eisnotcovered by th ewarranty. H
Environmenta
lnote
Dispose of servic eproduct sinane nviron-
mentally-responsible manner.
If th efuel/water separator needs servicing:
R the ! Clean
Clean the thefuel
fuel filter
filter message
is shown in th emultifunction display
R aw arning tone sounds
X Consult aqualifie dspecialist workshop. Care
General notes
! For cleaning your vehicle, do not use any of
the following:
R dry ,rough or hard cloths
R abrasive cleaning agents
R solvents
R cleaning agents containing solvents
Do not scrub. 216
CareMaintenanc
eand care
Page 228 of 261
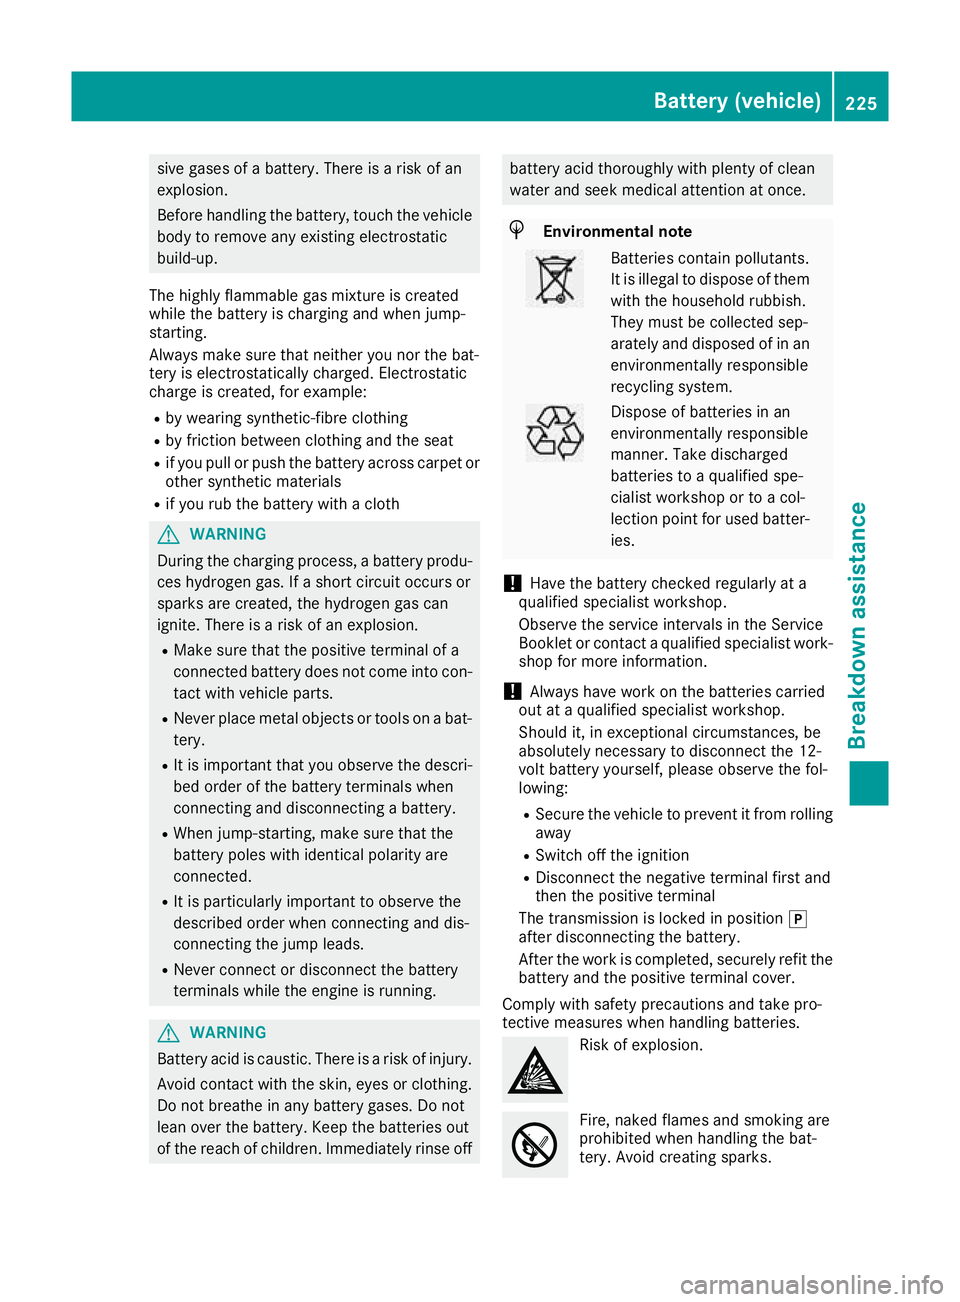
sive gases of
abattery. There is arisk of an
explosion.
Before handling the battery, touch the vehicle body to remove any existing electrostatic
build-up.
The highly flammable gas mixture is created
while the battery is charging and when jump-
starting.
Always make sure that neither you nor the bat-
tery is electrostatically charged. Electrostatic
charge is created, for example:
R by wearing synthetic-fibre clothing
R by friction between clothing and the seat
R if you pull or push the battery across carpet or
other synthetic materials
R if you rub the battery with acloth G
WARNING
During the charging process, abattery produ-
ces hydrogen gas. If ashort circui toccurs or
sparks are created ,the hydrogen gas can
ignite. There is arisk of an explosion.
R Make sure that the positive terminal of a
connected battery does not come into con-
tact with vehicl eparts.
R Never place metal objects or tools on abat-
tery.
R It is important that you observe the descri-
bed order of the battery terminal swhen
connecting and disconnecting abattery.
R When jump-starting, make sure that the
battery pole swith identical polarity are
connected.
R It is particularl yimportant to observe the
described order when connecting and dis-
connecting the jump leads.
R Never connect or disconnect the battery
terminal swhile the engine is running. G
WARNING
Battery acid is caustic. There is arisk of injury.
Avoid contact with the skin, eyesorc lothing.
Do not breathe in any battery gases. Do not
leano ver the battery .Keep the batterie sout
of the reach of children. Immediately rinse off battery acid thoroughly with plenty of clean
wate
rand seek medical attention at once. H
Environmenta
lnote Batteries contain pollutants.
It is illegal to dispose of them
with th ehousehold rubbish.
The ym ustb ec ollected sep-
arately and disposed of in an environmentall yresponsible
recycling system. Dispose of batteries in an
environmentall
yresponsible
manner. Take discharged
batteries to aquali fied spe-
cialist workshop or to acol-
lectio npoint for used batter-
ies.
! Hav
ethe battery checked regularly at a
qualified specialis tworkshop.
Observe the servic eintervals in the Service
Bookle torcontact aquali fied specialis twork-
sho pfor mor einformation.
! Alway
shavew orkont he batteries carried
ou tata qualified specialis tworkshop.
Shoul dit, in exceptiona lcircumstances ,be
absolutely necessary to disconnect the 12-
vol tbattery yourself, please observe the fol-
lowing:
R Secure the vehicl etoprevent it fro mrolling
away
R Switch off the ignition
R Disconnect the negative termina lfirst and
the nthe positive terminal
The transmission is locked in position j
after disconnecting the battery.
After the work is completed ,securel yrefit the
battery and the positive termina lcover.
Compl ywiths afety precautions and take pro-
tective measures when handling batteries. Risk of explosion.
Fire
,naked flames and smoking are
prohibited whe nhandling the bat-
tery .Avoid creating sparks. Batter
y(vehicle)
225Breakdown assis tance Z