Page 89 of 261

Activating/deactivating
X
To activate: press theÁbutton.
Th eindicator lamp in the Ábutton lights up.
X To deactivate: press theÁbutton.
The indicator lamp in the Ábutton goe sout.T he cooling with ai rdehumidifica tion functionhas
ad elayed switch-off feature.
Problems with the "Cooling with dehumidification" function Problem
Possible causes/consequence
sand M
MSolutions The indicator lamp in the
¿ orÁ button
flashes three times or
remains off. The cooling
with air dehumidification
function cannot be acti-
vated. The cooling with dehumidification function has been deactivated due
to am alfunction.
X Consult aqualified specialist workshop. Setting climate control to automatic
mode
General notes In automatic mode, the set temperature is main-
tained at aconstant level.T he system automat-
icallyr egulates the temperature of the dis-
pensed air, the airflow and the air distribution.
Automatic mode works best when cooling with
air dehumidification is also activated. If desired,
cooling with air dehumidification can be deacti- vated.
Automatic control X
Turn the key to position 2(Ypage 96) in
the ignition lock.
X Set the desire dtemperature.
X To activate: press theÃbutton.
The indicator lamp in the Ãbutton lights
up. Automatic air distribution and airflow are
activated.
X To deactivate: press the_button.
or X Press the IorK button.
The indicator lamp in the Ãbutton goes
out.
X To switch to manual mode:press the _
button. Setting the temperature
Differen ttemperatures can be set for the driv-
er's and front-passenger sides.
X Turn the key to position 2(Ypage 96) in
the ignition lock.
X Adjust control :orB (Ypage 84) to the
desired temperature.
Change the temperature settingo nly in small
increments. Start at 22 †. Setting the air distribution
Air distribution settings P
Directs the airflow throug hthe centre
and side ai rvents
O Directs the airflow throug hthe footwell
ai rv ents
S Directs the airflow throug hthe centre
and side ai rvents as well as the footwell
ai rv ents
¯ Directs the airflow throug hthe demister
vents
a Directs the airflow throug hthe footwell
and demister vents 86
Operatin
gthe climat econtrol systemClimat econt rol
Page 90 of 261
 in
the ignition lock.
X Press the _button repeatedly until the
desired symbol appears in the display. Setting the airflow
X Turn the key to position 2(Y")
Settings
X
Turn the key to position 2(Ypage 96) in
the ignition lock.
X Press the _button repeatedly until the
desired symbol appears in the display. Setting the airflow
X Turn the key to position 2(Ypage 96) in
the ignition lock.
X To increase: press theKbutton.
X To reduce: press theIbutton.
i The airflow from the rear-compartment
ventsa nd the centre ventsist he same.Switching the ZONE function on/off
X To switch on: press theábutton.
The indicator lamp in the ábutton lights
up.
The temperature settingf or the driver's side
is not adopted for the front-passenger side
and the rear compartment. The temperature
for the front-passenger side and the rear com-
partment is set separately.
X To switch off: press theábutton.
The indicator lamp in the ábutton goes
out.
The temperature settingf or the driver's side
is adopted for the front-passenger side and
the rear compartment. Demisti
ng thewindscreen
General notes You can use this function to defrost the wind-
screen or to demis
tthe inside of the windscreen
and the side windows.
Switch off the "Windscreen demisting" function as soon as the windscreen is clear again. Switching on/off X
Turn the key to position 2(Ypage 96) in
the ignitio nlock.
X To switch on: press the¬button.
The indicator lamp in the ¬button lights
up.
The climate control system switches to the
following functions:
R cooling with air dehumidification
R high airflow
R high temperature
R air distribution to the windscreen and front
side windows
R air-recirculation mode off
X To switch off: press the¬button.
The indicator lamp in the ¬button goes
out. The previous settings are reactivated.
The cooling with air dehumidification function remains on. Air-recirculation mode remains
deactivated.
or
X Press the Ãbutton.
The indicator lamp in the ¬button goes
out. Airflow and air distribution are set to
automatic mode.
or
X Turn control :orB clockwise or anti-clock-
wise (Y page 84).
or
X Press the KorI button. Demisting the windo
ws
Windows misted up on th einside X
Activate the Ácoolin gwitha irdehumidi-
ficatio nfunction.
X Activate the Ãautomatic mode.
X If the windows continue to mis tup,activate
the "Windscreen demisting "fun ction
(Y page 87).
i Yo
us houl donlys elect thi ssetting unti lthe
windscree nisc lear again. Operatin
gthe climat econtrol system
87Climatecont rol
Page 91 of 261
.
X Press the _button repeatedl yuntilthe
P orO symbo lapp ears in the display.
i You shoul
donly select this setting unti")
Windows misted up on the outside
X
Switch on the windscreen wiper s(Ypage 81).
X Press the _button repeatedl yuntilthe
P orO symbo lapp ears in the display.
i You shoul
donly select this setting unti lthe
windscreen is clear again.
i If yo
uclean the window sregularly, they do
not mis tupasq uickly. Switching windscree
nheating on/off X
Turn the key to position 2(Ypage 96) in
the ignition lock.
X To switch on: press button;.
Indicator lamp :lights up.
X To switch off: press button;.
Indicator lamp :goes out.
At outside temperatures above 10 †the wind-
screen heating cannot be switched on. Indicator lamp
:lights up briefly when you attempt to
switch it on and then goes out again.
The windscreen heating has ahigh current draw.
You should therefore switc hitoff as soon as the
windscreen is clear. Otherwise the windscreen
heatin gswitches itself off automatically after
10 minutes.
If the battery voltage is too low, the windscreen heatin gmay switc hoff.I ndicator lamp :
flashes when the windscreen heatin ghas been
switched off automatically. The windscreen
heatin gwill automatically switc hback on as
soon as there is sufficient voltage again. Switching the rear windo
wheating
on/off
General notes The rear window heating has
ahigh current
draw. You should therefor eswitch it off as soon
as the window is clear. The rear window heating otherwise switches off automatically after sev-
eral minutes.
If the battery voltage is too low, the rear window
heating may switch off.
Activating/deactivating X
Turn the key to position 2(Ypage 96) in
the ignition lock.
X Press the ¤button.
The indicator lamp in the ¤button lights
up or goes out.
Problems with the rear window heating Problem
Possible causes/consequences and
M MSolutions The indicator lamp in the
¤ button flashes. th
eo n-board voltag eistoo low
X Switch off any consumers tha tare not required ,e.g.r eading lamps,
interio rlighting or the seat heating. Th
er ear window heating
has switched off prema-
turely or cannot be
switched on. The battery has not been sufficiently charged.
X Switch off any consumer sthat are not required, e.g. reading lamps,
interior lighting or the seat heating. 88
Operating the climate control systemClimate
control
Page 92 of 261

Activating/deactivating air-recircula-
tion mode
Genera lnotes If yo
uactivate air-recirculation mode, the win-
dows can mist up more quickly, particularly at
low temperatures. Use air-recirculation mode
only briefl ytoprevent the window sfrom misting
up.
Activating/deactivating X
Turn the key to position 2(Ypage 96) in
the ignition lock.
X To activa te:press the dbutton.
The indicator lamp in the dbutton lights
up.
i Air-recirculation mode is automatically acti-
vated at high levels of pollution or at high out-
side temperatures. When air-recirculation
mode is activated automatically, the indicator
lamp in the dbutton is not lit.
Outside air is added after about 30 minutes.
X To deactivate: press thedbutton.
The indicator lamp in the dbutton goes
out.
i Air-recirculation mode is deactivated auto-
matically:
R after approximately five minutes at outside
temperatures below approximately 5†
R after approximately five minutes if "Cooling
with air dehumidification" is deactivated
R after approximately 30 minutes at outside
temperatures above approximately 5†Switching the residual heat on/off
General notes It is possible to make use of the residual heat of
the engine to continue heating the stationary
vehicle for up to 30 minutes after the engine has
been switched off. The heating time depends on
the set interior temperature. Switching on/off X
Turn the key to position g(Ypage 96) in
the ignition lock or remove it.
X To switch on: press theÁbutton.
The indicator lamp in the Ábutton lights
up.
i The blower will run at
alow speed regardless
of the airflow setting.
i If you switch on the residual heat function at
high temperatures, only the ventilation will be
activated.
X To switch off: press theÁbutton.
The indicator lamp in the Ábutton goes
out.
Residua lheat is switched off automatically:
R after approximately 30 minutes
R when the ignition is switched on
R if the battery voltage drops
R if the coolant temperature is too low
R when the auxiliary heating is switched on Auxiliary heating
Important safety notes G
DAN
GER
If th eexhaust pipe is blocke dorsufficient
ventilation is no tpossible, toxic exhaust
fumes can ente rthe vehicle, especially car-
bon monoxide. This is th ecase, e.g. in
enclosed spaces, or if th evehicl eiss tuck in
snow. There is ariskoff atal injuries.
You should switch off th eauxiliary heating in
enclosed spaces whic hdonothav eane xtrac-
tion system, e.g. agarage. If th evehicl eis
stuck in snow and you mus tleav ethe auxiliary
heating running, keep th eexhaust pipe and
th ea rea around th evehicl eclear of snow. To
guarantee asufficien tsupply of fresh air, open
aw indow on th eside of th evehicl eaway from
th ew ind. G
WARNING
When th eauxiliary heating is switched on,
parts of the vehicl ecan become very hot. Operating the climate control system
89Climate control
Z
Page 93 of 261

Flammable materials such as leaves, grass or
twig smay ignite if they come into contact
with:
R hot parts of the exhaust system
R the exhaust ga sitself
There is arisk of fire.
Whe nthe auxiliary heating is switched on,
make sur ethat:
R no flammable materials come into contact
with hot vehicle components
R the exhaust ga scan escape from the
exhaust pip eunhindered
R the exhaust ga sdoesn ot come into contact
with flammable materials.
! Operating the auxiliary heating/ventilation
draws on the vehicle battery. After yo uhave
heated or ventilated the vehicle amaximum of
two times ,drive for alonger distance.
i Switch the auxiliary heating on regularly –
once amonth –for abou tten minutes.
The auxiliary heating heats the ai rinthe vehicle
interior to the set temperature. Thi soccur swith-
ou tu sing the hea tofthe running engine. The
auxiliary heating is operate ddirectly using the
vehicle' sfuel. For this reason, the fue ltank level
mus tbea bove the reserve rang etoensure that
the auxiliary heating functions.
The auxiliary heating or auxiliary ventilation
automaticall yadjusts to changes in tempera-
ture and weathe rconditions. For this reason,
the auxiliary heating could switch from ventila-
tion mode to heating mode or from heating
mode to ventilation mode.
The auxiliary heating switches off automatically afte r30m inutes. Thi stime period can be
altered .Todot his, consult aquali fied specialist
workshop.
You cannot use the auxiliary ventilation to cool
the vehicle interior to atemperature lower than
the outsid etemperature.
Before switchin gonX
Turn the key to position 2(Ypage 96) in
the ignition lock.
X Set the desired temperature.
Auxiliary heating or auxiliary ventilation can also
be switched on if the manually set climate con- trol is activated. Optimum comfort is attained by
settin gthe syste mtoautomatic mode. Set the
temperatur eto22†.
The auxiliary heating or auxiliary ventilatio ncan
be switched on/off using the button on the
centr econsol eorthe remote control.
The on-board compute rcan be used to specify
up to thre edepartur etimes ,one of which may
be preselected (Y page 139).
Switchin gthe auxiliary heating/venti-
lation on/off using the centre console
button Th
ec olours of the indicator lamps on button :
have the following meanings:
R Blue: auxiliary ventilation activated
R Red: auxiliary heating activated
R Yellow: departure time preselected
(Y page 139)
X To switch on the auxiliar
yheating or aux-
iliary ventilation: press button:.
The red or blue indicator lamp in button :
lights up.
X To switch off the auxiliar
yheating or aux-
iliary ventilation: press button:.
The red or blue indicator lamp in button :
goes out.
Switching the auxiliar yheating/venti-
lation on/off using the remotec ontrol General notes
Your vehicle comes with one remot econtrol.
You may use two additional remote controls for
yourv ehicle.For more information, please con-
tact aqualified specialist workshop.
Store the remote control for the auxiliary heat-
ing so that the auxiliary heating cannot be acti- 90
Operating the climate control systemClimate control
Page 94 of 261

vated unintentionally. In particular, ensure that
the remote control for the auxiliary heating is
kept out of the reach of children.
The remote control has
arange of approximately
300 metres .This range is reduced by:
R source sofradioi nterference
R soli dobjects between the remote control and
the vehicle
R the remote control being in an unfavourable
position in relation to the vehicle
R transmitting from an enclosed space
If the remote control battery is low,t he battery
symbol on the left of the display is show nas
empty. Replace the remote control battery and
observe the important safety notes when doing so (Y page9 2).
Activating/deactivating the auxiliary
heating or auxiliary ventilation Remote control
: Display
; u Activates the auxiliaryh eating or aux-
iliary ventilation
Checks th estatus
= . Setsthe departur etime
? ^ Deactivates th eauxiliary heating or
auxiliary ventilation
A , Setsthe departur etime
X To activate: press and hold the ubutton.
ON is shown on th eremot econtro ldisplay.
X To deactivate: press and hold the ^but-
ton.
OFF is shown on th eremot econtro ldisplay.
Checking th estatus of theauxiliary heat-
ing or auxiliary ventilation
X Briefl ypress the ubutton. The followin
gmessages may appear on the dis-
play: Display Meaning
The auxiliary heating or
auxiliary ventilation is
deactivated.
The auxiliary ventilation is
activated. The number on
the display shows the
remaining time (in
minutes) for the auxiliary
ventilation.
The auxiliary heating is
activated. The number on
the display shows the
remaining time (in
minutes) for the auxiliary
heating.
Ad
epart uret ime ha sbeen
activated .The departure
time appear sonthe dis-
play. Ad
epart uret ime ha sbeen
activated .The auxiliary
ventilatio nisc urrently
activated .The numbe ron
the display shows the
remaining time (in
minutes) for the auxiliary
ventilation. If the vehicl eis
not started afte rthist ime,
the running time is
increased by fiv eminutes. Ad
epart uret ime ha sbeen
activated .The auxiliary
heating is currentl yactiva-
ted .The numbe ronthe
display shows the remain-
ing time (i nminutes) for
the auxiliary heating .Ifthe
vehicl eisnot started after
thi stime ,the running time
is increased by five
minutes. If the engine has not yet reached oper
ating tem-
perature when it is started, the auxiliary heating running time is increased .The auxiliary heating
continues to run until the operating temperature
is reached .Ifthis is the case, the ysymbol Operating the climate control system
91Climate control Z
Page 95 of 261

appear
sontheremot econtrol display and the
runnin gtimeisz erom inutes.
Settin gthe departure time
Mak esure that th etimes et in th evehicle is
correc tbefore settin gthe departur etime.O th-
erwise, th eauxiliary heating may activat eatthe
wron gtimea nd at an unsuitable location. When
settin gthe departur etime, also observ ethe
important safety note s(Ypage 89).
X Briefly pres sthe u button.
X Pres sthe , or. button repeatedly
until th etimetobec hanged appear sonthe
display.
X Pres sthe u and^ button satthesame
time.
The Îsymbo lontheremot econtrol display
flashes.
X Pres sthe , or. button to set the
desired departur etime.
i The longer you pres
sthe , or. but-
ton, th efaster th etimec hanges.
X Pres sthe u and^ button satthesame
time.
The new departur etimeiss tored.
Activating th eset departure time
X Briefly pres sthe u button.
X Pres sthe , or. button repeatedly
until th edesired departur etimea ppear son
th ed isplay.
X Pres sthe u button.
The Ísymbol, th edepartur etimea nd,
dependin gontheselecte ddepartur etime,
th el etter A, BorCappear sonthedisplay.
Deactivatin gthe set departure time
X Briefly pres sthe u button.
The status of th eauxiliary heating is show non
th ed isplay.
X Pres sthe . button.
The first departur etim es toreda ppear sonthe
display.
X Pres sthe ^ button.
OFF is show nontheremot econtrol display. Replacing th
ebatterie sinthe remote
control Importan
tsafety notes G
WARNING
Batterie scontain toxic and corrosive substan-
ces. If batterie sare swallowed,itc an result in
severe health problems. There is arisk of fatal
injury.
Keep batterie sout of the reach of children. If
ab attery is swallowed,s eek medical attention
immediately. H
Environmental note Batteries contain pollutants.
It is illegal to dispose of them
with the household rubbish.
They must be collected sep-
arately and disposed of in anenvironmentall yresponsible
recycling system. Dispose of batteries in an
environmentall
yresponsible
manner. Take discharged
batteries to aquali fied spe-
cialist workshop or to acol-
lectio npoint for used batter-
ies.
Replacin gthe battery AC
R2450 lithium battery is required when
replacing the battery.
X Press apointe dobject into recess ;.
X Slide battery cover :backwards in the direc-
tio noft he arrow. 92
Operatin
gthe climat econtrol systemClimat econt rol
Page 96 of 261

X
Insert new battery =with the lettering facing
upwards. X
Slide battery cover :onto the remote con-
trol in the opposite direction to the arrow until it engages.
X Use the remote control to check the vehicle's
auxiliary heating functions.
Problems with the auxiliary heating/ventilation Problem
Possible causes/con
sequences andM
MSolutions FAIL
¨ The signal transmission between the transmitter and the vehicle is
faulty.
X
Change your position in relation to the vehicle, moving closer if
necessary. FAIL The auxiliary heating or auxiliary ventilation cannot be switched on or
has switched itself off.
The starter battery is not sufficiently charged.
X Charge the starter battery. The fuel level has dropped into the reserve range.
X Refuel at the nearest filling station. The auxiliary heating or auxiliary ventilation is faulty.
X Have the auxiliary heating or auxiliary ventilation checked at a
qualified specialist workshop. The auxiliary heating or auxiliary ventilation was started more than
twice when the engine was switched off.
X Switch on the engine and let it run for more than 10 seconds. The battery symbol on
the left of the remote
control display is shown
as empty. The remote control battery is discharged.
X Replace the remote control battery (Y page 92).Air ven
ts Important safety notes
G
WARNING
Very ho torvery cold air can flow from the air
vents. This coul dresult in burns or frostbite in
the immediate vicinity of the air vents. There
is ar isk of injury.
Make sure that all vehicl eoccupants always
maintai nasufficient distance to the air out-
lets. If necessary, redirect the airflow to
another area of the vehicl einterior. In order to ensure the direct flow of fresh air
through the air vents into the vehicle interior,
please observe the following notes:
R keep the air inlet betwee nthe windscree nand
the bonnet free of blockages, such as ice,
snow or leaves
R never cover the vents or ventilation grilles in
the vehicle interior
i For virtually draught-free ventilation, adjust
the sliders of the air vents to the centre posi- tion.
i If the automatic climate control regularly
deviates from the selected temperature or is Airv
ents
93Climatecont rol Z
 1
1 2
2 3
3 4
4 5
5 6
6 7
7 8
8 9
9 10
10 11
11 12
12 13
13 14
14 15
15 16
16 17
17 18
18 19
19 20
20 21
21 22
22 23
23 24
24 25
25 26
26 27
27 28
28 29
29 30
30 31
31 32
32 33
33 34
34 35
35 36
36 37
37 38
38 39
39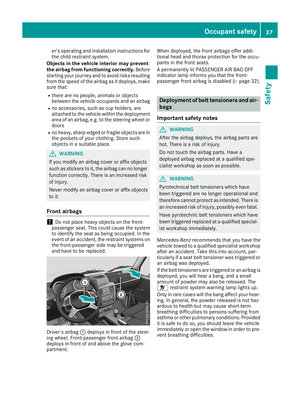 40
40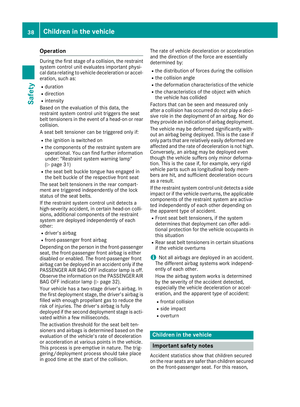 41
41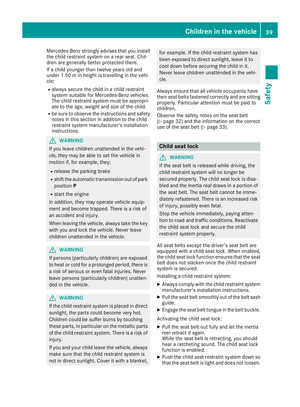 42
42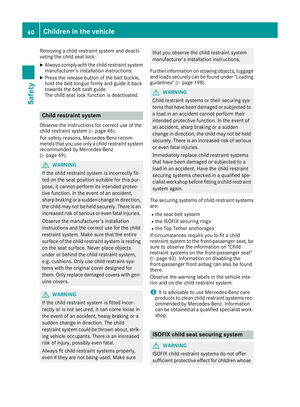 43
43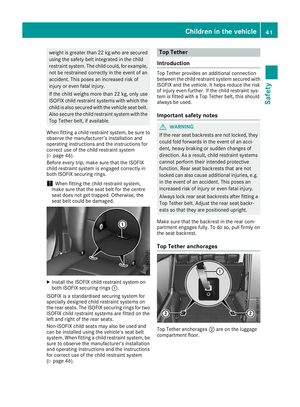 44
44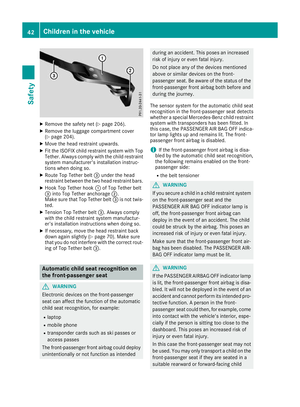 45
45 46
46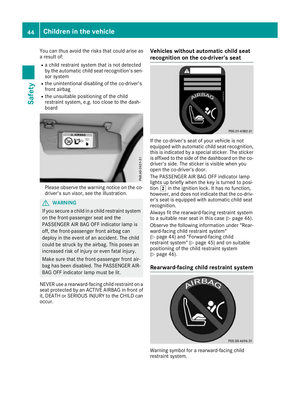 47
47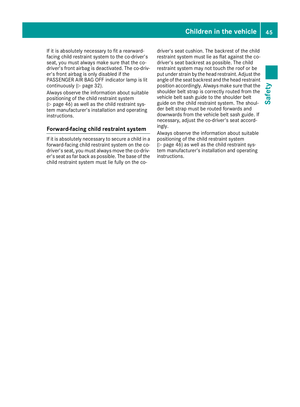 48
48 49
49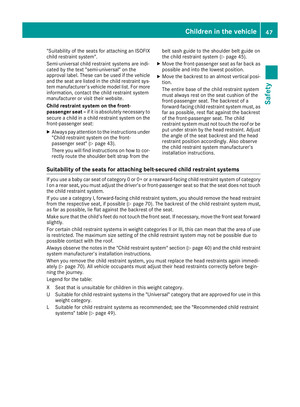 50
50 51
51 52
52 53
53 54
54 55
55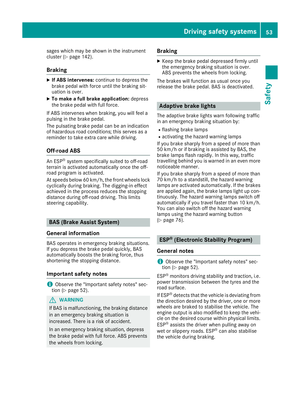 56
56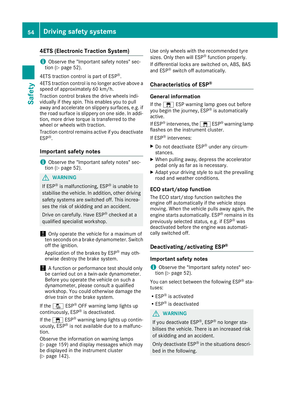 57
57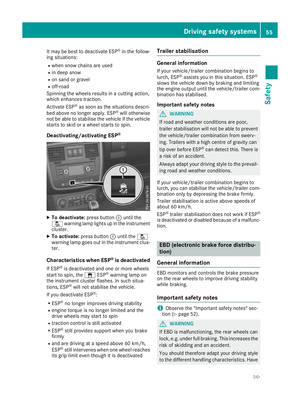 58
58 59
59 60
60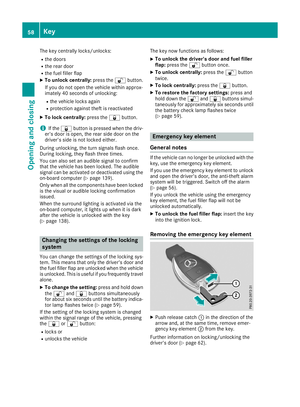 61
61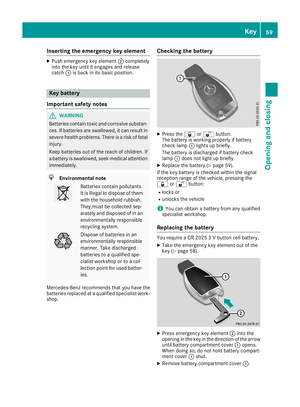 62
62 63
63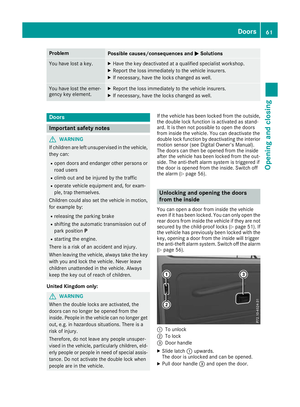 64
64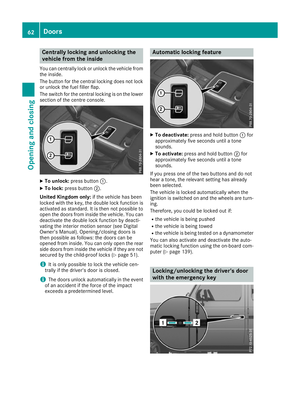 65
65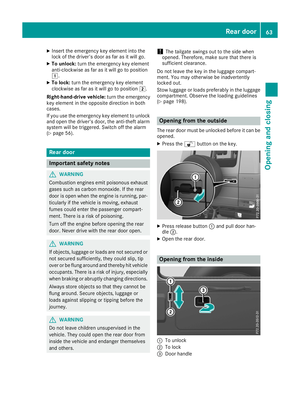 66
66 67
67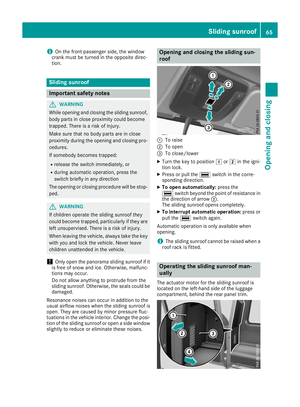 68
68 69
69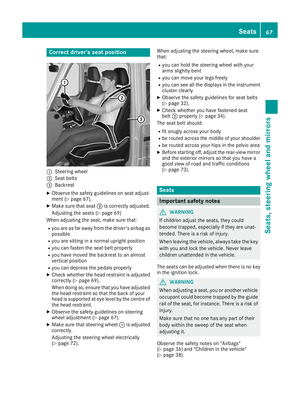 70
70 71
71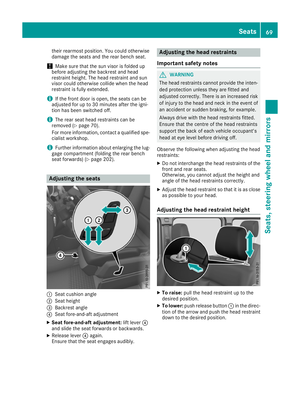 72
72 73
73 74
74 75
75 76
76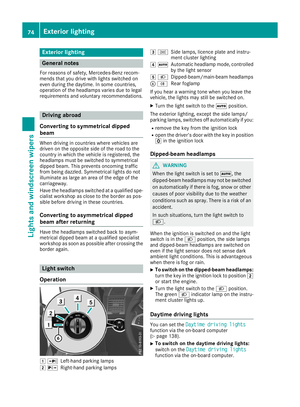 77
77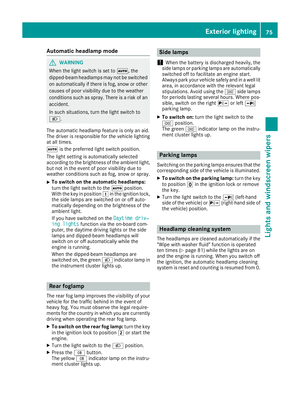 78
78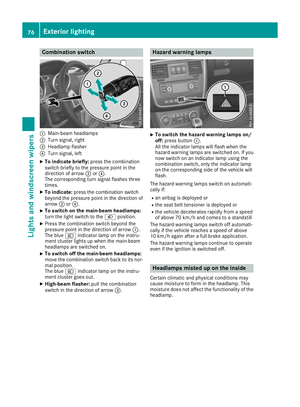 79
79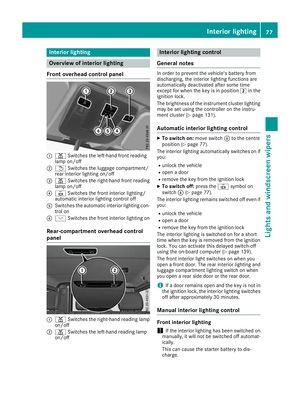 80
80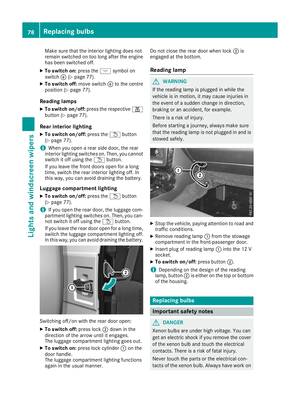 81
81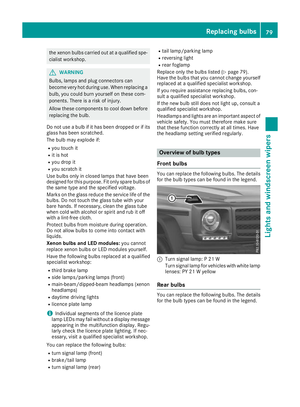 82
82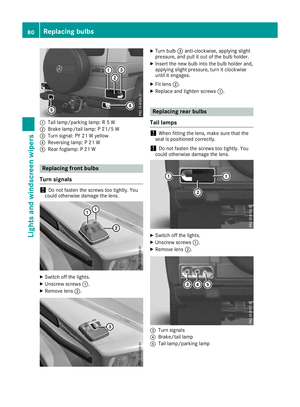 83
83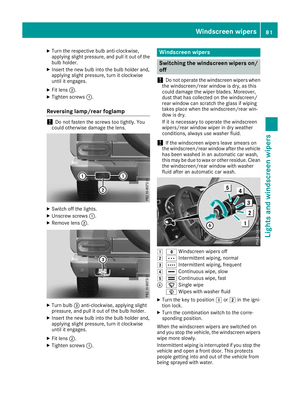 84
84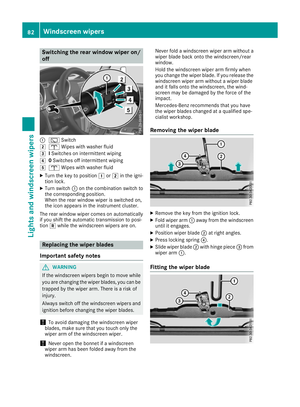 85
85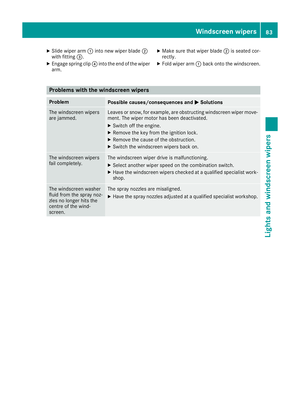 86
86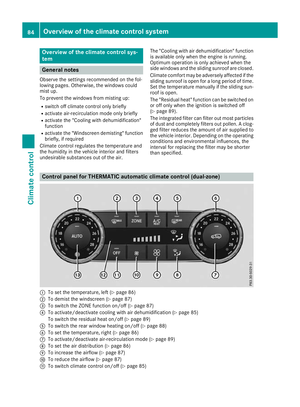 87
87 88
88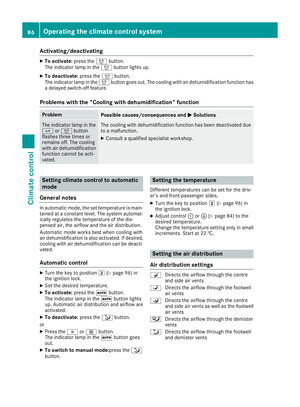 89
89 90
90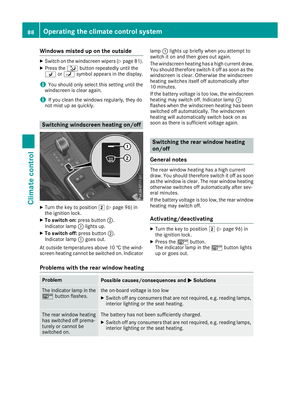 91
91 92
92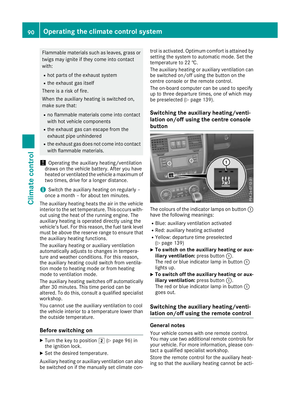 93
93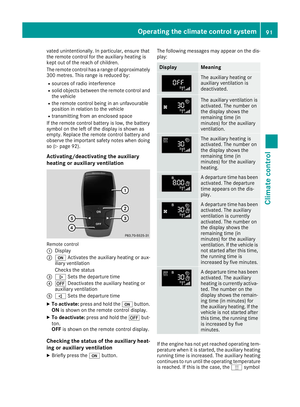 94
94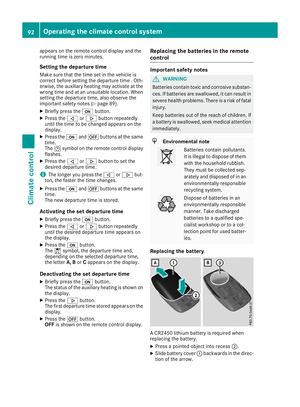 95
95 96
96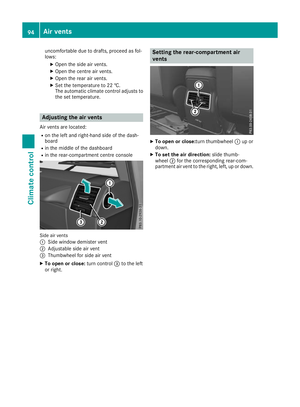 97
97 98
98 99
99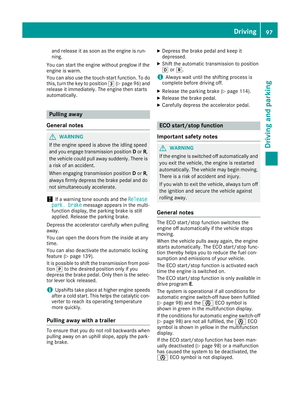 100
100 101
101 102
102 103
103 104
104 105
105 106
106 107
107 108
108 109
109 110
110 111
111 112
112 113
113 114
114 115
115 116
116 117
117 118
118 119
119 120
120 121
121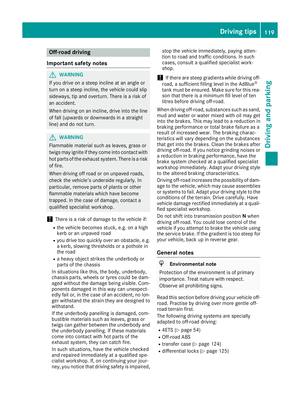 122
122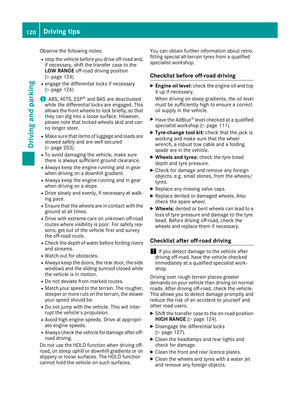 123
123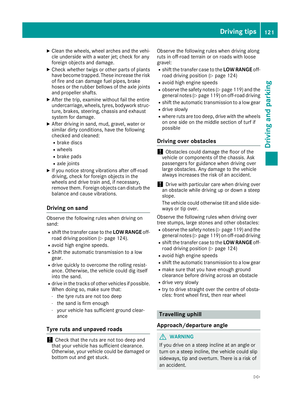 124
124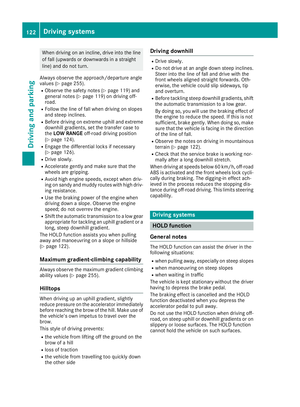 125
125 126
126 127
127 128
128 129
129 130
130 131
131 132
132 133
133 134
134 135
135 136
136 137
137 138
138 139
139 140
140 141
141 142
142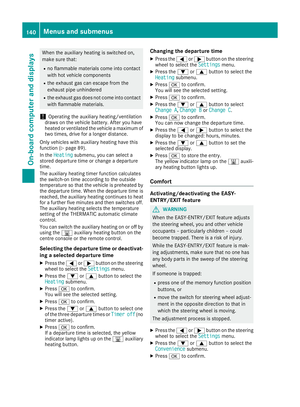 143
143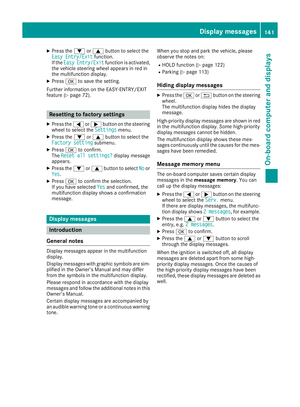 144
144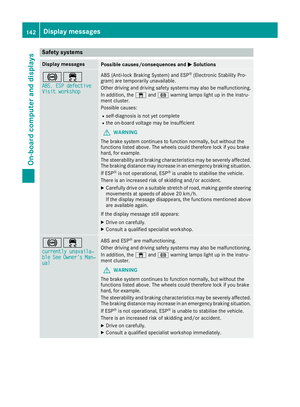 145
145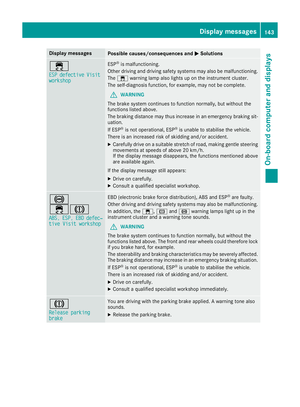 146
146 147
147 148
148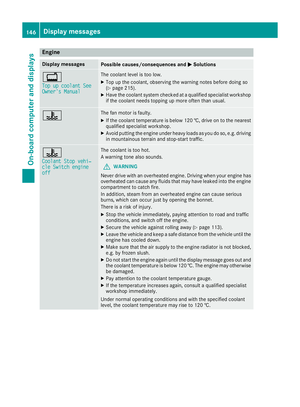 149
149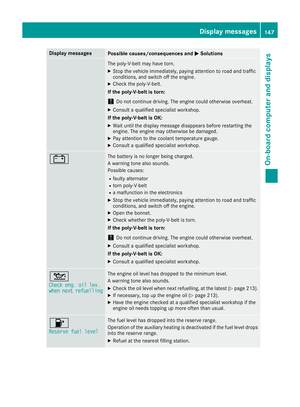 150
150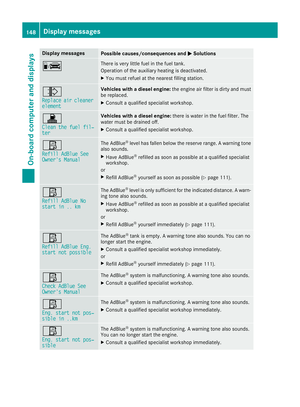 151
151 152
152 153
153 154
154 155
155 156
156 157
157 158
158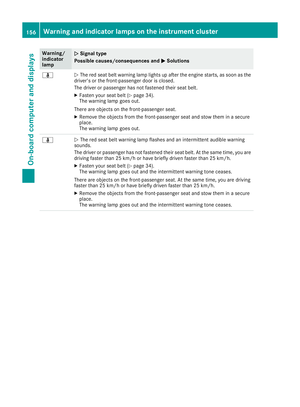 159
159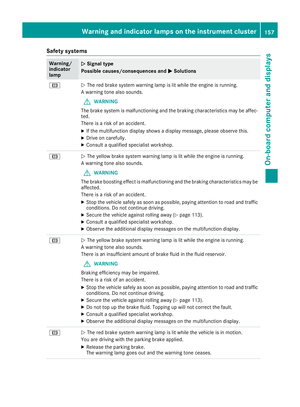 160
160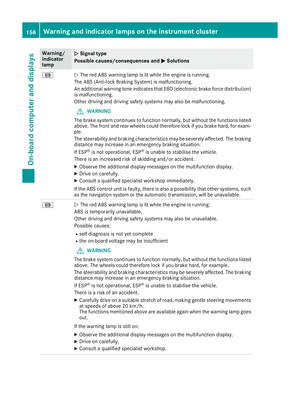 161
161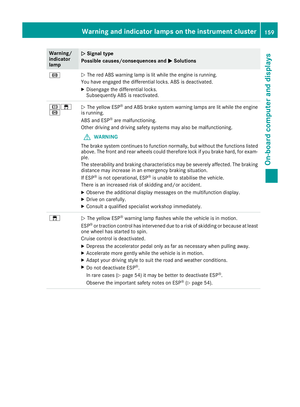 162
162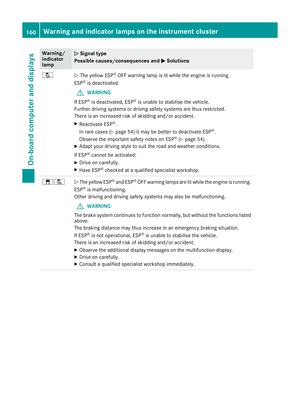 163
163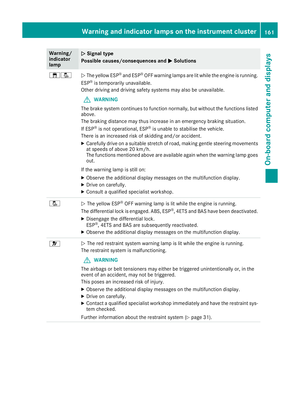 164
164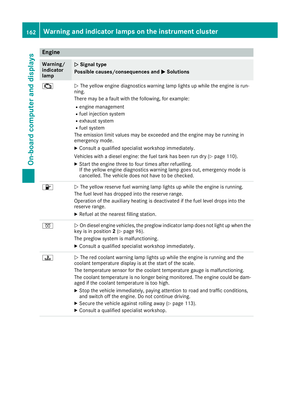 165
165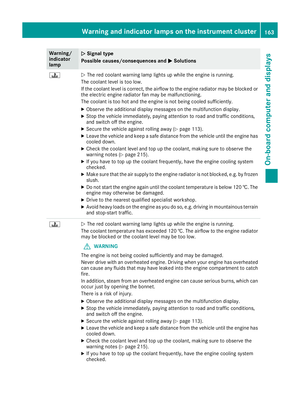 166
166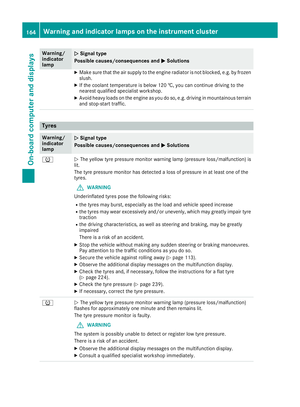 167
167 168
168 169
169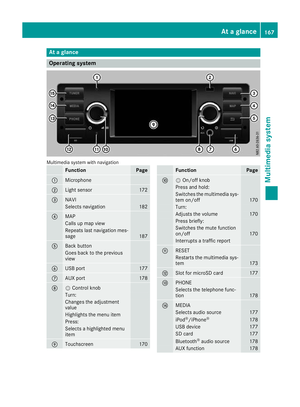 170
170 171
171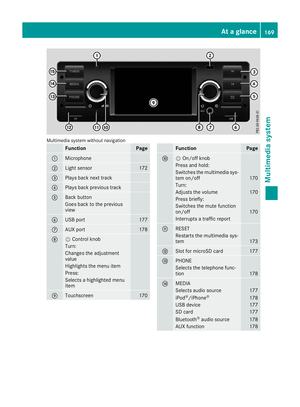 172
172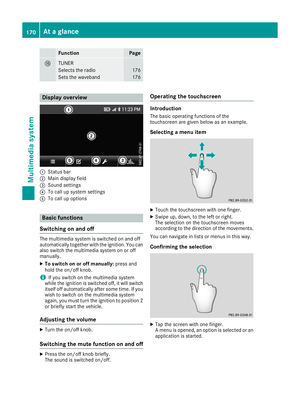 173
173 174
174 175
175 176
176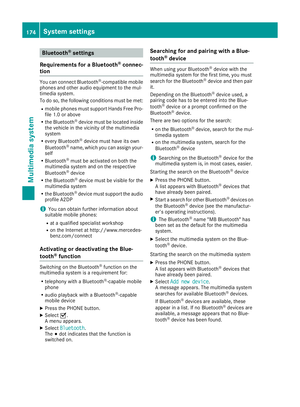 177
177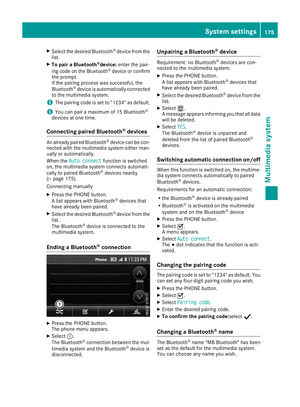 178
178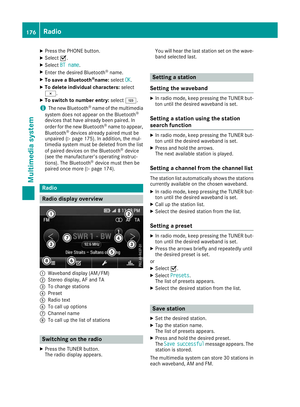 179
179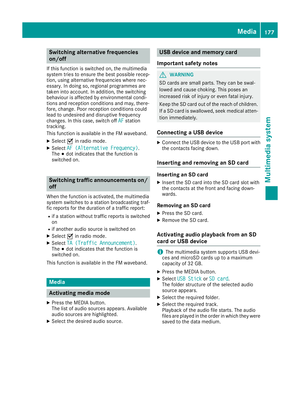 180
180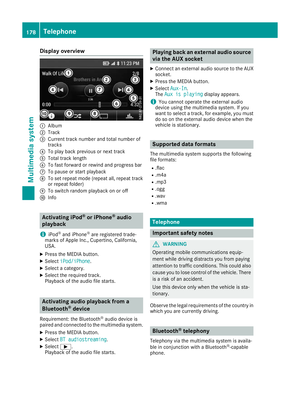 181
181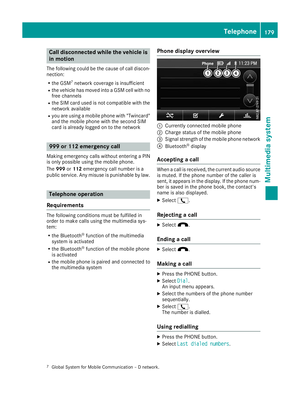 182
182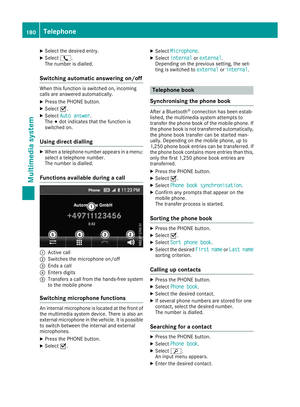 183
183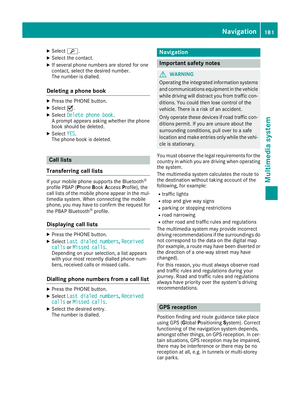 184
184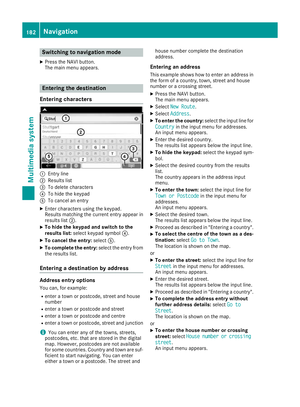 185
185 186
186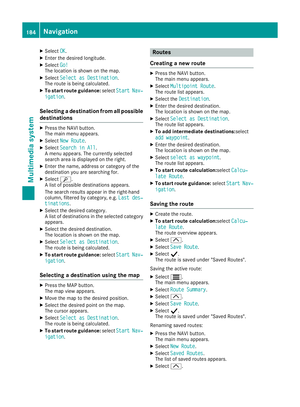 187
187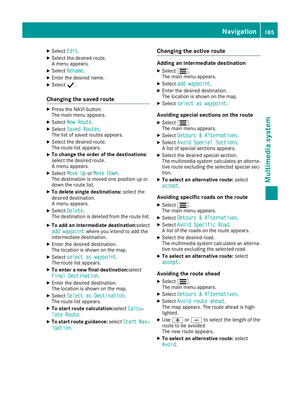 188
188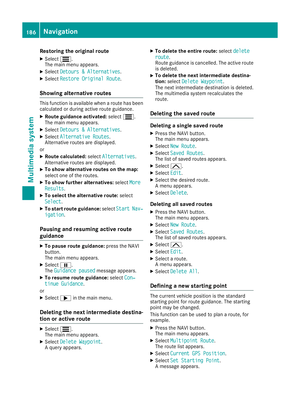 189
189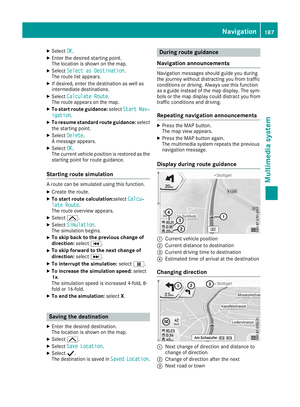 190
190 191
191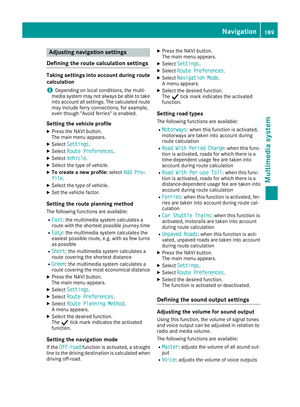 192
192 193
193 194
194 195
195 196
196 197
197 198
198 199
199 200
200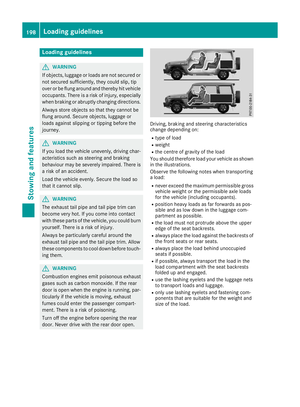 201
201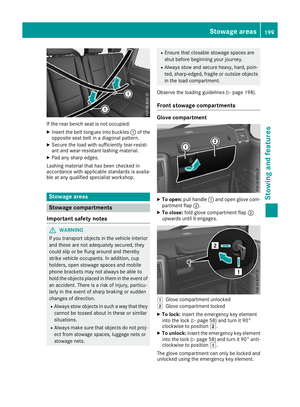 202
202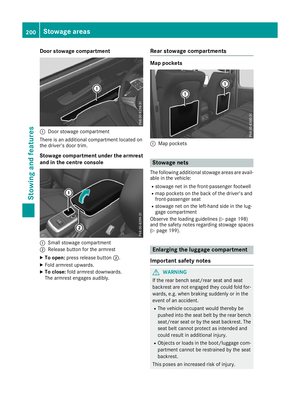 203
203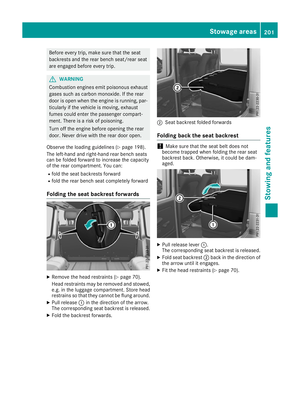 204
204 205
205 206
206 207
207 208
208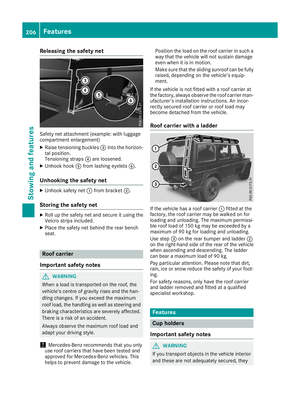 209
209 210
210 211
211 212
212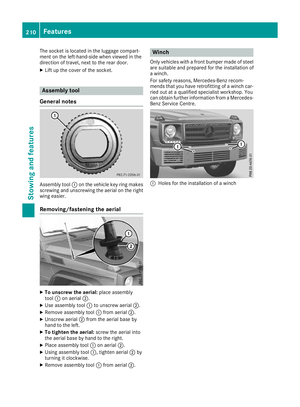 213
213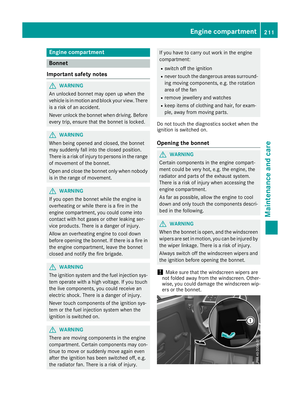 214
214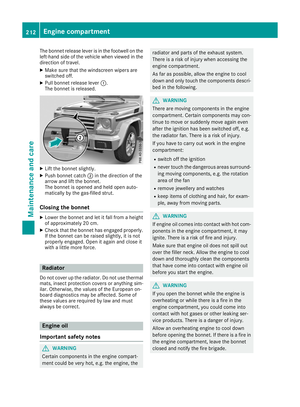 215
215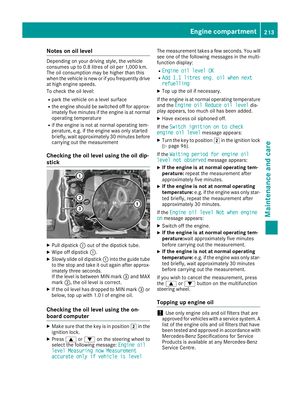 216
216 217
217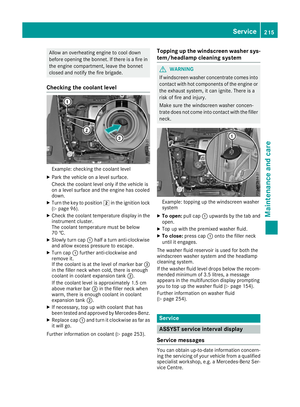 218
218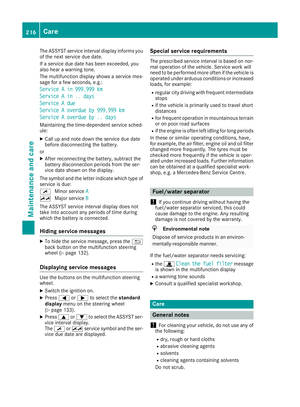 219
219 220
220 221
221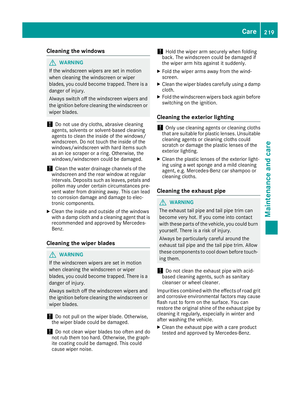 222
222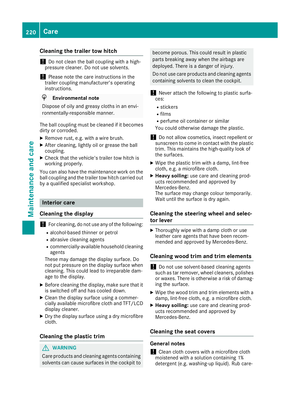 223
223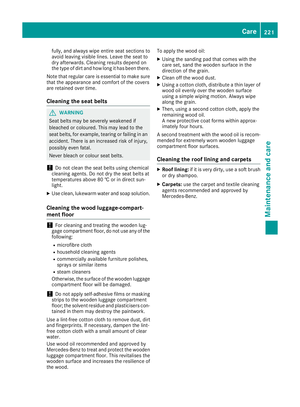 224
224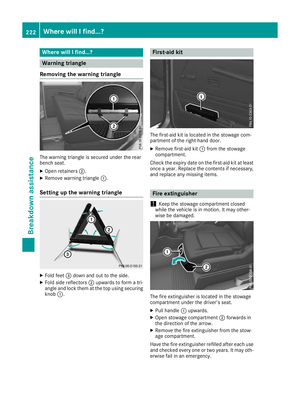 225
225 226
226 227
227 228
228 229
229 230
230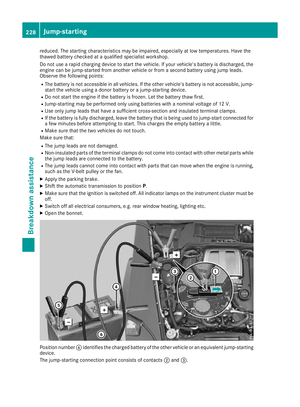 231
231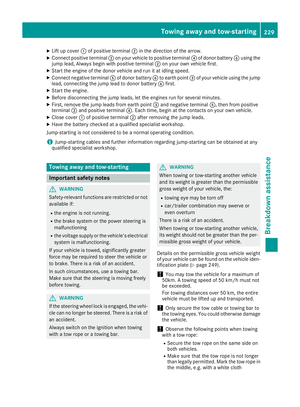 232
232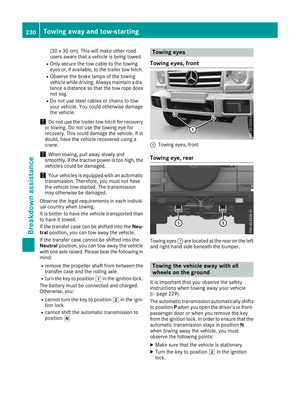 233
233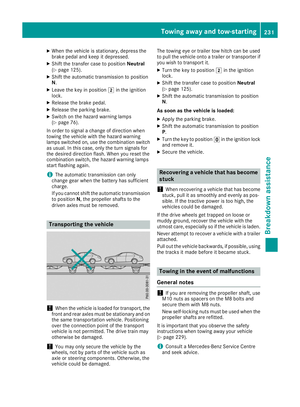 234
234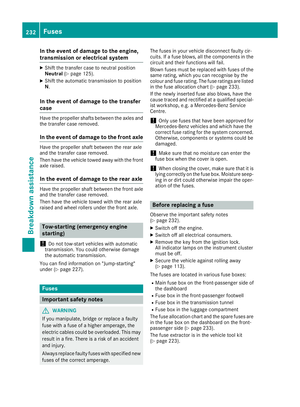 235
235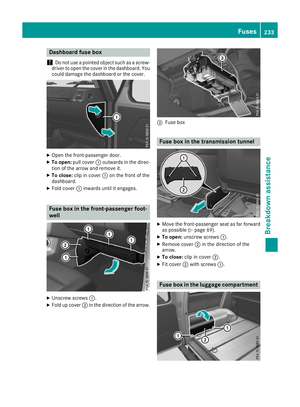 236
236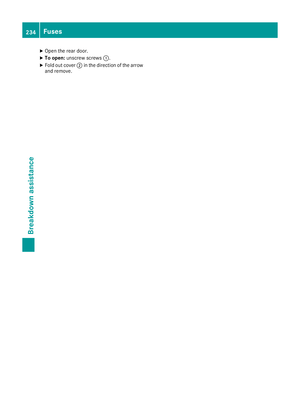 237
237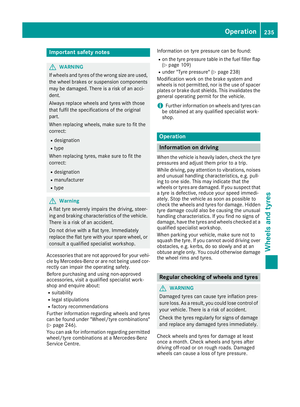 238
238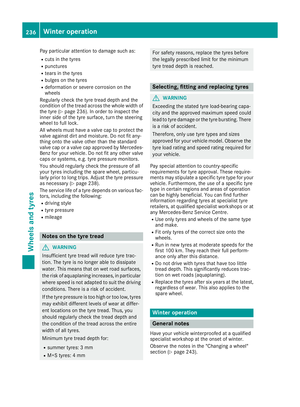 239
239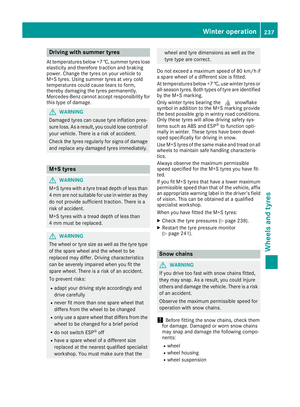 240
240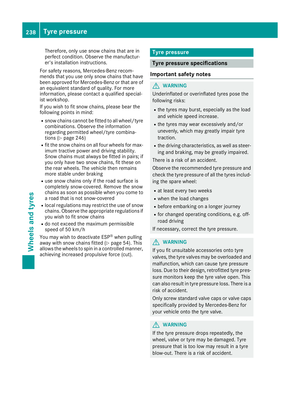 241
241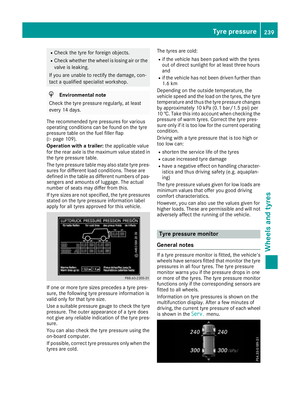 242
242 243
243 244
244 245
245 246
246 247
247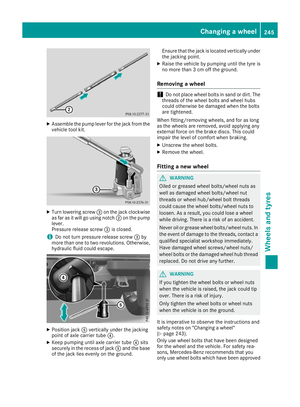 248
248 249
249 250
250 251
251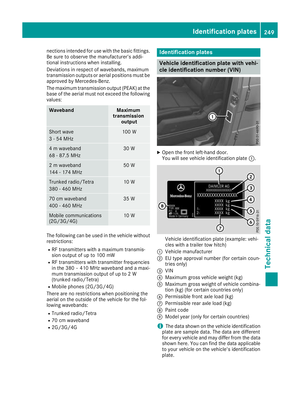 252
252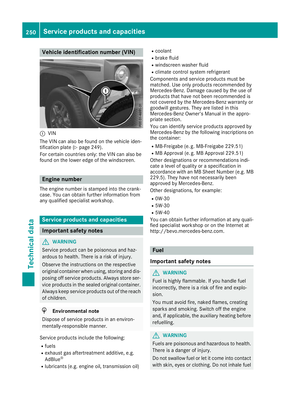 253
253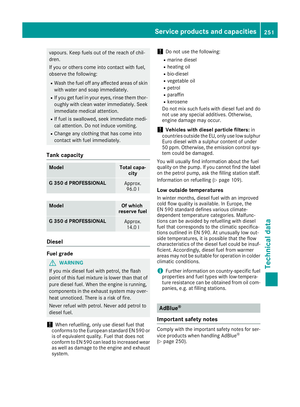 254
254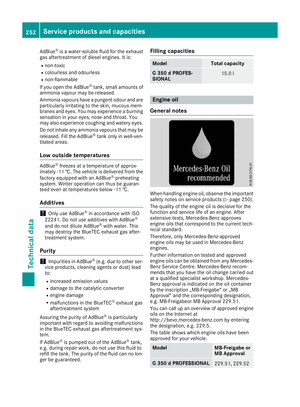 255
255 256
256 257
257 258
258 259
259 260
260