Page 41 of 264
 1.11
N 1.11 ,....,
• Pull the switch briefly to the se con d s top to au
tomatica lly close the window.
A WARNING
-When you leave your veh icle -even if on")
M N
i? co ,...., \!) 1.1'1
N 1.1'1 ,....,
• Pull the switch briefly to the se con d s top to au
tomatica lly close the window.
A WARNING
-When you leave your veh icle -even if only
br iefly -always remove the ignition key. This
applies part icularly when children remain in
the vehicle. Otherwise the children could start the engine o r operate electr ical equip
ment (e.g. power w indows). The power win
dows are functional until the d river's door o r
passenger's door has been opened.
- Pay close attention when closing the w in
dows to prevent pinch ing of hands or limbs.
- When loc king the veh icle from outs ide, the
vehicle must be unoccupied since t he win
dows can no longer be opened in an emer
gency.
@ Tips
- When you open the doors, the windows au
tomatically lower about 10 mm.
- After the ignition has been switched off, the
windows can st ill be opened or closed for
abo ut 10 m inutes. The window regulato rs
are not switched until the driver's or pas
senger's door is opened .
Convenience opening/closing
The windows and the panoramic tilting sunroof
can be opened and closed with the mechanical
key or the emergency key.
Fig. 3 1 Key tu rns fo r opening a nd clos ing
Con venience open ing fea ture
• Use the emergency key or pull the mechanical
key out of the master key
Q page 33 .
-
Opening and cl osing
• Insert the key into the lock of the driver's doo r.
• Turn the key to position
Q fig. 31 @ unti l all
the windows have reached the des ired pos ition
and the panoramic tilting sunroof is tilted.
Convenienc e clo sing featur e
• Use the emergency key or pull the mechanical
key out of the master key
Q page 33 .
• Turn the key in the lock of the d river's door to
the lock position @ unti l the windows and the
panoramic tilting sunroof are closed
Q ,A.
When the panoramic tilting sunroof is tilted/
closed, the electric sun shade* is also opened/
closed.
A WARNING
-- Never close the w indows and the panoram ic
tilt ing sunroof inattentively and without
checking - there is risk of injury.
- You must always watch when the windows
are be ing raised so that no one can be trap
ped. If you release the key, the closing ac
tion is immed iate ly canceled.
- Always read and heed WARNING
Q .&. in
General description on page 31.
Correcting window regulator malfunction
After disconnecting the vehicle battery , the one
touch up and down feature must be activated
again.
• Pull and hold the power window switch until
the window is completely closed.
• Release the sw itch and pull the sw itch again for
one second .
39
Page 42 of 264

Opening and closing
Panorama roof
Operation
Fig. 32 Sectio n of headliner : swi tc h fo r sunroo f
.,. To tilt the sunroof, press the switch briefly .
• To close the sunroof, pull the switch briefly .
• To set an intermediate position, press/pull the
switch until the roof reaches the desired posi
tion.
After the ignition is switched off, you can still op
erate the sunroof for about 10 minutes . As soon
as the driver's or passenger's door is opened, the
switch is inoperative .
Sun blind
The sun blind can be opened and closed manually in any position .
A WARNING
Pay careful attention when closing the sun
roof - otherwise serious injury could result!
For this reason, always remove the ignition
key when leaving the vehicle.
(D Note
Always close your sunroof when leaving your
veh icle. Sudden rain can cause damage to the
interior equipment of your vehicle, particular
ly the electronic equipment.
- Information on convenience opening/clos
i ng
c::> page 39.
40
Emergency closing of the panoramic tilting
sunroof
If the sunroof detects an object in its path when
it is closing, it will open again automatically . In
this case, you can close the roof with the power
emergency closing function.
• Within five seconds after the sunroof opens au
tomatically, pull the switch until the roof
closes .
Valet parking
Applies to vehicles: wi th valet parkin g function
The valet parking feature protects the luggage
compartment from unau thorized access.
-
Fig. 33 Glove com partment: va let pa rk ing b utto n
You can switch the "valet parking function" on
when someone else is parking your vehicle. When
the function is switched on, the vehicle can be driven, locked and un locked using the master key,
but access to the luggage compartment is not
permitted.
• Take the mechanical key out of the master key
c::>page33.
• Open the glove compartment c::> page 61.
• Activate c::> fig. 33 the "valet parking" feature by
pressing the
! VA LET I button . The indicator light
in the switch illuminates.
• Close the glove compartment and lock it with
the mechanical key .
• Lock both rear seatbacks w ith the mechan ical
key
c::> page 64.
• Lock the luggage compartment pass-through
with the mechanical key
c::> page 65 .
• Leave the master key with the service personnel
for parking and keep the mechanical key with
you.
Page 43 of 264

M N
0 loo
rl I.O
"' N
"' rl
The following buttons are deactivated when the
va let parking function is switched on:
- l'-"' I button in the dr iver's door
- I""' I button on the master key
- Handle in the rear lid
When the valet parking feature is activated, the message
V alet pa rk ing acti vated appears in the
instrument cluster d isp lay when you switch the
ignit ion on .
Garage door opener
(Homelink)
Description
Applies to vehicles: with ga rage door opener (Homeli nk)
Fig. 34 Garage door opene r: exa mples of us ing wit h differ
ent systems
You can activate various systems such as garage
doors, security systems and home lighting from
i nside your vehicle using the garage door opener
( H omelink). There are three buttons for this in
the vehicle headliner that can be in used in p lace
of up to three hand-he ld transmitters .
To operate systems using the garage door ope n
er, the th ree bu ttons in the roof head liner must
be p rog rammed first.
A WARNING
Make sure no people or objects are in the im
mediate v icin ity of the equipment when us ing
or programming the garage door opener. Peo
ple can be injured and objects can be dam
aged if they are caught in the equipment .
Opening and clo sing
(D Tips
- For security reasons, we recomme nd that
you clear the programmed b uttons before
selling the vehicle.
- For add itiona l information about Homelink
'
visit www.homelink.com.
- For Declaration of Compliance to United
States FCC and Ind ustry Canada reg ulations
¢page 247.
Operation
Applies to vehicles: wit h garage door opener (Homelink)
Fig . 3 5 Headliner : contro l uni t
Requirement: The buttons in the roof headliner
must be programmed ¢
page 41 or
¢
page 42 and the veh icle must be within
range of the system, such as the garage door
opener .
.,. Press the button to open the garage door. The
LED @ blinks or turns on .
.,. Press the button again to close the garage
door .
(D Tips
To open or close the garage door, press the
button, but do not hold it for longer than
10 seconds or the garage door opene r module
will switch to programming mode .
Programming the buttons (version A)
Applies to vehicles: with garage door opener (Homelink)
You can program both fixed code and ro lling code
systems using this procedure. .,.
41
Page 44 of 264

Opening and closing
Programming or reprogramming buttons
.. Swi tch the ignition on .
.. Press and ho ld the button in the roof head liner
¢ page 41, fig. 35 that you would like to pro
gram for at least 10 seconds. O r
.. Se lect:
ICARI function button> Car system s*
control button > Vehicle settings > Garage
door opener > Program garage door opener .
If
th is path is not available, program the butto n
as descr ibed in version B ¢
page 42 .
.., Fo llow the inst ruc tions in the MM I.
Erasing button programming
The programmed buttons cannot be erased indi
vidually. They must all be erased together. Repro
g ram t he b uttons if necessa ry .
.. Se lect :
ICARI funct ion button> Car systems *
control button > Vehicle sett ings > Garage
door opener > Clear program settings > Yes .
D isplaying the version /status /country code
.. Se lect: I CARI function button > Car sy stem s*
control button > Vehicle sett ings > Garage
door opene r> Version inform ation.
@ Tips
- Programming through the MM!* is not pos
sible with all infotainment systems. If this
i s the case, program the buttons as descri
bed in ve rsion B ¢
page 42.
-The requ ired distance between the hand
transmitter and the Homelink module in
the rad iator g rille
9 page 42, fig . 36 de
pends on the system that you a re program
ming.
- Depend ing on the model of the system, you
may need to release the b utton on the re
mote cont rol during programmi ng a nd
p ress it again. H old each pos ition you try for
at least 15 seconds before try ing another
p osition . Kee p t he turn signa ls o n your ve hi
cle in view when doing t his.
- After programmi ng the gar age door opener,
i t may be necessary to sync hronize the mo
tor with the system. Refer to the manufac
ture r's instructions .
42
Programming the buttons (version B)
Applies to vehicles: with garage door opener (Homelink)
Fig. 36 Dista nce be tween the radiato r grille a nd the hand
tra nsmi tter
Programming the button: Part 1 with the
controls
1. Swi tch the ign ition on .
2. Press and ho ld both outer b uttons in the roof
headline r¢
page 41, fig. 35 unti l the LED @
turns off completely (after about 20 sec
onds). This procedure clears the standard co
des that were set at the factory and does
not
need to be repeated aga in to program the
other buttons .
3 . Briefly press the button on the roof headliner
t h at you wo uld like to program.
4. Wai t until the LED@ begins to blink q uickl y.
Programming mode is act ive for 5 min utes.
5. Move in front of yo ur vehicle while holding
the or iginal remote control for t he system
t h at wou ld like to program to a button in the
roof headliner.
Programming the button: Part 2 at the
radiator grille
6. Hold the remote control up to the radiator
grille on your vehicle¢
fig. 36.
7. Press and ho ld the remote control unt il the
tu rn s ignals on your vehicle blink . Th is may
tak e up to 30 seco nds.
8. If the eme rgency flashers blink t hree times,
the programming w as suc ces sful. I f the
emergency flashers only blink one t ime, the
S minute time limit for the programm ing has
ended or the programming was not s uccess
f ul. Repeat the programming from the third
step, or try changing the distance to the radi-
ator grille .
IJ,,
Page 45 of 264
 ..,.,
N ..,., ,....,
9. If the garage door or other system does not
open using the buttons in the roof headliner
even though the programming was success
fu l, t")
M N
i? co ,...., \!) ..,.,
N ..,., ,....,
9. If the garage door or other system does not
open using the buttons in the roof headliner
even though the programming was success
fu l, the system may use a rolling code in
stead of a f ixed code.
Rolling code program
ming must be performed ¢ page 43.
The other two buttons in the roof headliner can
be programmed accord ing to the instructions
above. Begin w ith the third step .
Erasing button programming
The programmed buttons cannot be erased indi
vidua lly. They must a ll be erased together. Repro
gram the buttons if necessary.
.. Switch the ignition on.
.. Press and hold both outer b uttons in the roof
headliner until the LED ® turns off complete ly
(after about 20 seconds).
Reprogramming the buttons
"'S witch the ign ition on.
"'T o reprogram an individual button, press and
hold the button until the LED® starts to flash
quick ly (after about
10 seconds). Release the
button immediately. Programming mode is ac
t ive for 5 minutes .
.. Conti nue with the fifth step.
(D) Tips
-Programming using the buttons in the roof
headliner is not possib le w ith all Infotain
ment systems . If this is the case, program
the buttons as descr ibed in version A
¢page 41.
-The required distance between the hand
transmitter and the Homelink module in
the radiator grille¢
fig. 36 depends on the
system that you are prog rammin g.
- Depending on the model of the system, you
may need to release the button on the re
mote control during programming and
press it again . Hold each position you try for
at least 15 seconds before trying another
position. Keep the turn signals on your vehi
cle in view when doing this.
Opening and closing
Rolling code programming
Applies to vehicles: with garage door opener (Homelink)
Rolling code programming is also needed for
some systems .
Identifying a rolling code
.. Press and hold the button in the roof headliner
that was already programmed.
"' Watch the LEO @¢
page 41 , fig. 35. If the LED
blinks quickly, the systems (such as a garage
door) is equipped with a roll ing code.
"' Program the rolling code as follows:
Activating the motor unit in a system
.. Locate the programming button on the sys
tem's motor un it. The exact location and color
of the button may vary depend ing on the brand
of the system .
"' Press the programming button on the garage
door opene r moto r un it (th is w ill usually acti
vate an "i ndicator" on the motor unit). You now
have approximately
30 seconds to program the
button in the roof headliner.
Programming the button in the roof
headliner
"'Press and hold the previous ly programmed but
ton in the roof headliner for 2 seconds .
.. To end ro lling code programming, press and
hold the button again for 2 seconds.
.. With some systems, the button may need to be
pressed a third time to end the programming
process .
After programm ing, the system should detect
the signal and begin moving when the button in
the roof headliner is pressed. Now you may pro
gram the ot her buttons as needed .
(D Tips
-The rolling code can be programmed more
quickly and more easily with the help of a
second person.
- If you have difficulty programming the roll
ing code, referring to the user guide for the
system may help .
43
Page 46 of 264

Lights and Vi sion
Lights and Vision
Exterior Lighting
Switching the lights on and off
Fig. 3 7 Instrume nt pane l: headl ig h t co ntrol switc h
Light switch ·'t/-·
Tu rn the switch ¢ fig. 37 to the co rr e spond ing
position . Whe n the lights a re switched on, the
:oo,
symbo l turns on.
0 -The lights are off or the daytime runn ing
lights are on:
- USA models : The daytime running lights are ac
tivated when the light sw itch
¢ fig . 37 is in the
0 position or the AUTO position (only in day
li ght conditions). The daytime running lights
funct io n can be turned on and off in the radio
o r MM I* men u
Exterior lighting ¢ page 45,
c:?,& .
-Canada model s: T he daytime r unni ng lights are
activated when the lig ht switch
C?fig. 37 is in
t h e
O pos it ion, 300, position or the AUTO posi
tion (only in daylight conditions) . The daytime
runn ing lights function cannot be turned off
¢ ,A .
AUTO* -Au tomatic headlights swi tch on and off
depending on brightness, for examp le in twilight,
during rain or in tu nnels ¢
A.
:oo , -Side marker lights
fO -Low beam headlights
Fog lights /rear fog light(s )*
Press the appropriate button c:? fig. 3 7:
}0 -Fog lights
O* -Rea r fog light(s)
44
adaptive light*
When switched on, adap tive ligh t ad ap ts to
curves in the road depending on the vehicle
speed and the steering ang le. This provides bet
ter light ing through the curve. The system oper
ates at speeds between approximately 6 mph
(10 km/h) and 68 mph (110 km/h).
Static cornering light* (vehicles with adaptive
li ght) -the corne ring light switches on at speeds
up to approximate ly 25 mph (40 km/h) when a
certain steering wheel angle is reached or when a
turn s ignal is act ivated . T he area to the side of
the ve hicle is illuminated better when turning .
The adaptive light and the cornering light only
funct io n when the switc h is in the AUTO position
(automat ic head lights*) .
A WARNING
- Daytime r unning lights and a utomat ic head
lights* are only intended to as sist the driver .
T h ey do not re lieve the driver of his respon
sibility to c heck t he hea dlights and to tur n
t hem on m anually ac co rding to the cur rent
light and visibili ty conditions. Fo r exam ple,
fog cannot be detected by the light sen
sors*. So a lways sw itch on the headlights
l[D
under these weather conditi ons and when
driving in the dark.
- Crashes can happen when y ou cannot see
the road ahead and when you cannot be
seen by ot her moto rists. Always tu rn on the
headlights so that yo u ca n see ahead a nd so
that othe rs can see yo ur ca r from the back.
- Please obey all laws when usi ng the lighting
sys tems described here.
(D Note
The rear fog lights* should on ly be turned on
i n accordance w ith traffic regulat ion, as t he
lights are br ight for follow ing traffic.
{!) Tips
- The light sensor* for headlight control is lo
cated in the rear v iew mirror mount. Yo u
should the refore not app ly any st ickers to
Page 47 of 264

M N
0 loo
rl I.O
"' N
"' rl
the windshield in this a rea in order to
prevent malfunctions or failures .
- Some exterior lighting functions can be ad
ju ste d
~ page 45 .
-When yo u remove your key from the igni tion
while the vehi cle's ligh ts are turned o n, a
buzzer sounds as long as t he driver 's door is
open.
- In coo l o r dam p weather, t he inside of the
h eadlights, turn sig nals and tail lights can
fog over d ue to the temperature difference
between the inside and outs ide. They will
clea r shortly after switching them on. T his
does not affect t he service li fe of the light
i ng.
- In the event of a light sensor malfunction,
the driver is not ified in the instr ume nt clus
te r display~
page 21.
Turn signals and high beam lever
The lever operates the turn signals, the high
b eams and the headlight flasher.
Fi g. 3 8 Tu rn signa l and high beam lever
Turn signals ¢ Q
g N
0
~ CD
The turn signals activate when you move the lev
er into a turn s ignal position when the ignition is
switched on.
@ -righ t tur n signal
@ -left turn signa l
The turn s ignal b links three times if you just tap
the lever.
High beams and headlight flasher
[0
M ove the lever to the corresponding position:
@ -high beams o n
Lights and Vis ion
@ -high beams off or headlight flasher
T he ind icator light
II in t he inst rument cl uste r
tu rns on.
Notes on these features
- The
turn signals on ly wor k w ith the ign ition
tur ned on. The indicator ligh ts . or
II in the
instr um ent clus ter also b link.
-After you have tu rned a corner, the turn s ignal
sw itches off automatically.
- The
high beam works on ly when the headlights
are on . T he indicator light
II in the instrument
cluste r illuminates whe n the high beams a re
on.
- The
headlight flash er works o nly as long as yo u
hold the leve r - even if there are no lights
sw itched on . The indica to r li ght
II in the in
s trumen t cluste r ill umin ates when you use t he
head light flasher.
,&. WARNING
D o not use t he h igh beam or hea dlight flashe r
i f you know that these could blind oncoming
traffic.
Adjusting exterior lighting
The func tions are selected in the radio or MMI* .
.,. Select: !CAR I func tion b utton > Exterior light
ing .
Or
.,. Sele ct: !~C_A _R~ I function b utton > Car systems *
contro l butto n > Vehicle settings > Exterior
lighting .
Coming home (light when leaving car )*,
Leaving home (light when unlocking car)*
The
coming home f u nction illuminates the area
aro und t he vehicle when the ignition is switched
off and the driver's door is opened. Depend ing on
vehicle equipment, the function can be switched o n and off o r the length of t ime t he lig hts rema in
on* can be adjusted .
The
leaving home function illuminates t he area
around th e vehicle when unloc kin g it. This func-
t ion can be switched on and off. ""
45
Page 48 of 264

Lights and Vi sion
The comi ng h ome and leaving h ome fu nctions
only op erat e when it is da rk and the light switch
is in the AUTO position ¢
page 44, fig. 3 7.
Auto headlights*
When the light swit ch is in the A UTO ¢ page 44
posi tion, the sw itch-on po int of the lights can be
changed in the automatic drivi ng light function.
Daytime running lights
USA models :
You can sw itch th e dayt im e running
lights
on and off .
Canada models:
T he function ca nnot be turned
off . It is activated automatically eac h time the ig
n ition is switched on.
Travel mode*
The headlight beam is asymmetrical. This pro
vides stronger illum inat ion on the s ide of the
road on wh ich you a re driving. If you are driving
in a cou ntry that drives o n the opposite side of
the road from your own count ry, this will cause
g lare for oncom ing d rive rs. To prevent glare:
- Travel mode must be selected in vehicles with
Xenon headlights* .
- In veh icles with halogen headlights, certain
areas of the headlight lenses must be covered
with waterproof adhesive cove rs that prevent
l igh t from pass ing t hrough . For more informa
tion, ple ase see you r autho rized Aud i dea le r or
a ut ho rized repair facility.
When tr ave l mode is activa ted, a display in
t he dr ive r inform ati on system i nd ic ates this
e ach t ime yo u sw itch the ignition o n.
46
Emergency flashers
Fig. 39 Cente r co nsole : em erg en cy flas he r sw itc h
The emergency flashers makes other motorists
aware that you or you r vehicle a re in an emerge n
cy situat ion .
.. Press the switch~¢
fig. 39 to t urn the emer-
ge ncy flashers on or off.
When the emergency flas hers are on, all fo ur
turn s ignals b link at the same time. The turn sig
nal indicator lights
RB i n the instrument clus
ter, as we ll as the light in the emergency flasher
switch
IA] b link likewise .
You can indicate a lane change or a t urn w hen the
emergency flashers are switched on by using the
turn s ignal leve r. The emergency flashers stop
temporar ily .
The emergency flashers also wo rk when the igni
tion is turned off.
The emergency flashers w ill tu rn on a utomat ica l
l y if you a re in a n accident w here the airbag has
deployed .
@ Tips
You should turn on the emergency f lashers
when:
-yo u are the last veh icle standing in a t raff ic
jam so that any othe r vehicles com ing can
see you, or when
- yo ur vehicle has broken dow n or you a re in
an eme rgency s ituation, or when
-yo ur vehicle is be ing towed by a tow tru ck or
if yo u are towing a not her vehicle behind
you.
 1
1 2
2 3
3 4
4 5
5 6
6 7
7 8
8 9
9 10
10 11
11 12
12 13
13 14
14 15
15 16
16 17
17 18
18 19
19 20
20 21
21 22
22 23
23 24
24 25
25 26
26 27
27 28
28 29
29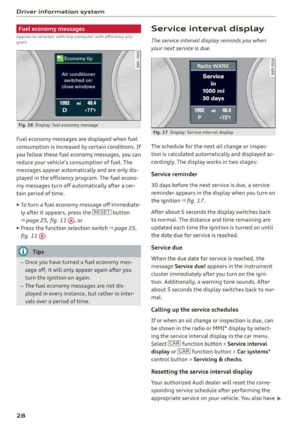 30
30 31
31 32
32 33
33 34
34 35
35 36
36 37
37 38
38 39
39 40
40 41
41 42
42 43
43 44
44 45
45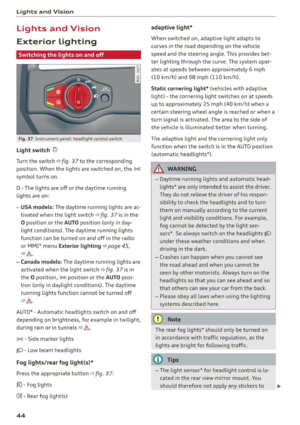 46
46 47
47 48
48 49
49 50
50 51
51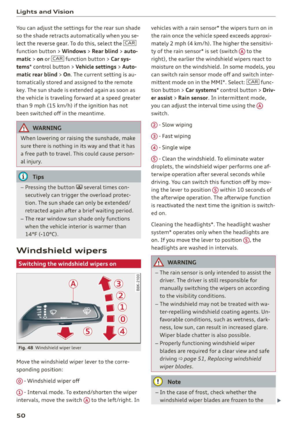 52
52 53
53 54
54 55
55 56
56 57
57 58
58 59
59 60
60 61
61 62
62 63
63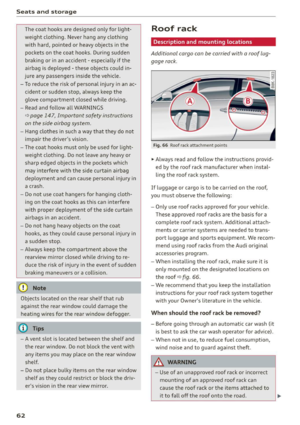 64
64 65
65 66
66 67
67 68
68 69
69 70
70 71
71 72
72 73
73 74
74 75
75 76
76 77
77 78
78 79
79 80
80 81
81 82
82 83
83 84
84 85
85 86
86 87
87 88
88 89
89 90
90 91
91 92
92 93
93 94
94 95
95 96
96 97
97 98
98 99
99 100
100 101
101 102
102 103
103 104
104 105
105 106
106 107
107 108
108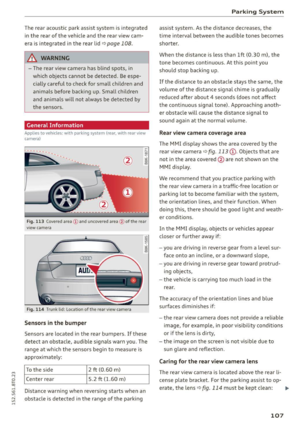 109
109 110
110 111
111 112
112 113
113 114
114 115
115 116
116 117
117 118
118 119
119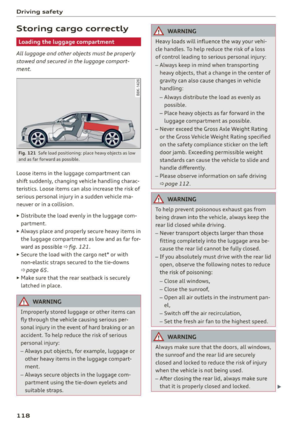 120
120 121
121 122
122 123
123 124
124 125
125 126
126 127
127 128
128 129
129 130
130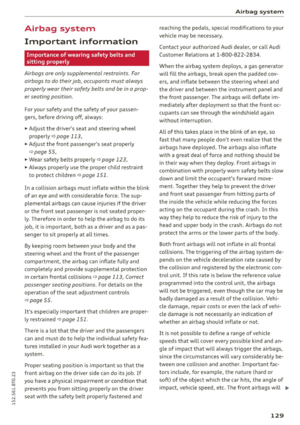 131
131 132
132 133
133 134
134 135
135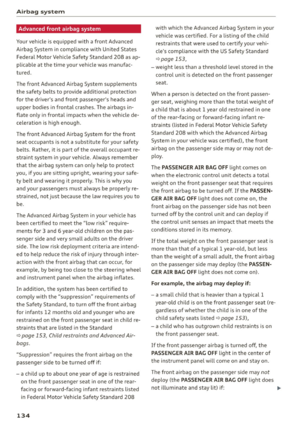 136
136 137
137 138
138 139
139 140
140 141
141 142
142 143
143 144
144 145
145 146
146 147
147 148
148 149
149 150
150 151
151 152
152 153
153 154
154 155
155 156
156 157
157 158
158 159
159 160
160 161
161 162
162 163
163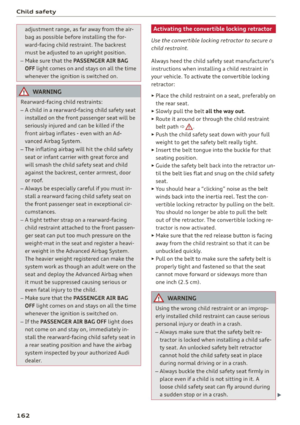 164
164 165
165 166
166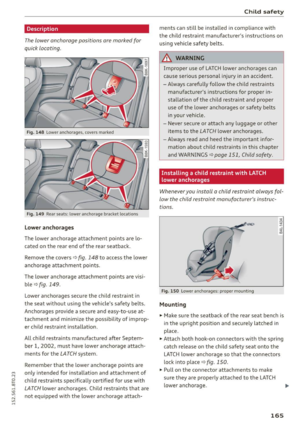 167
167 168
168 169
169 170
170 171
171 172
172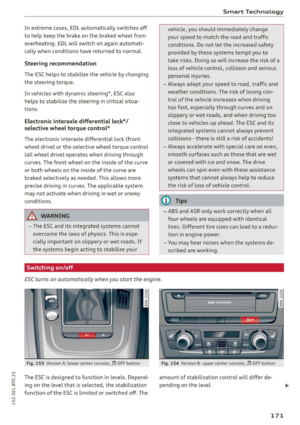 173
173 174
174 175
175 176
176 177
177 178
178 179
179 180
180 181
181 182
182 183
183 184
184 185
185 186
186 187
187 188
188 189
189 190
190 191
191 192
192 193
193 194
194 195
195 196
196 197
197 198
198 199
199 200
200 201
201 202
202 203
203 204
204 205
205 206
206 207
207 208
208 209
209 210
210 211
211 212
212 213
213 214
214 215
215 216
216 217
217 218
218 219
219 220
220 221
221 222
222 223
223 224
224 225
225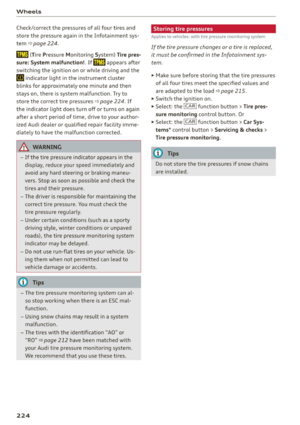 226
226 227
227 228
228 229
229 230
230 231
231 232
232 233
233 234
234 235
235 236
236 237
237 238
238 239
239 240
240 241
241 242
242 243
243 244
244 245
245 246
246 247
247 248
248 249
249 250
250 251
251 252
252 253
253 254
254 255
255 256
256 257
257 258
258 259
259 260
260 261
261 262
262 263
263