Page 97 of 284

Lights and visibility
●
Always use your dipped beam head lights if
it is raining or if visibility is poor. WARNING
If the headlights are set too high and not
used correctly, there is a risk of dazzling or
distracting other road users. This could result
in a serious accident.
● Always make sure that the headlights are
correctly adjusted. Daytime driving light
The daytime driving lights consist of individu-
al lights, integrated in the front headlights.
With the daylight driving lights on, only these
lights switch on
››› .
The daytime driving lights switch on every
time the ignition is switched on, if the switch
is in positions or , according to the level
of exterior lighting.
When the light switch is in position , a
light sensor automatically switches dipped
beam on and off (including the control and
instrument lighting) or the daytime driving
lights depending on the level of exterior
lighting. WARNING
● Never drive with daytime lights if the road
is not well lit due to weather or lighting con-
ditions. Daytime lights do not provide
enough light to illuminate the road properly
or be seen by other road users.
● The rear lights do not come on with the
daytime driving light. A vehicle which does
not have the rear lights on may not be visible
to other drivers in the darkness, in the case
of heavy rain or in conditions of poor visibili-
ty. Turn signal and main beam lever
Read the additional information carefully
››› page 15
Push the lever all the way down to turn off
the corresponding function.
Convenience turn signals
For the convenience turn signals, move the
lever as far as possible upwards or down-
wards and release the lever. The turn signal
will flash three times.
The convenience turn signals are activated
and deactivated in the Easy Connect system
via the key and the
Setup function button
››› page 81 . In
v ehicles that do not have the correspond-
ing menu, this function can be deactivated in
a specialised workshop. WARNING
Improper or lack of use of the turn signals, or
forgetting to deactivate them can confuse
other road users. This could result in a seri-
ous accident.
● Always give warning when you are going to
change lane, overtake or when turning, acti-
vating the turn signal in good time.
● As soon as you have finished changing
lane, overtaking or turning, switch the turn
signal off. WARNING
Incorrect use of the headlights may cause ac-
cidents and serious injury, as the main beam
may distract or dazzle other drivers. Note
● The turn signal only works when the igni-
tion is switched on. The hazard warning
lights also work when the ignition is switch-
ed off.
● If a trailer turn signal malfunctions, the
control lamp will stop flashing (trailer turn
signals) and the vehicle turn signal will flash
at double speed.
● The main beam headlights can only be
sw
itched on if the dipped beam headlights
are already on. » 95
Technical specifications
Advice
Operation
Safety
The essentials
Page 98 of 284

Operation
Note
In cold or damp weather conditions, the
headlights, tail lights and turn signals may
mist up inside temporarily. This is normal and
in no way effects the useful life of the vehicle
lighting system. Automatic dipped beam control
The automatic dipped beam control is merely
intended as an aid and is not able to recog-
nise all driving situations.
When the light switch is in position , the
vehicle lights and the instrument panel and
switch lighting switch on and off automatical-
ly in the following situations
››› in Daytime
driving light on page 95:Automatic switching
onAutomatic switching
off
The photo sensor detects
darkness, for example,
when driving through a
tunnel.When adequate lighting is
detected.
The rain sensor detects
rain and activates the
windscreen wipers.When the windscreen wip-
ers have been inactive for
a few minutes. WARNING
If the road is not well lit and other road users
cannot see the vehicle well enough or at all,
accidents may occur.
● The automatic dipped beam control ( )
only switches on the dipped beam when
there are no changes in brightness, and not,
for example when it is foggy. Main beam assist*
Main beam assist (Light Assist)
The main beam assist operates, within the
limits of the system and depending on the
environmental and traffic conditions, as of a
speed of 60 km/h (37 mph) when it switches
on automatically, and is then deactivated
again below 30 km/h (18 mph)
››› . This is
managed via a camera situated on the base
of the interior mirror.
The main beam assist generally detects illu-
minated areas and deactivates the main
beam when passing through a town, for ex-
ample. Switching the main beam assist on and off
Func-
tionAction
Acti-
vate:
– Switch the ignition on and turn the light
switch to position .
– From the base position, move the main
beam and turn signal lever forwards
››› page 95. When the warning lamp
is dis-
played on the instrument panel display, the
main beam assist is switched on.
To
switch
system off:
– Switch off the ignition.
– OR: turn the light switch to a different posi-
tion to
››› page 94.
– OR: with main beam on, move the main
beam and turn signal lever backwards.
– OR: move the main beam and turn the sig-
nal lever forwards to manually switch the
main beam on. The main beam assist will then
be deactivated. Malfunctions
The following conditions may prevent the
main beam headlight control from turning off
the headlights in time or from turning off al-
together:
● In poorly lit towns with highly reflective
signs.
● Other insufficiently lit road users (such as
pedestrians or cyclists).
● On tight bends and steep slopes (bumps)
and when oncoming vehicles are partially ob-
scured.
96
Page 99 of 284
 can see over a guard
rail in the centre of the road.
● If the camera is damaged or the power sup-
ply is cut")
Lights and visibility
● When the drivers of other oncoming vehi-
cles (such as a truck) can see over a guard
rail in the centre of the road.
● If the camera is damaged or the power sup-
ply is cut off.
● In fog, snow and heavy rain.
● With dust and sand turbulence.
● With loose gravel in the field of vision of
the camera.
● When the field of vision of the camera is
misted up, dirty or covered by stickers, snow,
ice, etc. WARNING
The convenience features of the main beam
assist should not encourage the taking of
risks. The system is not a replacement for
driver concentration.
● You are always in control of the main beam
and adapting it to the light, visibility and traf-
fic conditions.
● It is possible that the main beam headlight
control does not recognise all driving situa-
tions and is limited under certain circumstan-
ces.
● When the field of vision of the camera is
dirty, covered or damaged, operation of the
main beam control may be affected. This also
applies when changes are made to the vehi- cle lighting system, for example, if additional
headlights are installed.
CAUTION
To avoid affecting the operation of the sys-
tem, take the following points into considera-
tion:
● Clean the field of vision of the camera regu-
larly and make sure it is free of snow and ice.
● Do not cover the field of vision of the cam-
era.
● Check that the windscreen is not damaged
in the area of the field of vision of the camera. Note
Main beam and headlight flasher can be
turned on and off manually at any time with
the turn signal and main beam lever
››› page 95. Fog lights
The warning lamps
or also show, on the
light switch or instrument panel, when the
fog lights are on. ●
Switching on front fog lights* : pull the
light switch to the first point 1 , from posi-
tions ,
or .
● Switching on the rear fog light
: com-
pletely pull the light switch 2 from position
,
or .
● To switch off the fog lights, press the light
switch or turn it to position
.
Cornering lights* 1) When turning slowly or on very tight bends,
the cornering lights are activated automati-
cally. The cornering lights may be integrated
in the fog lights and are switched on only at
speeds of less than 40 km/h (25 mph).
When reverse gear is engaged, the cornering
lights on both sides of the vehicle switch on,
in order to better illuminate the area for park-
ing.
Coming home “function” This function may be connected/disconnec-
ted through the radio menu. The “Coming
Home” and/or “Leaving Home” delay time
may also be set (default: 30 sec).
»1)
This function is not available on vehicles equipped
with full-LED headlights. 97
Technical specifications
Advice
Operation
Safety
The essentials
Page 100 of 284
, the rear side
lights and the licence plate lights are
turned on.
Vehicle with
full-LED
he")
OperationVehicle with
halogen
headlightsIn the “Coming Home” function, the day-
time running lights (DRL), the rear side
lights and the licence plate lights are
turned on.
Vehicle with
full-LED
headlightsIn the “Coming Home” function, the dip-
ped beams and the daytime running
lights (DRL), the rear side lights and the
licence plate lights are switched on.
Automatic* activation of “Coming Home”
For vehicles with a light and rain sensor (rota-
ry light switch in position
).
● Sw it
ch off the engine and remove the key
from the ignition with the rotary light switch
in position ›››
page 15.
● The automatic “Coming Home” function is
only active when the light sensor detects
darkness.
● When the car door is opened, the “Coming
Home” lighting comes on.
Manual “Coming Home” activation
For vehicles with a light and rain sensor (rota-
ry light switch without position ).
● Switch off the engine and remove the key
from the ignition.
● Activate the headlight flashers for approxi-
mately 1 second.
● Activated for any position of the rotary light
switch. ●
When the car door is opened, the “Coming
Home” lighting comes on. The headlights are
turned off 60 seconds after the vehicle door
is opened.
Deactivation
● If no door has been closed, they go out au-
tomatically after 60 seconds.
● After the last door has been closed, the
headlights will be switched off after the
“Coming Home” delay (as established in the
radio menu) has elapsed.
● On turning the light switch to position
››› page 15.
● When the ignition i s
switched on (when
starting the engine).
“Leaving Home” function The “Leaving Home” function is only availa-
ble for vehicles with a light and rain sensor
(rotary light switch in position
).
This function may be connected/disconnec-
ted through the radio menu. The “Leaving
Home” function switch-off delay may also be
set (default: 30 sec).
Vehicle with
halogen
headlightsIn the “Leaving Home” function, the day-
time running lights (DRL), the rear side
lights and the licence plate lights are
switched on.
Vehicle with
full-LED
headlightsIn the “Leaving Home” function, the dip-
ped beams, the daytime running lights
(DRL), the rear side lights and the li-
cence plate lights are switched on. Activation
● When the vehicle is unlocked using the re-
mote control.
● The “Leaving Home” function is only activa-
ted when the rotary light switch is in position
and the light sensor detects darkness.
Deactivation
● When the “Leaving Home” delay period
ends (default: 30 sec).
● When the vehicle is locked using the re-
mote control.
● When the light control is switched into a
position other than .
● With the ignition is switched on.
98
Page 101 of 284

Lights and visibility
Hazard warning lights Fig. 99
Dash panel: switch for hazard warn-
ing lights. Read the additional information carefully
››› page 15
The hazard warning lights are used to draw
the attention of other road users to your vehi-
cle in emergencies.
If your vehicle breaks down:
1. Park your vehicle at a safe distance from moving traffic.
2. Press the button to switch on the hazard warning lights ››› .
3. Switch the ignition off.
4. Apply the handbrake.
5. For a manual gearbox, engage 1st gear; for an automatic gearbox, move the gear
lever to P
. 6. Use the warning triangle to draw the atten-
tion of other road users to your vehicle.
7. Always take the vehicle key with you when you leave the vehicle.
All turn signals flash simultaneously when
the hazard warning lights are switched on.
The two turn signal turn signal lamps
and the t
urn signal lamp in the switch will
flash at the same time. The hazard warning
lights also work when the ignition is switch-
ed off.
Emergency braking warning
If the vehicle is braked suddenly and continu-
ously at a speed of more than 80 km/h (50
mph), the brake light flashes several times
per second to warn vehicles driving behind. If
you continue braking, the hazard warning
lights will come on automatically when the
vehicle comes to a standstill. They switch off
automatically when the vehicle starts to
move again. WARNING
● The risk of an accident increases if your ve-
hicle breaks down. Always use the hazard
warning lights and a warning triangle to draw
the attention of other road users to your sta-
tionary vehicle.
● Never park where the catalytic converter
could come into contact with inflammable materials under the vehicle, for example dry
grass or spilt petrol. This could start a fire!
Note
● The battery will run down if the hazard
warning lights are left on for a long time,
even if the ignition is switched off.
● The use of the hazard warning lights de-
scribed here is subject to the relevant statu-
tory requirements. Parking light
When the parking light is switched on, (right
or left turn signal), the front side light and
the rear light on the corresponding side of
the vehicle stay lit. The parking lights can on-
ly be activated with the ignition switched off
and the turn signal and main beam lever in
the central position, before being triggered.
Parking light on both sides With the ignition switched off and the light
switch in position
, when locking the vehi-
cle from the outside, the parking lights on
both sides of the vehicle light up. In doing
so, only the side lights of both headlights
light up, and additionally the tail lights will
do so partially.
99
Technical specifications
Advice
Operation
Safety
The essentials
Page 102 of 284

Operation
Motorway lights* The motorway light is available on vehicles
equipped with full-LED lights.
The function is connected/disconnected via
the corresponding Easy Connect system
menu.
●
Activation: when going above 110 km/h for
mor e th
an 30 seconds, the dipped beam rai-
ses slightly to increase the distance of visibil-
ity of the driver.
● Deactivation: when reducing the speed of
the c ar belo
w 100 km/h, the dipped beam re-
turns to its normal position.
Driving abroad The light beam of the dipped beam lights is
asymmetric: the side of the road on which
you are driving is lit more intensely.
When a car that is manufactured in a country
that drives on the right travels to a country
that drives on the left (or vice versa), it is nor-
mally necessary to cover part of the headlight
bulbs with stickers or to change the adjust-
ment of the headlights to avoid dazzling oth-
er drivers.
In such cases, the regulations specify certain
light values that must be complied with for designated points of the light distribution.
This is known as “Tourist light”.
The light distribution that the halogen and
full-LED headlights of the SEAT Leon range
have allows the specific “tourist light” values
to be met without the need for stickers or
changes in the settings.
Note
“Tourist light” is only allowed temporarily. If
you are planning a long stay in a country that
drives on the other side, you should take the
vehicle to an Authorised Technical Service to
change the headlights. Headlight range control, lighting of
the instrument panel and controls
Fig. 100
Next to the steering wheel: Head-
light range control Lighting of the instrument panel, screens
and controls*
Depending on the model, lighting of the in-
strument panel and controls can be adjusted
in the Easy Connect system, using the button
and the function button
SETUP ›››
page 17
.
He a
dlight range control
The headlight range control ››› Fig. 100 is
modified acc
ording to the value of the head-
light beam and the vehicle load status. This
offers the driver optimum visibility and the
headlights do not dazzle oncoming drivers
››› .
The headlights can only be adjusted when
the dipped beam is switched on.
To reset, turn switch ››› Fig. 100 :
ValueVehicle load status a)
–Two front occupants, luggage compart-
ment empty
1All seats occupied, luggage compartment
empty
2All seats occupied, luggage compartment
full With trailer and minimum drawbar load
3Driver only, luggage compartment full With
trailer and maximum drawbar load
a)
If the vehicle load does not correspond to those shown in the
table, it is possible to select intermediary positions.
100
Page 103 of 284

Lights and visibility
Dynamic headlight range control
The control is not mounted in vehicles with
dynamic headlight range control. The head-
light range is automatically adjusted accord-
ing to the vehicle load status when they are
switched on.
Instrument panel lighting
With the ignition on and without light activa-
tion, the instrument panel lighting remains
activated in daytime light conditions. The
lighting is reduced as the exterior light di-
minishes. In some cases, e.g. when driving
through a tunnel without the function
active, the instrument panel lighting may
even switch off. The objective of this function
is to provide the driver with a visual indica-
tion that he or she should activate the dip-
ped beam. WARNING
Heavy objects in the vehicle may mean that
the headlights dazzle and distract other driv-
ers. This could result in a serious accident.
● Adjust the light beam to the vehicle load
status so that it does not blind other drivers. Interior and reading lights
1) Read the additional information carefully
››› page 16
Glove compartment and luggage
compartment lighting*
When opening and closing the glove com-
partment on the front passenger side and the
rear lid, the respective light will automatically
switch on and off.
Footwell lighting*
The lights in the footwell area below the dash
(driver and front passenger sides) will switch
on when the doors are opened and will de-
crease in intensity while driving. The intensity
of these lights can be adjusted using the ra-
dio menu (see Easy Connect > Adjusting Light-
ing > Interior lighting ›››
page 17).
Ambient light*
The ambient light in the door panel changes
colour (white or red) depending on the driv-
ing mode. The intensity of these lights can be
adjusted using the radio menu (see Easy Con-
nect > Adjusting Lights > Interior lighting
››› page 17
). Note
The reading lights switch off when the vehi-
cle is locked using a key or after several mi-
nutes if the key is removed from the ignition.
This prevents the battery from discharging. Visibility
Sun visors Fig. 101
Sun visor Options for adjusting driver and front
passenger sun visors:
● Lower the sun visor towards the wind-
screen. »1)
Depending on the level of equipment fitted in the
vehicle, LEDs can be used for the following interior
lights: front courtesy light, rear courtesy light, foot-
well light and sun visor light. 101Technical specifications
Advice
Operation
Safety
The essentials
Page 104 of 284

Operation
● The sun visor can be pulled out of its
mounting and turned towards the door
››› Fig. 101 1 .
● Swing the sun visor towards the door, lon-
gitudinally backwards.
Vanity mirror light
There may be a vanity mirror, with a cover, on
the rear of the sun visor. When the cover is
opened 2 a light comes on.
The lamp goes out when the vanity mirror
cover is closed or the sun visor is pushed
back up. WARNING
Folded sun blinds can reduce visibility.
● Always store sun blinds and visors in their
housing when not in use. Note
The light above the sun visor automatically
switches off after a few minutes in certain
conditions. This prevents the battery from
discharging. Sun blind*
3 Applies to the model: LEON ST
Fig. 102
Rear window: sun blind. Rear window sun blind*
– Pull out the visor and hook it into the hooks
in the centre of the top of the door frame
››› Fig. 102 .
W ind
screen wiper and window
wiper systems
Window wiper lever Read the additional information carefully
››› page 16 CAUTION
If the ignition is switched off with the wind-
screen wipers active, they complete their wipe before returning to the rest position.
Ice, snow and other obstacles on the wind-
screen may damage the wiper and the wind-
screen wiper motor.
● If necessary, remove snow and ice from the
windscreen wipers before starting your jour-
ney.
● Carefully lift the frozen windscreen wipers
from the glass. SEAT recommends a de-icer
spray for this operation.
● Do not switch on the windscreen wipers if
the windscreen is dry. Cleaning with the
windscreen wipers while dry can cause dam-
age.
● In icy conditions, always check that the
wiper blades are not frozen to the glass be-
fore using the wipers. In cold weather, it may
help to leave the vehicle parked with the wip-
ers in service position ››› page 230. Note
● The windscreen and window wipers only
function when the ignition is switched on and
the bonnet or rear lid, respectively, are
closed.
● The interval wipe speed varies according to
the vehicle speed. The faster the vehicle is
moving, the more often the windscreen is
cleaned.
● The rear wiper is automatically switched on
when the windscreen wiper is on and the car
is in reverse gear. 102
 1
1 2
2 3
3 4
4 5
5 6
6 7
7 8
8 9
9 10
10 11
11 12
12 13
13 14
14 15
15 16
16 17
17 18
18 19
19 20
20 21
21 22
22 23
23 24
24 25
25 26
26 27
27 28
28 29
29 30
30 31
31 32
32 33
33 34
34 35
35 36
36 37
37 38
38 39
39 40
40 41
41 42
42 43
43 44
44 45
45 46
46 47
47 48
48 49
49 50
50 51
51 52
52 53
53 54
54 55
55 56
56 57
57 58
58 59
59 60
60 61
61 62
62 63
63 64
64 65
65 66
66 67
67 68
68 69
69 70
70 71
71 72
72 73
73 74
74 75
75 76
76 77
77 78
78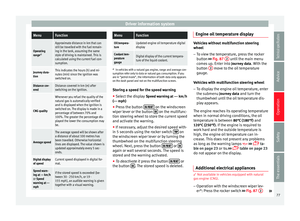 79
79 80
80 81
81 82
82 83
83 84
84 85
85 86
86 87
87 88
88 89
89 90
90 91
91 92
92 93
93 94
94 95
95 96
96 97
97 98
98 99
99 100
100 101
101 102
102 103
103 104
104 105
105 106
106 107
107 108
108 109
109 110
110 111
111 112
112 113
113 114
114 115
115 116
116 117
117 118
118 119
119 120
120 121
121 122
122 123
123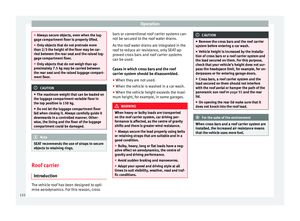 124
124 125
125 126
126 127
127 128
128 129
129 130
130 131
131 132
132 133
133 134
134 135
135 136
136 137
137 138
138 139
139 140
140 141
141 142
142 143
143 144
144 145
145 146
146 147
147 148
148 149
149 150
150 151
151 152
152 153
153 154
154 155
155 156
156 157
157 158
158 159
159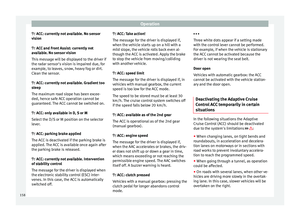 160
160 161
161 162
162 163
163 164
164 165
165 166
166 167
167 168
168 169
169 170
170 171
171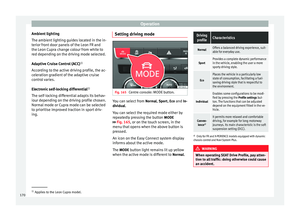 172
172 173
173 174
174 175
175 176
176 177
177 178
178 179
179 180
180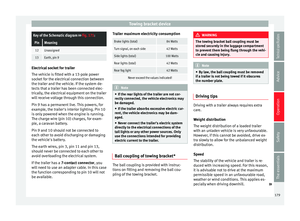 181
181 182
182 183
183 184
184 185
185 186
186 187
187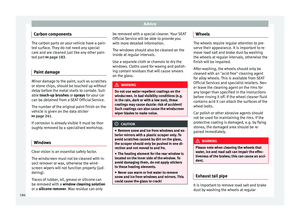 188
188 189
189 190
190 191
191 192
192 193
193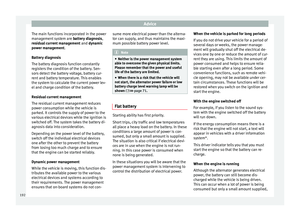 194
194 195
195 196
196 197
197 198
198 199
199 200
200 201
201 202
202 203
203 204
204 205
205 206
206 207
207 208
208 209
209 210
210 211
211 212
212 213
213 214
214 215
215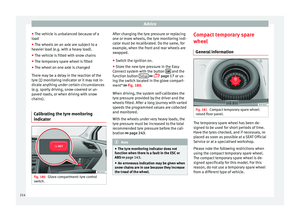 216
216 217
217 218
218 219
219 220
220 221
221 222
222 223
223 224
224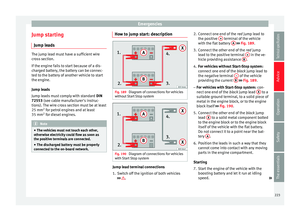 225
225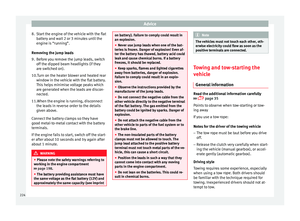 226
226 227
227 228
228 229
229 230
230 231
231 232
232 233
233 234
234 235
235 236
236 237
237 238
238 239
239 240
240 241
241 242
242 243
243 244
244 245
245 246
246 247
247 248
248 249
249 250
250 251
251 252
252 253
253 254
254 255
255 256
256 257
257 258
258 259
259 260
260 261
261 262
262 263
263 264
264 265
265 266
266 267
267 268
268 269
269 270
270 271
271 272
272 273
273 274
274 275
275 276
276 277
277 278
278 279
279 280
280 281
281 282
282 283
283