Page 81 of 284

Driver information systemMenu “Pause”
Interr. lapThe timer of the current lap ends and is
cancelled. It is not included in the statis-
tics.
EndThe current timer ends. The lap is inclu-
ded in the statistics.
Menu “Partial time”
Partial timeFor about 5 seconds a partial time is dis-
played. The timer continues in parallel.
New lap
The timer of the current lap stops and a
new lap starts immediately. The time for
the lap you have just completed is inclu-
ded in the statistics.
StopThe current lap timer will be interrupted.
The lap does not end. The
Pause menu is
displayed.
Menu “Statistics”
View of the latest lap times:
– total time
– best lap time
– worst lap time
– average lap duration
A maximum of 10 laps is possible, and a
total duration of 99 hours, 59 minutes
and 59 seconds.
If one of the 2 limits is reached, you will
have to reset the statistics in order to be-
gin a new timer.
BackThis returns to the previous menu.
Menu “Statistics”
Resetting
to zeroAll the memorised statistical data are re-
set. WARNING
Do your best to avoid handling the timer
while driving.
● Only set the timer or consult statistics
when the vehicle is stationary.
● While driving, do not handle the timer in
complicated driving situations. Speed warning function
Introduction The speed warning function will warn the
driver if a pre-set maximum speed is excee-
ded. The system gives an warning buzzer sig-
nal if the set speed is exceeded by about 3
km/h. The warning lamp
and the driver
message Speed limit exceeded!
will be dis-
played simultaneously on the instrument
panel display. The warning lamp switches
off when reducing speed below the stored
maximum limit.
You are recommended to store this speed
limit warning if you always wish to be re-
minded of a particular speed limit. This could
be when driving in countries with general speed limits, or if a particular speed should
not be exceeded when winter tyres are fitted
etc.
Note
● Please bear in mind that, even with the
speed warning function, it is still important
to keep an eye on the vehicle speed with the
speedometer and to observe the legal speed
limits.
● The speed limit warning function in the ver-
sion for several countries warns you at a
speed of 120 km/h (80 mph). This is a facto-
ry-set speed limit. Setting speed limit warning
You can use the radio or the Easy Connect* to
set, alter or cancel the speed limit warning.
Vehicles with radio
–
Select: SETUP button > control button
Driver assistant > Speed warning
.
Vehicles with Easy Connect
– Select: Systems
control button or Vehicle
systems > Driver assistant
> Speed warning
.
The warning limit can be set from 30 to
240 km/h (20 to 150 mph). The adjustment
is done in 10 km/h (mph) intervals.
79
Technical specifications
Advice
Operation
Safety
The essentials
Page 82 of 284

Operation
Service interval display Service interval display The service interval indication appears on the
instrument panel display
››› Fig. 82 4 .
SEAT distinguishes between services with en-
gine oi l
change (e.g. Oil change service) and
services without
engine oil change (e.g. In-
spection).
In vehicles with Services established by time
or mileage, the service intervals are already
pr e-defined.
In
vehicles with LongLife Service , the inter-
vals are determined individually. Technical
progress has made it possible to considera-
bly reduce servicing requirements. The tech-
nology used by SEAT ensures that your vehi-
cle only has an Oil Servicing when it is neces-
sary. To establish when the oil servicing is
due (max. 2 years), the vehicle's conditions
of use and individual driving styles are con-
sidered. The service pre-warning first ap-
pears 20 days before the date established for
the corresponding service. The kilometres
(miles) remaining until the next service are
always rounded up to the nearest 100 km
(miles) and the time is given in complete
days. The current service message cannot be
viewed until 500 km after the last service. Pri-
or to this only lines are visible on the display. Inspection reminder
When the Service date is approaching, when
the ignition is switched on a
Service remind-
er is displayed.
In vehicles without text messages , a s
panner
is displayed on the instrument panel with
a figure giv
en in km. The number of kilome-
tres shown is the maximum number that may
be driven until the next service. After a few
seconds, the display mode changes. A clock
symbol appears and the number of days until
the next service appointment is due.
In vehicles with text messages , Serv
ice in ---
km (miles) or --- days is displayed on the in- strument panel.
Service due
After the service date, an audible warning is
given when the ignition i
s switched on and
the spanner displayed on the screen flashes
for a few seconds . In
vehicles with text
messages, Service in --- km or --- days is dis-
played on the instrument panel.
Reading a service notification
With the ignition switched on, the engine off
and the vehicle at a standstill, the current
service notification
can be read:
Press and hold the button ››› Fig. 82 4 for
more than 5 seconds to consult the service
message. When the service date has past
, a minus sign
is displayed in front of the number of kilome-
tres or days. In vehicles with text messages
the following is displayed: Service --- km
(miles) or --- days ago .
The time can also be set via the key and
Setup function button in the Easy Connect
system ››› page 81 .
R e
setting service interval display
If the service was not carried out by a SEAT
dealership, the display can be reset as fol-
lows:
● To reset the service interval display, turn
the ignition off and press and hold the but-
ton ››› Fig. 82 4 .
● Switch the ignition back on.
● Release the button ››› Fig. 82 4 and press
the button 4 again for the next 20 seconds.
Note
● The service message disappears after a few
seconds, when the engine is started or when OK/RESET is pressed on the windscreen wiper
lever, or OK on the multifunction steering
wheel.
● In vehicles with the LongLife system in
which the battery has been disconnected for
a long period of time, it is not possible to cal-
culate the date of the next service. Therefore
the service interval display may not be cor- rect. In this case, bear in mind the maximum 80
Page 83 of 284
* Introduction To")
Introduction to the Easy Connect system*
service intervals permitted in the
››› Book-
let Maintenance Programme. Introduction to the Easy
Connect system*
System Settings (CAR)* Introduction To select the settings menus, press the Easy
Connect
button and the
Setup function
button.
The actual number of menus available and
the name of the various options in these me-
nus will depend on the vehicle’s electronics
and equipment. WARNING
Any distraction may lead to an accident, with
the risk of injury. Operating the Easy Connect
system while driving could distract you from
traffic. CAR menu Setup
Read the additional information carefully
››› page 17
Pressing the menu button will always take
you to the last menu used.
When the function button check box is activa-
ted , the function is active. Pressing the menu button
will always take
you to the last menu used.
Any changes made using the settings menus
are automatically saved on closing those me-
nus.Function buttons in the ve-
hicle’s settings menuPage
ESC system››› page 143
Tyres››› page 212
Driver assistance››› table on page 18
Parking and manoeuvring››› page 173
Vehicle lights››› table on page 18
Rear vision mirrors and wind-
screen wipers››› table on page 18
Opening and closing››› table on page 18
Multifunction display››› page 19
Date and time››› table on page 18
Units››› table on page 18
Service››› page 67
Factory settings››› table on page 18 81
Technical specifications
Advice
Operation
Safety
The essentials
Page 84 of 284

Operation
Opening and closing Central locking system Description The vehicle can be locked and unlocked via
the central locking system. There are several
methods, depending on the vehicle equip-
ment:
●
key with remote control ››› page 84 ,
● lock on driver door (emergency opening
››› page 227 ) or
● int erior c
entral locking switch ››› page 85.
Unlocking one side of the vehicle only
When you lock the vehicle with the key, the
doors and the rear lid are locked. When you
open the door, you can either unlock only the
driver door
, or all the vehicle doors. To select
the required option, use Easy Connect*
››› page 85
.
Automatic locking (Auto Lock)*
The Auto Lock function locks the doors and
the rear lid when the vehicle exceeds a speed
of about 15 km/h (10 mph).
The vehicle is unlocked again when the igni-
tion key is removed. Alternatively, the vehicle
can also be unlocked via the central locking
switch or by pulling one of the inside door handles. The Auto Lock function can be
switched on and off on the sound system or
on the Easy Connect* system
››› page 85.
In the event of an accident in which the air-
bags inflate, the doors will be automatically
unlocked to facilitate access and assistance.
Anti-theft alarm system*
If the anti-theft alarm system senses interfer-
ence with the vehicle it triggers an audible
and visible alarm.
The anti-theft alarm system is automatically
switched on when locking the vehicle. It
switches off when the vehicle is unlocked
from a distance.
When the driver door is unlocked with the
key, you should switch on the ignition within
15 seconds. Otherwise the alarm will be trig-
gered. On some export versions, the alarm is
triggered immediately when you open a door.
To deactivate the alarm, press the button on the remote control key, or switch on the
ignition. After a certain time, the alarm will
automatically switch off.
Switch off the vehicle interior monitoring and
tow-away protection if you wish to prevent
the alarm from being triggered accidentally
››› page 89 . T
urn s
ignals
The turn signals will flash twice when the ve-
hicle is unlocked and once when the vehicle
is locked.
If it does not flash, this indicates that one of
the doors, the rear lid or the bonnet is not
closed correctly.
Accidental lock-out
The central locking system prevents you from
being locked out of the vehicle in the follow-
ing situations:
● If the driver door is open, the vehicle can-
not be locked with the central locking switch
››› page 85.
Loc
k the vehicle with the remote control key,
when all the doors and the rear lid have been
closed. This prevents the accidental locking
of the vehicle. WARNING
Do not leave anyone (especially children) in
the vehicle if it is locked from the outside and
the anti-theft security system* is enabled, as
the doors and windows cannot then be
opened from the inside. Locked doors could
delay assistance in an emergency, potentially
putting lives at risk. 82
Page 85 of 284

Opening and closing
Note
● Never leave any valuable items in the vehi-
cle unattended. Even a locked vehicle is not a
safe.
● If the diode on the driver door sill lights up
for about 30 seconds when the vehicle is
locked, the central locking system or anti-
theft alarm* is not working properly. You
should have the fault repaired at a SEAT Offi-
cial Service or specialised workshop.
● The vehicle interior monitoring of the anti-
theft alarm* system will only function as in-
tended if the windows and the sunroof* are
closed. Car key
Fig. 91
Vehicle key Fig. 92
Vehicle key with alarm button Vehicle key
With the vehicle key the vehicle may be
locked or unlocked remotely
››› page 82.
The vehicle key includes an emitter and bat-
tery. The receiver is in the interior of the vehi-
cle. The range of the vehicle key with remote
control and new battery is several metres
around the vehicle.
If it is not possible to open or close the vehi-
cle using the remote control key, this should
be re-synchronised ››› page 87 or the bat-
tery changed ››› page 86 .
Diff er
ent keys belonging to the vehicle may
be used.
Control lamp on the vehicle key
When a button on the vehicle key is pressed,
the control lamp flashes ››› Fig. 91 (arrow)
once briefly
, but if the button is held down for a longer period the control lamp flashes sev-
eral times, such as in convenience opening.
If the vehicle key control lamp does not light
up when the button is pressed, replace the
key's battery
››› page 86.
Unfo
lding and folding the key shaft
Press button 1
››› Fig. 91 or
›
›› Fig. 92
to un-
lock and unfold the key shaft.
To fold the shaft away, press button 1 and
fold the key shaft in until it locks in place.
Alarm button*
Only press alarm button 2 in the event of an
emergency! When the alarm button is press-
ed, the vehicle horn is heard and the turn sig-
nals are switched on for a short time. When
the alarm button is pressed again, the alarm
is switched off.
Replacing a key
To obtain a spare key and other vehicle keys,
the vehicle chassis number is required.
Each new key contains a microchip which
must be coded with the data from the vehicle
electronic immobiliser. A vehicle key will not
work if it does not contain a microchip or the
microchip has not been encoded. This is also
true for keys which are specially cut for the
vehicle. »
83
Technical specifications
Advice
Operation
Safety
The essentials
Page 86 of 284

Operation
The vehicle keys or new spare keys can be
obtained from a SEAT Official Service, a spe-
cialised workshop or an approved key service
qualified to create this kind of key.
New keys or spare keys must be synchron-
ised before use ››› page 87. CAUTION
All of the vehicle keys contain electronic com-
ponents. Protect them from damage, impacts
and humidity. Note
● Only use the key button when you require
the corresponding function. Pushing the but-
ton unnecessarily could accidentally unlock
the vehicle or trigger the alarm. It is also pos-
sible even when you are outside the radius of
action.
● Key operation can be greatly influenced by
overlapping radio signals close to the vehicle
working in the same range of frequencies, for
example, radio transmitters or mobile tele-
phones.
● Obstacles between the remote control and
the vehicle, bad weather conditions and dis-
charged batteries can considerably reduce
the range of the remote control.
● If the buttons of the vehicle key are press-
ed ››› Fig. 91 or ››› Fig. 92 or one of the central
locking buttons ››› page 85 is pressed re-
peat
edly in short succession, the central
locking briefly disconnects as protection against overloading. The vehicle is then un-
locked. Lock it if necessary.
Remote unlock/lock
Read the additional information carefully
››› page 9
The vehicle will be locked again automatical-
ly if you do not open one of the doors or the
rear lid within 30 seconds after unlocking the
car. This function prevents the vehicle from
remaining unlocked if the unlocking button is
pressed by mistake. This does not apply if
you press the button for at least one sec-
ond.
In vehicles with a security central locking
feature (selective unlocking of side doors)
› ›
› page 84, when the button is pressed
once, only the driver door and the fuel tank
flap are unlocked. When the button is press-
ed a second time, all the vehicle doors are
unlocked. WARNING
Observe the safety warnings ››› in Descrip-
tion on page 82. Note
● Do not use the remote control key until the
vehicle is visible. ●
Other functions of the remote control key
››› page 91, Convenience opening/closing. Selective unlocking system
The selective unlocking system allows you to
only unlock the driver door and the fuel tank
flap. All other doors and the rear lid remain
locked.
Unlocking the driver door and tank flap
– Press button on the remote control key
once , or turn the key
onc
e
to open.
Unlocking all the doors, the rear lid and the
tank flap simultaneously.
– Within 5 seconds, press button on the
remote control key twice, or turn the key to
open twice
within 5 seconds.
The anti-theft security system* and the anti-
theft alarm* are immediately disabled if you
unlock only the driver door, without unlock-
ing the other doors.
In vehicles with Easy Connect*, you can pro-
gramme the security central locking system
directly ››› page 85.
84
Page 87 of 284

Opening and closing
Programming the central locking
system You can use Easy Connect* to select which
doors are unlocked with the central locking
system. Using the radio or the Easy Connect*
system, you can select whether the vehicle
automatically closes with the “Auto Lock”
programme at speeds of more than 15 km/h
(10 mph).
Programming the unlocking of the doors
(vehicles with Easy Connect)
– Select: control button Systems or Vehicle
systems > Vehicle settings > Central locking >
Unlocking doors.
Programming the Auto Lock (vehicles with
radio)
– Select: SETUP button > control button
Central locking > Locking while driving
.
Programming the Auto Lock (vehicles with
Easy Connect)
– Select: control button Systems
or Vehicle
systems > Vehicle settings
> Locking while
driving .
Unlocking doors You can choose to unlock all
the doors or only the driver door
when you
unlock the vehicle. In all
the options, the fuel
tank flap is also unlocked. With the Driver setting, when you press the
button on the remote control key only the
door on the driver's side is unlocked. If that
button is pressed twice, the rest of the doors
and the rear lid will be unlocked.
In vehicles with a conventional key, turn the
key in the door lock, in the direction of open-
ing, twice within 2 seconds.
If the button is pressed, all the vehicle
doors are locked. At the same time, a confir-
mation signal* is heard.
Auto Lock/Locking while driving. If you select
on, all the vehicle doors are locked at speeds above 15 km/h (10 mph).
Central locking switch Read the additional information carefully
››› page 9
Please note the following when using the
central locking switch to lock your vehicle:
● It is not possible to open the doors or the
rear lid from the outside
(for safety reasons,
e.
g. when stopped at traffic lights).
● The LED in the central locking switch lights
up when all the doors are closed and locked.
● You can open the doors individually from
the inside by pulling the inside door handle. ●
In the event of an accident in which the air-
bags inflate, doors locked from the inside will
be automatically unlocked to facilitate access
and assistance. WARNING
● The central locking switch also operates
when the ignition is switched off and auto-
matically locks all the vehicle doors when the
button is pressed.
● The central locking switch does not operate
if the vehicle is locked from the outside and
the anti-theft security system is switched on.
● Locked doors could delay assistance in an
emergency, potentially putting lives at risk.
Do not leave anyone, especially children, in
the vehicle. Note
The doors and the tailgate are locked auto-
matically when the vehicle reaches a speed of
about 15 km/h (Auto Lock) ››› page 82. You
can unlock the vehicle again using button on the central locking switch.
Anti-theft security system (Safelock)*
The following message is displayed on the in-
strument panel to remind the driver that
when the vehicle is closed from the outside,
the anti-theft security system is switched on.
Do not forget the Safelock. Please see »
85
Technical specifications
Advice
Operation
Safety
The essentials
Page 88 of 284

Operation
Instruction Manual. The vehicle cannot be
opened from inside. This makes it more diffi-
cult for unauthorised persons to break into
the vehicle ››› in Description on page 82.
The anti-theft security system can be switch-
ed off each time the vehicle is locked:
● Turn the key a second time to the lock posi-
tion, in the door lock, for the next two sec-
ond s. If necessary, remove the protective cov-
er on the driver door handle ››› page 227 or
else
● Press on the remote control key for a
second time for the following 2 seconds.
The fl a
shing frequency of the diode in the
door sill immediately confirms the process.
Initially, the diode flashes in a fast sequence
for a brief period, then it stops for approxi-
mately 30 seconds and, lastly continues
flashing slowly. Changing the battery Fig. 93
Vehicle key: opening the battery com-
partment Fig. 94
Vehicle key: removing the battery SEAT recommends you ask a specialised
workshop to replace the battery.
The battery is located to the rear of the vehi-
cle key, under a cover.Changing the battery
● Unfold the vehicle key shaft ››› page 83.
● Remove the cover from the back of the ve-
hicle key ››› Fig. 93 in the direction of the ar-
r o
w ››› .
● Extract the battery from the compartment
using a suitable thin object ››› Fig. 94 .
● Plac
e the new battery in the compartment
as shown ››› Fig. 94
, pressing in the opposite
direction to that shown by the arrow ››› .
● Fit the cover as shown ››› Fig. 93 , pressing
it onto the vehicle key casing in the opposite
direction to that shown by the arrow until it
clicks into place. CAUTION
● If the battery is not changed correctly, the
vehicle key may be damaged.
● Use of unsuitable batteries may damage
the vehicle key. For this reason, always re-
place the dead battery with another of the
same voltage, size and specifications.
● When fitting the battery, check that the po-
larity is correct. For the sake of the environment
Please dispose of your used batteries correct-
ly and with respect for the environment. 86
 1
1 2
2 3
3 4
4 5
5 6
6 7
7 8
8 9
9 10
10 11
11 12
12 13
13 14
14 15
15 16
16 17
17 18
18 19
19 20
20 21
21 22
22 23
23 24
24 25
25 26
26 27
27 28
28 29
29 30
30 31
31 32
32 33
33 34
34 35
35 36
36 37
37 38
38 39
39 40
40 41
41 42
42 43
43 44
44 45
45 46
46 47
47 48
48 49
49 50
50 51
51 52
52 53
53 54
54 55
55 56
56 57
57 58
58 59
59 60
60 61
61 62
62 63
63 64
64 65
65 66
66 67
67 68
68 69
69 70
70 71
71 72
72 73
73 74
74 75
75 76
76 77
77 78
78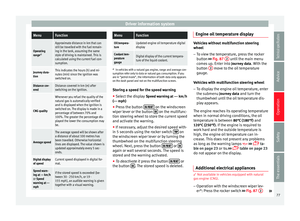 79
79 80
80 81
81 82
82 83
83 84
84 85
85 86
86 87
87 88
88 89
89 90
90 91
91 92
92 93
93 94
94 95
95 96
96 97
97 98
98 99
99 100
100 101
101 102
102 103
103 104
104 105
105 106
106 107
107 108
108 109
109 110
110 111
111 112
112 113
113 114
114 115
115 116
116 117
117 118
118 119
119 120
120 121
121 122
122 123
123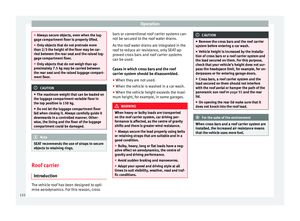 124
124 125
125 126
126 127
127 128
128 129
129 130
130 131
131 132
132 133
133 134
134 135
135 136
136 137
137 138
138 139
139 140
140 141
141 142
142 143
143 144
144 145
145 146
146 147
147 148
148 149
149 150
150 151
151 152
152 153
153 154
154 155
155 156
156 157
157 158
158 159
159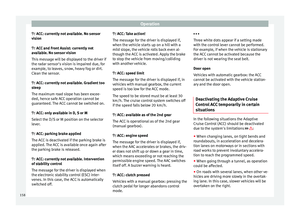 160
160 161
161 162
162 163
163 164
164 165
165 166
166 167
167 168
168 169
169 170
170 171
171 172
172 173
173 174
174 175
175 176
176 177
177 178
178 179
179 180
180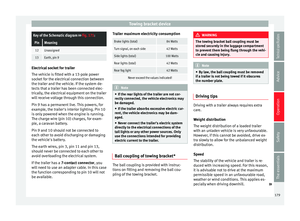 181
181 182
182 183
183 184
184 185
185 186
186 187
187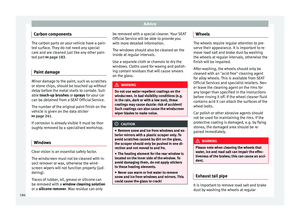 188
188 189
189 190
190 191
191 192
192 193
193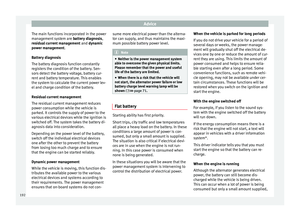 194
194 195
195 196
196 197
197 198
198 199
199 200
200 201
201 202
202 203
203 204
204 205
205 206
206 207
207 208
208 209
209 210
210 211
211 212
212 213
213 214
214 215
215 216
216 217
217 218
218 219
219 220
220 221
221 222
222 223
223 224
224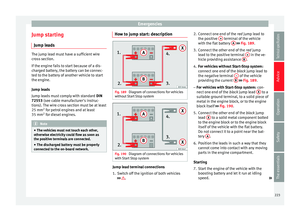 225
225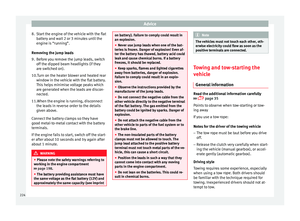 226
226 227
227 228
228 229
229 230
230 231
231 232
232 233
233 234
234 235
235 236
236 237
237 238
238 239
239 240
240 241
241 242
242 243
243 244
244 245
245 246
246 247
247 248
248 249
249 250
250 251
251 252
252 253
253 254
254 255
255 256
256 257
257 258
258 259
259 260
260 261
261 262
262 263
263 264
264 265
265 266
266 267
267 268
268 269
269 270
270 271
271 272
272 273
273 274
274 275
275 276
276 277
277 278
278 279
279 280
280 281
281 282
282 283
283