Page 73 of 284

Instruments and warning/control lamps
The display 6
››› Fig. 82 only works when
the ignition i s
switched on. When the display
reaches the reserve mark, the lower diode
lights up in red and the control lamp
ap-
pears ››› page 66. When the fuel level is very
low
, the lower diode flashes in red.
The distance to empty fuel level is displayed
on the instrument panel 3
››› Fig. 82 .
The c ap
acity of the fuel tank of your vehicle is
given in the Technical data section
››› page 268. CAUTION
Never run the fuel tank completely dry. An ir-
regular fuel supply could cause misfiring. In
this way the unburned fuel can reach the ex-
haust system, which could cause the catalytic
converter to overheat resulting in damage. Control lamps
Control and warning lamps Read the additional information carefully
››› page 22
.
The c ontr
ol and warning lamps are indicators
of warnings, ››› , faults
››› or certain func-
tions. Some control and warning lamps come
on when the ignition is switched on, and
switch off when the engine starts running, or
while driving. Depending on the model, additional text
messages may be viewed on the instrument
panel display. These may be purely informa-
tive or they may be advising of the need for
action
››› page 66, Instruments .
D ependin
g upon the equipment fitted in the
vehicle, instead of a warning lamp, some-
times a symbol may be displayed on the in-
strument panel.
When certain control and warning lamps are
lit, an audible warning is also heard. WARNING
If the warning lamps and messages are ignor-
ed, the vehicle may stall in traffic, or may
cause accidents and severe injuries.
● Never ignore the warning lamps or text
messages.
● Stop the vehicle safely as soon as possible.
● Park the vehicle away from traffic and en-
sure that there are no highly flammable ma-
terials under the vehicle that could come into
contact with the exhaust system (e.g. dry
grass, fuel).
● A faulty vehicle represents a risk of acci-
dent for the driver and for other road users. If
necessary, switch on the hazard warning
lamps and put out the warning triangle to ad-
vise other drivers.
● Before opening the bonnet, switch off the
engine and allow it to cool. ●
In any vehicle, the engine compartment is a
hazardous area and could cause severe inju-
ries ››› page 198. CAUTION
Failure to heed the control lamps and text
messages when they appear may result in
faults in the vehicle. Engine management*
This warning lamp monitors the engine man-
agement system for petrol engines.
The warning lamp (Electronic Power Con-
trol) lights up when the ignition is switched
on while system operation is being verified. It
should go out once the engine is started.
If there is a fault in the electronic engine
management system while you are driving,
this warning lamp will light up. Stop the vehi-
cle and seek technical assistance.
Glow plug system/Engine fault* The warning lamp lights up to show that the
glow plugs are preheating the diesel engine.
The control lamp
lights up
If the control lamp lights up when the en-
gine is started it means that the glow plugs »
71Technical specifications
Advice
Operation
Safety
The essentials
Page 74 of 284

Operation
are preheating. When the warning lamp goes
off, the engine should be started straight
away.
Control lamp flashes
If a f
ault develops in the engine management
system while you are driving, the glow plug
system lamp will flash
. Take the vehicle to
a specialised workshop as soon as possible
and have the engine checked. Driver information system
Information system Introduction With the ignition switched on, it is possible
to read the different functions of the display
by scrolling through the menus.
In vehicles with multifunction steering wheel,
the multifunction display can only be operat-
ed with the steering wheel buttons.
The number of menus displayed on the in-
strument panel will vary according to the ve-
hicle electronics and equipment.
A specialised workshop will be able to pro-
gramme or modify additional functions, ac-
cording to the vehicle equipment. SEAT rec-
ommends visiting a SEAT Official Service.
Some menu options can only be read when
the vehicle is at a standstill.
As long as a priority 1 warning is displayed, it
will not be possible to read the menus. Some
warning messages can be confirmed and
made to disappear with the windscreen wiper
lever button or the multifunction steering
wheel button.
The information system also provides the fol-
lowing information and displays (depending
on the vehicle's equipment):Driving data
››› page 76
■ Vehicle status
■ MFD from departure
■ MFD from refuelling
■ MFD total calculation
Assist systems ››› table on page 74
■ Activate/deactivate Lane Assist
■ Reverse (optional)
Navigation › ››
Book
let Navigation system
Audio
››› Booklet Radio or ››› Booklet Naviga-
tion system
Telephone
››› Booklet Radio or ››› Book-
let Navigation system
Vehicle
››› table on page 74 WARNING
Any distraction may lead to an accident, with
the risk of injury.
● Do not operate the instrument panel con-
trols when driving. 72
Page 75 of 284

Driver information system
Operating the instrument panel
menus Fig. 87
Windscreen wiper lever: control but-
tons. Fig. 88
Right side of multifunction steering
wheel: control buttons. Read the additional information carefully
››› page 19
The driver information system is controlled
with the multifunction steering wheel buttons ›››
Fig. 88 or with the windscreen wiper lever
› ›
› Fig. 87 (if the vehicle is not equipped with
multif
unction steering wheel).
Enabling the main menu ● Switch the ignition on.
● If a message or vehicle pictogram appears,
press button ››› Fig. 87 1 on the windscreen
wiper lever or button on the multifunction
steering wheel ››› Fig. 88.
● If managed from the windscreen wiper lev-
er: to display the main screen
›
›
› page 74 or
to return to the main menu from another
menu hold down the rocker button ››› Fig. 87
2 .
● If managed from the multifunction steering
wheel: the main menu list is not displayed.
T o g
o from point to point in the main menu,
press button
or
several times
››› Fig. 88 .
Sel ect
a submenu
● Press the rocker switch ››› Fig. 87 2 on the
windscreen wiper lever up or down or turn
the thumbwheel of the multifunction steering
wheel ››› Fig. 88 until the desired option ap-
pe ar
s marked on the menu.
● The selected option is displayed between
two horizontal lines. In addition, a triangle is
displayed on the right:
● To consult the submenu option, press but-
ton ››› Fig. 87 1 on the windscreen wiperlever or button
on the multifunction steer-
ing wheel ››› Fig. 88 .
M ak
ing changes according to the menu
● With the rocker switch on the windscreen
wiper lever or the thumbwheel of the multi-
function steering wheel, make the desired
changes. To increase or decrease the values
more quickly, turn the thumbwheel faster.
● Mark or confirm the selection with button
››› Fig. 87 1 on the windscreen wiper lever
or button on the multifunction steering
wheel ››› Fig. 88 .
B utt
on for the driving assistance
systems* Fig. 89
On the turn signal and main beam
headlight lever: button for the driving assis-
tance systems » 73
Technical specifications
Advice
Operation
Safety
The essentials
Page 76 of 284

Operation
With the turn signal and main beam head-
light lever button, you can activate or deacti-
vate the driver assistance systems displayed
in the Assist systems
menu ›
› › page 143.
Activ
ate or deactivate a driver assistance
system
● Briefly press the button ››› Fig. 89 in the di-
rection of
the arrow to open the menu Assist
systems.
● Select the driver assistance system and ac-
tivate or deactivate it ››› page 73. A mark indi-
cates that driver assistance system is switch-
ed on.
Menu
MenuFunction
Driving da-
taInformation and possible configurations
of the multifunction display (MFD)
››› page 76, ››› page 81.
Assist sys-
temsInformation and possible configurations
of the driver assistance systems
››› page 81.
MenuFunction
Navigation
Information instructions from the activa-
ted navigation system: when a route guid-
ance is activated, the turning arrows and
proximity bars are displayed. The appear-
ance is similar to the Easy Connect sys-
tem.
If route guidance is not activated, the di-
rection of travel (compass) and the name
of the street along which you are driving
are shown ››› Booklet Navigation system.
Audio
Station display on the radio.
Track name on the CD.
Track name in Media mode. ››› Booklet Ra-
dio or ››› Booklet Navigation system.
Telephone
Information and possible configurations
of the mobile phone preinstallation
››› Booklet Radio or ››› Booklet Navigation
system.
Lap timer
In a racing circuit, measurement and
memorisation of lap times by the vehicle
and comparison with previously measured
best times ››› page 78.
Vehicle
statusDisplay of the current warning or informa-
tion texts and other system components,
depending on the equipment
››› page 81. Outside temperature display
When the outside temperature is below +4°C
(+39°F), the symbol “ice crystal” (warning ofrisk of freezing) is also displayed next to the
temperature. At first this symbol flashes and
then it remains lit until the outside tempera-
ture rises above +6°C (+43°F)
››› in Dis-
plays on screen on page 69 .
When the v
ehicle is at a standstill or when
travelling at very low speeds, the tempera-
ture displayed may be higher than the true
outside temperature as a result of the heat
produced by the engine.
The temperatures measured range from
-40°C to +50°C (-40°F to +122°F).
Gear-change indicator Fig. 90
Instrument panel: gear-change indica-
tor (manual gearbox). To familiarise yourself with the gear-change
indicator, we recommend driving in the nor-
mal way to start with. A gear change will be
74
Page 77 of 284

Driver information system
recommended if the gear you are in is not the
most economical choice.
If no gear-change is recommended, it means
that you are already in the most economical
gear.
Vehicles with a manual gearbox
The following display symbols ››› Fig. 90
mean:
● Change to a higher gear: the suggested
gear appears to the right of the current gear
when a higher gear is recommended
.
● Change to a lower gear: the suggested
g e
ar appears to the left of the current gear
when a lower gear is recommended .
The gear recommendation may occasionally
skip a gear (2nd 4th).
Vehicles with an automatic gearbox*
The display is only visible in tiptronic mode
››› page 135
.
The following display symbols mean:
● Shifting up a gear
● Shifting down a gear CAUTION
The gear-change indicator is intended to help
save fuel, but it is not intended to recom-
mend the right gear for all driving situations. In certain situations, only the driver can
choose the correct gear (for instance when
overtaking, driving up a steep gradient or
towing a trailer).
Note
The display disappears from the instrument
panel when you press the clutch pedal. Bonnet, rear lid and doors open
When the ignition is switched on or when
driving, the bonnet, rear lid or doors that are
open will be indicated on the instrument pan-
el display, and if it should be the case, this
will also be indicated audibly. The display
may vary according to the type of instrument
panel fitted.
Illustra-
tionKey to ››› Fig. 83
A Do not continue driving!
The bonnet is open or is not properly
closed ››› page 198.
B Do not continue driving!
The rear lid is open or is not properly
closed ››› page 89.
C, D Do not continue driving!
A vehicle door is open or is not properly
closed ››› page 82. Warning and information texts
The system runs a check on certain compo-
nents and functions when the ignition is
switched on and while the vehicle is moving.
Faults in the operation are displayed on the
screen using red and yellow symbols and
messages on the instrument panel display
(
››› page 71) and, in some cases, with audible
w arnin
gs. The display may vary according to
the type of instrument panel fitted.
Priority 1 warning (red symbols)
Symbol flashing or lit; partly combined with audible
warnings.
Stop the vehicle! It is dangerous ››› in Control and
warning lamps on page 71 !
Check the function that is faulty and repair it. If necessa-
ry, request assistance from specialised personnel.
Priority 2 warning (yellow symbols)
Symbol flashing or lit; partly combined with audible
warnings.
A faulty function, or fluids which are below the correct
levels may cause damage to the vehicle! ›››
in Control
and warning lamps on page 71
Check the faulty function as soon as possible. If neces-
sary, request assistance from specialised personnel.
Informative text
Information relating to different vehicle processes. 75
Technical specifications
Advice
Operation
Safety
The essentials
Page 78 of 284

Operation
Assist systems submenuAssist
systems
menuFunction
Lane As-
sist*Switching the Lane Assist system on or off
››› page 168.
Tiredness
detection*Switching the tiredness detection on or off
(pause recommendation) ››› page 172. Driving data
Presets The MFD (multifunction display) shows differ-
ent values for the journey and the consump-
tion.
Changing between display modes on the
MFD
● In vehicles without multifunction steering
wheel: Press the rocker switch on the
windscreen wiper lever ›››
Fig. 87 .
● Vehicle
s with a multifunction steering
wheel: turn the thumbwheel ››
› Fig. 88.
Mu
ltifunction display memory
The multifunction display is equipped with
three memories that work automatically: MFD
from departure, MFD from refuelling, MFD to- tal calculation. On the screen display, you
can read which memory is currently dis-
played.
To change between memories with the igni-
tion on and the memory shown, press the
button
on the windscreen wiper lever
or you can also change between memories
using the button on the multifunction
steering wheel.
MenuFunction
MFD from
depar-
ture
Display and storage of the values for the
journey and the consumption from when the
ignition is switched on to when it is switch-
ed off.
If the journey is continued in less than 2
hours after the ignition is switched off, the
new data is added to the data already stor-
ed in the memory. The memory will auto-
matically be deleted if the journey is inter-
rupted for more than 2 hours.
MFD from
refuellingDisplay and storage of the values for the
journey and the consumption. By refuelling,
the memory will be erased automatically.
MFD total
calcula-
tion
The memory records the values for a specif-
ic number of partial trips, up to a total of 19
hours and 59 minutes or 99 hours and 59
minutes, or 1999.9 km or 9999 km, de-
pending on the model of instrument panel.
On reaching either of these limits a)
, the
memory is automatically erased and starts
to count from 0 again.
a) It varies according to the type of instrument panel fitted.
Erasing a memory manually
● Select the memory that you wish to erase.
● Hold the button of the multifunction
steering wheel or the button of the multi-
function wheel pressed down for about 2 sec-
onds.
Personalising the displays
In the Easy Connect system you can adjust
which of the possible displays of the MFD can
be shown on the instrument panel display
with the button and the function button
Setup
››› page 81 .
Dat a s
ummary
MenuFunction
Current fuel
consumption
The current fuel consumption display
operates throughout the journey, in li-
tres/100 km; and with the engine run-
ning and the vehicle stopped, in li-
tres/hour.
Average fuel
consumption a)
After turning on the ignition, average
fuel consumption in litres/100 km will
be displayed after travelling about 100
metres. Otherwise horizontal lines are
displayed. The value shown is updated
approximately every 5 seconds.
ACT®
*: Depending on the equipment,
number of active cylinders. 76
Page 79 of 284

Approximate distance in km that can
still be travelled with the fuel remain-
ing in the tank, assuming the same
style of driving is maintained.")
Driver information systemMenuFunction
Operating
range
a)
Approximate distance in km that can
still be travelled with the fuel remain-
ing in the tank, assuming the same
style of driving is maintained. This is
calculated using the current fuel con-
sumption.
Journey dura-
tionThis indicates the hours (h) and mi-
nutes (min) since the ignition was
switched on.
Distance cov-
eredDistance covered in km (m) after
switching on the ignition.
CNG quality
Whenever you refuel the quality of the
natural gas is automatically verified
and is displayed when the ignition is
switched on. The display is made in a
percentage of between 70% and
100%. The greater the percentage dis-
played the lower the consumption may
be.
Average speed
The average speed will be shown after
a distance of about 100 metres has
been travelled. Otherwise horizontal
lines are displayed. The value shown is
updated approximately every 5 sec-
onds.
Digital display
of speedCurrent speed displayed in digital for-
mat.
Speed warn-
ing at --- km/h
or Speed warning at ---
mphIf the stored speed is exceeded (be-
tween 30 - 250 km/h, or 19 -
155 mph), an audible warning is given
together with a visual warning.
MenuFunction
Oil tempera-
tureUpdated engine oil temperature digital
display
Coolant tem-
perature
gaugeDigital display of the current tempera-
ture of the liquid coolant.
a) In vehicles with a natural gas engine, range and average con-
sumption refer only to data or natural gas consumption. If you
are in “petrol mode”, the information of both data only appears
on the dash panel and not on the multifunction screen.
Storing a speed for the speed warning
● Select the display Speed warning at --- km/h
(--- mph)
● Press the button on the windscreen
wiper lever or the button on the multifunc-
tion steering wheel to store the current speed
and activate the warning.
● If necessary, adjust the desired speed with-
in 5 seconds using the rocker switch on
the windscreen wiper lever or by turning the
thumbwheel on the multifunction steering
wheel. Next, press the button or
again or wait several seconds. The speed is
stored and the warning activated.
● To deactivate it press the button
or
the button . The stored speed is deleted.Engine oil temperature display Vehicles without multifunction steering
wheel
– To view the temperature, press the rocker
button ››› Fig. 87 2 until the main menu
comes up. Enter into Journey data. With the
button 2 move to the oil temperature
gauge.
Vehicles with multifunction steering wheel
– To display the engine oil temperature, enter
the submenu Journey data and turn the
thumbwheel until the oil temperature dis-
play appears.
The engine reaches its operating temperature
when in normal driving conditions, the oil
temperature is between 80°C (180°F)
and
120°C (250°F) . If the engine is required to
work hard and the outside temperature is
high, the engine oil temperature can in-
crease. This does not present any problems
as long as the warning lamps ›››
ta-
ble on page 23 or ››
›
table on page 23
do not appear on the display.
Additional electrical appliances 3 Not available in vehicles equipped with natural
gas engine (CNG).
– Operation with the windscreen wiper lev-
er*: Press the rocker switch ›››
Fig. 87 2 »
77
Technical specifications
Advice
Operation
Safety
The essentials
Page 80 of 284

Operation
until the main menu appears. Enter into the
section Journey data
.
W ith the rocker
switch, move to the display Convenience ap-
pliances.
– Operation with the multifunction steering
wheel*: Move with the buttons 1 or
2 to
Journey data and enter with OK
. Turn the
thumb
wheel to the right until the Conven-
ience appliances display appears.
In addition, a scale will inform you of the cur-
rent sum of all the additional appliances.
Saving tips Tips on how to save fuel will be displayed in
certain conditions that contribute to in-
creased consumption. Following these tips
could reduce the fuel consumption of your
vehicle. The displays appear automatically
and will only be shown with the efficiency
programme. After a time, the saving tips will
disappear automatically.
– If you wish to hide a saving tip immediately
after it appears, press any button on the
windscreen wiper lever*/multifunction
steering wheel*. Note
● If you hide a saving tip, it will reappear af-
ter you switch the ignition on again. ●
The saving tips do not appear in all situa-
tions, but rather with a large separation of
time. Timer*
If you have the corresponding equipment you
can access the timer via the selection menu
››› page 74.
The timer al lo
ws you to manually time lap
times on a racing circuit, memorise them and
compare then to the vehicle's previous best
times.
The following menus can be displayed:
● Stop
● Lap
● Pause
● Partial time
● Statistics
Change from one menu to another ● Vehicles without multifunction steering
wheel: press the rocker switch in the
windscreen wiper lever.
● Vehicles with multifunction steering wheel:
press or
.
Menu “Stop”
Start
The timer starts.
If there are existing laps and they are in-
cluded in the statistics, it will begin with
the number of laps in question.
It is only possible to begin with a new first
lap if the statistics have been reset first in
the Statistics menu.
Since start
The timer begins when the vehicle sets
off.
If the vehicle is already moving, the timer
begins once the vehicle has stopped.
StatisticsThe Statistics menu is displayed on the
screen.
Menu “Lap”
New lap
The timer of the current lap stops and a
new lap starts immediately. The time for
the lap you have just completed is inclu-
ded in the statistics.
Partial timeFor about 5 seconds a partial time is dis-
played. The timer continues in parallel.
StopThe current lap timer will be interrupted.
The lap does not end. The Pause menu is
displayed.
Menu “Pause”
ContinueThe interrupted timer continues.
New lapA new timer starts. The halted lap ends
and is included in the statistics. 78
 1
1 2
2 3
3 4
4 5
5 6
6 7
7 8
8 9
9 10
10 11
11 12
12 13
13 14
14 15
15 16
16 17
17 18
18 19
19 20
20 21
21 22
22 23
23 24
24 25
25 26
26 27
27 28
28 29
29 30
30 31
31 32
32 33
33 34
34 35
35 36
36 37
37 38
38 39
39 40
40 41
41 42
42 43
43 44
44 45
45 46
46 47
47 48
48 49
49 50
50 51
51 52
52 53
53 54
54 55
55 56
56 57
57 58
58 59
59 60
60 61
61 62
62 63
63 64
64 65
65 66
66 67
67 68
68 69
69 70
70 71
71 72
72 73
73 74
74 75
75 76
76 77
77 78
78 79
79 80
80 81
81 82
82 83
83 84
84 85
85 86
86 87
87 88
88 89
89 90
90 91
91 92
92 93
93 94
94 95
95 96
96 97
97 98
98 99
99 100
100 101
101 102
102 103
103 104
104 105
105 106
106 107
107 108
108 109
109 110
110 111
111 112
112 113
113 114
114 115
115 116
116 117
117 118
118 119
119 120
120 121
121 122
122 123
123 124
124 125
125 126
126 127
127 128
128 129
129 130
130 131
131 132
132 133
133 134
134 135
135 136
136 137
137 138
138 139
139 140
140 141
141 142
142 143
143 144
144 145
145 146
146 147
147 148
148 149
149 150
150 151
151 152
152 153
153 154
154 155
155 156
156 157
157 158
158 159
159 160
160 161
161 162
162 163
163 164
164 165
165 166
166 167
167 168
168 169
169 170
170 171
171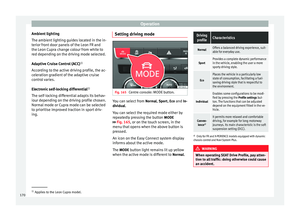 172
172 173
173 174
174 175
175 176
176 177
177 178
178 179
179 180
180 181
181 182
182 183
183 184
184 185
185 186
186 187
187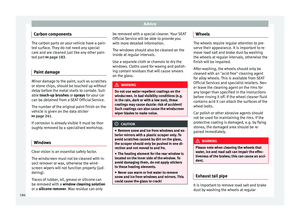 188
188 189
189 190
190 191
191 192
192 193
193 194
194 195
195 196
196 197
197 198
198 199
199 200
200 201
201 202
202 203
203 204
204 205
205 206
206 207
207 208
208 209
209 210
210 211
211 212
212 213
213 214
214 215
215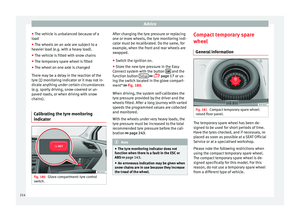 216
216 217
217 218
218 219
219 220
220 221
221 222
222 223
223 224
224 225
225 226
226 227
227 228
228 229
229 230
230 231
231 232
232 233
233 234
234 235
235 236
236 237
237 238
238 239
239 240
240 241
241 242
242 243
243 244
244 245
245 246
246 247
247 248
248 249
249 250
250 251
251 252
252 253
253 254
254 255
255 256
256 257
257 258
258 259
259 260
260 261
261 262
262 263
263 264
264 265
265 266
266 267
267 268
268 269
269 270
270 271
271 272
272 273
273 274
274 275
275 276
276 277
277 278
278 279
279 280
280 281
281 282
282 283
283