Page 129 of 306

Error messages
Applies to vehicles: with parking system plus/rear view
camera/per ipheral cameras
There is an e rror in the system if the LED in
the
p, qA button is blinking and you hear a con
tinuous alarm for a few seconds afte r switch
ing on the parking system or when the park
ing system is already activated. If the error is
not corrected before you switch off the igni
tion, the LED in the
Pw.6. button will blink the
next time you switch on the parking system by
shifting into reverse.
Parking system plus
If a sensor is faulty, the~ symbol will appear
in front of/behind the vehicle in the Infotain
ment display. If a rear sensor is fau lty, only
obstacles that are in areas @ and @ are
shown ¢
page 117, fig. 122. If a front sensor
i s faulty, only obstacles that are in areas ©
and @are shown .
Peripheral cameras*
There is also a system error if:
- the
'(:8:)• • symbol appears in the display and
the corresponding display area is shown in
blue. The camera is not working in this area.
- all segments around the vehicles are red or
if no segments are displayed.
Drive to your authorized Aud i dea ler o r au
thorized repair fac ility immediately to have
the ma lfunction corrected.
Trailer hitch
Appl ies to vehicles: with parking system plus/rear view
camera/per ipheral cameras and trailer hitch
For vehicles using the tra iler socket, the park
ing system rear senso rs do not turn on when
you shift into reverse gear or when yo u press
the P
01A button. This results in the following re
strictions:
Parking system plus*
There is no distance wa rning for the rear. The
front sensors rema in activated. The visual d is
play switches to the traile r tow ing mode.
Parking systems 127
Parking system plus and rear view
camera* /Peripheral cameras*
There is no distance warning for the rear. The
front sensors remain activated. The visual dis
play switches to the trailer towing mode. The
rear view camera image will not show the ori
entation lines and the blue surfaces .
{D Tips
Trailer hitches that are not installed at the
factory may cause the park ing system to
malfunction or they may restr ict its func
tion.
Page 130 of 306

128 Homelink
Homelink
Universal remote
control
General information
Applies to vehicles: with Homelink u nive rsal remote con
tro l
The HomeLink universal remote control can
be programmed with hand-held transmitters
from existing equipment.
With Homelink, you can control devices such
as the garage door, security systems, house
lights, etc. comfortably from the inside of you
vehicle.
Homelink makes it possible for you to replace
three different remote controls from devices in your home with one universal remote . Th is
feature works for most garage door and exte
rior door motor signals. Programming the in
d iv idual remo te control fo r your remote con
trol takes p lace near the center of the radiator
grille. There is a control module attached at
this location .
A one-t ime programm ing of the sensor mus t
be performed before you are able to use sys
tems w ith Homelink.
A WARNING
- Never use the Homelink transmitter
with any garage door opener that does
have not the safety stop and reverse fea
ture as requ ired by federal safety stand
ards. Th is includes any garage door open
er model manufactured before April 1, 1982.
- A garage door opener which cannot de
tect an object, signaling the door to stop
and reverse does not meet current feder
al safety standards . Us ing a garage doo r
opener witho ut these fea tures increases
risk of serious injury or death.
- For safety reasons never release the
parking brake or start the engine while
anyone is standing in front of the vehicle .
- A garage door or an estate gate may
sometimes be set in motion when the Homelink remote control is being pro
grammed. If the device is repeatedly ac
tivated, this can overstrain motor and
damage its electrical components -an
overheated motor is a fire hazard!
- To avo id possible injuries or property
damage, please always make absolutely
certa in that no persons or objects are lo
cated in the range of motion of any
equ ipment being operated.
(0 Tips
- If you would like additional information
on the Homelink Un iversal Transceiver,
Homelink compatible products, or to
purchase other accessories su ch as the
Homelink Lighting Package, please con
tact Homelink at 1 -800-355-3515 or on
the Internet at www.homelink.com.
- For Declara tion of Comp liance to United
States FCC and Ind ustry Canada reg ula
tions¢
page 288 .
-For security reasons, we recommend that
you clear the programmed b uttons be
fore selling the ve hicle .
Operation
Appl ies to vehicles: wit h Ho melink
Fig . 14 6 Headliner: controls
M 0
9 (!)
~
Requirement: The buttons must be program
med ¢
page 129 .
"'To open the garage door , press the program
med b utton . The LED @ will light up o r
flash.
"' To close the garage door, press the button
again .
Ill>
Page 131 of 306

@ Tips
To open the garage door, press the button,
but do not press it for longer ten seconds
or the Homelink module will switch to
programming mode .
Programming the transmitter
Applies to vehicles : with Home Link
Fig. 147 Di stan ce be twe en th e ra di ato r grille a nd th e
h an d trans mitter
You can program the fixed code and rolling
code systems using the described procedure.
Programming the button
.. Turn the ignition on .
.. There are two ways to program a bu tton :
press the button that you would like to pro
gram . The MMI will display instructions to
guide you through the programming . Or
.. Select :
I CARI function button> (Car)* sys
tems
control button > Vehicle settings >
Garage door opener > Program garage door
opener .
.. Select the button that you would like to pro
gram .
.. Follow the instructions in the MMI.
.. If the garage door opening must also be
synchronized with the Homelink module,
refer to the owner's manual for the garage
door opener.
Remote control units for garage door openers
in Canada are set to stop transmitting radio
frequency signals after two seconds . This time
may not be sufficient for the Homelink sys
tem to learn the radio frequency signal. Per
form all other steps as described above.
Homelink 129
Erasing/Clearing the programmed button
settings
.. To erase all of the programmed buttons at
the same time, select:
!CAR ! function button
>
(Car)* systems function key> Vehicle set
tings
> Garage door opener > Clear pro
gram settings> Yes .
The programmed but
tons can not be erased individually. Repro
gram the buttons if necessary .
.. Reprogram an individual button in the same
manner that you would for the one-time
programming.
Displaying the version/status/country
code
.. Select: !CAR I function button> (Car)* sys
tems
control button > Vehicle settings >
Garage door opener> Version information.
(D Tips
- The required distance between the hand
transmitter and the Homelink module in
the radiator grille~
fig. 147 depends on
the system that you are programming .
- Depending on the model of the garage
door opener, you may need to release the
button on the remote and press it again
when programming. When program
ming a new device, keep the button
pressed for at least 15 seconds before
trying again with the transmitter in a dif
ferent position. Watch out for the emer
gency flasher during that time.
Page 132 of 306

130 Driving Saf ely
Driving Safely
General notes
Safe driving habits
Please remember -safety first!
This chapter contains important information,
tips, instructions and warnings that you need
to read and observe for your own safety, the
safety of your passengers and others . We have
summarized here what you need to know
about safety belts, a irbags, ch ild restra ints as
well as child safety. Your safety is for us
priori
ty number 1.
Always observe the info rmat ion
and warn ings in th is sect ion -fo r yo ur own
safety as well as that of your passengers .
The information in this se ction app lies to all
model ve rsions of your veh icle . Some of the
feat ures described in this sec tions may be
standard equipment on some models, or may
be optional equipment on others . If you are
not sure, ask your authorized Audi dealer.
A WARNING
- Always make sure that you follow the in
struct ions and heed the WARNINGS in
this Manual. It is in your interest and in
the inte rest of you r passengers.
- Always keep the complete Owner's Liter
ature in your Audi when you lend or sell
your vehicle so that this important info r
mation will always be ava ilable to the
dr iver and passengers.
- Always keep the Owner's literature handy
so that you can find i t eas ily if you have
ques tions.
Safety equipment
The safety features are part of the occupant
restraint system and work together to help
redu ce the risk of injury in a wide variety of
accident situations.
Your safety and the safety of your passenge rs
should not be left to chance. Advances in
technology have made a varie ty o f fea tures
avai la bl e to he lp re duce the risk of injury in an accident
. The following is a list of just a few of
the safety features in your Audi:
- sophis tic ated s afety be lts fo r drive r and a ll
passenger sea ting pos it ions,
- safety belt prete nsioners ,
- safety belt force lim iters fo r the front seats,
- safety belt he ight adjustment systems for
the front seats ,
- front airbags,
- knee airbags for the front seats *
- side airbags in the front seats a nd outer rear
seats*,
- side curtain airbags ,
- specia l LATCH anchorages for child re-
straints,
- hea d restr aints for each sea ting pos ition,
- ad justab le s teer ing colum n.
These ind iv idual safety features, can work to
ge ther as a system to help protect you and
you r passengers in a wide range of accidents .
T hese features canno t wo rk as a system if
they are not always cor re ct ly adjusted and co r
rect ly used.
Safety i s everybody' s respon sibility!
Important things to do before driving
Safety is everybody 's job! Vehicle and occu
pant safety always depends on the informed and careful driver .
For your safety and the safety of your passen
gers,
befor e driv ing always:
.. Make s ure that all lights and signals are op
erating correctly.
.. Make sure that the t ire pressure is correct .
.. Make s ure t hat all windows are clean and af
ford good vis ibility to the outs ide .
.. Sec ure all luggage a nd other items caref ully
q page 64, q page 61 .
.. Ma ke s ure t hat nothing can interfe re wi th
the peda ls .
.. Adjust front seat, head restraint and mirrors
correctly for your height.
.. Instruct passengers to adjust the head re-
straints according to the ir height . .,..
Page 133 of 306

.. Make sure to use the right child rest raint
correct ly to protect children
Q page 175,
Child Safety .
.. Sit properly in your seat and make sure that
your passengers do the same¢
page 53,
General recommendations .
.. Fasten your safety belt and wear it properly.
Also instruct your passengers to fasten their
safety belts properly ¢
page 140 .
What impairs driving safety?
Safe driving is directly related to the condi
tion of the vehicle, the driver as well as the
driver 's ability to concentrate on the road
without being distracted.
The driver is respons ible for the safety of the
veh icle and all of its occupants.
If your ability
to drive is impai red, safety r isks for everybody
in the vehicle increase and you also become a
hazard to everyone else on the road ¢
A.
Therefore:
.. Do not let yourself be distracted by passen
gers or by using a cellular telephone.
.. NEVER drive when your driving ability is im
paired (by medications, alcohol, drugs, etc.).
.. Observe all traffic laws, rules of the road
and speed limits and plain common sense .
.. ALWAYS adjust your speed to road, traff ic
and weather conditions .
.,. Take frequent breaks on long trips. Do not
drive for more than two hours at a stretch.
.. Do NOT drive when you are t ired, under
pressure or when you are stressed.
A WARNING
Impaired driving safety increases the risk
of serious personal injury and death when
ever a vehicle is being used.
Driving Safely 131
Proper occupant
seating positions
Proper seating position for the driver
The proper driver seating position is impor
tant for safe, relaxed driving .
Fig. 148 Correct seat ing pos it ion
For your own safety and to reduce the risk of
injury in the event of an accident, we recom
mend that you adjust the driver's seat to the
follow ing pos ition:
.. Adjust the driver's seat so that you can easi
ly push the pedals all the way to the floor
wh ile keeping your knee(s) slightly bent
¢.&_ .
.. Adjust the angle of the seatback so that it is
in an upr ight position so that your back
comes in full contact w ith it when you drive.
.. Adjust the steering wheel so that th ere is a
distance of at least 10 inches (25 cm) be
tween the steering wheel and yo ur breast
bone
Q fig. 148. If not possible, see your au
thorized Audi dealership about adaptive
equipment .
.. Adjust the steering wheel so that the steer
ing wheel and airbag cover points at your
chest and not at your face.
.,. Grasp the top of the steering wheel with
your elbow(s) slightly bent.
.. App lies to veh icles with adjustable head re
straints: Ad just the head restraint so the up
per edge is as even as possible with the top
of your head. If that is not possible, try to
adjust the head restraint so that it is as
close to this posit ion as possible. Move the
head restraint so that it is as close to the
back of the head as poss ible. .,.
Page 134 of 306

132 Driving Safely
• Fasten and wear safety belts correctly
9 page 143.
• Always keep both feet in the footwell so
that you are in control of the vehicle at all
t imes.
Fo r detailed information on how to adjust the
driver's seat, see
<=> page 54.
A WARNING
Drivers who are unbelted, out of position
or too close to the airbag can be seriously
injured by an airbag as it unfolds . To help
reduce the risk of serious personal injury:
- Always adjust the driver's seat and the
steering wheel so that there are at least 10 inches (25 cm) between your breast
bone and the steering wheel.
- Always adjust the driver's seat and the
steering wheel so that there are at least
4 inches (10 cm) between the knees and
the lower part of the instrument panel.
- Always hold the steering wheel on the
outside of the steering wheel rim with
your hands at the 9 o'clock and 3 o'clock
positions to help reduce the risk of per
sonal injury if the driver's airbag inflates.
- Never hold the steering wheel at the
12 o'clock position or with your hands at
other positions inside the steering wheel
rim or on the steering wheel hub. Hold
ing the steering wheel the wrong way
can cause serious injuries to the hands,
arms and head if the driver's airbag in
flates.
- Pointing the steering wheel toward your
face decreases the ability of the supple
mental driver's airbag to protect you in a
collision.
- Always sit in an upright position and nev
er lean against or place any part of your
body too close to the area where the air
bags are located.
- Before driving, always adjust the front
seats and head restraints properly and
make sure that all passengers are prop
erly restrained. -
Never adjust the seats while the vehicle
is moving. Your seat may move unexpect
edly and you could lose control of the ve hicle .
- Never drive with the backrest reclined or
tilted far back! The farther the backrests
are tilted back, the greater the risk of in
jury due to incorrect positioning of the safety belt and improper seating posi
tion .
- Children must always ride in child seats
<=> page 175. Special precautions apply
when installing a child seat on the front
passenger seat
r=,> page 149.
Proper seating position for the front
passenger
The proper front passenger seating position
is important for safe, relaxed driving.
For your own safety and to reduce the risk of
injury in the event of an accident, we recom
mend that you adjust the seat for the front
passenger to the following position:
• Adjust the angle of the seatback so that it is
in an upright position and your back comes
in full contact w ith it whenever the vehicle is
moving.
• Adjust the head restraint so the upper edge
is as even as possible with the top of your
head. If that is not possible, try to adjust
the head restraint so that it is as close to
this position as possible <=>
page 134. Move
the head restraint so that it is as close to the
back of the head as possible.
• Keep both feet flat on the floor in front of
th e front passenger seat.
• Fasten and wear safety belts correctly
<=> page 143.
For detailed information on how to adjust the
front passenger's seat, see
9 page 53.
WARNING
Front seat passengers who are unbelted,
out of position or too close to the airbag
Page 135 of 306

can be seriously injured or killed by the air
bag as it unfolds. To help reduce the risk of
serious personal injury:
- Passengers must always sit in an upright
position and never lean against or place
any part of their body too close to the area where the airbags are located.
- Passengers who are unbelted, out of po
sition or too close to the airbag can be seriously injured by an airbag as it un
folds with great force in the blink of an eye .
- Always make sure that there are at least
10 inches (25 cm) between the front
passenger's breastbone and the instru
ment panel.
- Always make sure that there are at least
4 inches (10 cm) between the front pas
senger's knees and the lower part of the
instrument panel.
- Each passenger must always sit on a seat
of their own and properly fasten and
wear the safety belt belonging to that
seat.
- Before driving, always adjust the front passenger seat and head restraint prop
erly.
- Always keep your feet on the floor in front of the seat. Never rest them on the seat, instrument panel, out of the win
dow, etc. The airbag system and safety
belt will not be able to protect you prop
erly and can even increase the risk of in
jury in a crash .
- Never drive with the backrest reclined or
tilted far back! The farther the backrests
are tilted back, the greater the risk of in
jury due to incorrect positioning of the
safety belt and improper seating posi
tion.
- Children must always ride in child seats
~ page 175. Special precautions apply
when installing a child seat on the front
passenger seat¢
page 149.
Driving Safely 133
Proper seating positions for passengers
in rear seats
Rear seat passengers must sit upright with
both feet on the floor consistent with their
physical size and be properly restrained
whenever the vehicle is in use.
To reduce the risk of injury caused by an incor
rect seating position in the event of a sudden
braking maneuver or an accident , your pas
sengers on the rear bench seat must always
observe the following:
.,.. Adjust the head restraint so the upper edge
is as even as possible with the top of your
head. If that is not possible , try to adjust
the head restraint so that it is as close to
this position as possible¢
page 134 .
.,.. Keep both feet flat in the footwell in front of
the rear seat .
.,.. Fasten and wear safety belts properly
¢ page 143 .
.,.. Make sure that children are always properly
restrained in a child restraint that is appro
priate for their size and age~
page 175.
_& WARNING
..-
Passengers who are improperly seated on
the rear seat can be seriously injured in a
crash.
- Each passenger must always sit on a seat
of their own and properly fasten and
wear the safety belt belonging to that seat .
- Safety belts only offer maximum protec
tion when the safety belts are properly
positioned on the body and securely
latched . By not sitting upright, a rear
seat passenger increases the risk of per
sonal injury from improperly positioned
safety belts!
- Always adjust the head restraint properly
so that it can give maximum protection.
•
•
Page 136 of 306

134 Driving Safely
Proper adjustment of head restraints
Correctly adjusted head restraints are an im
portant part of your vehicle's occupant re
straint system and can help to reduce the risk
of injuries in accident situations.
Fig. 149 H ead restraint: viewed from the front
The head restraints must be correctly adjust
ed to achieve the best protection.
i,.. For adjustable head restraints: adjust the
head restraint so the upper edge is as even
as possible with the top of your head. If that
is not possible, try to adjust the head re
stra int so that it is as close to this position
as possible¢
fig. 149. Move the head re
stra int so that it is as close to the back of
the head as possible .
i,.. If there is a passenger on the rear center
seat ing position*, slide the center head re
straint* upward at least to the next notch.
Adjusting head restraints¢
page 56.
A WARNING
All seats are equipped with head re
straints. Driving without head restraints or
with head restraints that are not properly
adjusted increases the risk of serious or fa
tal neck injury dramatically. To help reduce
the risk of injury:
- Always drive with the head restraints in
place and properly adjusted.
- Every person in the vehicle must have a
properly adjusted head restraint.
- Always make sure each person in the ve
hicle properly adjusts their head re
straint. Adjust the head restraint so the
upper edge is as even as possible with the top of your head. If that
is not possi
ble, try to adjust the head restraint so
that it is as close to this position as pos
sible. Move the head restraint so that it
is as close to the back of the head as pos
sible.
- Never attempt to adjust head restraint
while driving. If you have driven off and must adjust the driver headrest for any
reason, first stop the vehicle safely be
fore attempting to adjust the head re
straint.
- Children must always be properly re
strained in a child restraint that is appro
priate for their age and size ¢
page 175.
Examples of improper seating positions
The occupant restraint system can only re
duce the risk of injury if vehicle occupants are
properly seated.
Improper seating positions can cause serious
injury or death. Safety belts can only work
when they are properly positioned on the
body. Improper seating positions reduce the
effectiveness of safety belts and will even in
crease the risk of injury and death by moving
the safety belt to crit ica l areas of the body.
Improper seating positions also increase the
risk of serious injury and death when an air
bag deploys and strikes an occupant who is
not in the proper seating position. A driver is
responsible for the safety of all vehicle occu
pants and especially for children. Therefore:
i,.. Never allow anyone to assume an incorrect
seating position when the vehicle is being
used ¢& .
The following bulletins list only some sample
positions that will increase the risk of serious
injury and death. Our hope is that these exam
ples will make you more aware of seating po
sitions that are dangerous.
Therefore, whenever the vehicle is
moving:
- never stand up in the vehicle
- never stand on the seats
 1
1 2
2 3
3 4
4 5
5 6
6 7
7 8
8 9
9 10
10 11
11 12
12 13
13 14
14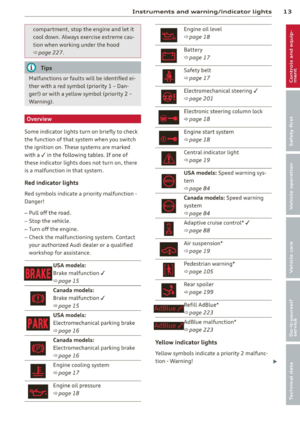 15
15 16
16 17
17 18
18 19
19 20
20 21
21 22
22 23
23 24
24 25
25 26
26 27
27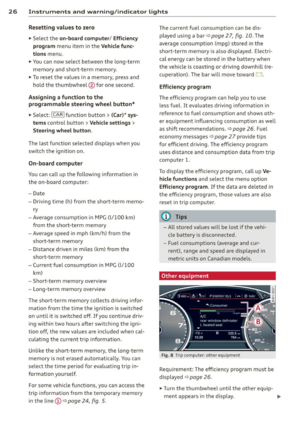 28
28 29
29 30
30 31
31 32
32 33
33 34
34 35
35 36
36 37
37 38
38 39
39 40
40 41
41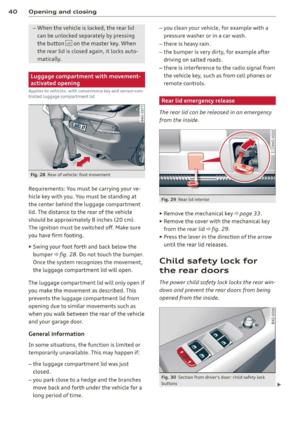 42
42 43
43 44
44 45
45 46
46 47
47 48
48 49
49 50
50 51
51 52
52 53
53 54
54 55
55 56
56 57
57 58
58 59
59 60
60 61
61 62
62 63
63 64
64 65
65 66
66 67
67 68
68 69
69 70
70 71
71 72
72 73
73 74
74 75
75 76
76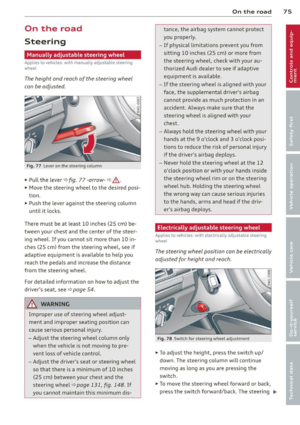 77
77 78
78 79
79 80
80 81
81 82
82 83
83 84
84 85
85 86
86 87
87 88
88 89
89 90
90 91
91 92
92 93
93 94
94 95
95 96
96 97
97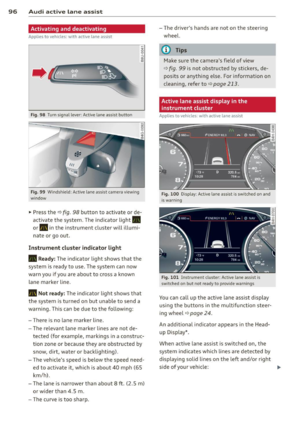 98
98 99
99 100
100 101
101 102
102 103
103 104
104 105
105 106
106 107
107 108
108 109
109 110
110 111
111 112
112 113
113 114
114 115
115 116
116 117
117 118
118 119
119 120
120 121
121 122
122 123
123 124
124 125
125 126
126 127
127 128
128 129
129 130
130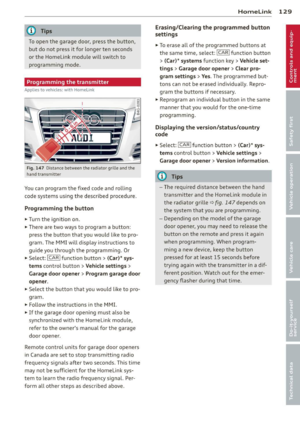 131
131 132
132 133
133 134
134 135
135 136
136 137
137 138
138 139
139 140
140 141
141 142
142 143
143 144
144 145
145 146
146 147
147 148
148 149
149 150
150 151
151 152
152 153
153 154
154 155
155 156
156 157
157 158
158 159
159 160
160 161
161 162
162 163
163 164
164 165
165 166
166 167
167 168
168 169
169 170
170 171
171 172
172 173
173 174
174 175
175 176
176 177
177 178
178 179
179 180
180 181
181 182
182 183
183 184
184 185
185 186
186 187
187 188
188 189
189 190
190 191
191 192
192 193
193 194
194 195
195 196
196 197
197 198
198 199
199 200
200 201
201 202
202 203
203 204
204 205
205 206
206 207
207 208
208 209
209 210
210 211
211 212
212 213
213 214
214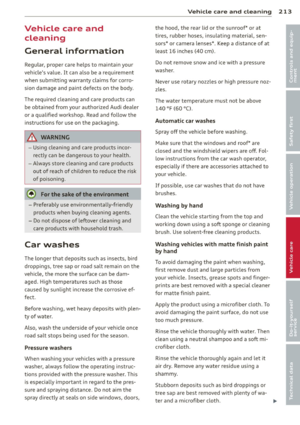 215
215 216
216 217
217 218
218 219
219 220
220 221
221 222
222 223
223 224
224 225
225 226
226 227
227 228
228 229
229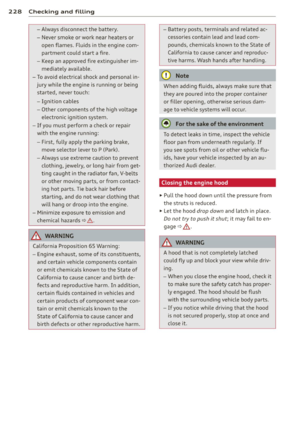 230
230 231
231 232
232 233
233 234
234 235
235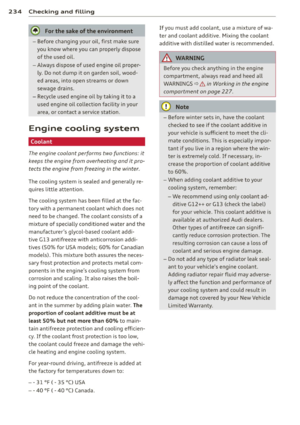 236
236 237
237 238
238 239
239 240
240 241
241 242
242 243
243 244
244 245
245 246
246 247
247 248
248 249
249 250
250 251
251 252
252 253
253 254
254 255
255 256
256 257
257 258
258 259
259 260
260 261
261 262
262 263
263 264
264 265
265 266
266 267
267 268
268 269
269 270
270 271
271 272
272 273
273 274
274 275
275 276
276 277
277 278
278 279
279 280
280 281
281 282
282 283
283 284
284 285
285 286
286 287
287 288
288 289
289 290
290 291
291 292
292 293
293 294
294 295
295 296
296 297
297 298
298 299
299 300
300 301
301 302
302 303
303 304
304 305
305