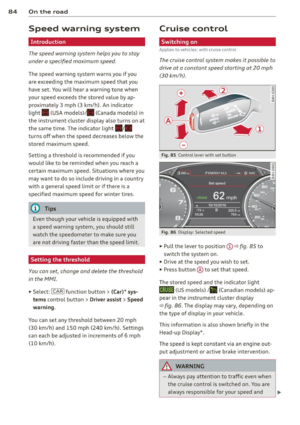
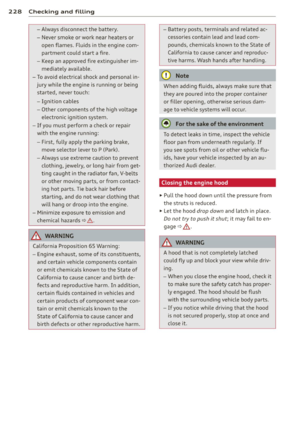
Page 113 of 306

At speeds above about 1 mph (2 km/h) the
Automatic Shift Lock is automatically deact i
vated in the N position .
A time de lay element prevents the se lector
l ever from locking when it is moved through
the N position (go ing from R to D/S). The lock
ing e lement will lock the selecto r lever if the
l ever is left in N (Neutral) for more than ap
proximately 2 second, without the brake ped
al being pressed .
Relea se butt on
The release button on the selector lever pre
vents the lever from being accidentally shifted
into certain positions . Depending on the direc
tion of the shift, the se lector lever locks at d if
ferent positions. The positions are h ighlighted
i n the illustration
c:> fig . 117 .
Driving the automatic transmission
Applies to vehicles: with S tronic/tiptronic
Fig . 1 18 Sh ift gate on the center conso le: se lector lev
er w it h relea se button
Startin g the engin e
• The selector leve r must be in P or N .
Starting off
• Press and hold the brake pedal.
• Press and hold the release button in these
lector lever handle, select the desired se lec
tor lever pos ition such as D/S and release
the button .
• Wait br iefly until the transmission has shift
ed (you will feel a slight movement).
• Remove your foot from the b rake pedal and
acce le rate .
Automatic Tra nsmi ssi on 11 1
Stopping t emporaril y
• Keep the veh icle stationary using the brak
ing pedal , for example at traffic lights .
• Do not press the accelerator peda l when do
ing this .
• To prevent the vehicle from ro lling when you
start driv ing, set the parking brake when
stopping on steep inclines
c:> .&_ .
• The parking brake will release automat ically
and the vehicle will start mov ing once you
press the acce lerator pedal.
Stopping /parking
If the selector lever is not in the P position
when you open the driver's door, the veh icle
could roll. The message
Tran smi ssion: Car
ma y roll! Shift to park!
appears .
• Press and hold the brake pedal until the ve-
hicle has come to a comp lete stop .
• Apply the parking brake
c:> page 80, Parking .
• Select the P selector lever posit ion c:> .&_ .
Stopping on an incline
• Always press the brake pedal to ho ld the ve
hicle in place and preven t it from "rolling
back"
c:> .&_ . Do not try to prevent the vehi
cle from "rolling back " when a gear is en
gaged by increasing the engine speed
c:> 0.
Starting on an incline
• Activate the parking brake.
• With the driving gear selected, press the ac
celerator pedal carefully . The parking brake
w ill release automatically if your seat belt is
fastened.
Under certa in circumstances, such as driving
in the mounta ins, it may be usefu l to sw itch
temporar ily to the manual sh ift p rogram in or
der to adj ust the gears to the driving cond i
ti ons by hand
<:? _&. .
On slopes, activate the parki ng b rake first and
then move the selector lever to the P position.
T his prevents too much st ress from being
placed on the locking mechanism.
Page 114 of 306

112 Automatic Tran sm iss ion
8_ WARNING
-The vehicle can also roll when the engine
is stopped .
- Unintended vehicle movement can cause
serious injury.
- Never leave your vehicle with the engine running whi le in gear. If you must leave
your vehicle when the engine is running, act ivate the park ing brake and move the
selector lever to P.
- Power is st ill transmitted to the wheels
when the eng ine is running at idle . To
prevent the vehicle from "creeping", you
must keep your foot on the b rake when
the engine is runn ing and the se lector
lever is in D/S or R or "tiptronic" mode is
selected .
- Do no t press the accelera tor pedal when
changing the selector lever position
whi le the vehicle is stationary and the
engine is running.
- Never shift into
R or P whi le driving.
- Be fore driv ing down a steep slope, re -
duce you r speed and shift into a lower
gear with "tiptronic".
- Do not ride the brakes or press the brake
peda l too often or too long when driving
down a hill. Constant braking causes the
brakes to overheat and substant ially re
duces braking performance, increases
braking d istance or causes comp lete fail
ure of the brake system.
- To prevent the veh icle from rolling back
when stopping on inclines, always hold it in place with the brake peda l or parking
brake.
- Never hold the veh icle on an incl ine with
a slipp ing clutch . The clutch opens auto
matically when it becomes too hot from
the ove rload. An ind icator lamp
[O] illu
minates and a dr iver message appears
¢ page 114 when the clutch is overload
ed.
- If the eng ine must remain running, never
have any driving position engaged when
checking under the hood. Make sure the
selector lever has securely engaged and is locked in P w
it h the park ing brake set
¢ page 227. Otherw ise, any increase in
engine speed may set the vehicle in mo
tion, even with the parking brake ap plied.
(D Note
- When stopping on an incl ine, do not try
to hold t he vehicle in place by pressing
the acce lerator pedal while a driving gear
is se lected. This ca n cause the transmis
sion to ove rheat and can damage it . Acti
vate the pa rking brake or press the bra ke
peda l to preven t the vehicle from roll ing.
- Allowing th e vehicle to ro ll when the en
gine is stopped and the selecto r lever is
in N will d amage the tr ansmission be
cause it is not l ubricated unde r those cir
cumstances .
(D Tips
Fo r saf ety reaso ns, the pa rking br ake is re
l eased automatically on ly when the d riv
er's safety belt is engaged in the buckle.
Hill descent control
Appl ies to vehicles: wit h S t ronic/tiptro nic
The hill descent control system assis ts the
driver when driving down declines.
Hill des cent con trol is activated when these
lector lever is in D/S and yo u press the brake
peda l. The transmission automatica lly selects
a gear that is suitable for the incline . Hi ll de
scent contro l tries to maintain the speed ach
ieved at the time of braking, within phys ica l
and technical lim itations. If may st ill be nec
essary to adjust the speed with the brakes .
Hill descent cont ro l switches off once the de
cline leve ls out or you press the acce lerator
pedal.
On vehicles with the cruise contro l system*
¢ page 84, hill descent control is also activat-
ed when the speed is set. .,..
Page 115 of 306

A WARNING
Hill descent control cannot overcome
physical limitations, so it may not be able
to maintain a constant speed under all
conditions. Always be ready to apply the
brakes.
Manual shift program
Applies to vehicles : with S tronic/tiptronic
Using the manual shift program you can
manually select gears .
Fig. 119 Cen ter con sole : shift ing th e gear s manua lly
Fi g. 120 S tee ring wheel: S hift b uttons•
Gear s election with se lecto r le ver
The tiptron ic mode can be selected either with
the vehicle stationary or on the move.
" Push the selector lever to the right from 0/
S . An M appears in the instrument cluster
display as soon as the transmission has
shifted.
• To upsh ift, push the selector lever forward
to the plus position
0 ~ fig. 119.
"To downshift, push the lever to the minus
position
0 .
Automatic Tra nsmi ssi on 11 3
Gear sele ct ion w ith pad dle l eve rs *
The shift buttons are activated when these
lector lever is in D/S or the tiptronic manual
shift program.
" To upshift, touch the button on the r ight
0
~ fig. 120 .
"To downshift, touch the button on the left
0 .
The transm iss ion automatically shifts up or
down before cr itical engine speed is reached .
The transm iss ion only allows manual sh ifting
when the engine speed is w ith in the permit
ted range .
(0 Tips
-When you shift into the next lower gear,
the t ransmission will downshift only
when there is no possibility of over-rev
ving the engine .
- When the ki ck-down comes on, the
transm ission wi ll shift down to a lower
gear, depending on vehicle and engine
speeds.
- T iptron ic is inoperative when the trans
mission is in the fai l-safe mode .
Kick-down
Applies to vehicles: wit h S tronic/t iptron ic
Kick-down enables maximum acceleration .
When you depress the accelerator peda l be
yond the resistance point , the automatic
transmission downsh ifts into a lower gear, de
pending on veh icle speed and eng ine speed .
The upshift into the next higher gear takes
place once th e maximum specified engine
speed is reached .
A WARNING
--Please note that the drive wheels can spin
if kick-down is used on a smooth slippery
road - the re is a risk of skidding .
Page 116 of 306

114 Automatic Transmission
Launch Control Program
Applies to vehicles: with S tro nic
The Launch Control Program provides the
best acceleration possible when starting from
a stop .
Requirement: The engine must be at operat
ing temperature and the steering wheel must
not be turned .
.. Press the
I~ O FFI button 9 page 198 while
the engine is running. The
II indicator light
illuminates in the instrument cluster and
Stabilization control (ESC): Off Warning!
Reduced stability
appears in the driver in
formation system display.
.. Move the selector lever to position D/S to
select sport mode (5) or select
Dynamic
mode in Audi drive select ¢page 103.
.. Press the brake peda l strongly with your left
foot and hold it down for at least
1 second.
.. At the same t ime, press the accelera tor ped
al down completely w ith your r ight foot un
t il the engine reaches and maintains a high
RPM.
.. Remove your foot from the brake pedal
within S seconds ¢
Li)..
.&_ WARNING
-Always adapt your driving to the traffic
flow .
- Only use the Launch Control Program
when road and traffic conditions allow it
and other drivers will not be endangered
or annoyed by yo ur driving and the vehi
cle's acce lerat ion.
- Please note that the driving wheels can
spin and the vehicle can break away
when sport mode is sw itched on, espe
c ially when the road is slippery .
- Once yo u have accelerated, you should
switch sport mode off by pressing the
j .i, OFF I button.
- The transmission temperat ure may in
crease significantly after using the
Launch Control Program . If that hap- pens,
the program may not be available
for a few minutes . It will be available
again after a cool-down period.
- When accelerating using the Launch
Contro l Program, a ll vehicle parts are
subject to heavy loads. This can result in
increased wear.
Transmission malfunction
Applies to vehicles: wit h S tronic/tiptro nic
[O] Transmission: Press brake pedal and se
lect gear again
Press the brake pedal and select the desired
selector lever position again. You can then continue driving .
[O] Transmission overheating: Please drive
conservatively
The transmission temperature has increased
s ignificantly due to the sporty driving manner .
Drive in a less sporty manner until the tem
perature returns to the normal range and the
indicator light switches of.
[O] Transmission malfunction: You can con
tinue driving
T he re is a system mal function in the transmis
sion . You may continue driving. Drive to your
authorized Audi dea ler or qualified repair fa
cility soon to have the malfunction corrected.
[O] [O] Transmission malfunction: You can
continue driving with limited functionality
There is a system malfunction in the transmis
s ion. The transmission is switching to emer
gency mode. This mode on ly shifts into cer
tain gears or will no longer shift at all. The en
gine may sta ll. Drive to your authorized Audi
dealer or qualified repair facility immediately
to have the malfunction corrected.
[O] Iii Transmission malfunction: No reverse
gear. You can continue driving
S tronic transmission: There is a system mal
fu nct ion in the transm ission. The transmis
sion is switching to emergency mode . This
mode only shifts into certain gears or will no
l onger shift at a ll. The engine may stall. You .,..
Page 117 of 306
![AUDI A7 2014 Owners Manual cannot engage the reverse gear. Drive to your
authorized Audi dealer or qualified repair fa
cility immediately to have the malfunction
corrected.
[O] Transmission malfunction: St AUDI A7 2014 Owners Manual cannot engage the reverse gear. Drive to your
authorized Audi dealer or qualified repair fa
cility immediately to have the malfunction
corrected.
[O] Transmission malfunction: St](/manual-img/6/57602/w960_57602-116.png)
cannot engage the reverse gear. Drive to your
authorized Audi dealer or qualified repair fa
cility immediately to have the malfunction
corrected.
[O] Transmission malfunction: Stop vehicle
and shift to P
Do not continue driving. Select the P selector
l eve r position and see your autho rized Aud i
dealer or qualified repair facility for assis
tance.
(D Note
If the transmission switches to emergency
mode, you should take the vehicle to an
authorized Audi dealership as soon as pos
sible to have the cond ition corrected.
Selector lever emergency release
Applies to vehicles: with S tro nic/t iptronic
If the vehicle's power supply fails, the selec
tor lever can be released in an emergency.
Fig. 121 F ront center co nsole: selecto r lever emergen
c y r elease
~ To r each the emergency release mechanism,
remove the asht ray insert* .
~ Loosen and remove the small cap in the ash
tray mount
~ fig. 121.
~ You now have access to a bolt. Using a
screwdriver or simi lar, press the bolt down
and hold it down.
~ Now press the interlock and move the selec-
tor lever to the N pos ition.
The selector lever can only be moved from the P posit ion if the ignition is turned on . If the
vehicle has to be pushed or towed if the power
supp ly fai ls (e .g . battery is discha rged), the
Automatic Transmission 115
selector lever must first be moved to the N
position using the emergency locking device.
Page 118 of 306

116 Parking system s
Parking systems
General information
A ppl ies to vehicles: with parkin g system plus/rear view
camera/peripheral cameras
Depending on your vehicle's equ ipment, vari
ous parking a ids wi ll help you when pa rk ing
and maneuvering.
The
p ar king sy st e m plu s assists you when
pa rking by audib ly and visually indicat ing ob
jects detected
in front of and behind the vehi
cle
<=? page 117.
The rear view ca m era shows the area behind
the vehicle in the Infotainment d isp lay. This
d isplay assists you when you are c ross o r par
allel parking
q page 118. In addit ion, you are
assisted by the functions from the parking
system plus <=?
page 117.
The peripher al cam era s ass ist you with park
ing and maneuvering. You are aided by var ious
cameras depending on the vehicle equipment leve l¢
page 121. In addition, you are assist
ed by the functions from the parking system
plus ¢ page 117.
A WARNING
-Always look for traff ic and check the area
around your vehicle by looking at it di
rectly as well . The parking system cannot
rep lace the d river's attent ion. The dr iver
is always respons ible for safety du ring
p arki ng and for all other maneuvers.
- Please note that some surfaces, such as
clothing, a re not detected by the system.
- Senso rs and cameras have blind spots in
wh ich peop le and objects ca nnot be de
te cted. Be especially cau tious of children
and animals.
- T he sensors can be displaced by impacts
or damage to the radia to r grille, bumpe r,
wheel housing and the unde rbody. The
par king systems may become impaired
as a resu lt . Have your a uthorized Audi
dealer or qualified wor kshop check their
function. -
Make s ure the sensors are not covered by
stickers, deposits or any other obstruc
tions as it may impair the sensor func
tion . For information on cleaning, refer
to <=?
page 213 .
(D Note
- Some objects are not detected by the
system under certain c ircumstances:
- Obje cts su ch as ba rrie r chains, trailer
draw bars, vertical po les or fences
- Objects above t he senso rs such as wall
extensions
- Objects w ith specific surfaces or struc
tures su ch as chain link fences or pow
der snow.
- If you conti nue d riving closer to a low- ly
ing object, it may disappea r from the
sensor range. Note th at yo u w ill no lon
ger be warned abo ut this obstacle.
(j) Tips
- T he system may provide a wa rni ng even
t ho ugh the re are no obs ta cl es in the cov
erage a rea in some situa tions, such as:
- certain road surfaces or for long grass.
- externa l ultrasonic sources e.g. from
clean ing vehicles.
- heavy rain, snow or thick vehicle ex
ha ust.
- We recommend that you practice park
ing in a traff ic-free location or park ing
lot to become familiar w ith the system.
When doing this, there should be good light and weather cond itions .
- You can change the volume and pitch of
the s ignals as we ll as the disp lay
¢page 126.
- Please refer to the instructions for tow
ing a t railer
¢ page 127.
-What appears in the infotainment dis
play is somewhat time-delayed.
Page 119 of 306

Parking system plus
Description
Applies to vehicles: with parking system plus
Audi parking system plus provides audio and
visual signals when parking.
Fi g. 1 22 Dis p lay f ie ld
Sensors are located in the front and rear
bumpers.
If these detect an obs tacle, visual
and in some situations aud ible signals warn
you.
M ake sure t he sensors are not cove red by
s t icke rs, deposits or any o ther obs truc tions as
it may impair the sensor function. For infor
mation on cleaning, refer to
c::> page 213.
The display field begins approximately at:
® 4 ft (1.20 m)
® 3 ft (0 .90 m)
© 5.2 ft (1.60 m)
@ 3 ft (0 .90 m)
The clos er you get to the obstacle, the sho rter
the interval between the audible signa ls. A
con tinuous tone sounds when the obstacle is
l ess than approximate ly 1 ft (0.30 m) away .
Do not continue driving farther¢
& in Gener
al information on page 116,
¢ CD i n General
information on page
116 !
If the d istance to an obstacle remains con
stant, the volume of the d istance warning
gradually drops after about four seconds (this
does not apply in the continuous tone range).
P arking systems 11 7
Switching on/off
Applies to vehicles: with parking system plus
F ig. 123 Ce nter co nso le :
Pv! button
F ig . 1 24 Infota in m ent : v is u al d is ta n ce d isplay
Switching on
.,. Shift into reverse or
.,. Press the
p,;A button in the center console
c::> fig. 123 . A short confirmation tone
sounds and the LED in the button turns on .
Switching off
.,. Dr ive fo rward fas ter than 6 mph (10 km/ h),
or
.,. press the
P" IA button, or
.,. sw itch the ignit ion off.
Visual d isplay
U sing the segmen ts, yo u can estimate the dis
tance to a n object in front of o r behind the ve
hicle ¢
fig. 124 . The red lines mark the ex
pected d irect ion of travel according to the
steering ang le . A wh ite segment indicates an
identified obstacle that is outside of the vehi
cle's pat h. Red segments show identified ob
stacles that are in your vehicle's path . As your
vehicle comes close r to the obstacle, the seg
ments move closer to the vehicle . At the lat-
est th e collision area has been reached when ..,.
Page 120 of 306

118 Parking systems
the next to last segment is disp layed . Obsta
cles in the collision area, including those out
side of the vehicle 's path, are shown in red. Do
not continue driving farther forward or in re
verse
q .&. in General information on
page 116, q(f) in General information on
page 116 .
Rear view camera
Introduction
Applies to vehicles: with pa rkin g system p lus wit h rear
view ca mera
Fig. 125 Illustration: Cross parking
F ig. 126 Illustrat ion: paralle l parking
In addition to parking system p lus
q page 117, this parking system also has a
rear view camera .
You can use
cross parking for examp le, to
park in a parking space or in a garage
q fig. 125. You can use parallel parking if you
wou ld like to park on the side of the road
r::;, fig. 126.
General information
Applies to vehicles : wit h parking system plus with rear
v iew camera
Fig. 1 27 Area covered © and area not covered @by
the rea r view camera
F ig. 128 Rea r lid : Location of the rear view camera
N 0 q
Cl
~
The rear view camera is located above the rear
license p late bracket. Make sure that the lens
for the parking system
r::;, fig . 128 is not cov
ered by deposits or any other obst ruct ions be
ca use this can affect the fun ction of the park
i ng system. For informa tion on cleaning, refer
to
q page 213.
The rea r view camera coverage area includes
@ q fig. 12 7. Only this area is shown in the
Infot ainment display. Objects tha t are out side
of this area @are not displayed .
The acc uracy of th e orientation lines and the
blue surfaces is reduced if the adapt ive a ir
s u spension* is faulty, if the vehicle is lifted or
if the
Dynam ic mode is ac tiva ted q page 102.
A WARNING ~
-Always read and follow the applicable
warnings
r::;, .&. in General information on
page 116.
- If the position and t he installation angle
-
of the rear view camera was changed, for IJl>