Page 97 of 146
capacity of mechanical components......................(current page)maintenance:mechanical ........................")
battery...................................................(up to the end of the DU)capacity of mechanical components......................(current page)maintenance:mechanical .......................................................(current page)
4.9
ENG_UD5593_1Batterie (B90 - Dacia)ENG_NU_817-2_NU_Dacia_4
Batterie
BATTERY
Depending on the vehicle, the battery may be a low maintenance version.
Low maintenance battery
A label on the battery will indicate if the battery is the low maintenance type.
The engine may be hot during operations in close proximity. In addition, the engine cooling fan may come on at any moment.
Risk of injury.
Battery requiring
maintenance
Checking intervals:
Every six months, open cover
1.
Remove the plugs and check the level.
Liquid
Distilled or demineralised water to
1.5 cm above the plates.
Never add electrolyte or other prod-
ucts.
Handle the battery with care as it contains sulphuric acid, which must not come into contact with eyes or skin. If it does, wash the affected area with
plenty of cold water.
Ensure that naked flames, red hot objects and sparks do not come into contact with the battery as there is a risk of explosion.
1
As the battery is specific to the vehicle (presence of a ventilation pipe to expel corrosive and explosive gases), make sure that it is replaced
with a battery that enables this pipe to be connected. Consult an ap- proved dealer.
Page 98 of 146
 ......................(up to the end of the DU)maintenance:bodywork ........................................(up to the end of the DU)washing .................................")
bodywork (maintenance) ......................(up to the end of the DU)maintenance:bodywork ........................................(up to the end of the DU)washing ................................................(up to the end of the DU)paintworkmaintenance ....................................................(current page)
4.10
ENG_UD5594_1Entretien de la carrosserie (B90 - Dacia)ENG_NU_817-2_NU_Dacia_4
JauneNoirNoir texte
Entretien de la carrosserie
BODYWORK MAINTENANCE
Protection against the effects
of corrosive agents
Although your vehicle has been treated with very effective anti-corrosion prod- ucts, it nevertheless remains subject to the effects of:
– corrosives in the atmosphere
– atmospheric pollution (urban and
industrial areas),
– saline atmospheres (near the sea, particularly in hot weather),
– seasonal and damp climatic con- ditions, (e.g.: road salt in winter, water from road cleaners, etc.).
– abrasives
wind-borne dust and sand, mud, road grit thrown up by other vehicles, etc
– minor impacts
You should take a minimum number of precautions in order to safeguard your vehicle against such risks and not to lose the benefit of your vehicle’s anti- corrosion protection.
You should not:
– Wash the vehicle in bright sunlight or freezing temperatures.
– Scrape off mud or dirt without pre
- wetting.
– Allow dirt to accumulate.
– Allow rust to form following minor im
- pacts.
– Use solvents not approved by the
Technical Department to remove stains as this could damage the paintwork.
– Drive frequently in snow or muddy
conditions without washing the vehicle, particularly under the wheel arches and body. –
Degrease or clean mechanical com
- ponents (e.g. engine compartment), underneath the body, parts with hinges (e.g. fuel filler cap, inside of filler flap, sunroof, etc.) and painted external plastic fittings (e.g. bump- ers) using high-pressure cleaning equipment or using spray products not approved by the Technical Department. If adequate precautions are not taken, this could give rise to corrosion or operational faults.
Page 99 of 146
ENG_NU_817-2_NU_Dacia_4
BODYWORK MAINTENANCE (continued)
You should
– Wash your car frequently, with the engine")
JauneNoirNoir texte
4.11
ENG_UD5594_1Entretien de la carrosserie (B90 - Dacia)ENG_NU_817-2_NU_Dacia_4
BODYWORK MAINTENANCE (continued)
You should
– Wash your car frequently, with the engine off, with cleaning products recommended by the manufacturer (never use abrasive products) and be sure to jet-rinse off:
– spots of tree resin and industrial grime;
– bird droppings, which contain chemicals that rapidly discolour paintwork and may cause the paint to peel off;
Wash the vehicle immediately to
remove these marks since it is im- possible to remove them by pol- ishing;
– salt deposited in the wheel arches and underneath the body after driving in areas where the roads are chemically treated;
– mud in the wheel arches and un- derneath the body which form damp patches. –
Keep well away from the vehicle in
front when driving on gravelled sur- faces to prevent paint damage.
– Repair or have repaired quickly
patches where the paint has been damaged to prevent corrosion spreading.
– Remember to visit the body shop pe
- riodically in order to maintain your anti-corrosion warranty. Refer to the Maintenance Service Booklet.
– Respect local regulations about
washing vehicles (e.g. do not wash your vehicle on a public highway). –
Before using a roller type car wash,
put the windscreen wiper stalk in Park position (refer information on the “Windscreen wash/wipe” in Section 1), check that the external accessories, additional lights, and mirrors are securely fitted and that the wiper blades and radio aerial are taped down.
If your vehicle has a car phone and radio, remove the aerials.
– Spray mechanical components,
hinges, etc. with products approved by the Technical Department to protect them after they have been cleaned.
We have selected special products to care for your vehicle and you can obtain these from approved dealer accessory outlets.
Page 100 of 146
interior trimmaintenance ...................................(up to the end of the DU)
4.12
ENG_UD5507_1Entret")
maintenance:interior trim ......................................(up to the end of the DU)interior trimmaintenance ...................................(up to the end of the DU)
4.12
ENG_UD5507_1Entretien des garnitures intérieures (U90 - Dacia)ENG_NU_817-2_NU_Dacia_4
– Seat beltsThese must be kept clean.
Use products selected by the Technical Department or warm soapy water and a sponge and dry off with a dry cloth.
Do not use cleaning agents or dyes.
Entretien des garnitures intérieures
INTERIOR TRIM MAINTENANCE
Whatever type of stain is on the trim, use soapy water (if possible, warm water) containing:
– normal soap,
– washing up liquid (with one part
washing up liquid to 200 parts water).
Rinse off with a soft, damp cloth.
Special features
– Glass instrument panel
(e.g.: instrument panel, radio display, etc.).
Use a soft cloth (or cotton wool).
If this does not clean it properly, use a soft cloth (or cotton wool) slightly moistened with soapy water and then wipe clean with a soft damp cloth or cotton wool.
Finally, dry off carefully with a soft dry cloth.
Cleaning products containing al- cohol must not be used under any circumstances.
You should not:
You are strongly recommended not to use high-pressure or spray clean- ing equipment inside the passenger compartment: without careful use, this equipment could impair the correct functioning of the electrical or electronic components in the vehicle, or have other detrimental effects.
You are strongly advised not to place items such as air fresheners, perfume etc. near the air vents as these could damage the dashboard fittings.
We have selected special products to care for your vehicle and you can obtain these from approved dealer accessory outlets.
Page 101 of 146
ENG_NU_817-2_NU_Dacia_5
Section 5: Practical advice
Emergency spare wheel . . . . . . . . . . . . . . . . . . . . . . . . . . . . . . . . . . . .\
. . . . . .")
5.1
ENG_UD8705_2Sommaire 5 (B90 - Dacia)ENG_NU_817-2_NU_Dacia_5
Section 5: Practical advice
Emergency spare wheel . . . . . . . . . . . . . . . . . . . . . . . . . . . . . . . . . . . .\
. . . . . . . . . . . . . . . . . . . . . . 5.2
Tools (Jack - Wheelbrace, etc.) . . . . . . . . . . . . . . . . . . . . . . . . . . . . . . . . . . . . \
. . . . . . . . . . . . . . . . . 5.3
Wheel trim - wheels . . . . . . . . . . . . . . . . . . . . . . . . . . . . . . . . . . . . \
. . . . . . . . . . . . . . . . . . . . . . . . . . 5.4
Changing a wheel . . . . . . . . . . . . . . . . . . . . . . . . . . . . . . . . . . . .\
. . . . . . . . . . . . . . . . . . . . . . . . . . . 5.6
Tyres (tyre and wheel safety, use in winter) . . . . . . . . . . . . . . . . . . . . . . . . . . . . . . . . . . . .\
. . . . . . . 5.7
Wiper blades . . . . . . . . . . . . . . . . . . . . . . . . . . . . . . . . . . . .\
. . . . . . . . . . . . . . . . . . . . . . . . . . . . . . . 5.10
Changing bulbs . . . . . . . . . . . . . . . . . . . . . . . . . . . . . . . . . . . .\
. . . . . . . . . . . . . . . . . . . . . . . . . . . . . 5.11
Front lights . . . . . . . . . . . . . . . . . . . . . . . . . . . . . . . . . . . . \
. . . . . . . . . . . . . . . . . . . . . . . . . . . 5.11
Fog lights . . . . . . . . . . . . . . . . . . . . . . . . . . . . . . . . . . . .\
. . . . . . . . . . . . . . . . . . . . . . . . . . . . 5.12
Rear lights . . . . . . . . . . . . . . . . . . . . . . . . . . . . . . . . . . . .\
. . . . . . . . . . . . . . . . . . . . . . . . . . . 5.13
Indicator lights . . . . . . . . . . . . . . . . . . . . . . . . . . . . . . . . . . . .\
. . . . . . . . . . . . . . . . . . . . . . . . 5.15
Interior lights . . . . . . . . . . . . . . . . . . . . . . . . . . . . . . . . . . . . \
. . . . . . . . . . . . . . . . . . . . . . . . . . 5.16
Radio frequency remote control: battery . . . . . . . . . . . . . . . . . . . . . . . . . . . . . . . . . . . . \
. . . . . . . . . . 5.19
Battery . . . . . . . . . . . . . . . . . . . . . . . . . . . . . . . . . . . . \
. . . . . . . . . . . . . . . . . . . . . . . . . . . . . . . . . . . . 5.20
Fuses . . . . . . . . . . . . . . . . . . . . . . . . . . . . . . . . . . . . \
. . . . . . . . . . . . . . . . . . . . . . . . . . . . . . . . . . . . \
. 5.22
Towing: breakdownז . . . . . . . . . . . . . . . . . . . . . . . . . . . . . . . . . . . .\
. . . . . . . . . . . . . . . . . . . . . . . . . 5.25
Towing: equipment. . . . . . . . . . . . . . . . . . . . . . . . . . . . . . . . . . . . \
. . . . . . . . . . . . . . . . . . . . . . . . . . . 5.26
Diesel filter . . . . . . . . . . . . . . . . . . . . . . . . . . . . . . . . . . . . \
. . . . . . . . . . . . . . . . . . . . . . . . . . . . . . . . . 5.27
Fitting a radio . . . . . . . . . . . . . . . . . . . . . . . . . . . . . . . . . . . . \
. . . . . . . . . . . . . . . . . . . . . . . . . . . . . . . 5.28
Accessories . . . . . . . . . . . . . . . . . . . . . . . . . . . . . . . . . . . . \
. . . . . . . . . . . . . . . . . . . . . . . . . . . . . . . . 5.29
Operating faults . . . . . . . . . . . . . . . . . . . . . . . . . . . . . . . . . . . . \
. . . . . . . . . . . . . . . . . . . . . . . . . . . . . 5.30
Page 102 of 146
practical advice .....................................(up to the end of the DU)puncture................................................(up to the end of the DU)emergency spare wheel .......................(up to the end of the DU)lifting the vehiclechanging a wheel ............................(up to the end of the DU)
5.2
ENG_UD5597_1Roue de secours (B90 - Dacia)ENG_NU_817-2_NU_Dacia_5
Roue de secours
EMERGENCY SPARE WHEEL
Emergency spare wheel
This is stored in cage 3 under the floor at the rear of the vehicle.
To access the emergency spare wheel:
– Open the tailgate.
– Loosen nut
1 with the wheelbrace (located in the luggage compart- ment).
– Detach the cage using handle
2.
– Remove the emergency spare
wheel 4.
If the emergency spare
wheel has been stored for several years, have it checked by your Dealer to ensure that it is safe to use.
1
324
Page 103 of 146
practical advice .....................................(up to the end of the DU)jack ..................................")
towing hitch...........................................(up to the end of the DU)practical advice .....................................(up to the end of the DU)jack .......................................................(up to the end of the DU)lifting the vehiclechanging a wheel ............................(up to the end of the DU)wheelbrace ...........................................(up to the end of the DU)
5.3
ENG_UD5598_1Outils (B90 - Dacia)ENG_NU_817-2_NU_Dacia_5
Towing hitch 1
Refer to the information on “Towing: breakdown” in Section 5.
Outils (Cric - Manivelle, etc.)
TOOLS
The tools are stored in the luggage compartment.
Do not leave the tools unse- cured inside the vehicle as they may come loose under braking. After use, ensure the tools are correctly stored: risk of injury.
Wheelbrace 2
This is used to tighten or release the wheel bolts.
Jack 3
To use the jack, undo bolt 5.
When replacing the jack, fold it up com- pletely and replace it in its housing.
Hubcap tool 4
This tool is used to remove the wheel trims.
The jack is designed for wheel changing purposes only. Under no circum- stances should it be used for carrying out repairs underneath the vehicle or to gain access to the
underside of the vehicle.
3
12
2
13
5
4
4
Page 104 of 146
trims ......................................................(up to the end of the DU)lifting the vehiclechanging a whee")
practical advice .....................................(up to the end of the DU)trims ......................................................(up to the end of the DU)lifting the vehiclechanging a wheel ............................(up to the end of the DU)
5.4
ENG_UD5599_1Enjoliveurs - Jantes (B90 - Dacia)ENG_NU_817-2_NU_Dacia_5
JauneNoirNoir texte
Central wheel trim with
concealed wheel bolts
Remove the wheel trim using the
hubcap tool by inserting the tool 4 into
valve recess 3.
To refit the wheel trim, align recess
3 with the wheel rim, clip the wheel trim
back in place and use tool 4 to tighten the nut.
Enjoliveurs - jantes
WHEEL TRIM - WHEELS
Wheel trim with concealed
wheel bolts
Remove the wheel trim using the
hubcap tool 1, by inserting the tool into
valve recess 2.
To refit it, align it with valve
2. Push the retaining hooks in fully, starting
with side A near the valve, followed
by B and C, finishing at D opposite the
valve.
We would advise you to note the
number engraved on the tool so that you can replace it if it is lost.
B
D
C
A
123
4
 1
1 2
2 3
3 4
4 5
5 6
6 7
7 8
8 9
9 10
10 11
11 12
12 13
13 14
14 15
15 16
16 17
17 18
18 19
19 20
20 21
21 22
22 23
23 24
24 25
25 26
26 27
27 28
28 29
29 30
30 31
31 32
32 33
33 34
34 35
35 36
36 37
37 38
38 39
39 40
40 41
41 42
42 43
43 44
44 45
45 46
46 47
47 48
48 49
49 50
50 51
51 52
52 53
53 54
54 55
55 56
56 57
57 58
58 59
59 60
60 61
61 62
62 63
63 64
64 65
65 66
66 67
67 68
68 69
69 70
70 71
71 72
72 73
73 74
74 75
75 76
76 77
77 78
78 79
79 80
80 81
81 82
82 83
83 84
84 85
85 86
86 87
87 88
88 89
89 90
90 91
91 92
92 93
93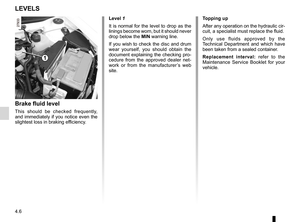 94
94 95
95 96
96 97
97 98
98 99
99 100
100 101
101 102
102 103
103 104
104 105
105 106
106 107
107 108
108 109
109 110
110 111
111 112
112 113
113 114
114 115
115 116
116 117
117 118
118 119
119 120
120 121
121 122
122 123
123 124
124 125
125 126
126 127
127 128
128 129
129 130
130 131
131 132
132 133
133 134
134 135
135 136
136 137
137 138
138 139
139 140
140 141
141 142
142 143
143 144
144 145
145puncture................................................(up to the end of the DU)emergency spare wheel ................")