2012 MERCEDES-BENZ SL ROADSTER reset
[x] Cancel search: resetPage 454 of 637
Deleting/saving search queries
X Select the Delete
Deleteall
allsearches
searches entry by
turning cVdthe COMAND controller and
press Wto confirm.
A prompt appears, asking whether you
really wish to delete the search queries.
X Select Yes
Yes orNo No and press Wto confirm.
Selecting options for the weather dis-
play Setting the default view
You can specify which view is called up after
activating the weather display (Y
page 447).
You can make the following settings:
R current weather
R five-day forecast
R info view
R last view
X Select Weather
Weather in the options menu by
turning cVdthe COMAND controller and
press Wto confirm (Y page 450).
The menu shows the current settings.
X Confirm the entry after Default view:
Default view: by
pressing W.
The #dot indicates the currently selected
default view.
X Select an entry by turning cVdthe
COMAND controller and press Wto con-
firm.
The selected view is accepted.
X To exit the menu: selectBack Backby turning
cVd the COMAND controller and press W
to confirm.
Setting the default location
You can make the following settings: R Current position
R current destination
R Presets X
Select Weather Weather in the options menu by
turning cVdthe COMAND controller and
press Wto confirm (Y page 450).
The menu shows the current settings.
X Select the entry after Default
Defaultlocation:
location:
by turning cVdthe COMAND controller
and press Wto confirm.
The #dot indicates the currently selected
default location.
X Select an entry by turning cVdthe
COMAND controller and press Wto con-
firm.
The selected location is accepted.
X To exit the menu: selectBack Backby turning
cVd the COMAND controller and press W
to confirm.
Selecting weather data for the map view
The weather map can display the following
weather data:
R hazard icons (e.g. storms, slippery condi-
tions)
R precipitation radar (e.g. rain, snow)
R atmospheric pressure
R temperatures
R cloud cover
R wind direction and speeds
You can select one feature each for the map
view.
The availability of weather information is
country-dependent.
X Select Weather Weather in the options menu by
turning cVdthe COMAND controller and
press Wto confirm (Y page 450).
The menu shows the current settings.
X Select the entry after Default
Defaultmap
mapview:
view:
by turning cVdthe COMAND controller
and press Wto confirm.
The #dot indicates the currently selected
feature.
X Select an entry and press Wto confirm.
The selected feature is accepted. Online and Internet functions
451COMAND Online Z
Page 455 of 637
X
To exit the menu: selectBack
Backby turning
cVd the COMAND controller and press W
to confirm.
Setting options for destination/route
download Specifying the ID for the download
You can replace the vehicle identification
number (ID) with your e-mail address. The
vehicle identification number is usually
entered.
X Select Destination/route download Destination/route download in
the Options menu by sliding ZVÆthe
COMAND controller and press Wto con-
firm (Y page 450).
The menu shows the current settings.
X Confirm the entry next to ID:
ID: by pressing
W.
An input menu appears.
X Enter an e-mail address. Character entry
(Y page 303).
X After entry, select ¬and press Wto
confirm.
The e-mail address is entered in the menu.
An e-mail will be sent to your e-mail address
shortly afterwards. You must confirm it
within 48 hours. Otherwise, your previous
ID will continue to be used.
X To complete the settings, check your mail-
box and follow the link in the e-mail.
X To exit the menu: selectBack Backby turning
cVd the COMAND controller and press W
to confirm.
Setting the type of import
You can choose between manual and auto-
matic importing.
X Select the entry after Import:
Import: by turning
cVd the COMAND controller and press W
to confirm.
The #dot indicates the current setting. X
Select Manual Manual orAutomatic Automatic and pressW
to confirm.
The setting is accepted.
X To exit the menu: selectBack Backby turning
cVd the COMAND controller and press W
to confirm.
Deleting/keeping POIs after they have
been imported to the server X Select the entry after Import & delete: Import & delete:
by turning cVdthe COMAND controller
and press Wto confirm.
The #dot indicates the current setting.
X Select Yes
Yes orNo
No and press Wto confirm.
The setting is accepted.
Yes Yes deletes the POIs after importing to the
server.
No No does not delete the POIs on the server.
X To exit the menu: selectBack Backby turning
cVd the COMAND controller and press W
to confirm.
i Routes and destinations are automati-
cally deleted on the server after seven
days.
Resetting the settings The reset function resets all Mercedes-Benz
Apps settings to the factory settings. After
resetting, routes and destinations can only be
sent to the vehicle identification number (ID)
once you have activated your e-mail address
again (Y page 452).
X Select the ®symbol in the main function
bar by turning cVdthe COMAND con-
troller and press Wto confirm.
The carousel view appears.
X Bring the Mercedes-Benz Apps Mercedes-Benz Apps panel to
the front by turning cVdthe COMAND
controller and press Wto confirm.
X Select Options
Options by sliding VÆand turning
cVd the COMAND controller and press W
to confirm. 452
Online and Internet functionsCOMAND Online
Page 456 of 637
X
Select Reset
Resetand press Wto confirm.
A prompt appears asking whether you
really wish to reset.
X Select Yes
YesorNo
No and press Wto confirm. Additional services
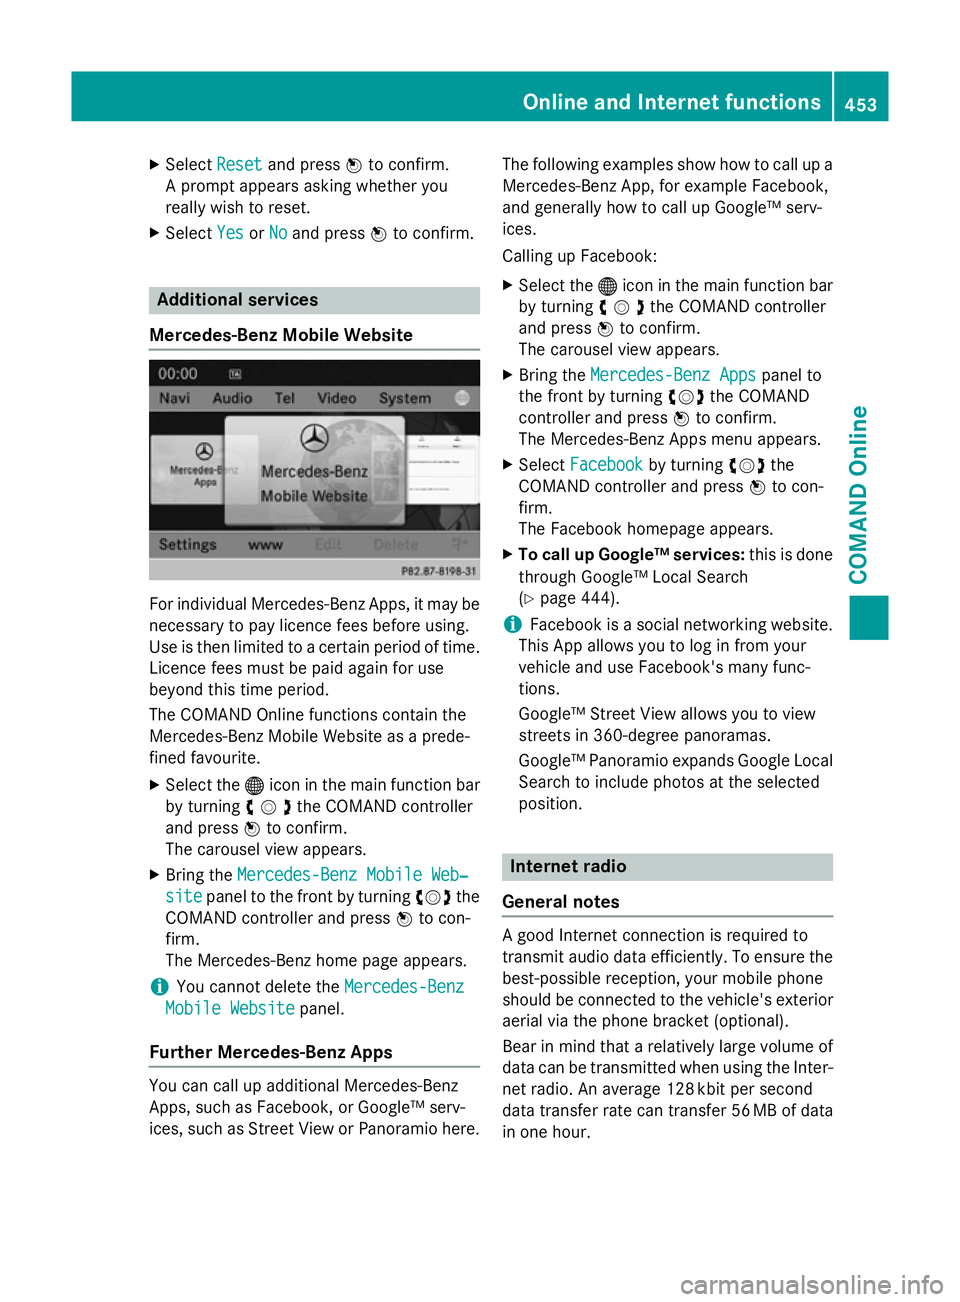
Mercedes-Benz Mobile Website For individual Mercedes-Benz Apps, it may be
necessary to pay licence fees before using.
Use is then limited to a certain period of time. Licence fees must be paid again for use
beyond this time period.
The COMAND Online functions contain the
Mercedes-Benz Mobile Website as a prede-
fined favourite.
X Select the ®icon in the main function bar
by turning cVdthe COMAND controller
and press Wto confirm.
The carousel view appears.
X Bring the Mercedes-Benz Mobile Web‐
Mercedes-Benz Mobile Web‐
site site panel to the front by turning cVdthe
COMAND controller and press Wto con-
firm.
The Mercedes-Benz home page appears.
i You cannot delete the
Mercedes-Benz
Mercedes-Benz
Mobile Website Mobile Website panel.
Further Mercedes-Benz Apps You can call up additional Mercedes-Benz
Apps, such as Facebook, or Google™ serv-
ices, such as Street View or Panoramio here. The following examples show how to call up a
Mercedes-Benz App, for example Facebook,
and generally how to call up Google™ serv-
ices.
Calling up Facebook:
X Select the ®icon in the main function bar
by turning cVdthe COMAND controller
and press Wto confirm.
The carousel view appears.
X Bring the Mercedes-Benz Apps Mercedes-Benz Apps panel to
the front by turning cVdthe COMAND
controller and press Wto confirm.
The Mercedes-Benz Apps menu appears.
X Select Facebook
Facebook by turning cVdthe
COMAND controller and press Wto con-
firm.
The Facebook homepage appears.
X To call up Google™ services: this is done
through Google™ Local Search
(Y page 444).
i Facebook is a social networking website.
This App allows you to log in from your
vehicle and use Facebook's many func-
tions.
Google™ Street View allows you to view
streets in 360-degree panoramas.
Google™ Panoramio expands Google Local Search to include photos at the selected
position. Internet radio
General notes A good Internet connection is required to
transmit audio data efficiently. To ensure the
best-possible reception, your mobile phone
should be connected to the vehicle's exterior aerial via the phone bracket (optional).
Bear in mind that a relatively large volume of
data can be transmitted when using the Inter- net radio. An average 128 kbit per second
data transfer rate can transfer 56 MB of data
in one hour. Online and Internet functions
453COMAND Online Z
Page 465 of 637
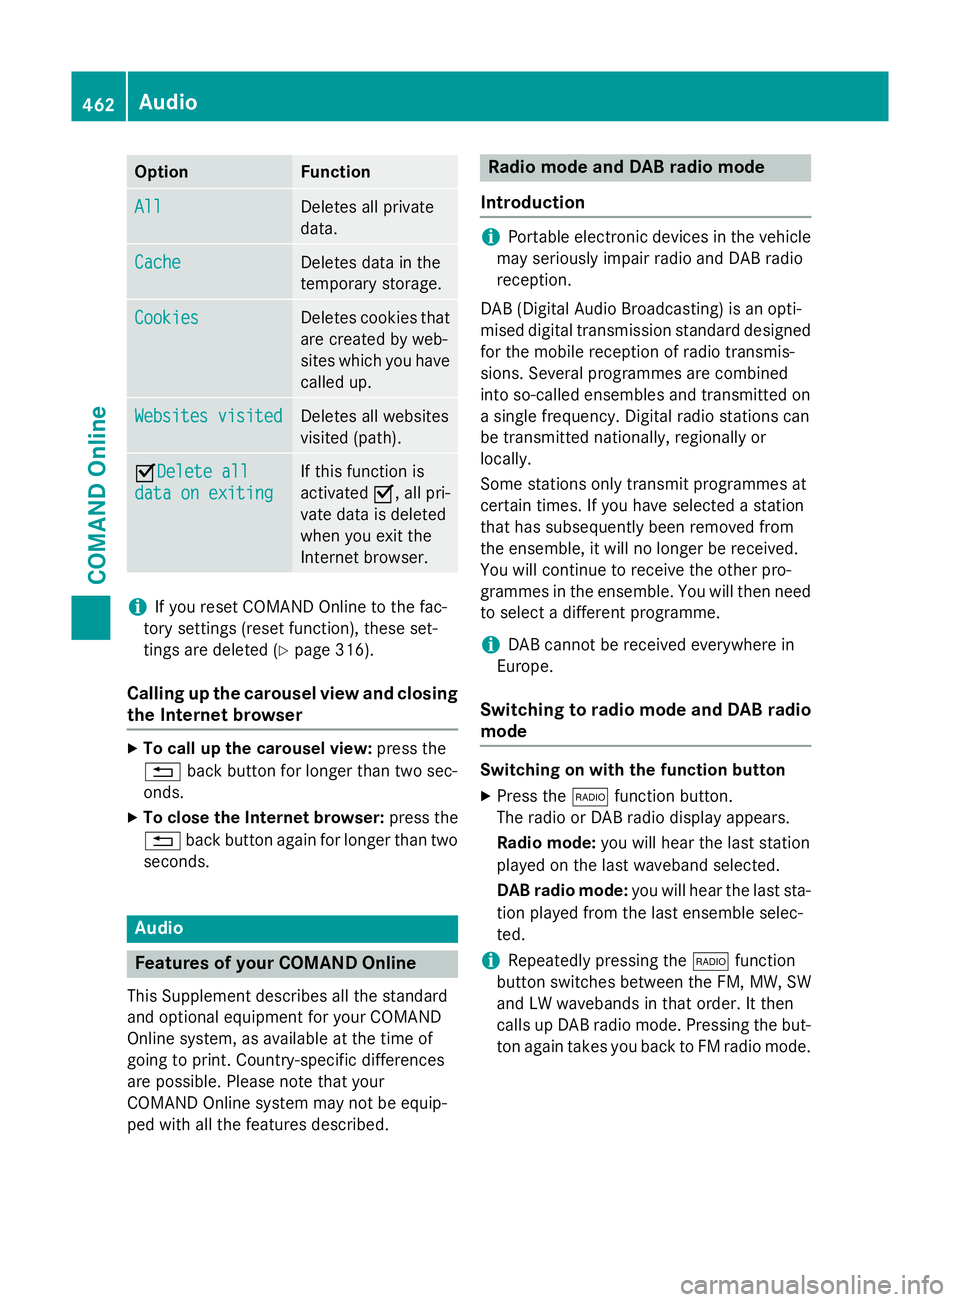
Option Function
All
All Deletes all private
data.
Cache Cache Deletes data in the
temporary storage.
Cookies Cookies Deletes cookies that
are created by web-
sites which you have called up. Websites visited Websites visited Deletes all websites
visited (path).
ODelete all
Delete all
data on exiting data on exiting If this function is
activated
O, all pri-
vate data is deleted
when you exit the
Internet browser. i
If you reset COMAND Online to the fac-
tory settings (reset function), these set-
tings are deleted (Y page 316).
Calling up the carousel view and closing the Internet browser X
To call up the carousel view: press the
% back button for longer than two sec-
onds.
X To close the Internet browser: press the
% back button again for longer than two
seconds. Audio
Features of your COMAND Online
This Supplement describes all the standard
and optional equipment for your COMAND
Online system, as available at the time of
going to print. Country-specific differences
are possible. Please note that your
COMAND Online system may not be equip-
ped with all the features described. Radio mode and DAB radio mode
Introduction i
Portable electronic devices in the vehicle
may seriously impair radio and DAB radio
reception.
DAB (Digital Audio Broadcasting) is an opti-
mised digital transmission standard designed
for the mobile reception of radio transmis-
sions. Several programmes are combined
into so-called ensembles and transmitted on
a single frequency. Digital radio stations can
be transmitted nationally, regionally or
locally.
Some stations only transmit programmes at
certain times. If you have selected a station
that has subsequently been removed from
the ensemble, it will no longer be received.
You will continue to receive the other pro-
grammes in the ensemble. You will then need
to select a different programme.
i DAB cannot be received everywhere in
Europe.
Switching to radio mode and DAB radio mode Switching on with the function button
X Press the $function button.
The radio or DAB radio display appears.
Radio mode: you will hear the last station
played on the last waveband selected.
DAB radio mode: you will hear the last sta-
tion played from the last ensemble selec-
ted.
i Repeatedly pressing the
$function
button switches between the FM, MW, SW
and LW wavebands in that order. It then
calls up DAB radio mode. Pressing the but- ton again takes you back to FM radio mode. 462
AudioCOMAND Online
Page 468 of 637
selection window for the radio display is
active.
or
X Press the EorF button.
The needle jumps to the left or right.
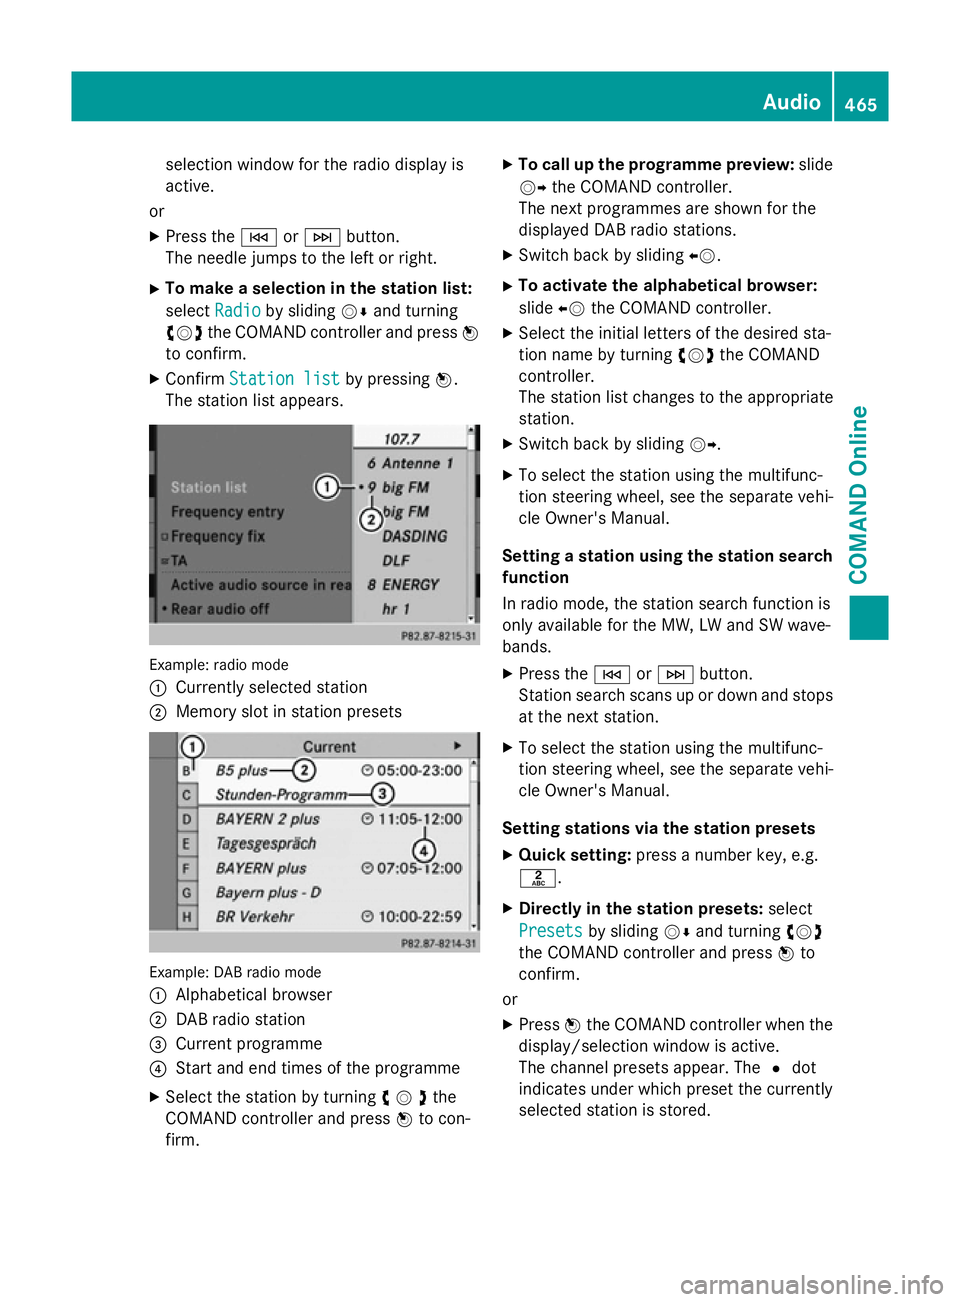
X To make a selection in the station list:
select Radio
Radio by sliding VÆand turning
cVd the COMAND controller and press W
to confirm.
X Confirm Station list Station list by pressingW.
The station list appears. Example: radio mode
:
Currently selected station
; Memory slot in station presets Example: DAB radio mode
:
Alphabetical browser
; DAB radio station
= Current programme
? Start and end times of the programme
X Select the station by turning cVdthe
COMAND controller and press Wto con-
firm. X
To call up the programme preview: slide
VY the COMAND controller.
The next programmes are shown for the
displayed DAB radio stations.
X Switch back by sliding XV.
X To activate the alphabetical browser:
slide XVthe COMAND controller.
X Select the initial letters of the desired sta-
tion name by turning cVdthe COMAND
controller.
The station list changes to the appropriate
station.
X Switch back by sliding VY.
X To select the station using the multifunc-
tion steering wheel, see the separate vehi-
cle Owner's Manual.
Setting a station using the station search function
In radio mode, the station search function is
only available for the MW, LW and SW wave-
bands.
X Press the EorF button.
Station search scans up or down and stops
at the next station.
X To select the station using the multifunc-
tion steering wheel, see the separate vehi-
cle Owner's Manual.
Setting stations via the station presets X Quick setting: press a number key, e.g.
l.
X Directly in the station presets: select
Presets
Presets by sliding VÆand turning cVd
the COMAND controller and press Wto
confirm.
or X Press Wthe COMAND controller when the
display/selection window is active.
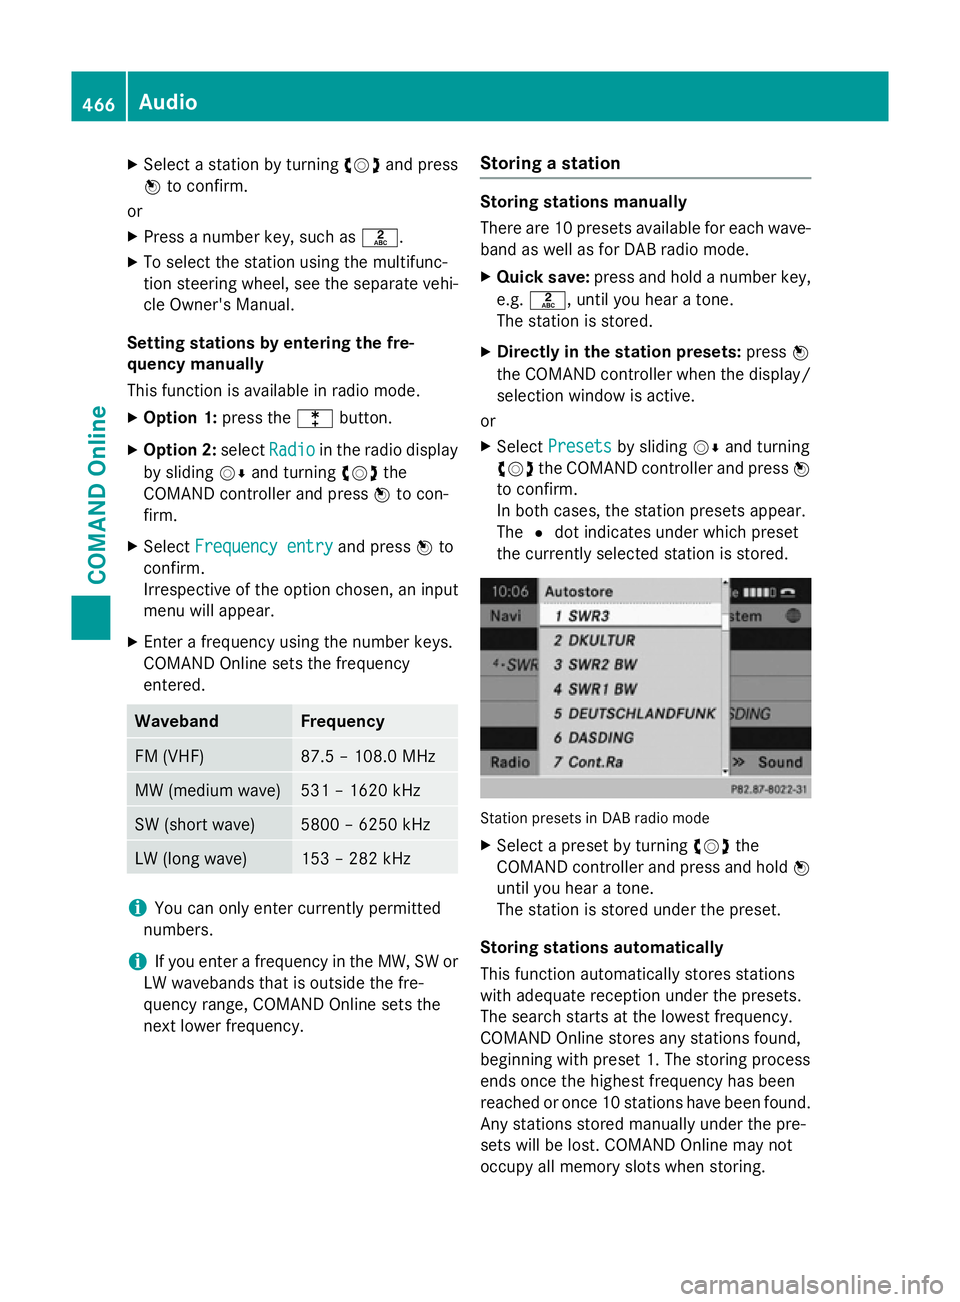
The channel presets appear. The #dot
indicates under which preset the currently
selected station is stored. Audio
465COMAND Online Z
Page 469 of 637
X
Select a station by turning cVdand press
W to confirm.
or X Press a number key, such as l.
X To select the station using the multifunc-
tion steering wheel, see the separate vehi-
cle Owner's Manual.
Setting stations by entering the fre-
quency manually
This function is available in radio mode.
X Option 1: press thelbutton.
X Option 2: selectRadio
Radio in the radio display
by sliding VÆand turning cVdthe
COMAND controller and press Wto con-
firm.
X Select Frequency entry
Frequency entry and pressWto
confirm.
Irrespective of the option chosen, an input
menu will appear.
X Enter a frequency using the number keys.
COMAND Online sets the frequency
entered. Waveband Frequency
FM (VHF) 87.5 – 108.0 MHz
MW (medium wave) 531 – 1620 kHz
SW (short wave) 5800 – 6250 kHz
LW (long wave) 153 – 282 kHz
i
You can only enter currently permitted
numbers.
i If you enter a frequency in the MW, SW or
LW wavebands that is outside the fre-
quency range, COMAND Online sets the
next lower frequency. Storing a station Storing stations manually
There are 10 presets available for each wave-
band as well as for DAB radio mode.
X Quick save: press and hold a number key,
e.g. l, until you hear a tone.
The station is stored.
X Directly in the station presets: pressW
the COMAND controller when the display/
selection window is active.
or
X Select Presets Presets by sliding VÆand turning
cVd the COMAND controller and press W
to confirm.
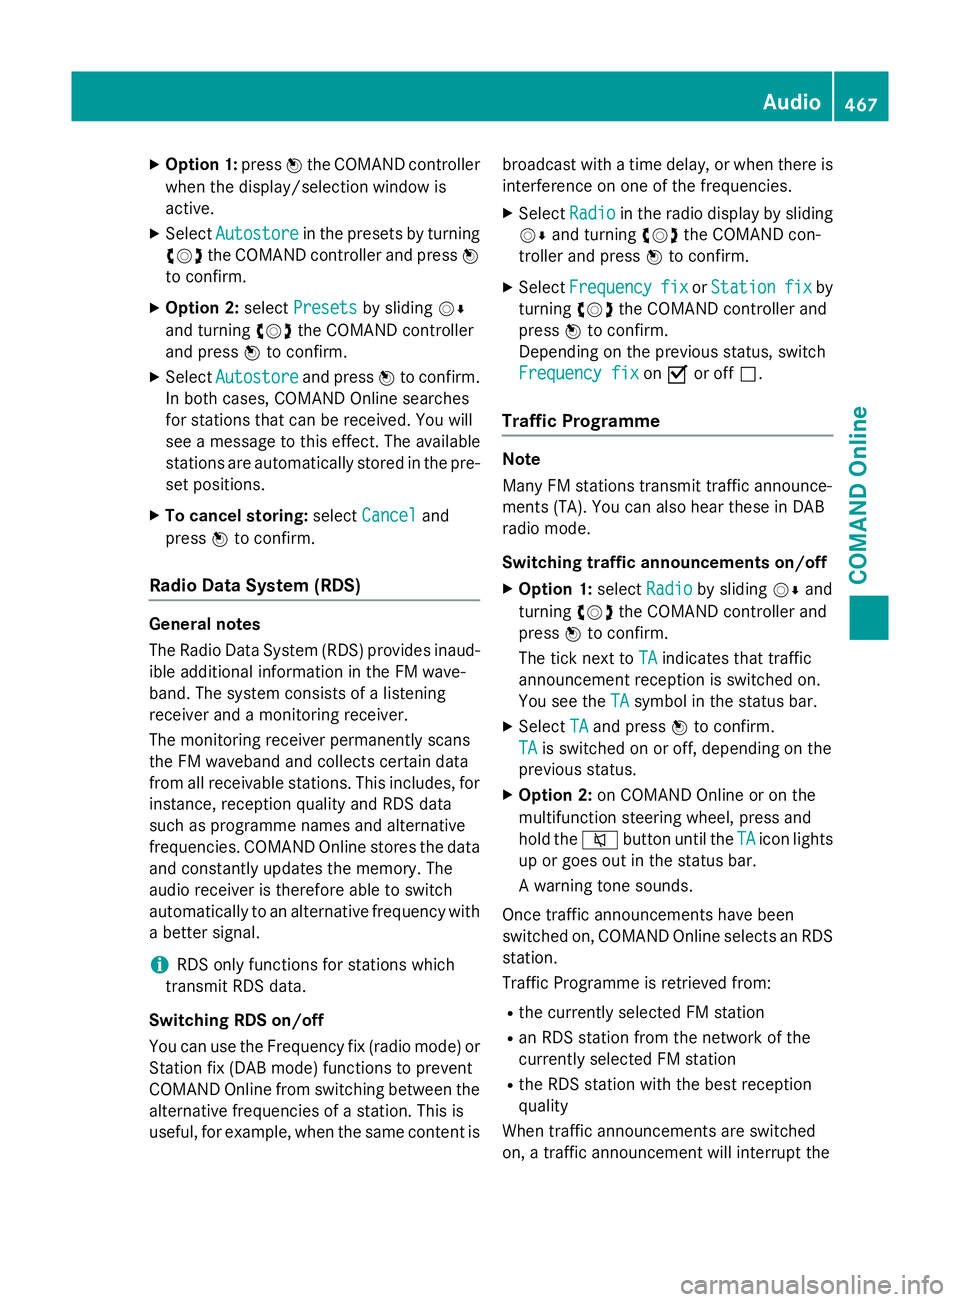
In both cases, the station presets appear.
The #dot indicates under which preset
the currently selected station is stored. Station presets in DAB radio mode
X Select a preset by turning cVdthe
COMAND controller and press and hold W
until you hear a tone.
The station is stored under the preset.
Storing stations automatically
This function automatically stores stations
with adequate reception under the presets.
The search starts at the lowest frequency.
COMAND Online stores any stations found,
beginning with preset 1. The storing process
ends once the highest frequency has been
reached or once 10 stations have been found.
Any stations stored manually under the pre-
sets will be lost. COMAND Online may not
occupy all memory slots when storing. 466
AudioCOMAND Online
Page 470 of 637
X
Option 1: pressWthe COMAND controller
when the display/selection window is
active.
X Select Autostore
Autostore in the presets by turning
cVd the COMAND controller and press W
to confirm.
X Option 2: selectPresets
Presets by sliding VÆ
and turning cVdthe COMAND controller
and press Wto confirm.
X Select Autostore
Autostore and pressWto confirm.
In both cases, COMAND Online searches
for stations that can be received. You will
see a message to this effect. The available
stations are automatically stored in the pre- set positions.
X To cancel storing: selectCancel
Cancel and
press Wto confirm.
Radio Data System (RDS) General notes
The Radio Data System (RDS) provides inaud-
ible additional information in the FM wave-
band. The system consists of a listening
receiver and a monitoring receiver.
The monitoring receiver permanently scans
the FM waveband and collects certain data
from all receivable stations. This includes, for
instance, reception quality and RDS data
such as programme names and alternative
frequencies. COMAND Online stores the data and constantly updates the memory. The
audio receiver is therefore able to switch
automatically to an alternative frequency with
a better signal.
i RDS only functions for stations which
transmit RDS data.
Switching RDS on/off
You can use the Frequency fix (radio mode) or Station fix (DAB mode) functions to prevent
COMAND Online from switching between the
alternative frequencies of a station. This is
useful, for example, when the same content is broadcast with a time delay, or when there is
interference on one of the frequencies.
X Select Radio
Radio in the radio display by sliding
VÆ and turning cVdthe COMAND con-
troller and press Wto confirm.
X Select Frequency Frequency fix
fixorStation
Station fix
fix by
turning cVdthe COMAND controller and
press Wto confirm.
Depending on the previous status, switch
Frequency fix Frequency fix onO or off ª.
Traffic Programme Note
Many FM stations transmit traffic announce-
ments (TA). You can also hear these in DAB
radio mode.
Switching traffic announcements on/off
X Option 1: selectRadio Radio by sliding VÆand
turning cVdthe COMAND controller and
press Wto confirm.
The tick next to TA
TAindicates that traffic
announcement reception is switched on.
You see the TA TAsymbol in the status bar.
X Select TA
TAand press Wto confirm.
TA
TA is switched on or off, depending on the
previous status.
X Option 2: on COMAND Online or on the
multifunction steering wheel, press and
hold the 8button until the TA TAicon lights
up or goes out in the status bar.
A warning tone sounds.
Once traffic announcements have been
switched on, COMAND Online selects an RDS station.
Traffic Programme is retrieved from:
R the currently selected FM station
R an RDS station from the network of the
currently selected FM station
R the RDS station with the best reception
quality
When traffic announcements are switched
on, a traffic announcement will interrupt the Audio
467COMAND Online Z
Page 504 of 637
Information on:
R volume settings (Y page 299)
R sound settings (Y page 299)
Increasing the volume on COMAND
Online X
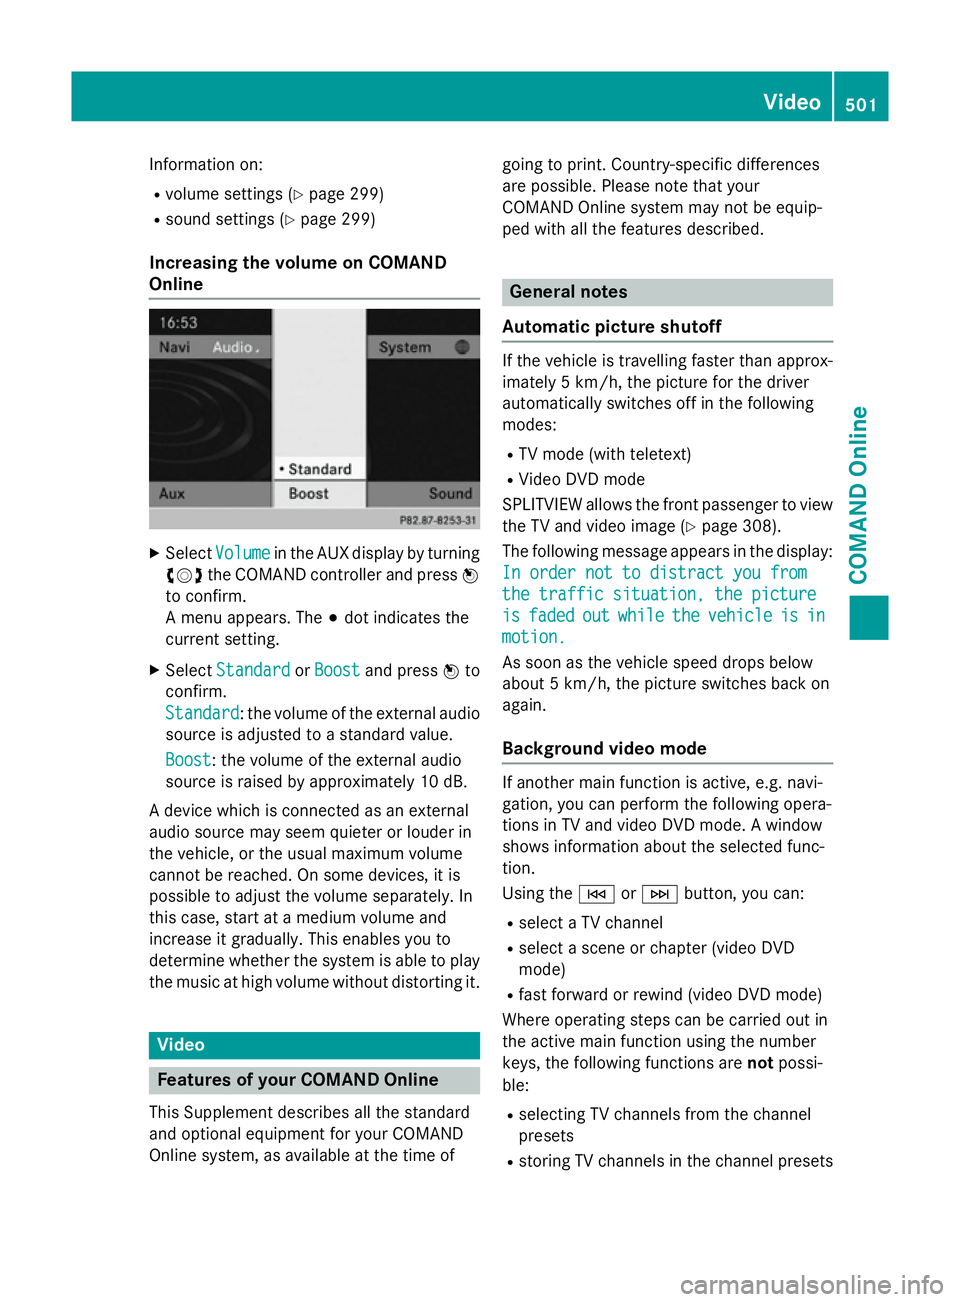
Select Volume Volume in the AUX display by turning
cVd the COMAND controller and press W
to confirm.
A menu appears. The #dot indicates the
current setting.
X Select Standard
Standard orBoost Boost and press Wto
confirm.
Standard Standard: the volume of the external audio
source is adjusted to a standard value.
Boost
Boost: the volume of the external audio
source is raised by approximately 10 dB.
A device which is connected as an external
audio source may seem quieter or louder in
the vehicle, or the usual maximum volume
cannot be reached. On some devices, it is
possible to adjust the volume separately. In
this case, start at a medium volume and
increase it gradually. This enables you to
determine whether the system is able to play the music at high volume without distorting it. Video
Features of your COMAND Online
This Supplement describes all the standard
and optional equipment for your COMAND
Online system, as available at the time of going to print. Country-specific differences
are possible. Please note that your
COMAND Online system may not be equip-
ped with all the features described. General notes
Automatic picture shutoff If the vehicle is travelling faster than approx-
imately 5 km/h, the picture for the driver
automatically switches off in the following
modes:
R TV mode (with teletext)
R Video DVD mode
SPLITVIEW allows the front passenger to view the TV and video image (Y page 308).
The following message appears in the display: In order not to distract you from In order not to distract you from
the traffic situation, the picture the traffic situation, the picture
is is faded
faded out
outwhile
while the
thevehicle
vehicle is
is in
in
motion.
motion.
As soon as the vehicle speed drops below
about 5 km/h, the picture switches back on
again.
Background video mode If another main function is active, e.g. navi-
gation, you can perform the following opera-
tions in TV and video DVD mode. A window
shows information about the selected func-
tion.
Using the EorF button, you can:
R select a TV channel
R select a scene or chapter (video DVD
mode)
R fast forward or rewind (video DVD mode)
Where operating steps can be carried out in
the active main function using the number
keys, the following functions are notpossi-
ble:
R selecting TV channels from the channel
presets
R storing TV channels in the channel presets Video
501COMAND Online Z