2012 MERCEDES-BENZ SL ROADSTER reset
[x] Cancel search: resetPage 535 of 637
Selecting TV channels
Selecting channels using the control
menu
X Press the =or; button on the
remote control while the display window is active.
or
X Press the EorF button.
The TV tuner selects the previous or next
channel from the alphabetical channel list.
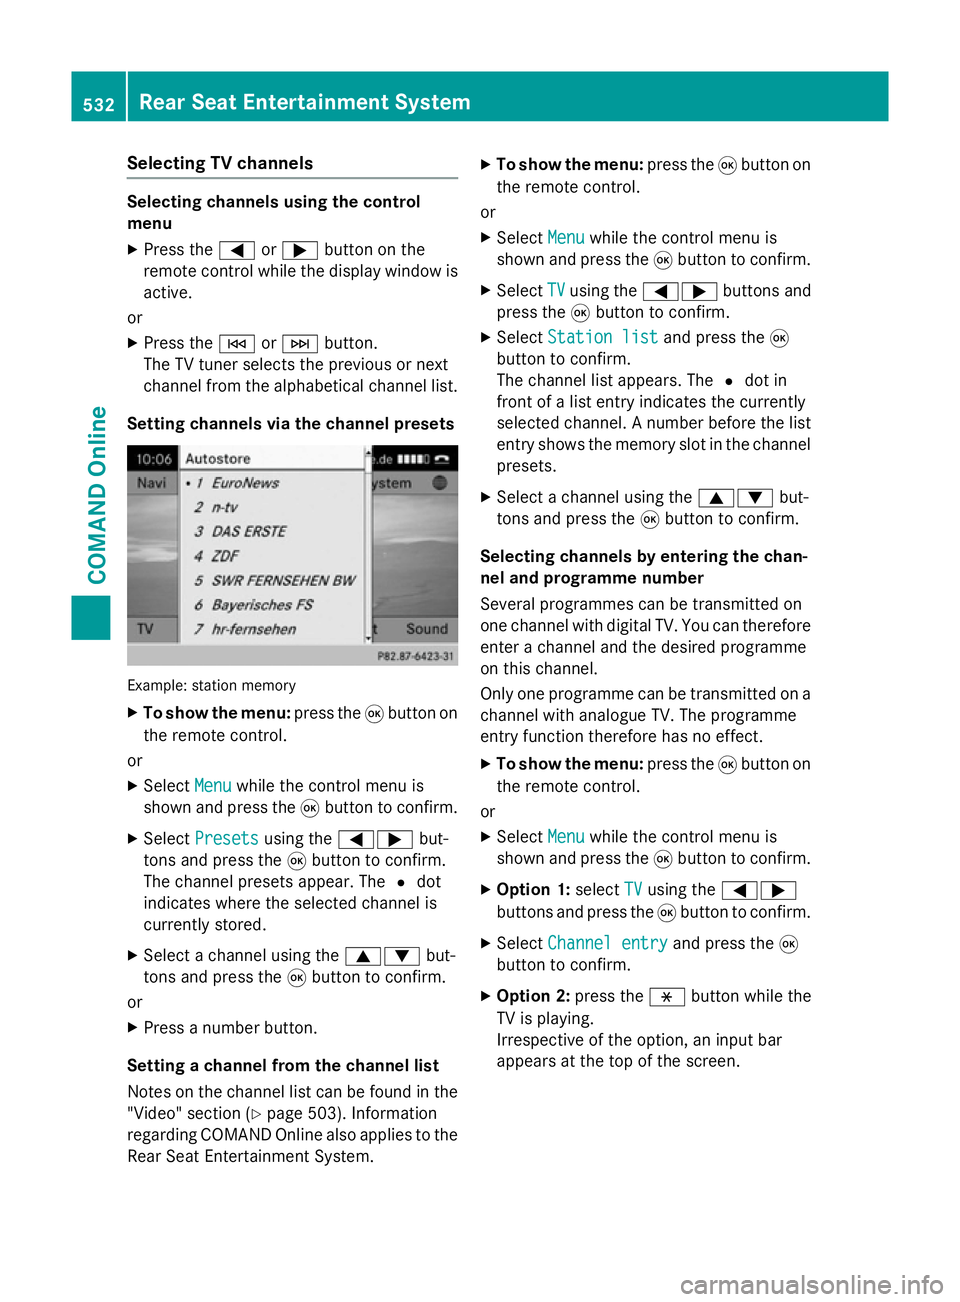
Setting channels via the channel presets Example: station memory
X
To show the menu: press the9button on
the remote control.
or
X Select Menu Menuwhile the control menu is
shown and press the 9button to confirm.
X Select Presets
Presets using the =; but-
tons and press the 9button to confirm.
The channel presets appear. The #dot
indicates where the selected channel is
currently stored.
X Select a channel using the 9:but-
tons and press the 9button to confirm.
or X Press a number button.
Setting a channel from the channel list
Notes on the channel list can be found in the
"Video" section (Y page 503). Information
regarding COMAND Online also applies to the
Rear Seat Entertainment System. X
To show the menu: press the9button on
the remote control.
or
X Select Menu
Menu while the control menu is
shown and press the 9button to confirm.
X Select TV TVusing the =; buttons and
press the 9button to confirm.
X Select Station list
Station list and press the9
button to confirm.
The channel list appears. The #dot in
front of a list entry indicates the currently
selected channel. A number before the list entry shows the memory slot in the channel
presets.
X Select a channel using the 9:but-
tons and press the 9button to confirm.
Selecting channels by entering the chan-
nel and programme number
Several programmes can be transmitted on
one channel with digital TV. You can therefore
enter a channel and the desired programme
on this channel.
Only one programme can be transmitted on a channel with analogue TV. The programme
entry function therefore has no effect.
X To show the menu: press the9button on
the remote control.
or
X Select Menu
Menu while the control menu is
shown and press the 9button to confirm.
X Option 1: selectTV TVusing the =;
buttons and press the 9button to confirm.
X Select Channel entry
Channel entry and press the9
button to confirm.
X Option 2: press thehbutton while the
TV is playing.
Irrespective of the option, an input bar
appears at the top of the screen. 532
Rear Seat Entertainment SystemCOMAND Online
Page 536 of 637
X
To set a channel: enter the channel num-
ber using the number keys and press the 9
button to confirm.
or
X Press and hold the number key until the
entry line is hidden.
The channel is set.
i If you have not entered a programme
number, the first programme with ade-
quate reception will be set for a digital
channel.
i You can enter channels or programmes
available in your country even if the recep-
tion is currently not adequate.
If you enter channels that are either not
intended for or not allowed in your country,
the Invalid channel number
Invalid channel number message
appears.
Storing TV channels Storing channels manually
There are ten preset positions available.
X To show the menu: press the9button on
the remote control or confirm Menu Menuby
pressing the 9button while the control
menu is shown.
X Select Presets
Presets using the =; but-
tons and press the 9button to confirm.
The channel presets appear. The #dot
indicates under which preset the currently
selected channel is stored.
X To store a channel: select a preset using
the 9: buttons and press and hold
the 9button until you hear a tone.
or
X Press and hold a number button until you
hear a tone.
The TV picture then reappears.
Storing channels automatically
This function automatically stores channels
with adequate reception in order of their reception quality. Any channels stored man-
ually in the preset memory will be lost.
X To show the menu: press the9button on
the remote control or confirm Menu
Menu by
pressing the 9button while the control
menu is shown.
X Select Presets Presets using the =; but-
tons and press the 9button to confirm.
X Select Autostore
Autostore and press the 9button
to confirm.
The Rear Seat Entertainment System
searches for channels it can receive. The
available channels are automatically stored
in the preset positions.
Information about the current pro-
gramme This function is only available on digital TV
channels. If you are watching an analogue TV channel, this menu cannot be selected.
X To show the menu: press the9button on
the remote control or confirm Menu
Menu by
pressing the 9button while the control
menu is shown.
X Select Info Infousing the =; buttons
and press the 9button to confirm.
If the current TV channel provides the cor-
responding information, this will be dis-
played.
i It can take a few seconds for the infor-
mation to be displayed.
Displaying the current programme or
programme preview This function is only available on digital TV
channels. The programme preview is also
referred to as the electronic programme
guide (EPG).Rear Seat Entertainment System
533COMAND Online Z
Page 565 of 637
Useful information
i This Owner's Manual describes all mod-
els, series and optional equipment for your
vehicle that were available at the time of
going to press. National variations are pos- sible. Note that your vehicle may not be
equipped with all of the functions descri-
bed. This is also the case for systems and
functions relevant to safety.
i Read the information on qualified special-
ist workshops: (Y page 34). Engine compartment
Bonnet
Important safety notes G
WARNING
An unlocked bonnet may open while driving
and block your view. There is a risk of an acci- dent.
Never unlock the bonnet while driving. G
WARNING
When being opened and closed, the bonnet
may suddenly fall into the closed position.
There is a risk of injury to persons in the range of movement of the bonnet.
Open and close the bonnet only when nobody
is in the range of movement. G
WARNING
If you open the bonnet while the engine is
overheating or while there is a fire in the
engine compartment, you could come into
contact with hot gases or other leaking ser-
vice products. There is a danger of injury.
Allow an overheating engine to cool down
before opening the bonnet. If there is a fire in the engine compartment, leave the bonnet
closed and notify the fire brigade. G
WARNING
There are moving components in the engine
compartment. Certain components may con-
tinue to move or suddenly move again even
after the ignition has been switched off, e.g.
the radiator fan. There is a risk of injury.
If you have to carry out work in the engine
compartment:
R switch off the ignition
R never touch the dangerous areas surround-
ing moving components, e.g. the rotation
area of the fan
R remove jewellery and watches
R keep items of clothing and hair, for exam-
ple, away from moving parts.
Active bonnet (pedestrian protection) Operating principle
! An active bonnet that had been triggered
must be repaired at a qualified specialist
workshop. The active bonnet function will
then be available again. The additional
pedestrian protection provided by the
active bonnet will then be restored.
The active bonnet is only available in certain
countries.
The active bonnet can reduce the risk of injury to pedestrians in certain accident situations.
Raising the active bonnet increases the clear-
ance to hard components, such as the engine.
If the active bonnet has been triggered, it is
raised at the rear in the area around the hinge
by approximately 85 mm. The active bonnet is triggered by pyrotechnics.
For the drive to the workshop, reset the trig-
gered active bonnet yourself. If the active
bonnet has been triggered, pedestrian pro-
tection may be limited.
Resetting G
WARNING
Certain components in the engine compart-
ment could be very hot, e.g. the engine, the
radiator and parts of the exhaust system. 562
Engine compartmentMaintenance and care
Page 570 of 637
i
The ASSYST PLUS service interval display
does not show any information on the
engine oil level. Observe the notes on the
engine oil level (Y page 564).
The multifunction display shows a service
message for a few seconds, e.g.:
R Service A in .. days
Service A in .. days
R Service A due Service A due
R Service A overdue by .. days
Service A overdue by .. days
Depending on the operating conditions of the vehicle, the remaining time or distance until
the next service due date is displayed.
The letter indicates which service is due. A A
stands for a minor service and B
Bfor a major
service. A number or another letter may be
displayed after the letter.
Only for certain countries: the position after
the letter A
A or B Bindicates any necessary addi-
tional maintenance work to be performed. If
you notify a qualified specialist workshop of
this display, you will receive a statement on
the associated costs.
The ASSYST PLUS service interval display
does not take into account any periods of
time during which the battery is disconnec-
ted.
Maintaining the time-dependent service
schedule:
X Note down the service due date displayed
in the multifunction display before discon-
necting the battery.
or X After reconnecting the battery, subtract
the battery disconnection periods from the service date shown on the display. Hiding a service message
X Press the aor% button on the steer-
ing wheel. Displaying a service message
X Switch the ignition on.
X Press the =or; button on the steer-
ing wheel to select the Serv. Serv.menu.
X Press the 9or: button to select the
ASSYST PLUS ASSYST PLUS submenu and confirm by
pressing the abutton.
The service due date appears in the multi-
function display. Information about Service
Resetting the ASSYST PLUS service
interval display !
If the ASSYST PLUS service interval dis-
play has been inadvertently reset, this set-
ting can be corrected at a qualified special-
ist workshop.
Have service work carried out as described in the Service Booklet. This may otherwise
lead to increased wear and damage to the
major assemblies or the vehicle.
A qualified specialist workshop, e.g. a
Mercedes-Benz Service Centre, will reset the ASSYST PLUS service interval display after
the service work has been carried out. You
can also obtain further information on main-
tenance work, for example.
Special service requirements The prescribed service interval is based on
normal operation of the vehicle. Service work
will need to be performed more often if the
vehicle is operated under arduous conditions
or increased loads, for example:
R regular city driving with frequent intermedi-
ate stops
R if the vehicle is primarily used to travel
short distances
R for frequent operation in mountainous ter-
rain or on poor road surfaces
R if the engine is often left idling for long peri-
ods ASSYST PLUS
567Maintenance and care Z
Page 594 of 637
X
Switch on the hazard warning lamps
(Y page 130).
X Turn the key in the ignition lock to position
0 and remove the key from the ignition
lock.
X When leaving the vehicle, take the key or
the KEYLESS-GO key with you.
When towing your vehicle with the rear axle
raised, it is important that you observe the
safety instructions (Y page 588).Towing the vehicle with both axles on
the ground G
WARNING
If the steering wheel lock is engaged, the vehi- cle can no longer be steered. There is a risk of
an accident.
Always switch on the ignition when towing
with a tow rope or a towing bar.
The automatic transmission automatically
shifts to position Pwhen you open the driver's
or front-passenger door or when you remove the key from the ignition lock.
In order to ensure that the automatic trans-
mission stays in position Nwhen towing the
vehicle, you must observe the following
points:
X Switch on the hazard warning lamps
(Y page 130).
i In order to signal a change of direction
when towing the vehicle with the hazard
warning lamps switched on, use the com-
bination switch as usual. In this case, only
the turn signals for the desired direction
flash. When the combination switch is
reset, the hazard warning lamps start flash- ing again.
X Make sure that the vehicle is stationary and
that the key is in position 0in the ignition
lock.
X Turn the key to position 2in the ignition
lock. On vehicles with KEYLESS-GO, use the key
instead of the Start/Stop button
(Y page 155).
X Depress and hold the brake pedal.
X Shift the automatic transmission to posi-
tion N.
X Release the brake pedal.
X Release the electric parking brake.
X Leave the key in position 2in the ignition
lock.
It is important that you observe the safety
instructions when towing away your vehicle
(Y page 588). Transporting the vehicle
! You may only secure the vehicle by the
wheels, not by parts of the vehicle such as
axle or steering components. Otherwise,
the vehicle could be damaged.
The towing eye can be used to pull the vehicle
onto a trailer or transporter for transport pur-
poses.
X Turn the key to position 2in the ignition
lock.
X Shift the automatic transmission to posi-
tion N.
As soon as the vehicle is loaded: X Prevent the vehicle from rolling away by
applying the electric parking brake.
X Shift the automatic transmission to posi-
tion P.
X Turn the key to position 0in the ignition
lock and remove it.
X Secure the vehicle. Tow-starting (emergency engine
starting)
! Do not tow-start vehicles with automatic
transmission. You could otherwise damage the automatic transmission. Towing and tow-starting
591Breakdown assistance Z