Page 41 of 232
1FEATURES OF YOUR HYUNDAI
30
!
2. Route the child restraint seat strap
over the back of the seat. For vehicles with adjustable head- rests, route the tether strap underthe headrest and between the head- rest posts, otherwise route the tether strap over the top of the seatback. B230C02MC
B230C04A-DAT Installing a Child Restraint Seat (4 Door) Three Child Restraint Anchorage Fit- ting Packages are located on the rearseat package tray.
1. Open the tether anchor cover on the
rear seat package tray.
B230C01MC
WARNING:
Do not mount more than one child restraint to a single tether or to a child restraint lower anchorage point.The improper increased load may cause the anchorage points or tether anchor to break, causing seriousinjury or death.
B230C01A-D
3. Connect the attaching clip (2) to the Child Restraint Anchorage Fitting Package (1) and tighten to secure the seat. (1)
(2)
Page 42 of 232
1
FEATURES OF YOUR HYUNDAI
31
!
2. Route the child restraint seat strap
over the back of the seat. For vehicles with adjustable head- rests, route the tether strap under theheadrest and between the headrest posts, otherwise route the tether strap over the top of the seatback.
B230E01MC-DAT Installing a Child Restraint Seat (3 Door) Three Child Restraint Anchorage Fit- ting Package are located on the rearfloor panel.
B230E01MC
1. Open the tether anchor cover on the rear floor panel.
B230C02MC
WARNING:
Do not mount more than one child restraint to a single tether or to a child restraint lower anchorage point.
The improper increased load may cause the anchorage points or tether anchor to break, causing seriousinjury or death.
3. Connect the attaching clip (2) to the
Child Restraint Anchorage Fitting Package (1) through the hole on the covering shelf and tighten to securethe seat.B230E01A-D (1)
(2)
Covering shelf
Page 43 of 232

1FEATURES OF YOUR HYUNDAI
32
!
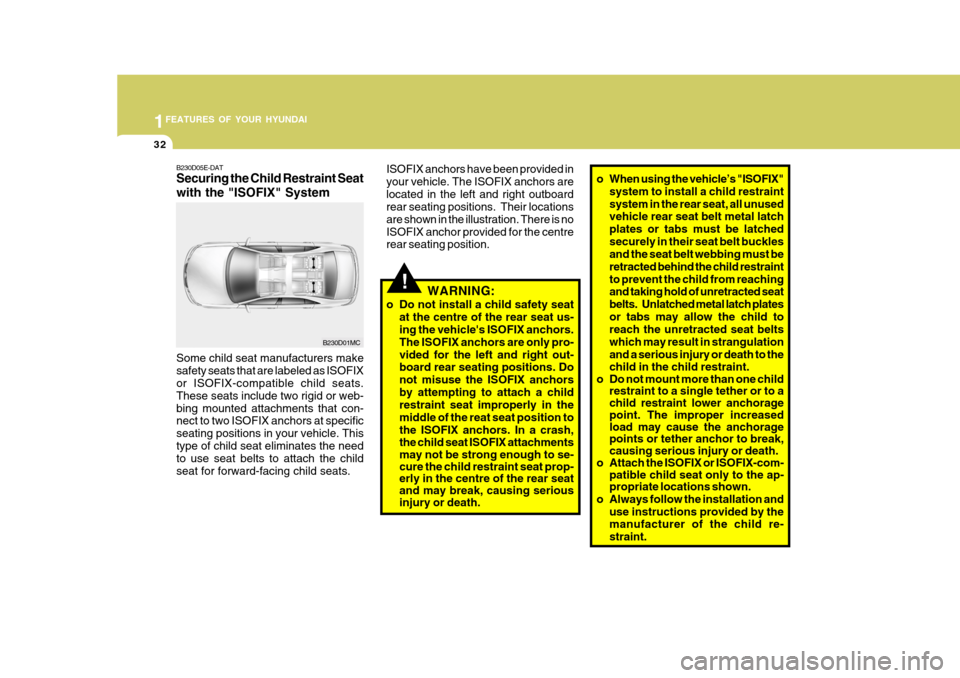
Some child seat manufacturers make safety seats that are labeled as ISOFIX or ISOFIX-compatible child seats. These seats include two rigid or web-bing mounted attachments that con- nect to two ISOFIX anchors at specific seating positions in your vehicle. Thistype of child seat eliminates the need to use seat belts to attach the child seat for forward-facing child seats. WARNING:
o Do not install a child safety seat at the centre of the rear seat us- ing the vehicle's ISOFIX anchors. The ISOFIX anchors are only pro-vided for the left and right out- board rear seating positions. Do not misuse the ISOFIX anchorsby attempting to attach a child restraint seat improperly in the middle of the reat seat position tothe ISOFIX anchors. In a crash,
the child seat ISOFIX attachments may not be strong enough to se- cure the child restraint seat prop- erly in the centre of the rear seat and may break, causing serious injury or death. o When using the vehicle’s "ISOFIX"
system to install a child restraint system in the rear seat, all unused vehicle rear seat belt metal latch plates or tabs must be latchedsecurely in their seat belt buckles and the seat belt webbing must be retracted behind the child restraintto prevent the child from reaching and taking hold of unretracted seat
belts. Unlatched metal latch platesor tabs may allow the child to reach the unretracted seat belts which may result in strangulationand a serious injury or death to the child in the child restraint.
o Do not mount more than one child restraint to a single tether or to a child restraint lower anchorage
point. The improper increased load may cause the anchorage points or tether anchor to break, causing serious injury or death.
o Attach the ISOFIX or ISOFIX-com-
patible child seat only to the ap- propriate locations shown.
o Always follow the installation and
use instructions provided by the manufacturer of the child re- straint.
B230D05E-DAT
Securing the Child Restraint Seat
with the "ISOFIX" System
B230D01MC
ISOFIX anchors have been provided in your vehicle. The ISOFIX anchors arelocated in the left and right outboard rear seating positions. Their locations are shown in the illustration. There is noISOFIX anchor provided for the centre rear seating position.
Page 44 of 232

1
FEATURES OF YOUR HYUNDAI
33
!WARNING:
If the child restraint seat is not an- chored properly, the risk of a childbeing seriously injured or killed in a collision greatly increases. B230F02A-DAT Installation on the Centre of the Rear Seat
Use the seat belt to install the child restraint system as illustrated. After installation of the child restraint sys- tem, rock the child seat back and forth,and side to side to ensure that it is positively secured by the seat belt. If the child seat moves, readjust thelength of the seat belt. In Australia/NZ the child restraint manufacturer's in- structions must be followed when fit-ting the unit to the vehicle.
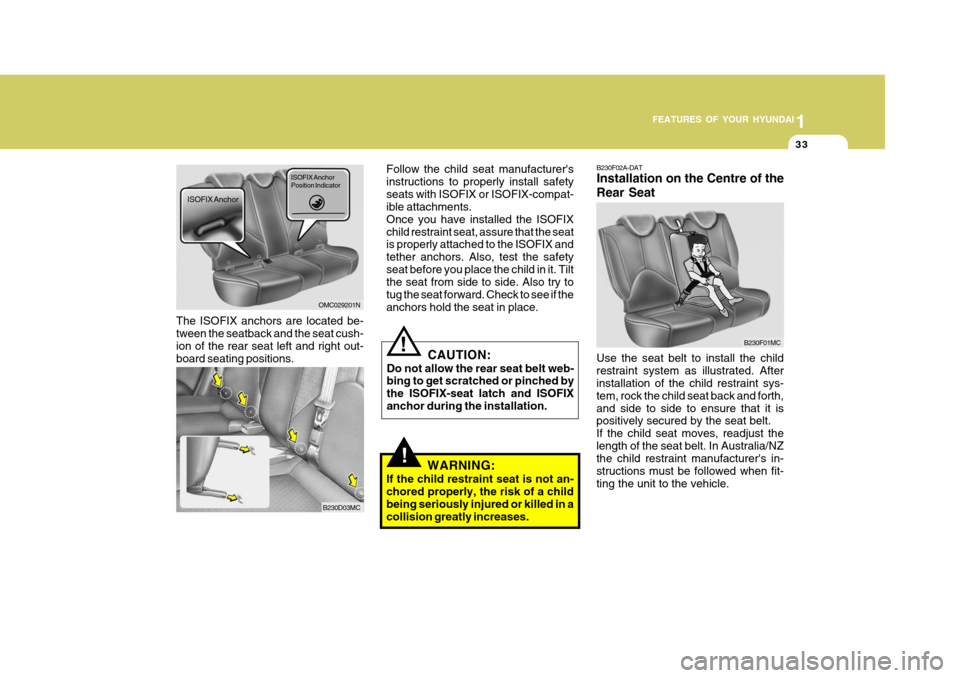
Follow the child seat manufacturer'sinstructions to properly install safetyseats with ISOFIX or ISOFIX-compat- ible attachments. Once you have installed the ISOFIXchild restraint seat, assure that the seat is properly attached to the ISOFIX and tether anchors. Also, test the safetyseat before you place the child in it. Tilt the seat from side to side. Also try to tug the seat forward. Check to see if theanchors hold the seat in place.
OMC029201N
The ISOFIX anchors are located be- tween the seatback and the seat cush-ion of the rear seat left and right out- board seating positions. ISOFIX Anchor
B230D03MC
B230F01MC
ISOFIX Anchor Position Indicator
CAUTION:
Do not allow the rear seat belt web- bing to get scratched or pinched by the ISOFIX-seat latch and ISOFIXanchor during the installation.!
Page 45 of 232

1FEATURES OF YOUR HYUNDAI
34
!
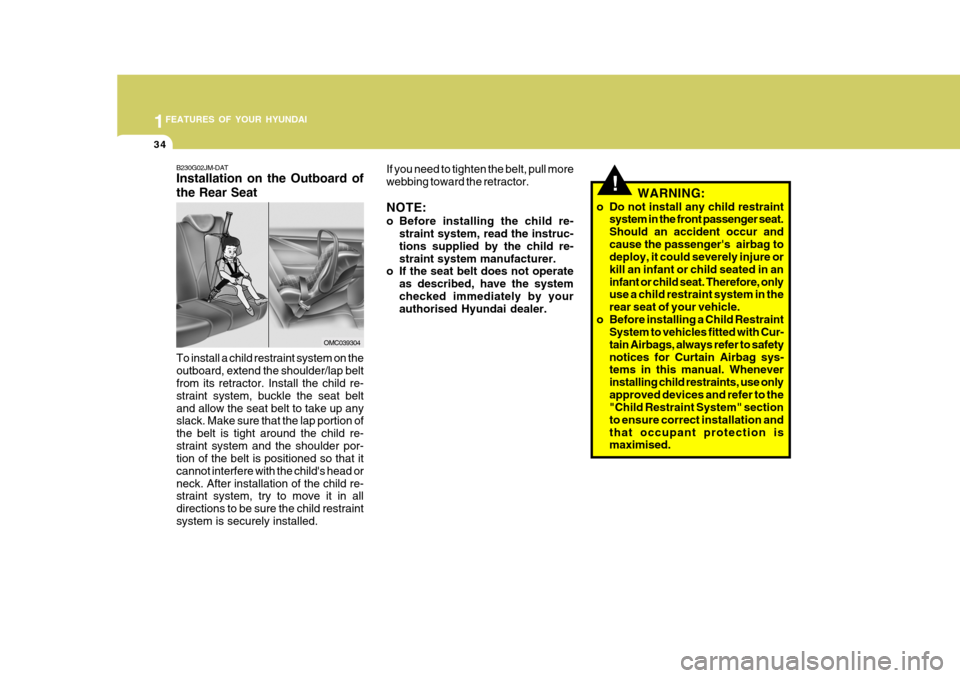
B230G02JM-DAT Installation on the Outboard of the Rear Seat To install a child restraint system on the outboard, extend the shoulder/lap belt from its retractor. Install the child re- straint system, buckle the seat beltand allow the seat belt to take up any slack. Make sure that the lap portion of the belt is tight around the child re-straint system and the shoulder por- tion of the belt is positioned so that it cannot interfere with the child's head orneck. After installation of the child re- straint system, try to move it in all directions to be sure the child restraintsystem is securely installed.
OMC039304 If you need to tighten the belt, pull more webbing toward the retractor. NOTE:
o Before installing the child re-
straint system, read the instruc- tions supplied by the child re-straint system manufacturer.
o If the seat belt does not operate
as described, have the systemchecked immediately by your authorised Hyundai dealer. WARNING:
o Do not install any child restraint system in the front passenger seat. Should an accident occur andcause the passenger's airbag to deploy, it could severely injure or kill an infant or child seated in aninfant or child seat. Therefore, only use a child restraint system in the rear seat of your vehicle.
o Before installing a Child Restraint System to vehicles fitted with Cur-tain Airbags, always refer to safetynotices for Curtain Airbag sys- tems in this manual. Whenever installing child restraints, use onlyapproved devices and refer to the "Child Restraint System" section to ensure correct installation andthat occupant protection is maximised.
Page 46 of 232

1
FEATURES OF YOUR HYUNDAI
35
!
B180B02MC-DAT Pre-Tensioner Seat Belt Your Hyundai vehicle is equipped with driver's and front passenger's pre-tensioner seat belts. The purpose of the pre-tensioner is to make sure that the seat belts fit tightly against thewearer's body in certain frontal colli- sions. The pre-tensioner seat belts can beactivated with the airbags.
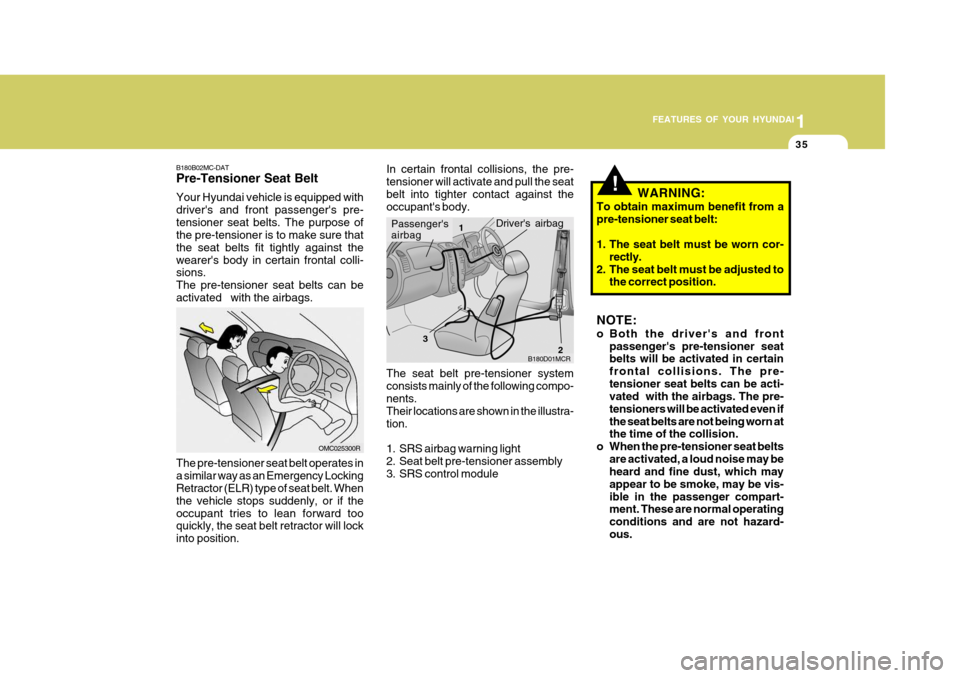
OMC025300R In certain frontal collisions, the pre- tensioner will activate and pull the seatbelt into tighter contact against the occupant's body.
B180D01MCR
The seat belt pre-tensioner system consists mainly of the following compo- nents. Their locations are shown in the illustra-tion.
1. SRS airbag warning light
2. Seat belt pre-tensioner assembly
3. SRS control module WARNING:
To obtain maximum benefit from a pre-tensioner seat belt:
1. The seat belt must be worn cor- rectly.
2. The seat belt must be adjusted to the correct position.
Passenger's airbagDriver's airbag1
2
3
The pre-tensioner seat belt operates in a similar way as an Emergency Locking Retractor (ELR) type of seat belt. When the vehicle stops suddenly, or if theoccupant tries to lean forward too quickly, the seat belt retractor will lock into position. NOTE:
o Both the driver's and front
passenger's pre-tensioner seat belts will be activated in certain frontal collisions. The pre-tensioner seat belts can be acti- vated with the airbags. The pre- tensioners will be activated even ifthe seat belts are not being worn at the time of the collision.
o When the pre-tensioner seat belts are activated, a loud noise may beheard and fine dust, which may appear to be smoke, may be vis-ible in the passenger compart- ment. These are normal operating conditions and are not hazard-ous.
Page 47 of 232

1FEATURES OF YOUR HYUNDAI
36
o Do not attempt to inspect or re-
place the pre-tensioner seat belts yourself. This must be done by an authorised Hyundai dealer.
o Do not strike the pre-tensioner seat belt assemblies.
o Do not attempt to service or repair
the pre-tensioner seat belt system in any manner.
o Improper handling of the pre-
tensioner seat belt assemblies, andfailure to heed the warnings not to strike, modify, inspect, replace, service or repair the pre-tensionerseat belt assemblies may lead to improper operation or inadvertent activation and serious injury.
o Always wear seat belts when driv- ing or riding in a motor vehicle.
o If the vehicle or pre-tensioner seat belt must be discarded, contact an authorised Hyundai dealer.
!
CAUTION:
o Because the sensor that activates the SRS airbag is connected with pre-tensioner seat belt, the SRS airbag warning light on the instrument panel will illuminatefor approximately 6 seconds after the ignition key has been turned to the "ON" position, and then itshould turn off.
o If pre-tensioner seat belt is not
working properly, this warninglight will illuminate even if there is no malfunction of the SRS airbag. WARNING:
o Pre-tensioners are designed to op- erate once only. After activation, pre-tensioner seat belts must be replaced. All seat belts, of any type, should always be replacedafter they have been worn during a collision.
o The pre-tensioner seat belt assem- bly mechanisms become hot dur-ing activation. Do not touch the pre-tensioner seat belt assembliesfor several minutes after they have been activated.!
o Although it is harmless, the finedust may cause skin irritation and should not be inhaled for pro- longed periods. Wash your hands and face thoroughly after an acci-dent in which the pre-tensioner seat belts were activated. If the SRS airbag warning lightdoes not illuminate when the igni- tion key is turned to "ON", or if itblinks for a second and remains illuminated after illuminating for approximately 6 seconds, or if itilluminates while the vehicle is being driven, please have an authorised Hyundai dealer inspectthe pre-tensioner seat belt or SRS airbag system as soon as pos- sible.
Page 48 of 232
1
FEATURES OF YOUR HYUNDAI
37
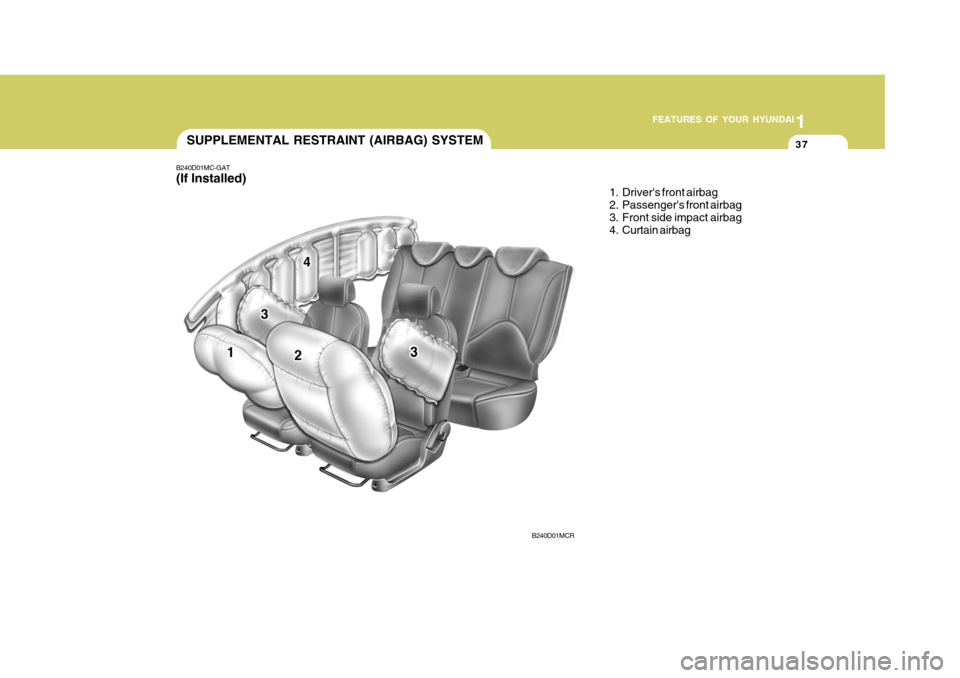
B240D01MC-GAT (If Installed)
SUPPLEMENTAL RESTRAINT (AIRBAG) SYSTEM
1. Driver's front airbag
2. Passenger's front airbag
3. Front side impact airbag
4. Curtain airbag
B240D01MCR