Page 289 of 321

739
Maintenance
Speed Rating: An alphanumeric
code assigned to a tire indicating the
maximum speed at which a tire can
operate.
Traction: The friction between the
tire and the road surface. The
amount of grip provided.
Tr e a d: The portion of a tire that
comes into contact with the road.
Treadwear Indicators: Narrow
bands, sometimes called "wear
bars," that show across the tread of a
tire when only 2/32 inch of tread
remains.
UTQGS: Uniform Tire Quality
Grading Standards, a tire information
system that provides consumers with
ratings for a tire's traction, tempera-
ture and treadwear. Ratings are
determined by tire manufacturers
using government testing proce-
dures. The ratings are molded into
the sidewall of the tire.
Vehicle Capacity Weight : The num-
ber of designated seating positions
multiplied by 150 lbs. (68 kg) plus the
rated cargo and luggage load. Vehicle Maximum Load on the
Tire: Load on an individual tire due to
curb and accessory weight plus
maximum occupant and cargo
weight.
Vehicle Normal Load on the Tire
:
That load on an individual tire that is
determined by distributing to each
axle its share of the curb weight,
accessory weight, and normal occu-
pant weight and driving by 2.
Vehicle Placard: A label permanent-
ly attached to a vehicle showing the
original equipment tire size and rec-
ommended inflation pressure. All season tires
Kia specifies all season tires on
some models to provide good per-
formance for use all year round,
including snowy and icy road condi-
tions. All season tires are identified
by ALL SEASON and/or M+S (Mud
and Snow) on the tire sidewall. Snow
tires have better snow traction than
all season tires and may be more
appropriate in some areas.
Summer tires
Kia specifies summer tires on some
models to provide superior perform-
ance on dry roads. Summer tire per-
formance is substantially reduced in
snow and ice. Summer tires do not
have the tire traction rating M+S
(Mud and Snow) on the tire side wall.
if you plan to operate your vehicle in
snowy or icy conditions. Kia recom-
mends the use of snow tires or all
season tires on all four wheels.
Page 290 of 321

Maintenance40
7Snow tires
If you equip your car with snow tires,
they should be the same size and
have the same load capacity as the
original tires. Snow tires should be
installed on all four wheels; other-
wise, poor handling may result.
Snow tires should carry 4 psi (28
kPa) more air pressure than the
pressure recommended for the stan-
dard tires on the tire label on the dri-
ver's side of the center pillar, or up to
the maximum pressure shown on the
tire sidewall, whichever is less.
Do not drive faster than 75 mph (120
km/h) when your car is equipped with
snow tires.
Tire chains
Tire chains, if necessary, should be
installed on the drive wheels (front
wheel).
Be sure that the chains are installed
in accordance with the manufactur-
er's instructions.
To minimize tire and chain wear, do
not continue to use tire chains when
they are no longer needed.
✽ ✽
NOTICE• If you hear noise caused by chains
contacting the body, retighten the
chain to avoid contact with the
vehicle body.
• To prevent body damage, retight- en the chains after driving 0.3 ~
0.6 miles (0.5 ~ 1.0 km).
WARNING
- Snow or ice
When driving on roads cov- ered with snow or ice, drive at
less than 20 mph (30 km/h).
Use the SAE “S” class or wire chains.
Do not use tire chains on vehi- cles equipped with aluminum
wheels. In unavoidable cir-
cumstance, use a wire type
chain.
Use wire chains less than 15mm to prevent damage to
the chain’s connection.
Page 291 of 321

741
Maintenance
BULB REPLACEMENT Use only the bulbs of the specifiedwattage.
Headlight bulb replacement ✽
✽ NOTICEAfter heavy, driving rain or washing,
headlight and taillight lenses could
appear frosty. This condition is caused by
the temperature difference between the
lamp inside and outside. This is similar
to the condensation on your windows
inside your vehicle during the rain and
doesn’t indicate a problem with your
vehicle. If the water leaks into the lamp
bulb circuitry, have the vehicle checked
by an Authorized Kia Dealer.
WARNING
- Working on
the lights
Prior to working on the light, firmly
apply the parking brake and ensure
that the ignition switch is turned to
the “LOCK” position to avoid sud-
den movement of the vehicle and
burning your fingers or receiving an
electric shock.
CAUTION
If you don’t have necessary tools,
the correct bulbs and the expertise,consult an Authorized Kia Dealer. In many cases, it is difficult to replacevehicle light bulbs because otherparts of the vehicle must beremoved before you can get the bulb. Especially if you must removethe front bumper to replace the lightbulbs in the front of the vehicle. This may result in damage to thevehicle.
OGH056016
➀ Headlight (High)
➁ Headlight (Low)
➂ Front fog light
➃ Position light
➄ Front turn signal light
\b Side mark light
WARNING
- Halogen bulbs
Halogen bulbs contain pressur-
ized gas that will produce flying
pieces of glass if broken.
Always handle them carefully, and avoid scratches and abra-
sions. If the bulbs are lit, avoid
contact with liquids. Never touch
the glass with bare hands.
Residual oil may cause the bulb
to overheat and burst when lit. A
bulb should be operated only
when installed in a headlight.
(Continued)
G270A03ON
Page 292 of 321

Maintenance42
7
1. Open the hood.
2. Remove the engine compartment
shroud.
3. Remove the headlight bulb cover by turning it counterclockwise.
4. Disconnect the headlight bulb assem- bly by turning it counterclockwise.
5. Install a new headlight bulb assembly.
6. Install the headlight bulb cover by turn- ing it clockwise.
Headlight (HID type), position and
front fog light, turn signal light
and side mark light bulb replace-
mentIf the light bulb is not operating, have the
vehicle checked by an authorized Kia
Dealer.
* HID : High Intensity Discharge
(Continued)
If a bulb becomes damaged orcracked, replace it immediately
and carefully dispose of it.
Wear eye protection when chang- ing a bulb. Allow the bulb to cool
down before handling it.
OMG075038N
WARNING
- HID Headlight
low beam (if equipped)
Do not attempt to replace or inspect
the low beam (XENON bulb) due to
electric shock danger. If the low
beam (XENON bulb) is not working,
have your vehicle checked by an
Authorized Kia Dealer.
Page 293 of 321
743
Maintenance
Interior light bulb replacement1. Using a flat-blade screwdriver, gentlypry the lens from the interior light
housing.
2. Remove the bulb by pulling it straight out.
3. Install a new bulb.
4. Align the lens tabs with the interior light housing notches and snap the
lens into place.
2GHA424
OFFDOORON
2GHA746
1GHA5611GHA4311GHA432
Front map lamp
Center dome lamp
Vanity mirror lampTrunk room lampGlove box lamp
WARNING
- HID Headlight
low beam (if equipped)
Prior to working on the Interior
Lights, ensure that the “OFF” but-
ton is depressed to avoid burning
your fingers or receiving an electric
shock.
Page 294 of 321
Maintenance44
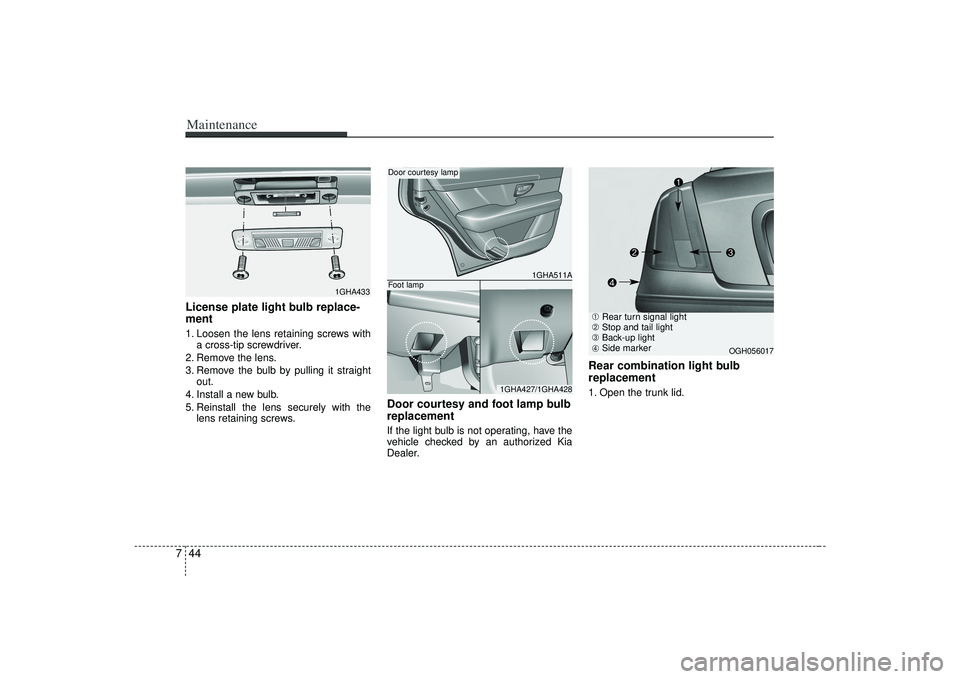
7License plate light bulb replace-
ment 1. Loosen the lens retaining screws with
a cross-tip screwdriver.
2. Remove the lens.
3. Remove the bulb by pulling it straight out.
4. Install a new bulb.
5. Reinstall the lens securely with the lens retaining screws.
Door courtesy and foot lamp bulb
replacementIf the light bulb is not operating, have the
vehicle checked by an authorized Kia
Dealer.
Rear combination light bulb
replacement1. Open the trunk lid.
1GHA433
1GHA511A
1GHA427/1GHA428
Door courtesy lampFoot lamp
➀ Rear turn signal light
➁ Stop and tail light
➂ Back-up light
➃ Side marker
OGH056017
Page 295 of 321
745
Maintenance
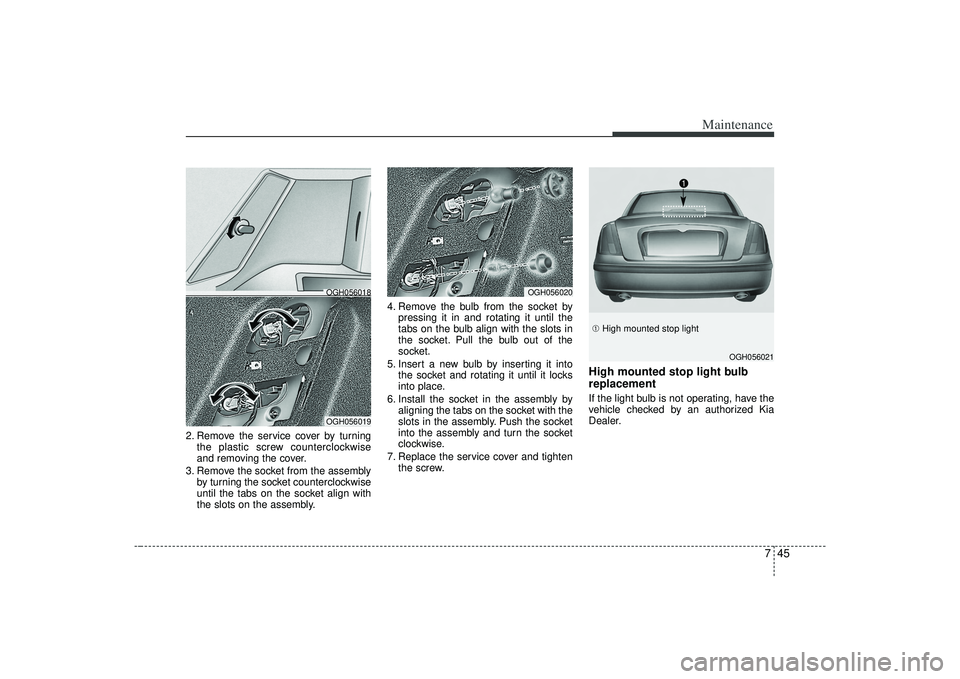
2. Remove the service cover by turningthe plastic screw counterclockwise
and removing the cover.
3. Remove the socket from the assembly by turning the socket counterclockwise
until the tabs on the socket align with
the slots on the assembly. 4. Remove the bulb from the socket by
pressing it in and rotating it until the
tabs on the bulb align with the slots in
the socket. Pull the bulb out of the
socket.
5. Insert a new bulb by inserting it into the socket and rotating it until it locks
into place.
6. Install the socket in the assembly by aligning the tabs on the socket with the
slots in the assembly. Push the socket
into the assembly and turn the socket
clockwise.
7. Replace the service cover and tighten the screw.
High mounted stop light bulb
replacementIf the light bulb is not operating, have the
vehicle checked by an authorized Kia
Dealer.
OGH056020
OGH056019OGH056018
➀ High mounted stop light
OGH056021
Page 296 of 321

Maintenance46
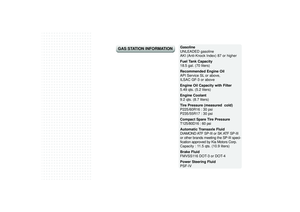
7LUBRICANT SPECIFICATIONS Recommended lubricants To help achieve proper engine and pow-
ertrain performance and durability, use
only lubricants of the proper quality. The
correct lubricants also help promote
engine efficiency that results in improved
fuel economy.
Engine oils labeled Energy Conserving
Oil are now available. Along with other
additional benefits, they contribute to fuel
economy by reducing the amount of fuel
necessary to overcome engine friction.
Often, these improvements are difficult to
measure in everyday driving, but in a
year’s time, they can offer significant cost
and energy savings.
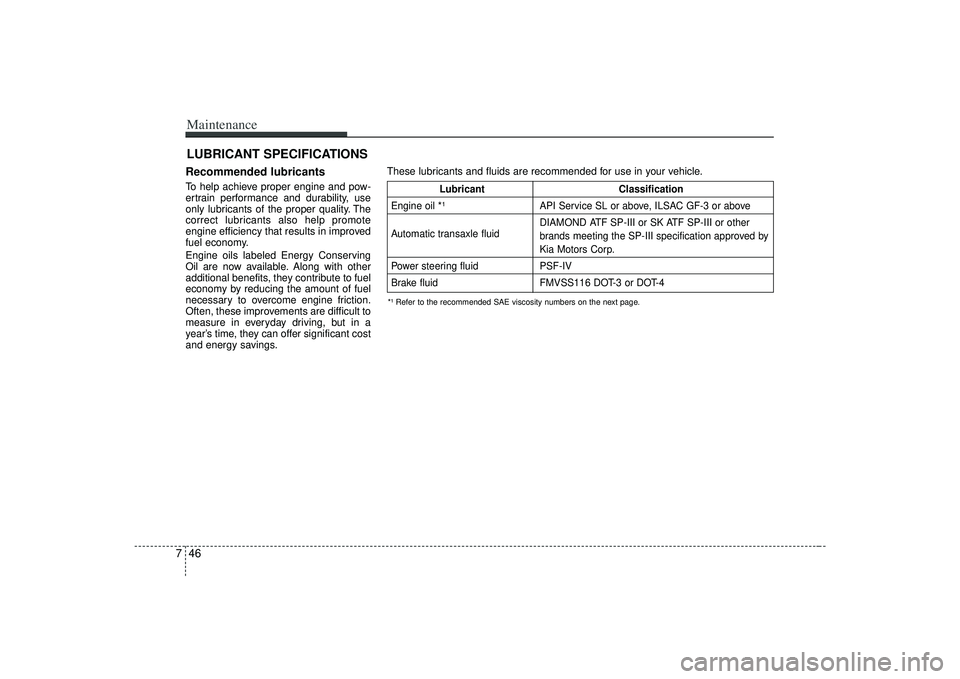
*¹ Refer to the recommended SAE viscosity numbers on the next page.These lubricants and fluids are recommended for use in your vehicle.
Lubricant Classification
Engine oil *¹
API Service SL or above, ILSAC GF-3 or above
Automatic transaxle fluid DIAMOND ATF SP-III or SK ATF SP-III or other
brands meeting the SP-III specification approved by
Kia Motors Corp.
Power steering fluid PSF-IV
Brake fluid FMVSS116 DOT-3 or DOT-4