Page 177 of 321

441
Driving your vehicle
Lane change signals To signal a lane change, move the turn
signal lever slightly and hold it in position.
The lever will return to the OFF position
when released.
If an indicator stays on and does not
flash or if it flashes abnormally, one of the
turn signal bulbs may be burned out and
will require replacement.✽ ✽NOTICEIf an indicator flash is abnormally quick
or slow, bulb may be burned out or have
a poor electrical connection in the cir-
cuit.
Automatic headlight aiming
(if equipped)To provide better driver visibility and
reduce eye fatigue, the headlight aiming
(direction) is automatically controlled
depending on vehicle load and vehicle
angle (when vehicle is loaded with pas-
sengers, cargo or used for towing, the
additional load can alter the headlight
aiming point on the road surface). This
system provides constant automatic
headlight aiming under various vehicle
conditions and angles to ensure the
headlights are always pointed in the right
direction.
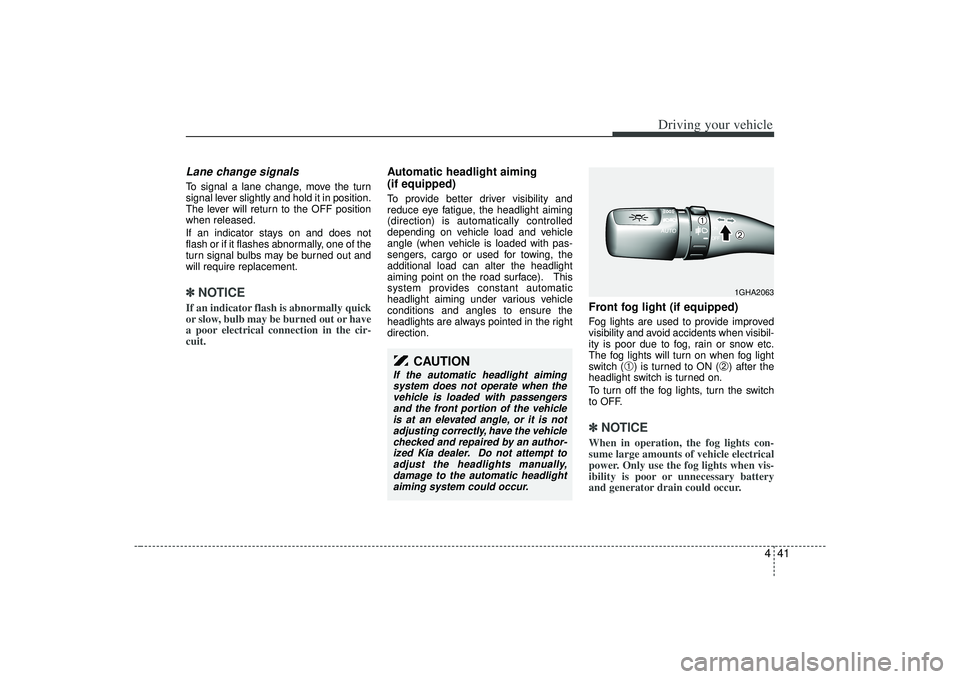
Front fog light (if equipped) Fog lights are used to provide improved
visibility and avoid accidents when visibil-
ity is poor due to fog, rain or snow etc.
The fog lights will turn on when fog light
switch (
➀) is turned to ON (
➁) after the
headlight switch is turned on.
To turn off the fog lights, turn the switch
to OFF.
✽ ✽ NOTICEWhen in operation, the fog lights con-
sume large amounts of vehicle electrical
power. Only use the fog lights when vis-
ibility is poor or unnecessary battery
and generator drain could occur.
CAUTION
If the automatic headlight aiming
system does not operate when thevehicle is loaded with passengersand the front portion of the vehicleis at an elevated angle, or it is not adjusting correctly, have the vehiclechecked and repaired by an author- ized Kia dealer. Do not attempt toadjust the headlights manually, damage to the automatic headlightaiming system could occur.
1GHA2063
➀
➁
Page 178 of 321
Driving your vehicle42
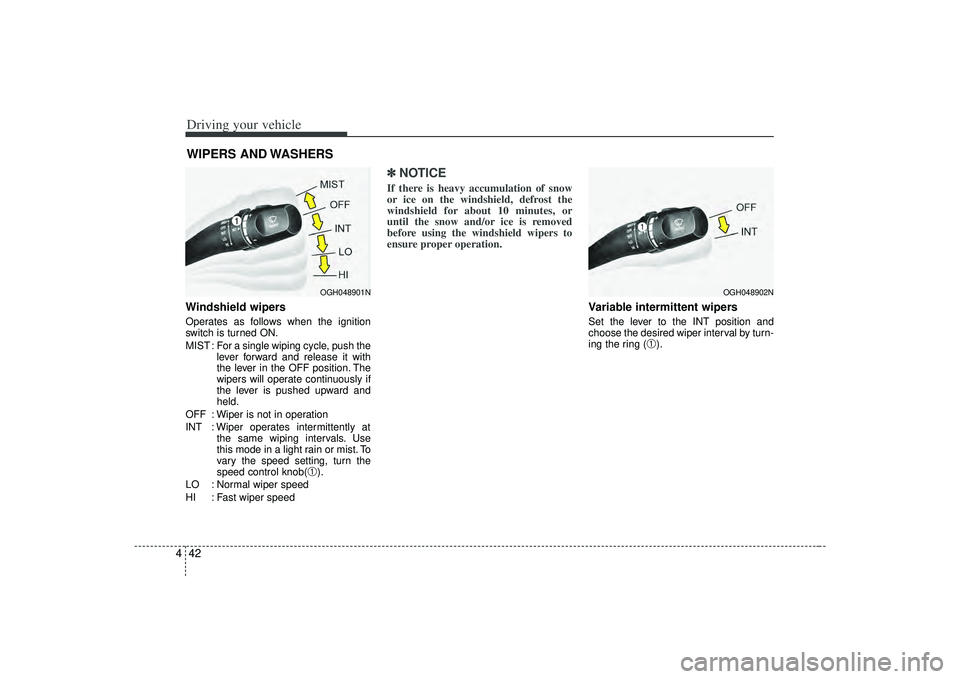
4Windshield wipers Operates as follows when the ignition
switch is turned ON.
MIST : For a single wiping cycle, push the
lever forward and release it with
the lever in the OFF position. The
wipers will operate continuously if
the lever is pushed upward and
held.
OFF : Wiper is not in operation
INT : Wiper operates intermittently at the same wiping intervals. Use
this mode in a light rain or mist. To
vary the speed setting, turn the
speed control knob(
➀).
LO : Normal wiper speed
HI : Fast wiper speed
✽ ✽ NOTICEIf there is heavy accumulation of snow
or ice on the windshield, defrost the
windshield for about 10 minutes, or
until the snow and/or ice is removed
before using the windshield wipers to
ensure proper operation.
Variable intermittent wipersSet the lever to the INT position and
choose the desired wiper interval by turn-
ing the ring (
➀).
WIPERS AND WASHERS
OGH048901N
OGH048902N
1
Page 179 of 321
443
Driving your vehicle
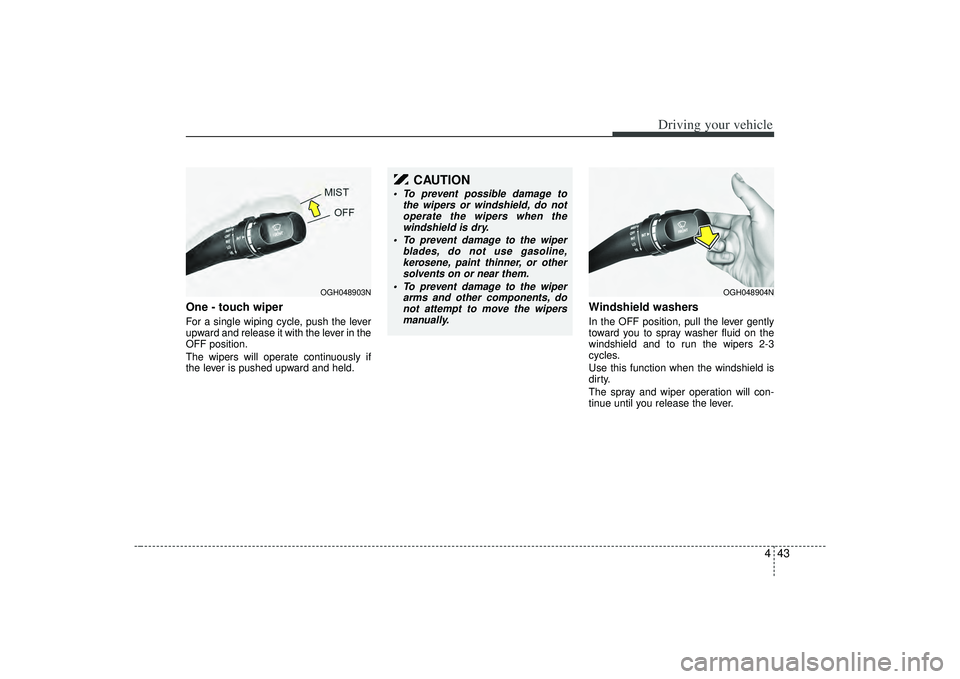
One - touch wiper For a single wiping cycle, push the lever
upward and release it with the lever in the
OFF position.
The wipers will operate continuously if
the lever is pushed upward and held.
Windshield washers In the OFF position, pull the lever gently
toward you to spray washer fluid on the
windshield and to run the wipers 2-3
cycles.
Use this function when the windshield is
dirty.
The spray and wiper operation will con-
tinue until you release the lever.
OGH048903N
CAUTION
To prevent possible damage tothe wipers or windshield, do notoperate the wipers when thewindshield is dry.
To prevent damage to the wiper blades, do not use gasoline,kerosene, paint thinner, or othersolvents on or near them.
To prevent damage to the wiper arms and other components, donot attempt to move the wipersmanually.
OGH048904N
Page 180 of 321

Driving your vehicle44
4If the washer does not work, check the
washer fluid level. If the fluid level is not
sufficient, you will need to add appropri-
ate non-abrasive windshield washer fluid
to the washer reservoir.
The reservoir filler neck is located in the
front of the engine compartment on the
passenger side.
The defroster heats the window to
remove frost, fog and thin ice from the
interior and exterior of the rear window,
while the engine is running.To activate the rear window defroster,
press the rear window defroster button
located in the heater contorl panel. The
indicator on the rear window defroster
button illuminates when the defroster is
ON.
If your vehicle is equipped with the front
windshield deicer, it will be operating at
the same time when you operate the rear
window defroster.
If there is heavy accumulation of snow on
the rear window, brush it off before oper-
ating the rear defroster.
The rear window defroster automatically
turns off after 20 minutes or when the
ignition switch is turned off. To turn off the
defroster, press the rear window
defroster button again.
WARNING
Do not use the washer in freezing
temperatures without first warming
the windshield with the defrosters;
the washer solution could freeze on
contact with the windshield and
obscure your vision.
DEFROSTER
OGH026044
CAUTION
To prevent possible damage to the
washer pump, do not operate thewasher when the fluid reservoir is empty.
Page 181 of 321
445
Driving your vehicle
✽
✽NOTICE• To prevent damage to the conductors
bonded to the inside surface of the
bottom of the front windshield and the
rear window, never use sharp instru-
ments or window cleaners containing
abrasives to clean the window.
• To prevent the battery from being dis- charged, operate the defroster only
while the engine is running.
• The front windshield defroster is designed to defrost wiper blades. If
you want to defrost and defog the
front windshield, refer to “Windshield
Defrosting and Defogging” in this sec-
tion.
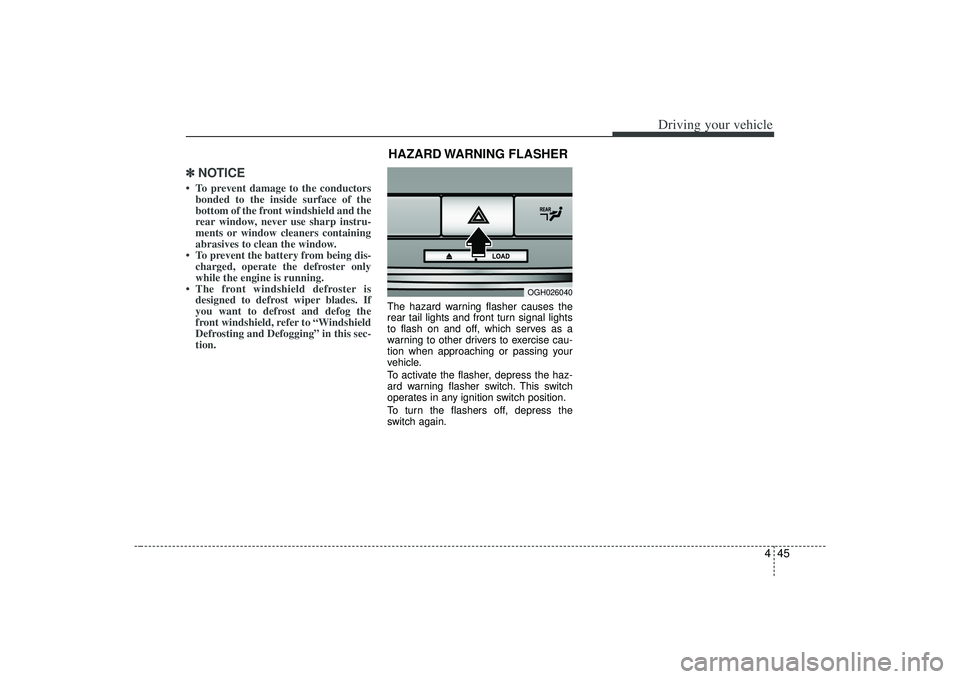
The hazard warning flasher causes the
rear tail lights and front turn signal lights
to flash on and off, which serves as a
warning to other drivers to exercise cau-
tion when approaching or passing your
vehicle.
To activate the flasher, depress the haz-
ard warning flasher switch. This switch
operates in any ignition switch position.
To turn the flashers off, depress the
switch again.
OGH026040
HAZARD WARNING FLASHER
Page 182 of 321
Driving your vehicle46
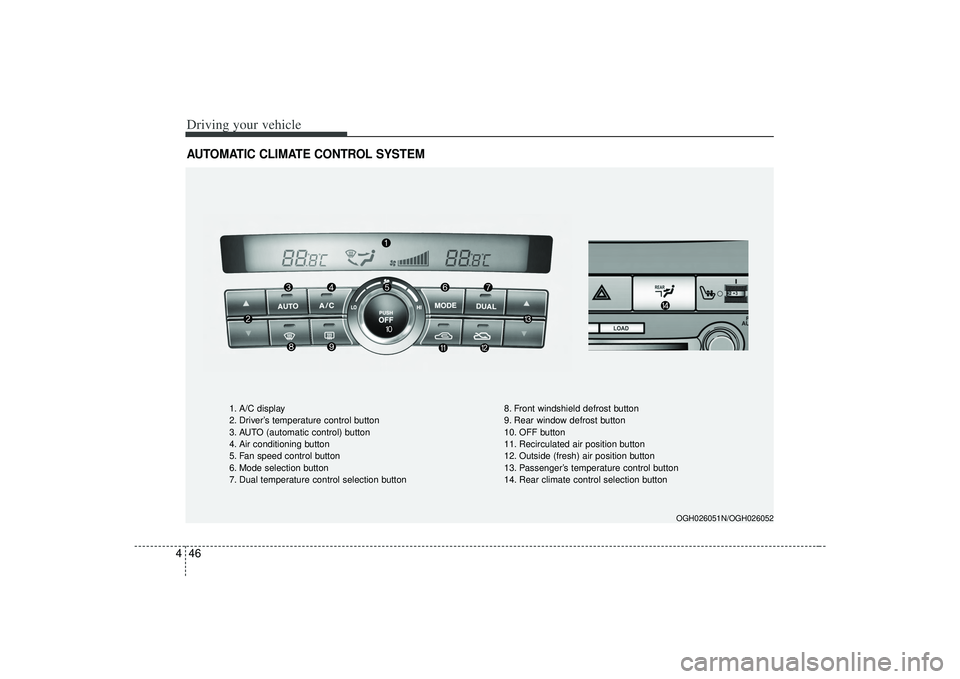
4AUTOMATIC CLIMATE CONTROL SYSTEM
OGH026051N/OGH026052
1. A/C display
2. Driver’s temperature control button
3. AUTO (automatic control) button
4. Air conditioning button
5. Fan speed control button
6. Mode selection button
7. Dual temperature control selection button 8. Front windshield defrost button
9. Rear window defrost button
10. OFF button
11. Recirculated air position button
12. Outside (fresh) air position button
13. Passenger’s temperature control button
14. Rear climate control selection button
Page 183 of 321

447
Driving your vehicle
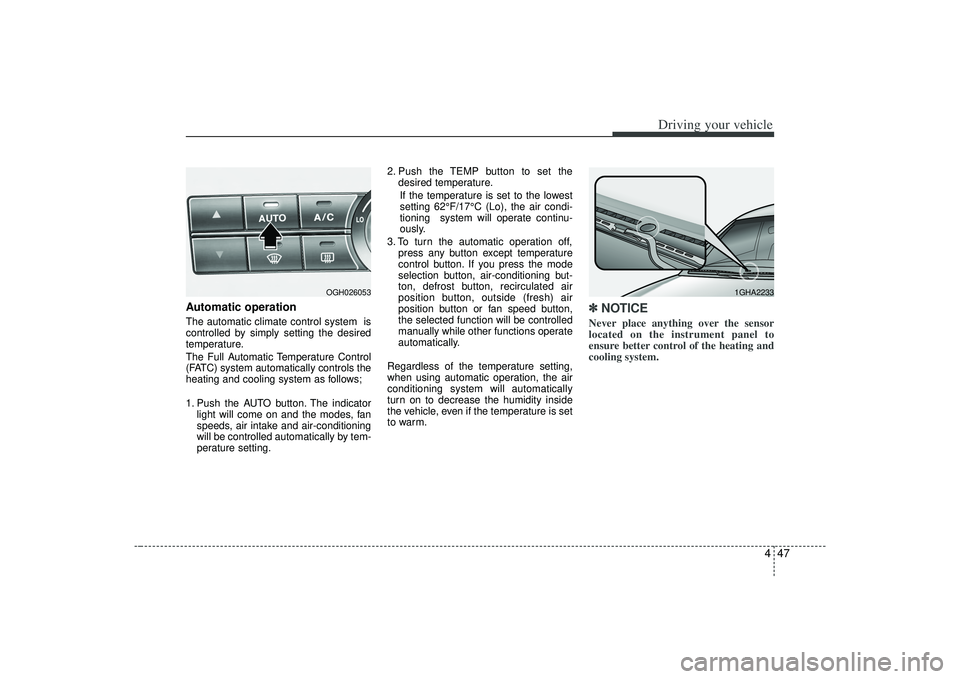
Automatic operationThe automatic climate control system is
controlled by simply setting the desired
temperature.
The Full Automatic Temperature Control
(FATC) system automatically controls the
heating and cooling system as follows;
1. Push the AUTO button. The indicatorlight will come on and the modes, fan
speeds, air intake and air-conditioning
will be controlled automatically by tem-
perature setting. 2. Push the TEMP button to set the
desired temperature.
If the temperature is set to the lowest
setting 62°F/17°C (Lo), the air condi-
tioning system will operate continu-
ously.
3. To turn the automatic operation off, press any button except temperature
control button. If you press the mode
selection button, air-conditioning but-
ton, defrost button, recirculated air
position button, outside (fresh) air
position button or fan speed button,
the selected function will be controlled
manually while other functions operate
automatically.
Regardless of the temperature setting,
when using automatic operation, the air
conditioning system will automatically
turn on to decrease the humidity inside
the vehicle, even if the temperature is set
to warm.
✽ ✽ NOTICENever place anything over the sensor
located on the instrument panel to
ensure better control of the heating and
cooling system.
OGH026053
1GHA2233
Page 184 of 321

Driving your vehicle48
4Manual operation The heating and cooling system can be
controlled manually as well by pushing
buttons other than the AUTO button. In
this case, the system works sequentially
according to the order of buttons select-
ed.
When pressing any button except AUTO,
the functions of the buttons not selected
will be controlled automatically.
Press the AUTO button in order to con-
vert to full automatic control of the sys-
tem.
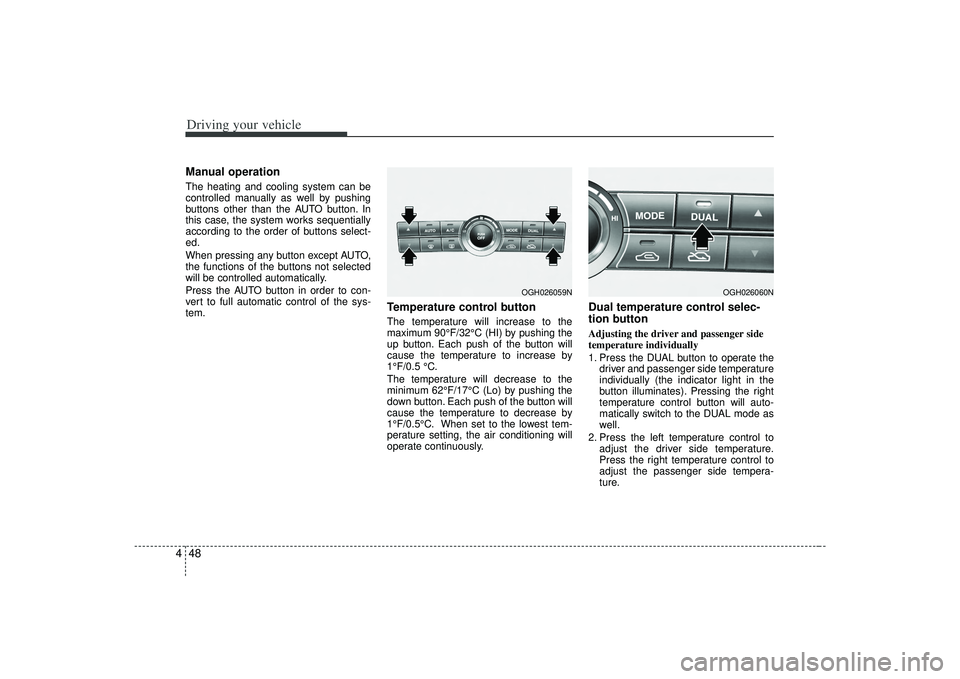
Temperature control buttonThe temperature will increase to the
maximum 90°F/32°C (HI) by pushing the
up button. Each push of the button will
cause the temperature to increase by
1°F/0.5 °C.
The temperature will decrease to the
minimum 62°F/17°C (Lo) by pushing the
down button. Each push of the button will
cause the temperature to decrease by
1°F/0.5°C. When set to the lowest tem-
perature setting, the air conditioning will
operate continuously.
Dual temperature control selec-
tion buttonAdjusting the driver and passenger side
temperature individually
1. Press the DUAL button to operate the
driver and passenger side temperature
individually (the indicator light in the
button illuminates). Pressing the right
temperature control button will auto-
matically switch to the DUAL mode as
well.
2. Press the left temperature control to adjust the driver side temperature.
Press the right temperature control to
adjust the passenger side tempera-
ture.
OGH026060N
OGH026059N