2007 INFINITI QX56 stop start
[x] Cancel search: stop startPage 2883 of 3061
TROUBLE DIAGNOSIS FOR SYSTEM
TF-61
< SERVICE INFORMATION >
C
E
F
G
H
I
J
K
L
MA
B
TF
N
O
P
Data are reference value.
TRANSFER CONTROL UNIT TERMINALS AND REFERENCE VALUE
Data are reference value and are measured between each terminal and ground.
CAUTION:
When using a circuit tester to measure voltage for inspection, be sure not to extend forcibly any connector terminals.
DIAGNOSTIC PROCEDURE
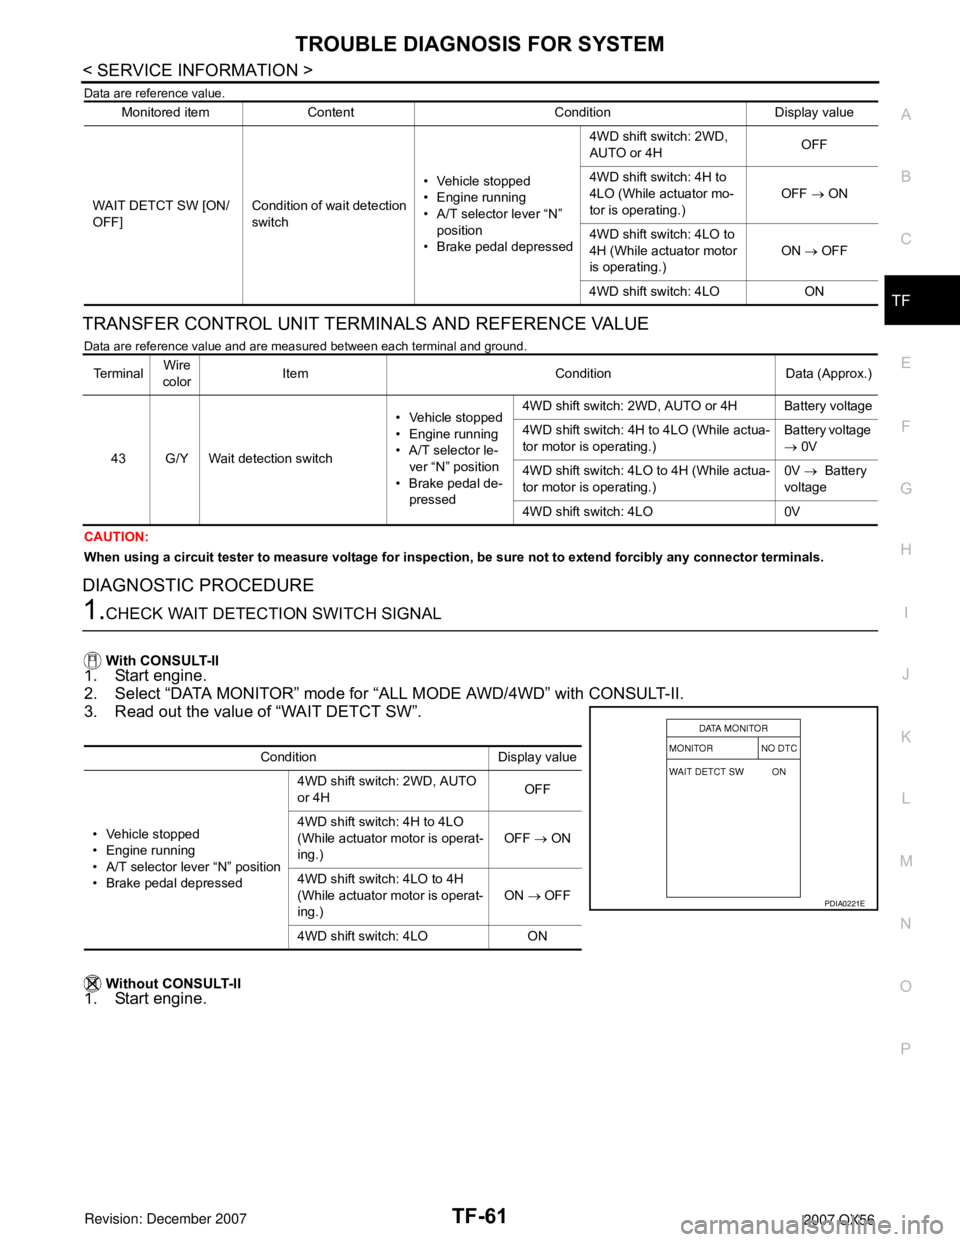
1.CHECK WAIT DETECTION SWITCH SIGNAL
With CONSULT-II
1. Start engine.
2. Select “DATA MONITOR” mode for “ALL MODE AWD/4WD” with CONSULT-II.
3. Read out the value of “WAIT DETCT SW”.
Without CONSULT-II
1. Start engine.
Monitored item Content Condition Display value
WAIT DETCT SW [ON/
OFF]Condition of wait detection
switch• Vehicle stopped
• Engine running
• A/T selector lever “N”
position
• Brake pedal depressed4WD shift switch: 2WD,
AUTO or 4HOFF
4WD shift switch: 4H to
4LO (While actuator mo-
tor is operating.)OFF → ON
4WD shift switch: 4LO to
4H (While actuator motor
is operating.)ON → OFF
4WD shift switch: 4LO ON
Te r m i n a lWire
colorItem Condition Data (Approx.)
43 G/Y Wait detection switch• Vehicle stopped
• Engine running
• A/T selector le-
ver “N” position
• Brake pedal de-
pressed4WD shift switch: 2WD, AUTO or 4H Battery voltage
4WD shift switch: 4H to 4LO (While actua-
tor motor is operating.)Battery voltage
→ 0V
4WD shift switch: 4LO to 4H (While actua-
tor motor is operating.)0V → Battery
voltage
4WD shift switch: 4LO 0V
Condition Display value
• Vehicle stopped
• Engine running
• A/T selector lever “N” position
• Brake pedal depressed4WD shift switch: 2WD, AUTO
or 4HOFF
4WD shift switch: 4H to 4LO
(While actuator motor is operat-
ing.)OFF → ON
4WD shift switch: 4LO to 4H
(While actuator motor is operat-
ing.)ON → OFF
4WD shift switch: 4LO ON
PDIA0221E
Page 2887 of 3061
TROUBLE DIAGNOSIS FOR SYSTEM
TF-65
< SERVICE INFORMATION >
C
E
F
G
H
I
J
K
L
MA
B
TF
N
O
P
CAUTION:
When using a circuit tester to measure voltage for inspection, be sure not to extend forcibly any connector terminals.
DIAGNOSTIC PROCEDURE
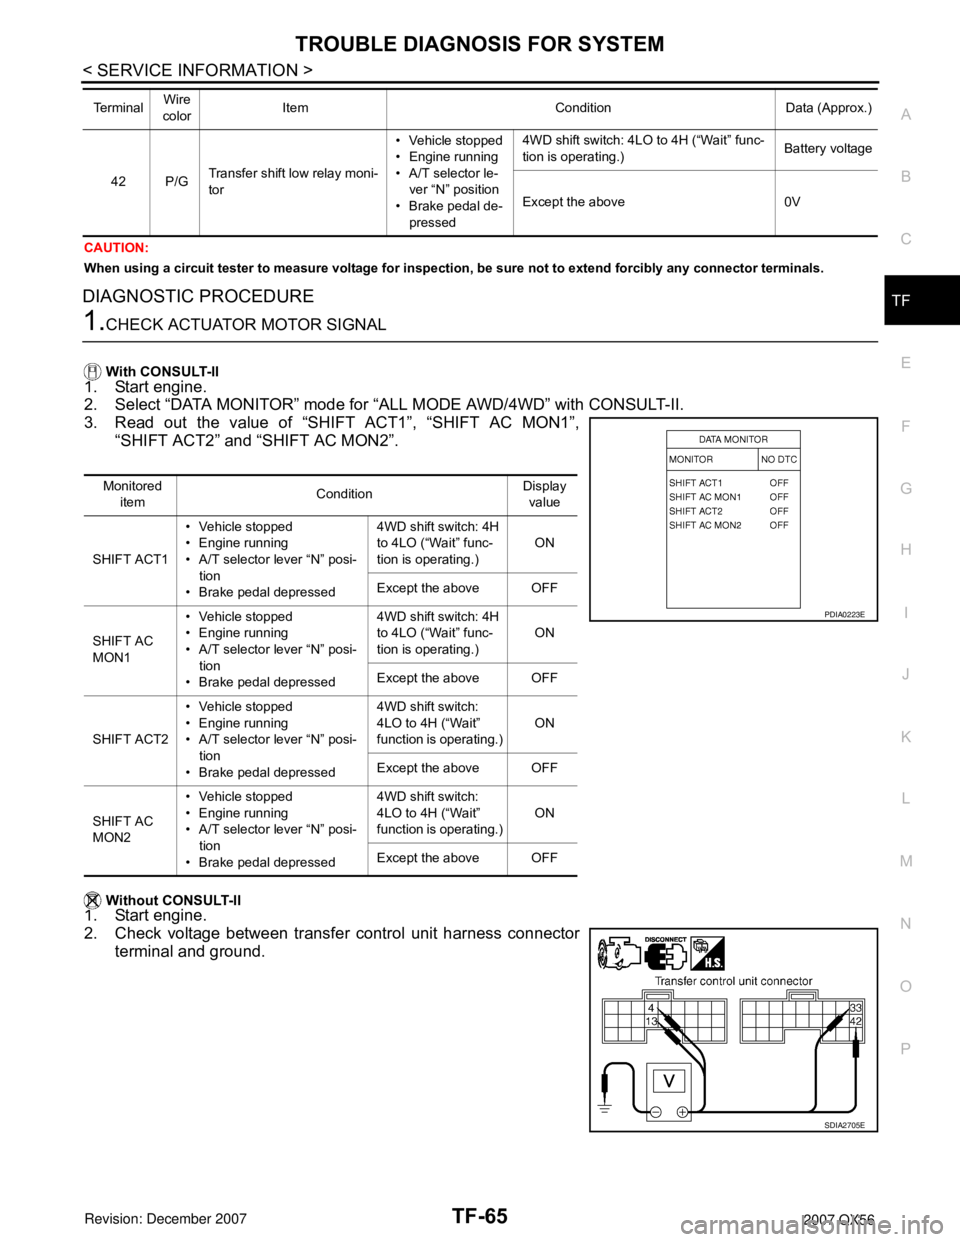
1.CHECK ACTUATOR MOTOR SIGNAL
With CONSULT-II
1. Start engine.
2. Select “DATA MONITOR” mode for “ALL MODE AWD/4WD” with CONSULT-II.
3. Read out the value of “SHIFT ACT1”, “SHIFT AC MON1”,
“SHIFT ACT2” and “SHIFT AC MON2”.
Without CONSULT-II
1. Start engine.
2. Check voltage between transfer control unit harness connector
terminal and ground.
42 P/GTransfer shift low relay moni-
tor• Vehicle stopped
• Engine running
• A/T selector le-
ver “N” position
• Brake pedal de-
pressed4WD shift switch: 4LO to 4H (“Wait” func-
tion is operating.)Battery voltage
Except the above 0V Te r m i n a lWire
colorItem Condition Data (Approx.)
Monitored
itemConditionDisplay
value
SHIFT ACT1• Vehicle stopped
• Engine running
• A/T selector lever “N” posi-
tion
• Brake pedal depressed4WD shift switch: 4H
to 4LO (“Wait” func-
tion is operating.)ON
Except the above OFF
SHIFT AC
MON1• Vehicle stopped
• Engine running
• A/T selector lever “N” posi-
tion
• Brake pedal depressed4WD shift switch: 4H
to 4LO (“Wait” func-
tion is operating.)ON
Except the above OFF
SHIFT ACT2• Vehicle stopped
• Engine running
• A/T selector lever “N” posi-
tion
• Brake pedal depressed4WD shift switch:
4LO to 4H (“Wait”
function is operating.)ON
Except the above OFF
SHIFT AC
MON2• Vehicle stopped
• Engine running
• A/T selector lever “N” posi-
tion
• Brake pedal depressed4WD shift switch:
4LO to 4H (“Wait”
function is operating.)ON
Except the above OFF
PDIA0223E
SDIA2705E
Page 2888 of 3061
TF-66
< SERVICE INFORMATION >
TROUBLE DIAGNOSIS FOR SYSTEM
OK or NG
OK >> GO TO 7.
NG >> GO TO 2.
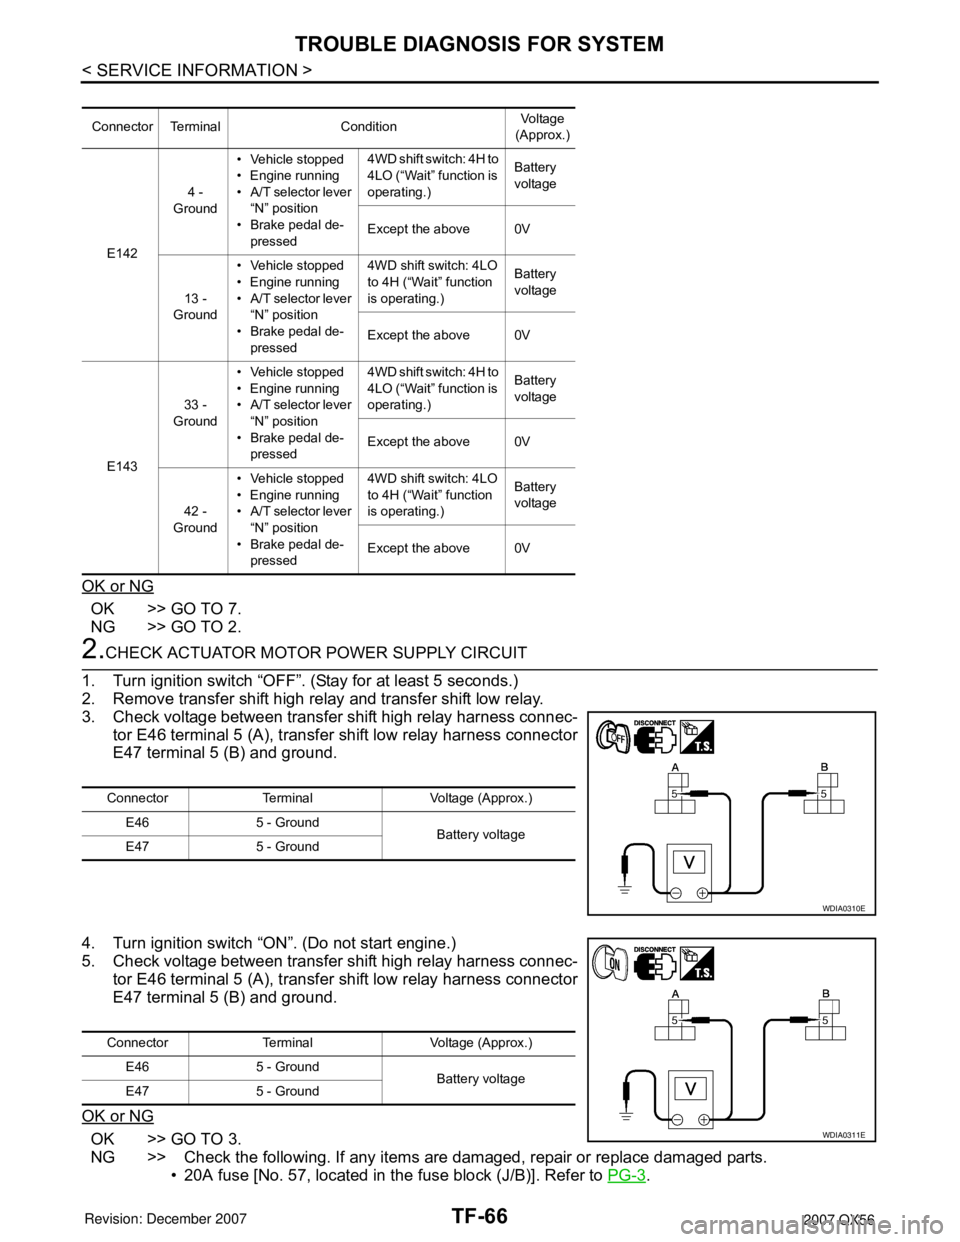
2.CHECK ACTUATOR MOTOR POWER SUPPLY CIRCUIT
1. Turn ignition switch “OFF”. (Stay for at least 5 seconds.)
2. Remove transfer shift high relay and transfer shift low relay.
3. Check voltage between transfer shift high relay harness connec-
tor E46 terminal 5 (A), transfer shift low relay harness connector
E47 terminal 5 (B) and ground.
4. Turn ignition switch “ON”. (Do not start engine.)
5. Check voltage between transfer shift high relay harness connec-
tor E46 terminal 5 (A), transfer shift low relay harness connector
E47 terminal 5 (B) and ground.
OK or NG
OK >> GO TO 3.
NG >> Check the following. If any items are damaged, repair or replace damaged parts.
• 20A fuse [No. 57, located in the fuse block (J/B)]. Refer to PG-3
.
Connector Terminal ConditionVoltage
(Approx.)
E1424 -
Ground• Vehicle stopped
• Engine running
• A/T selector lever
“N” position
• Brake pedal de-
pressed4WD shift switch: 4H to
4LO (“Wait” function is
operating.)Battery
voltage
Except the above 0V
13 -
Ground• Vehicle stopped
• Engine running
• A/T selector lever
“N” position
• Brake pedal de-
pressed4WD shift switch: 4LO
to 4H (“Wait” function
is operating.)Battery
voltage
Except the above 0V
E14333 -
Ground• Vehicle stopped
• Engine running
• A/T selector lever
“N” position
• Brake pedal de-
pressed4WD shift switch: 4H to
4LO (“Wait” function is
operating.)Battery
voltage
Except the above 0V
42 -
Ground• Vehicle stopped
• Engine running
• A/T selector lever
“N” position
• Brake pedal de-
pressed4WD shift switch: 4LO
to 4H (“Wait” function
is operating.)Battery
voltage
Except the above 0V
Connector Terminal Voltage (Approx.)
E46 5 - Ground
Battery voltage
E47 5 - Ground
WDIA0310E
Connector Terminal Voltage (Approx.)
E46 5 - Ground
Battery voltage
E47 5 - Ground
WDIA0311E
Page 2892 of 3061
TF-70
< SERVICE INFORMATION >
TROUBLE DIAGNOSIS FOR SYSTEM
Data are reference value.
TRANSFER CONTROL UNIT TERMINALS AND REFERENCE VALUE
Data are reference value and are measured between each terminal and ground.
CAUTION:
When using a circuit tester to measure voltage for inspection, be sure not to extend forcibly any connector terminals.
DIAGNOSTIC PROCEDURE
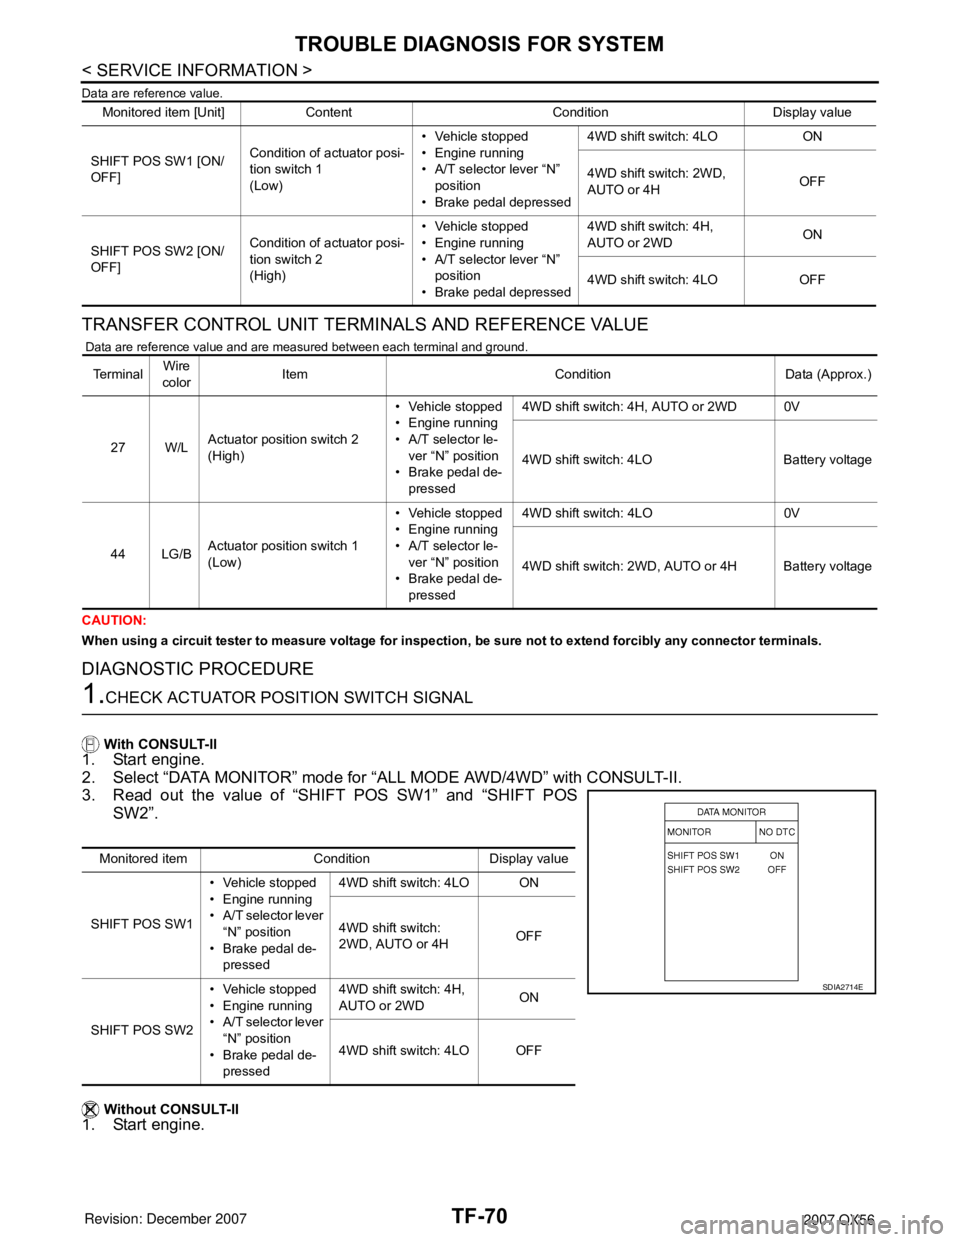
1.CHECK ACTUATOR POSITION SWITCH SIGNAL
With CONSULT-II1. Start engine.
2. Select “DATA MONITOR” mode for “ALL MODE AWD/4WD” with CONSULT-II.
3. Read out the value of “SHIFT POS SW1” and “SHIFT POS
SW2”.
Without CONSULT-II
1. Start engine.
Monitored item [Unit] Content Condition Display value
SHIFT POS SW1 [ON/
OFF]Condition of actuator posi-
tion switch 1
(Low)• Vehicle stopped
• Engine running
• A/T selector lever “N”
position
• Brake pedal depressed4WD shift switch: 4LO ON
4WD shift switch: 2WD,
AUTO or 4HOFF
SHIFT POS SW2 [ON/
OFF]Condition of actuator posi-
tion switch 2
(High)• Vehicle stopped
• Engine running
• A/T selector lever “N”
position
• Brake pedal depressed4WD shift switch: 4H,
AUTO or 2WDON
4WD shift switch: 4LO OFF
Te r m i n a lWire
colorItem Condition Data (Approx.)
27 W/LActuator position switch 2
(High)• Vehicle stopped
• Engine running
• A/T selector le-
ver “N” position
• Brake pedal de-
pressed4WD shift switch: 4H, AUTO or 2WD 0V
4WD shift switch: 4LO Battery voltage
44 LG/BActuator position switch 1
(Low)• Vehicle stopped
• Engine running
• A/T selector le-
ver “N” position
• Brake pedal de-
pressed4WD shift switch: 4LO 0V
4WD shift switch: 2WD, AUTO or 4H Battery voltage
Monitored item Condition Display value
SHIFT POS SW1• Vehicle stopped
• Engine running
• A/T selector lever
“N” position
• Brake pedal de-
pressed4WD shift switch: 4LO ON
4WD shift switch:
2WD, AUTO or 4HOFF
SHIFT POS SW2• Vehicle stopped
• Engine running
• A/T selector lever
“N” position
• Brake pedal de-
pressed4WD shift switch: 4H,
AUTO or 2WDON
4WD shift switch: 4LO OFF
SDIA2714E
Page 2898 of 3061

TF-76
< SERVICE INFORMATION >
TROUBLE DIAGNOSIS FOR SYSTEM
7.PERFORM SELF-DIAGNOSIS (WITH CONSULT-II)
With CONSULT-II
1. Turn ignition switch “ON”. (Do not start engine.)
2. Select “SELF-DIAG RESULTS” mode for “ALL MODE AWD/4WD” with CONSULT-II.
3. Touch “ERASE”.
4. Turn ignition switch “OFF” and wait at least 10 seconds.
5. Perform the self-diagnosis again.
Is the
“SHIFT ACT CIR [P1819]” displayed?
YES >> Replace transfer control unit. Refer to TF-115, "Removal and Installation".
NO >> Inspection End.
8.PERFORM SELF-DIAGNOSIS (WITHOUT CONSULT-II)
Without CONSULT-II1. Perform the self-diagnosis and then erase self-diagnostic results. Refer to TF-48, "Self-Diagnosis Proce-
dure" and TF-48, "Self-Diagnosis Procedure".
2. Perform the self-diagnosis again.
Do the self-diagnostic results indicate transfer control device?
YES >> Replace transfer control unit. Refer to TF-121, "Removal and Installation".
NO >> Inspection End.
Engine Speed Signal (ECM)INFOID:0000000003532540
DIAGNOSTIC PROCEDURE
1.CHECK DTC WITH ECM
Perform self-diagnosis with ECM. Refer to E C - 111 , "
CONSULT-II Function (ENGINE)" .
Is any malfunction detected by self-diagnosis?
YES >> Check the malfunctioning system.
NO >> GO TO 2.
2.CHECK TRANSFER CONTROL UNIT
Check transfer control unit input/output signal. Refer to TF-35, "
Transfer Control Unit Input/Output Signal Ref-
erence Value".
OK or NG
OK >> GO TO 3.
NG >> Check transfer control unit pin terminals for damage or loose connection with harness connector.
If any items are damaged, repair or replace damaged parts.
3.CHECK DTC
Perform the self-diagnosis, after driving a vehicle for a while.
OK or NG
OK >> Inspection End.
NG >> Perform self-diagnosis with ECM again. Refer to E C - 111 , "
CONSULT-II Function (ENGINE)" .
Clutch Pressure SolenoidINFOID:0000000003532541
CONSULT-II REFERENCE VALUE IN DATA MONITOR MODE
Data are reference value.
TRANSFER CONTROL UNIT TERMINALS AND REFERENCE VALUE
Monitored item Content Condition Display value
DUTY SOLENOID [%]Condition of clutch pres-
sure solenoid• Vehicle stopped
• Engine running
• A/T selector lever “N”
position
• Brake pedal depressed4WD shift switch: 2WD 4%
4WD shift switch: AUTO 96 - 4%
4WD shift switch: 4H or
4LO4%
Page 2899 of 3061
TROUBLE DIAGNOSIS FOR SYSTEM
TF-77
< SERVICE INFORMATION >
C
E
F
G
H
I
J
K
L
MA
B
TF
N
O
P
Data are reference value and are measured between each terminal and ground.
CAUTION:
When using a circuit tester to measure voltage for inspection, be sure not to extend forcibly any connector terminals.
DIAGNOSTIC PROCEDURE
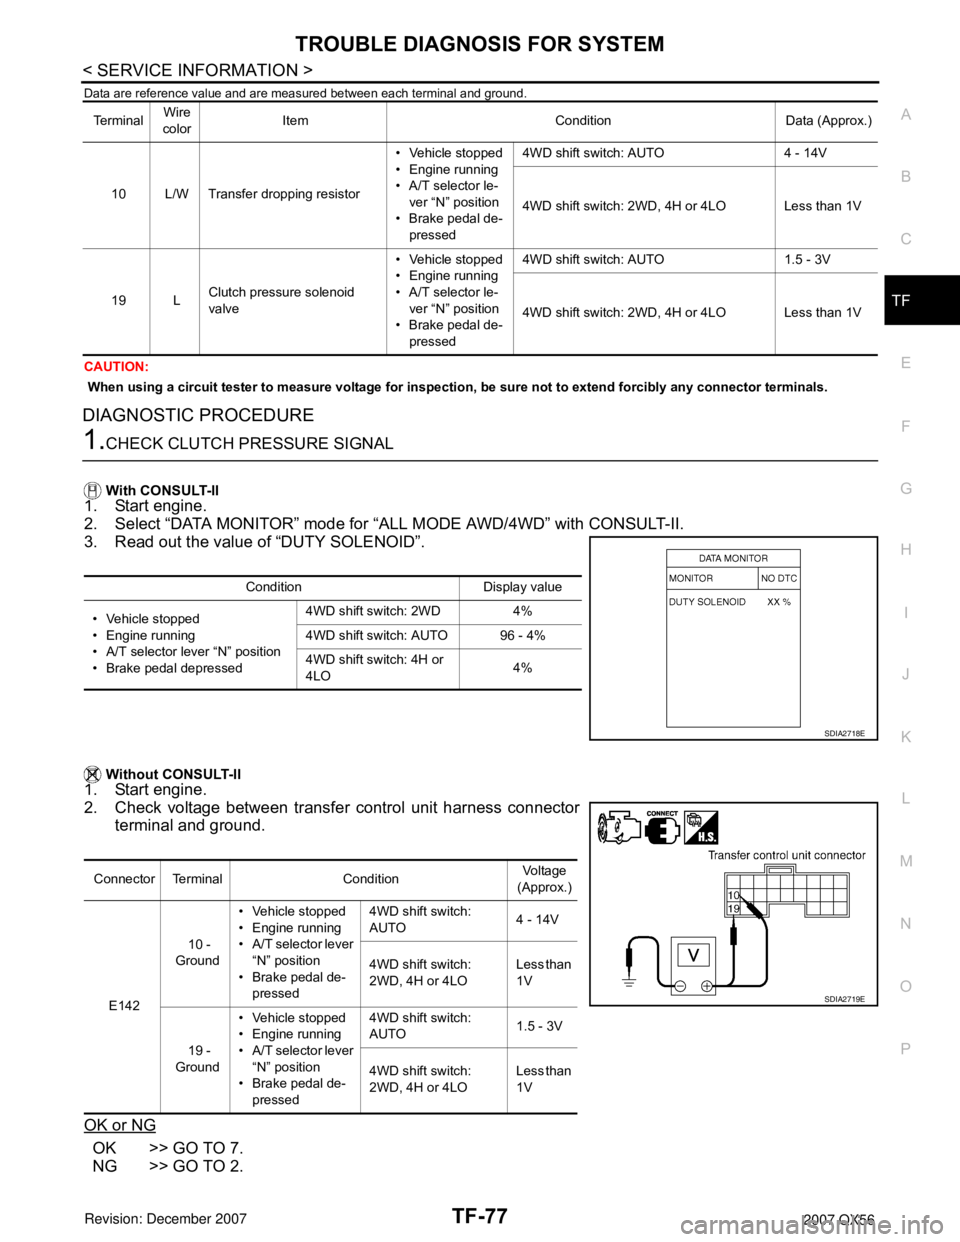
1.CHECK CLUTCH PRESSURE SIGNAL
With CONSULT-II1. Start engine.
2. Select “DATA MONITOR” mode for “ALL MODE AWD/4WD” with CONSULT-II.
3. Read out the value of “DUTY SOLENOID”.
Without CONSULT-II
1. Start engine.
2. Check voltage between transfer control unit harness connector
terminal and ground.
OK or NG
OK >> GO TO 7.
NG >> GO TO 2.
Te r m i n a lWire
colorItem Condition Data (Approx.)
10 L/W Transfer dropping resistor• Vehicle stopped
• Engine running
• A/T selector le-
ver “N” position
• Brake pedal de-
pressed4WD shift switch: AUTO 4 - 14V
4WD shift switch: 2WD, 4H or 4LO Less than 1V
19 LClutch pressure solenoid
valve• Vehicle stopped
• Engine running
• A/T selector le-
ver “N” position
• Brake pedal de-
pressed4WD shift switch: AUTO 1.5 - 3V
4WD shift switch: 2WD, 4H or 4LO Less than 1V
Condition Display value
• Vehicle stopped
• Engine running
• A/T selector lever “N” position
• Brake pedal depressed4WD shift switch: 2WD 4%
4WD shift switch: AUTO 96 - 4%
4WD shift switch: 4H or
4LO4%
SDIA2718E
Connector Terminal ConditionVoltage
(Approx.)
E142 10 -
Ground• Vehicle stopped
• Engine running
• A/T selector lever
“N” position
• Brake pedal de-
pressed4WD shift switch:
AUTO4 - 14V
4WD shift switch:
2WD, 4H or 4LOLess than
1V
19 -
Ground• Vehicle stopped
• Engine running
• A/T selector lever
“N” position
• Brake pedal de-
pressed4WD shift switch:
AUTO1.5 - 3V
4WD shift switch:
2WD, 4H or 4LOLess than
1V
SDIA2719E
Page 2903 of 3061
TROUBLE DIAGNOSIS FOR SYSTEM
TF-81
< SERVICE INFORMATION >
C
E
F
G
H
I
J
K
L
MA
B
TF
N
O
P
Data are reference value and are measured between each terminal and ground.
CAUTION:
When using a circuit tester to measure voltage for inspection, be sure not to extend forcibly any connector terminals.
DIAGNOSTIC PROCEDURE
1.CHECK 4WD SHIFT SWITCH SYSTEM
Perform self-diagnosis. Refer to TF-48, "
Self-Diagnosis Procedure".
Is the "4WD MOD SW [P1814]" (with CONSULT-II) or "Flickering pattern: 16 (without CONSULT-II) detected?
YES >> Perform trouble diagnosis for 4WD shift switch. Refer to TF-57, "4WD Shift Switch".
NO >> GO TO 2.
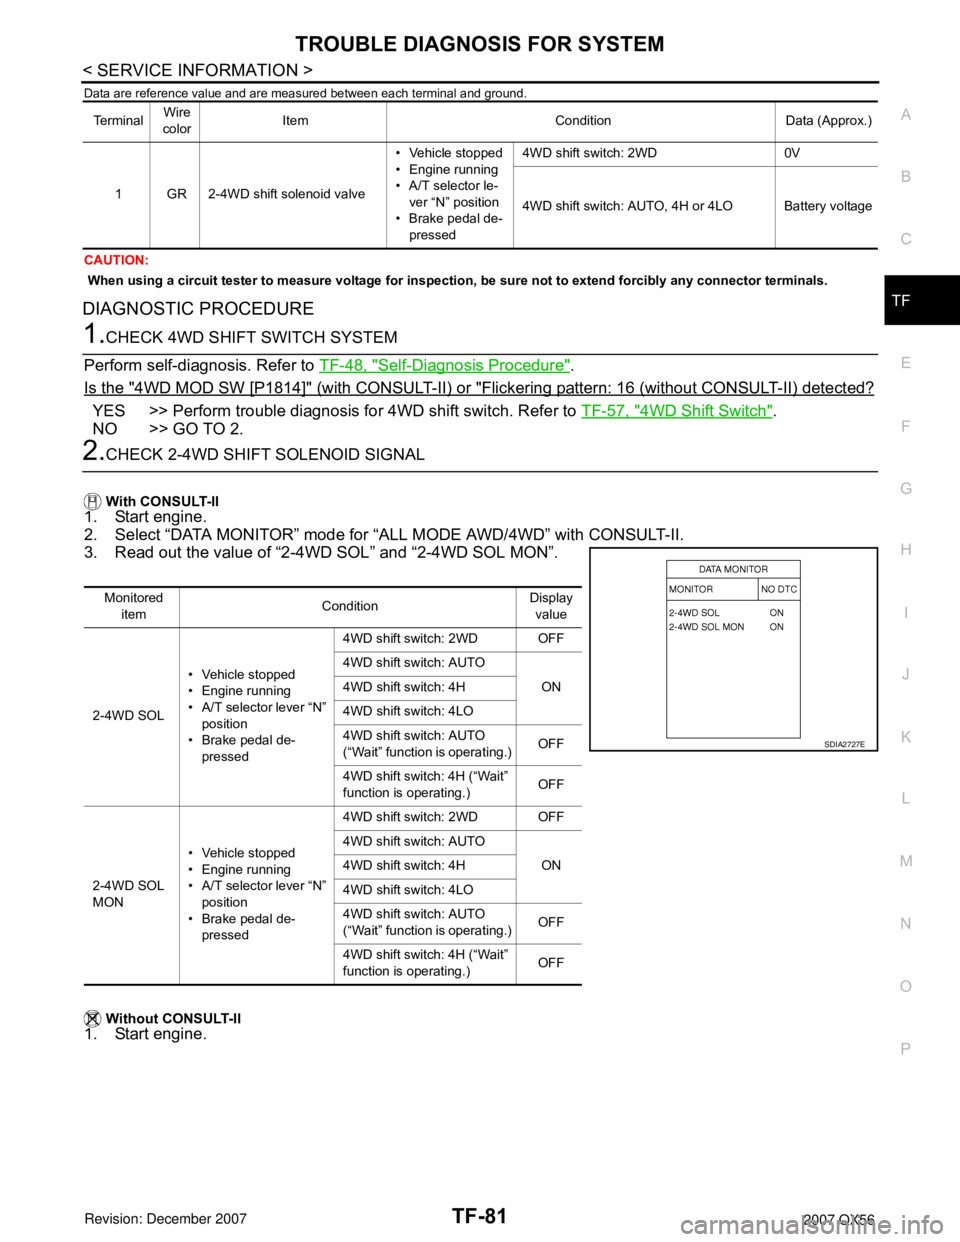
2.CHECK 2-4WD SHIFT SOLENOID SIGNAL
With CONSULT-II
1. Start engine.
2. Select “DATA MONITOR” mode for “ALL MODE AWD/4WD” with CONSULT-II.
3. Read out the value of “2-4WD SOL” and “2-4WD SOL MON”.
Without CONSULT-II
1. Start engine.
Te r m i n a lWire
colorItem Condition Data (Approx.)
1 GR 2-4WD shift solenoid valve• Vehicle stopped
• Engine running
• A/T selector le-
ver “N” position
• Brake pedal de-
pressed4WD shift switch: 2WD 0V
4WD shift switch: AUTO, 4H or 4LO Battery voltage
Monitored
itemConditionDisplay
value
2-4WD SOL• Vehicle stopped
• Engine running
• A/T selector lever “N”
position
• Brake pedal de-
pressed4WD shift switch: 2WD OFF
4WD shift switch: AUTO
ON 4WD shift switch: 4H
4WD shift switch: 4LO
4WD shift switch: AUTO
(“Wait” function is operating.)OFF
4WD shift switch: 4H (“Wait”
function is operating.)OFF
2-4WD SOL
MON• Vehicle stopped
• Engine running
• A/T selector lever “N”
position
• Brake pedal de-
pressed4WD shift switch: 2WD OFF
4WD shift switch: AUTO
ON 4WD shift switch: 4H
4WD shift switch: 4LO
4WD shift switch: AUTO
(“Wait” function is operating.)OFF
4WD shift switch: 4H (“Wait”
function is operating.)OFF
SDIA2727E
Page 2904 of 3061
TF-82
< SERVICE INFORMATION >
TROUBLE DIAGNOSIS FOR SYSTEM
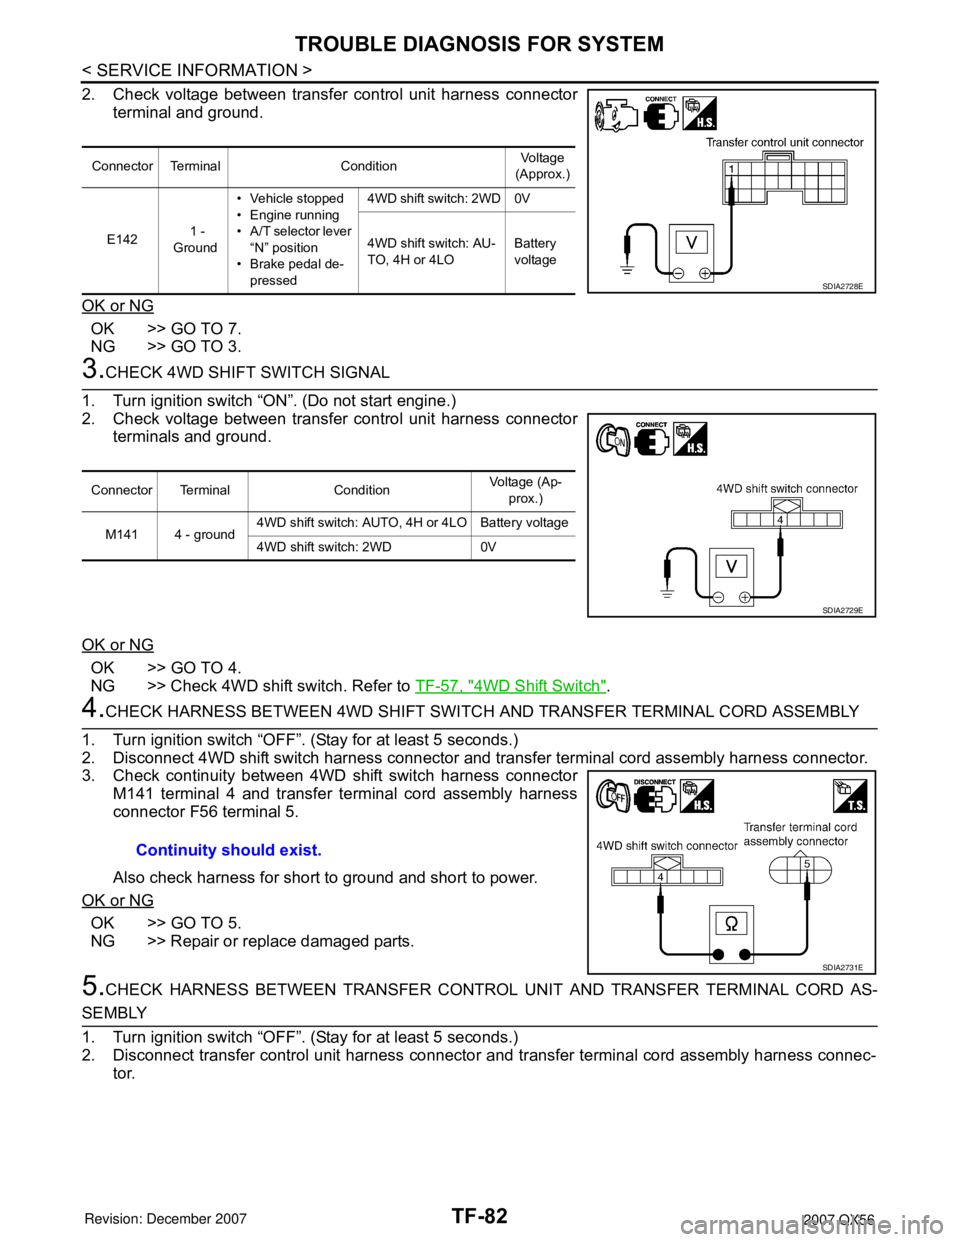
2. Check voltage between transfer control unit harness connector
terminal and ground.
OK or NG
OK >> GO TO 7.
NG >> GO TO 3.
3.CHECK 4WD SHIFT SWITCH SIGNAL
1. Turn ignition switch “ON”. (Do not start engine.)
2. Check voltage between transfer control unit harness connector
terminals and ground.
OK or NG
OK >> GO TO 4.
NG >> Check 4WD shift switch. Refer to TF-57, "
4WD Shift Switch".
4.CHECK HARNESS BETWEEN 4WD SHIFT SWITCH AND TRANSFER TERMINAL CORD ASSEMBLY
1. Turn ignition switch “OFF”. (Stay for at least 5 seconds.)
2. Disconnect 4WD shift switch harness connector and transfer terminal cord assembly harness connector.
3. Check continuity between 4WD shift switch harness connector
M141 terminal 4 and transfer terminal cord assembly harness
connector F56 terminal 5.
Also check harness for short to ground and short to power.
OK or NG
OK >> GO TO 5.
NG >> Repair or replace damaged parts.
5.CHECK HARNESS BETWEEN TRANSFER CONTROL UNIT AND TRANSFER TERMINAL CORD AS-
SEMBLY
1. Turn ignition switch “OFF”. (Stay for at least 5 seconds.)
2. Disconnect transfer control unit harness connector and transfer terminal cord assembly harness connec-
tor.
Connector Terminal ConditionVoltage
(Approx.)
E142 1 -
Ground• Vehicle stopped
• Engine running
• A/T selector lever
“N” position
• Brake pedal de-
pressed4WD shift switch: 2WD 0V
4WD shift switch: AU-
TO, 4H or 4LOBattery
voltage
SDIA2728E
Connector Terminal ConditionVoltage (Ap-
prox.)
M141 4 - ground4WD shift switch: AUTO, 4H or 4LO Battery voltage
4WD shift switch: 2WD 0V
SDIA2729E
Continuity should exist.
SDIA2731E