Page 113 of 173
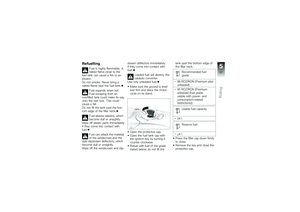
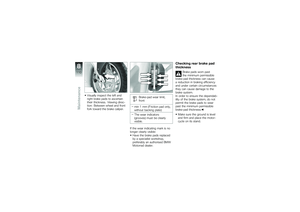
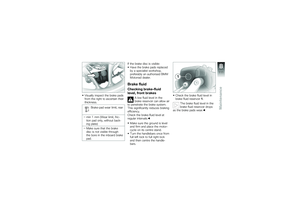
Visually inspect the brake pads
from the right to ascertain their
thickness.Brake-pad wear limit, rear
min 1 mm (Wear limit, fric-
tion pad only, without back-
ing plate)
Make sure that the brake
disc is not visible through
the bore in the inboard brake
pad. If the brake disc is visible:
Have the brake pads replaced
by a specialist workshop,
preferably an authorised BMW
Motorrad dealer.
Brake fluidChecking brake-fluid
level, front brakes
A low fluid level in the
brake reservoir can allow air
to penetrate the brake system.
This significantly reduces braking
efficiency.
Check the brake-fluid level at
regular intervals.
Make sure the ground is level
and firm and place the motor-
cycle on its centre stand.
Turn the handlebars once from
full left lock to full right lock
and then centre the handle-
bars. Check the brake fluid level in
brake fluid reservoir
1.
The brake fluid level in the
brake fluid reservoir drops
as the brake pads wear.
8111zMaintenance
Page 114 of 173
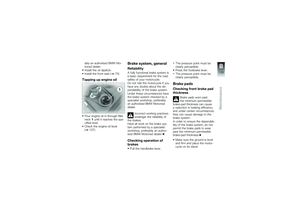
Brake fluid level, front
DOT4 brake fluid
Do not permit the brake fluid
level to drop below the MIN
mark. (Brake-fluid reservoir
horizontal. Before reading
the level, swing the handle-
bars once from full left lock
to full right lock.)
If the brake fluid level drops be-
low the permitted level: Have the defect rectified as
quickly as possible by a spe- cialist workshop, preferably
an authorised BMW Motorrad
dealer.
Checking brake-fluid
level, rear brakes
A low fluid level in the
brake reservoir can allow air
to penetrate the brake system.
This significantly reduces braking
efficiency.
Check the brake-fluid level at
regular intervals.
Make sure the ground is level
and firm and place the motor-
cycle on its centre stand. Check the brake fluid level in
brake fluid reservoir
1.
The brake fluid level in the
brake fluid reservoir drops
as the brake pads wear.
8112zMaintenance
Page 115 of 173

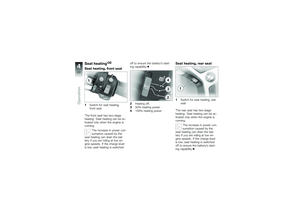
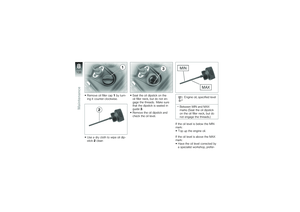
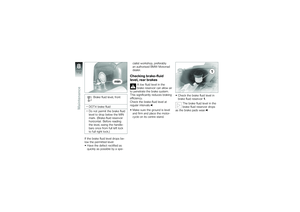
Brake fluid level, rear
DOT4 brake fluid
Do not permit the brake fluid
level to drop below the MIN
mark. (Brake-fluid reservoir
horizontal)
If the brake fluid level drops be-
low the permitted level: Have the defect rectified as
quickly as possible by a spe-
cialist workshop, preferably
an authorised BMW Motorrad
dealer.
ClutchChecking clutch operationPull the clutch lever.
The pressure point must be
clearly perceptible.
If the pressure point is not clearly
perceptible: Have the clutch checked by a
specialist workshop, preferably
an authorised BMW Motorrad
dealer.TyresMeasuring tread depth of
tyres
Your motorcycle's handling
and grip can be impaired
even before the tyres wear to
the minimum tyre tread depth
permitted by law.
Have the tyres changed in good
time before they wear to the
minimum permissible tread
depth. Make sure the ground is level
and firm and place the motor-
cycle on its stand.
Measure the tyre tread depth
in the main tread grooves with
wear marks.
Tyres have wear indicators
integrated into the main
tread grooves. The tyre is worn
out when the tyre tread has worn
down to the level of the marks.
The locations of the marks are
indicated on the edge of the tyre,
e.g. by the letters TI, TWI or by
an arrow.
If the tyre tread no longer com-
plies with the minimum legally
required tread depth:
Replace tyre or tyres, as applic-
able.
8113zMaintenance
Page 116 of 173

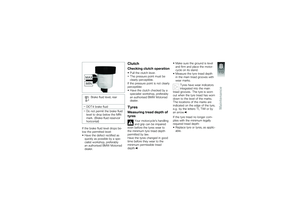
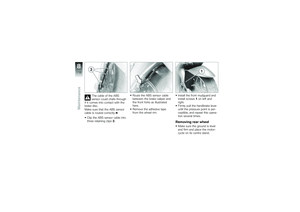
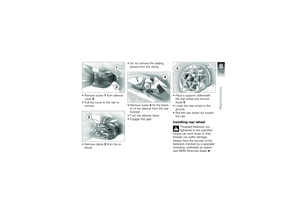
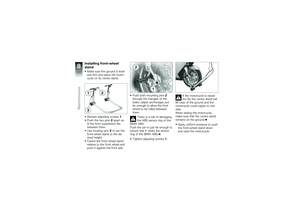
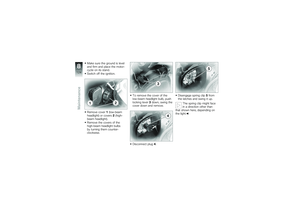
RimsVisual inspectionMake sure the ground is level
and firm and place the motor-
cycle on its stand.
Visually inspect the rims for
defects.
Have damaged rims checked
and, if necessary, replaced by a
specialist workshop, preferably
an authorised BMW Motorrad
dealer.WheelsRecommended tyresFor each size of tyre BMW Mo-
torrad tests certain makes, and
approves those that it certifies
as roadworthy. If BMW Motorrad
has not approved the wheels and
tyres, it cannot assess their suit-
ability or provide any guarantee
of road safety.Use only wheels and tyres ap-
proved by BMW Motorrad for
your type of motorcycle.
You can obtain detailed informa-
tion from your authorised BMW
Motorrad dealer or on the Inter-
net at www.bmw-motorrad.com.
RDC label
OE
Incorrect tyre-removal pro-
cedures can result in dam-
age to the RDC sensors.
Be sure to notify the authorised
BMW Motorrad dealer or spe-
cialist workshop that the wheel is
fitted with an RDC sensor. If the motorcycle is equipped
with RDC, each wheel rim bears
an adhesive label indicating the
position of the RDC sensor.
When changing the tyre, take
care not to damage the RDC
sensor. Be sure to draw the
attention of the authorised BMW
Motorrad dealer or specialist
workshop to the fact that the
wheel is fitted with an RDC
sensor.
Remove the front wheelMake sure the ground is level
and firm and place the motor-
cycle on its centre stand.
8114zMaintenance
Page 117 of 173
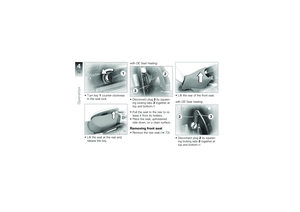
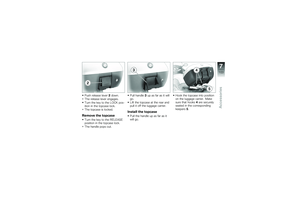
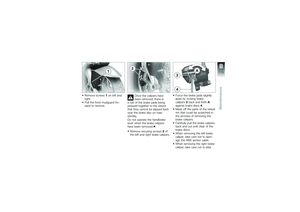
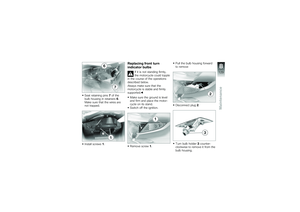
Remove screws1on left and
right.
Pull the front mudguard for-
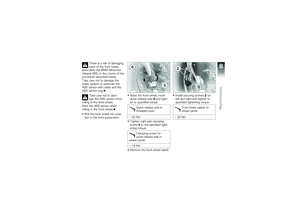
ward to remove. Once the calipers have
been removed, there is
a risk of the brake pads being
pressed together to the extent
that they cannot be slipped back
over the brake disc on reas-
sembly.
Do not operate the handbrake
lever when the brake calipers
have been removed.
Remove securing screws 2of
the left and right brake calipers. Force the brake pads slightly
apart by rocking brake
calipers
3back and forth A
against brake discs 4.
Mask off the parts of the wheel
rim that could be scratched in
the process of removing the
brake calipers.
Carefully pull the brake calipers
back and out until clear of the
brake discs.
When removing the left brake
caliper, take care not to dam-
age the ABS sensor cable.
When removing the right brake
caliper, take care not to alter
8115zMaintenance
Page 118 of 173

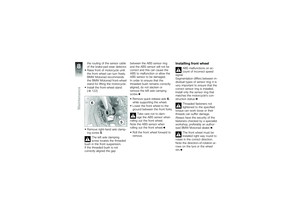
the routing of the sensor cable
of the brake-pad wear detector.
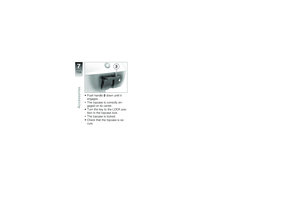
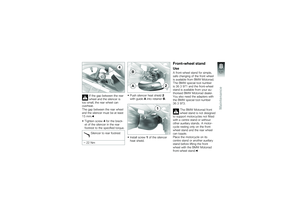
Raise front of motorcycle until
the front wheel can turn freely.
BMW Motorrad recommends
the BMW Motorrad front-wheel
stand for lifting the motorcycle.
Install the front-wheel stand
( 122)
Remove right-hand axle clamp-
ing screw5.
The left axle clamping
screw locates the threaded
bush in the front suspension.
If the threaded bush is not
correctly aligned the gap between the ABS sensor ring
and the ABS sensor will not be
correct and this can cause the
ABS to malfunction or allow the
ABS sensor to be damaged.
In order to ensure that the
threaded bush remains correctly
aligned, do not slacken or
remove the left axle camping
screw.
Remove quick-release axle 6,
while supporting the wheel.
Lower the front wheel to the
ground between the front forks.
Take care not to dam-
age the ABS sensor when
rolling out the front wheel.
Note the ABS sensor when
rolling out the front wheel.
Roll the front wheel forward to
remove.
Installing front wheel
ABS malfunctions on ac-
count of incorrect speed
signal.
Segmentation differs between in-
dividual types of sensor ring; it is
very important to ensure that the
correct sensor ring is installed.
Install only the sensor ring that
matches the motorcycle's con-
struction status.
Threaded fasteners not
tightened to the specified
torque can work loose or their
threads can suffer damage.
Always have the security of the
fasteners checked by a specialist
workshop, preferably an author-
ised BMW Motorrad dealer.
The front wheel must be
installed right way round to
rotate in the correct direction.
Note the direction-of-rotation ar-
rows on the tyre or the wheel
rim.
8116zMaintenance
Page 119 of 173
There is a risk of damaging
parts of the front brake,
particularly the BMW Motorrad
Integral ABS, in the course of the
procedure described below.
Take care not to damage the
brake system, in particular the
ABS sensor with cable and the
ABS sensor ring.
Take care not to dam-
age the ABS sensor when
rolling in the front wheel.
Note the ABS sensor when
rolling in the front wheel.
Roll the front wheel into posi-
tion in the front suspension. Raise the front wheel, insert
quick-release axle
6and tight-
en to specified torque.
Quick-release axle in
threaded bush
50 Nm
Tighten right axle clamping
screw 5to the specified tight-
ening torque.
Clamping screw for
quick-release axle in
wheel carrier
19 Nm
Remove the front-wheel stand. Install securing screws
2on
left and right and tighten to
specified tightening torque.
Front brake caliper to
wheel carrier
30 Nm
8117zMaintenance
Page 120 of 173
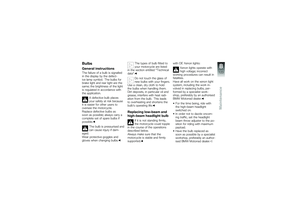
The cable of the ABS
sensor could chafe through
if it comes into contact with the
brake disc.
Make sure that the ABS sensor
cable is routed correctly.
Clip the ABS sensor cable into
three retaining clips 3. Route the ABS sensor cable
between the brake caliper and
the front forks as illustrated
here.
Remove the adhesive tape
from the wheel rim.
Install the front mudguard and
install screws
1on left and
right.
Firmly pull the handbrake lever
until the pressure point is per-
ceptible, and repeat this opera-
tion several times.
Removing rear wheelMake sure the ground is level
and firm and place the motor-
cycle on its centre stand.
8118zMaintenance