2007 BMW MOTORRAD K 1200 GT clutch
[x] Cancel search: clutchPage 4 of 173
Table of ContentsYou can also consult the index at
the end of this Rider's Manual if
you want to find a particular topic
or item of information.
1 General instructions . . . . . 5
Overview ...................... 6
Abbreviations and symbols . . . . 6
Equipment . . . . . . .............. 7
Technical data . . .............. 7
Currency . ..................... 7
2 General views . . . . . . . . . . . . . 9
General view, left side . . . . . . . . 11
General view, right side . . . . . . 13
Underneath the seat ......... 15
Handlebar fitting, left ......... 16
Handlebar fitting, right . . . . . . . . 17
Instrument cluster . . . ......... 18
Headlight . .................... 19 3 Status indicators . . . . . . . 21
Standard status
indicators .
.................... 22
Status indicators with on-
board computer
OE
........... 23
Status indicators with
tyre-pressure monitoring
(RDC)
OE...................... 24
Status indicators with seat
heatingOE
.................... 24
Telltale light with cruise con-
trol
OE
........................ 25
Standard warnings . . ......... 25
Warnings issued by the on-
board computer
OE
........... 30
ABS warnings . . . ............. 32
ASC warnings
OE
............. 34
RDC warnings
OE
............. 36
Anti-theft alarm
warnings
OE................... 41 4 Operation . . . . . . . . . . . . . . . . 45
Ignition switch and steering
lock . .
........................ 47
Electronic immobiliser . . . . . . . . 48
Clock . . . . . .................... 49
Odometer and tripmeters . . . . 49
Multifunction display ......... 51
On-board computer
OE
....... 51
Tyre pressure monitoring
RDC
OE
....................... 54
Lights . . . . .................... 55
Turn indicators . . ............. 56
Hazard warning flashers . . . . . . 57
Emergency off switch (kill
switch) . . . .................... 58
Grip heating
OE
............... 59
Seat heatingOE............... 60
Automatic Stability Control
ASC
OE
....................... 61
Seat height . . . . . . ............. 62
Windscreen . . . . . ............. 63
Cruise-control system
OE
..... 63
Stowage compartment . . . . . . . 66
Clutch . . . . .................... 66
Page 5 of 173
Brakes . . . . . .................. 67
Handlebars . . ................. 67
Mirrors . . . . . . ................. 68
Spring preload . . ............. 68
Damping . . . . ................. 69
Electronic Suspension Ad-
justment ESA
OE
............. 69
Tyres . ........................ 72
Headlight . . . . ................. 72
Front and rear seats . . . . ...... 73
Helmet holder . . . ............. 76
5 Riding . . . . ................ 77
Safety instructions . . . . . ...... 78
Checklist . . . . ................. 80
Starting . . . . . . ................. 80
Running in . . ................. 83
Brakes . . . . . . ................. 84
Parking your motorcycle . . . . . 85
Refuelling . . . ................. 87 6 Engineering details . . . . . 89
Brake system with BMW Mo-
torrad Integral ABS . . . . .
...... 90
Electronic engine manage-
ment with BMW Motorrad
ASC
OE
....................... 92
Tyre pressure monitoring
RDC
OE
....................... 94
7 Accessories . . . . . . . . . . . . . 97
General instructions . . . . ...... 98
Power socket . . . ............. 98
Luggage . . . . ................. 99
Case . ...................... 100
TopcaseOA
................. 102
8 Maintenance . . . . . . . . . . . 105
General instructions . . . . .... 106
Toolkit ...................... 106
Engine oil . . . ............... 107
Brake system, general . . .... 109
Brake pads . . ............... 109
Brake fluid . . . ............... 111
Clutch ...................... 113
Tyres . ...................... 113
Rims . ...................... 114
Wheels . . . . . . ............... 114 Front-wheel stand . . . . . .
.... 121
Bulbs . ...................... 123
Jump starting . . . ........... 131
Battery . . . . . . ............... 132
9 Care . . . . . . . . . . . . . . . . . . . . . 137
Care products . . . ........... 138
Washing motorcycle . . . . .... 138
Cleaning easily damaged
components . ............... 138
Paint care . . . ............... 139
Protective wax coating . .... 140
Laying up the motor-
cycle . ...................... 140
Restoring motorcycle to
use......................... 140
10 Technical data . . . . . . . 141
Troubleshooting chart . . .... 142
Threaded fasteners . . . . .... 143
Engine . . . . . . ............... 145
Fuel . . ...................... 146
Engine oil . . . ............... 146
Clutch ...................... 147
Transmission ............... 147
Rear-wheel drive ........... 148
Running gear ............... 148
Page 47 of 173
Operation
Operation
Ignition switch and steering lock..... 47
Electronic immobiliser . . . ............ 48
Clock ................................ 49
Odometer and tripmeters ............ 49
Multifunction display ................. 51
On-board computer
OE
............... 51
Tyre pressure monitoring
RDC
OE
.............................. 54
Lights ................................ 55
Turn indicators ....................... 56
Hazard warning flashers . . ............ 57
Emergency off switch (kill switch) . . . . 58
Grip heating
OE
....................... 59
Seat heatingOE
...................... 60 Automatic Stability Control
ASC
OE
.............................. 61
Seat height . . . ....................... 62
Windscreen . . . ....................... 63
Cruise-control system
OE
............. 63
Stowage compartment . ............. 66
Clutch . . ............................. 66
Brakes . . ............................. 67
Handlebars . . . ....................... 67
Mirrors . . ............................. 68
Spring preload ....................... 68
Damping ............................. 69
Electronic Suspension Adjustment
ESA
OE
............................... 69
Tyres . . . ............................. 72
445zOperation
Page 67 of 173
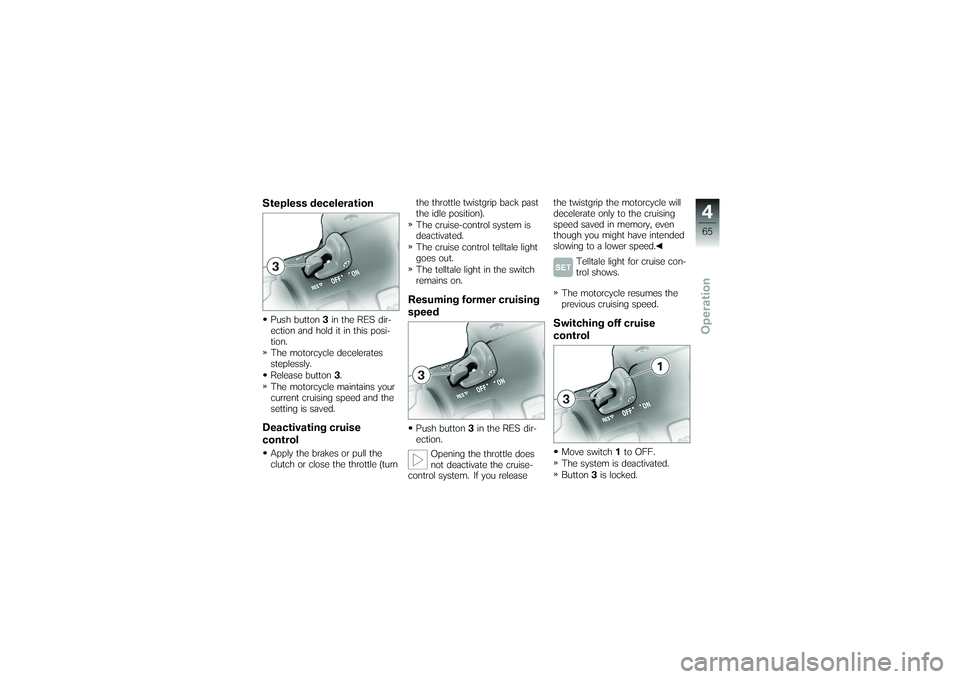
Stepless decelerationPush button3in the RES dir-
ection and hold it in this posi-
tion.
The motorcycle decelerates
steplessly.
Release button 3.
The motorcycle maintains your
current cruising speed and the
setting is saved.Deactivating cruise
controlApply the brakes or pull the
clutch or close the throttle (turn the throttle twistgrip back past
the idle position).
The cruise-control system is
deactivated.
The cruise control telltale light
goes out.
The telltale light in the switch
remains on.
Resuming former cruising
speedPush button
3in the RES dir-
ection.
Opening the throttle does
not deactivate the cruise-
control system. If you release the twistgrip the motorcycle will
decelerate only to the cruising
speed saved in memory, even
though you might have intended
slowing to a lower speed.
Telltale light for cruise con-
trol shows.
The motorcycle resumes the
previous cruising speed.
Switching off cruise
controlMove switch 1to OFF.
The system is deactivated.
Button 3is locked.
465zOperation
Page 68 of 173
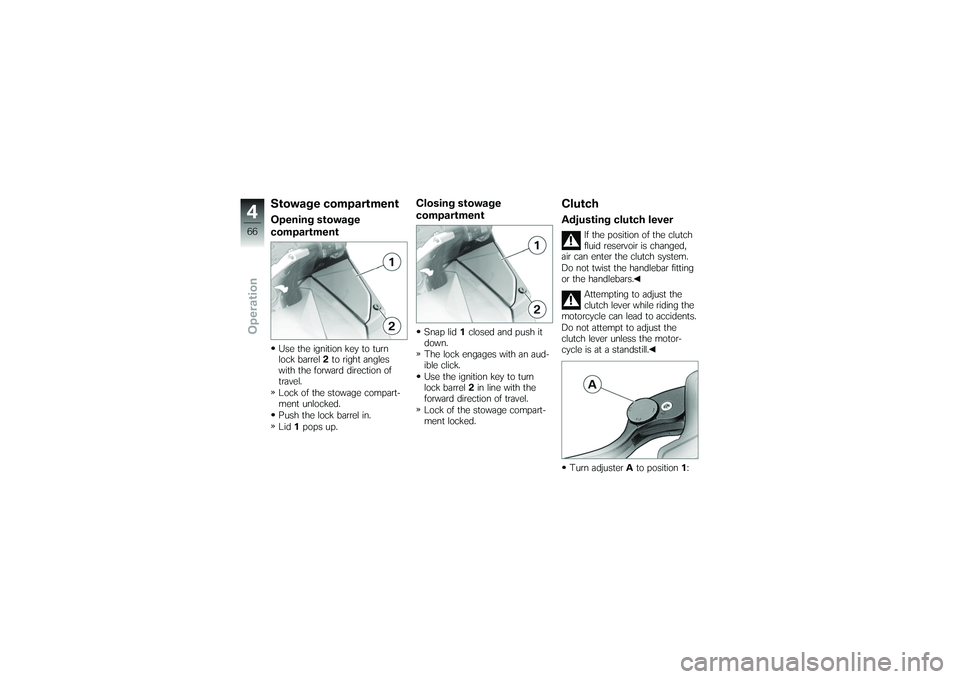
Stowage compartmentOpening stowage
compartmentUse the ignition key to turn
lock barrel2to right angles
with the forward direction of
travel.
Lock of the stowage compart-
ment unlocked.
Push the lock barrel in.
Lid 1pops up.
Closing stowage
compartmentSnap lid 1closed and push it
down.
The lock engages with an aud-
ible click.
Use the ignition key to turn
lock barrel 2in line with the
forward direction of travel.
Lock of the stowage compart-
ment locked.
ClutchAdjusting clutch lever
If the position of the clutch
fluid reservoir is changed,
air can enter the clutch system.
Do not twist the handlebar fitting
or the handlebars.
Attempting to adjust the
clutch lever while riding the
motorcycle can lead to accidents.
Do not attempt to adjust the
clutch lever unless the motor-
cycle is at a standstill.
Turn adjuster Ato position 1:
466zOperation
Page 69 of 173
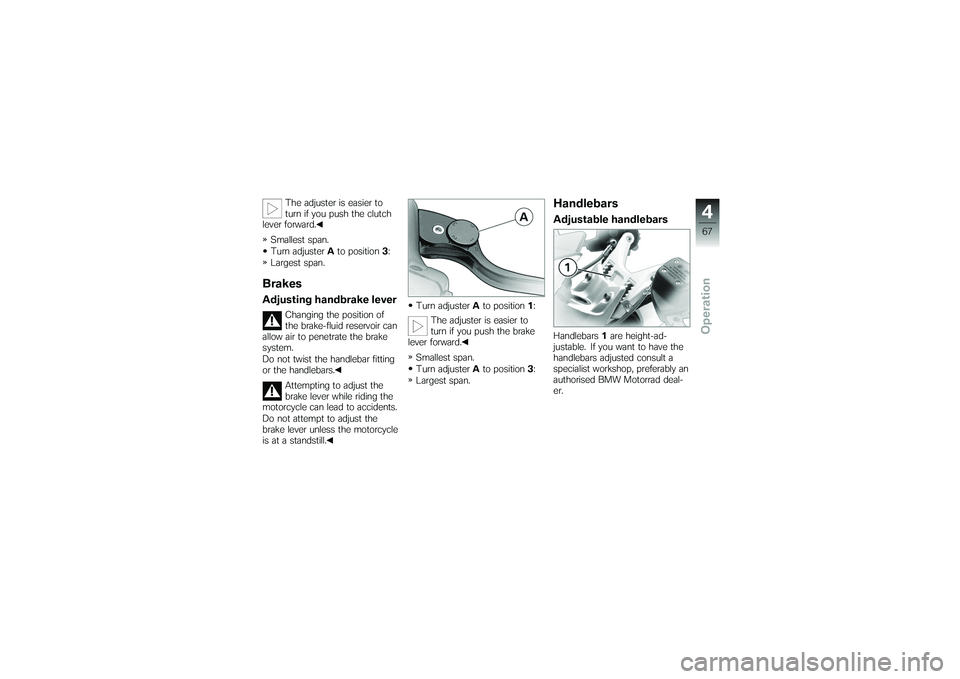
The adjuster is easier to
turn if you push the clutch
lever forward.
Smallest span.
Turn adjuster Ato position 3:
Largest span.
BrakesAdjusting handbrake lever
Changing the position of
the brake-fluid reservoir can
allow air to penetrate the brake
system.
Do not twist the handlebar fitting
or the handlebars.
Attempting to adjust the
brake lever while riding the
motorcycle can lead to accidents.
Do not attempt to adjust the
brake lever unless the motorcycle
is at a standstill. Turn adjuster
Ato position 1:
The adjuster is easier to
turn if you push the brake
lever forward.
Smallest span.
Turn adjuster Ato position 3:
Largest span.
HandlebarsAdjustable handlebarsHandlebars 1are height-ad-
justable. If you want to have the
handlebars adjusted consult a
specialist workshop, preferably an
authorised BMW Motorrad deal-
er.
467zOperation
Page 82 of 173
ChecklistUse the following checklist to
check important functions, set-
tings and wear limits before you
ride off.Brakes
Brake-fluid levels, front and rear
Clutch
Clutch fluid level
Shock absorber setting and
spring preload
Tyre-tread depth and tyre
pressures
Cases correctly installed and
luggage secured
At regular intervals: Engine oil level (every refuelling
stop)
Brake-pad wear (every third
refuelling stop)
StartingSide standYou cannot start the motorcycle
with the side stand extended and
a gear engaged. The engine will
switch itself off if you start it with
the gearbox in neutral and then
engage a gear before retracting
the side stand.GearboxYou can start the engine when
the gearbox is in neutral or if you
pull the clutch with a gear en-
gaged. Do not pull the clutch un-
til after you have switched on the
ignition, as otherwise the engine
will refuse to start. When the
gearbox is in neutral, the green
neutral telltale light is on and the
gear indicator in the multifunction
display shows N.
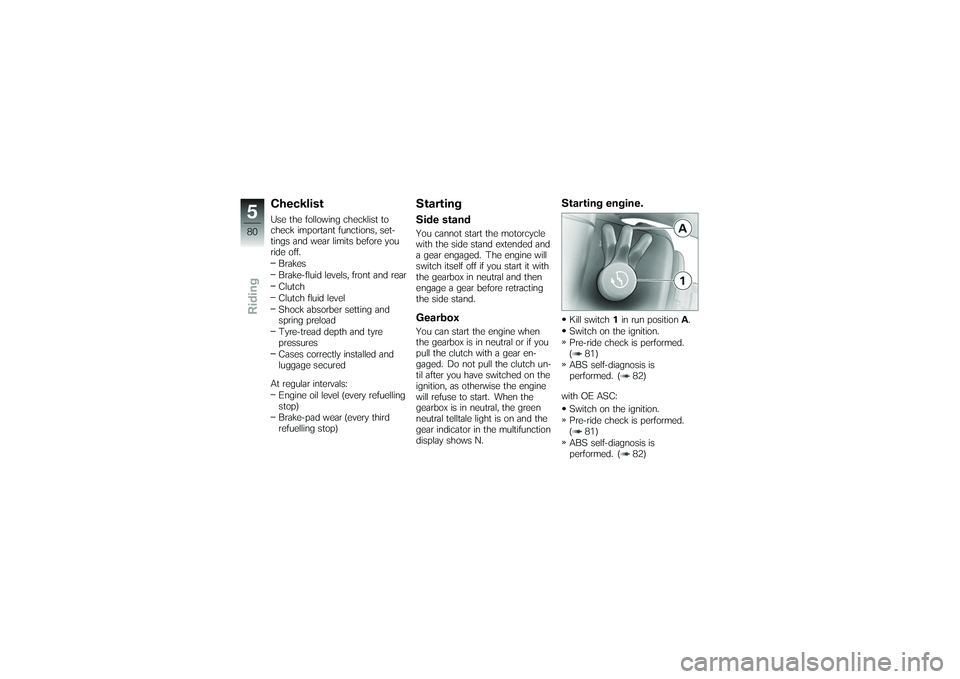
Starting engine.Kill switch 1in run position A.
Switch on the ignition.
Pre-ride check is performed.
( 81)
ABS self-diagnosis is
performed. ( 82)
with OE ASC: Switch on the ignition.
Pre-ride check is performed.
( 81)
ABS self-diagnosis is
performed. ( 82)
580zRiding
Page 83 of 173

ASC self-diagnosis is per-
formed. ( 82)
Press starter button1.
If ambient temperatures are
very low, you might find it
necessary to open the throttle
slightly when starting the engine.
At ambient temperatures below
0 °C, disengage the clutch after
switching on the ignition.
The start attempt is auto-
matically interrupted if bat-
tery voltage is too low. Recharge
the battery before you start the engine, or use jump leads and a
donor battery to start.
The engine starts.
Consult the troubleshooting
chart below if the engine re-
fuses to start. ( 142)
Pre-ride checkThe instrument cluster runs a
test of the 'General' warning light
when the ignition is switched
on: this is the "Pre-Ride-Check"
The warning light shows first red
and then yellow, so that you can
check that it is in working order.
The test is aborted if you start
the engine before it completes.
Phase 1 General warning light shows
red.CHECK!
appears on the dis-
play. Phase 2
General warning light shows
yellow.
CHECK!
appears on the dis-
play.
If the motorcycle is
equipped with cruise
control, SET lights up.
If the 'General' warning light does
not show:
Some malfunctions cannot
be indicated if the 'Gener-
al' warning light cannot be dis-
played.
Check that the 'General' warning
light comes on, and that it shows
red and yellow.
Have the fault rectified as
quickly as possible by a
specialist workshop, preferably
an authorised BMW Motorrad
dealer.
581zRiding