2006 LAND ROVER FRELANDER 2 alarm
[x] Cancel search: alarmPage 2762 of 3229

Keys and remote controls
42
L
Single and double locking
The vehicle can be locked in two ways.
Single locking
Single locking secures the vehicle and prevents
the doors being opened from outside of the
vehicle. The doors can be unlocked and opened
from inside the vehicle.
Double locking
Double locking secures the vehicle and
prevents the doors being opened from inside
or outside of the vehicle. The doors can not be
unlocked or opened from inside the vehicle.
This provides additional security if the vehicle
is left unattended. The vehicle cannot be
opened by breaking a window and operating
the door locks from inside the vehicle.
Locking
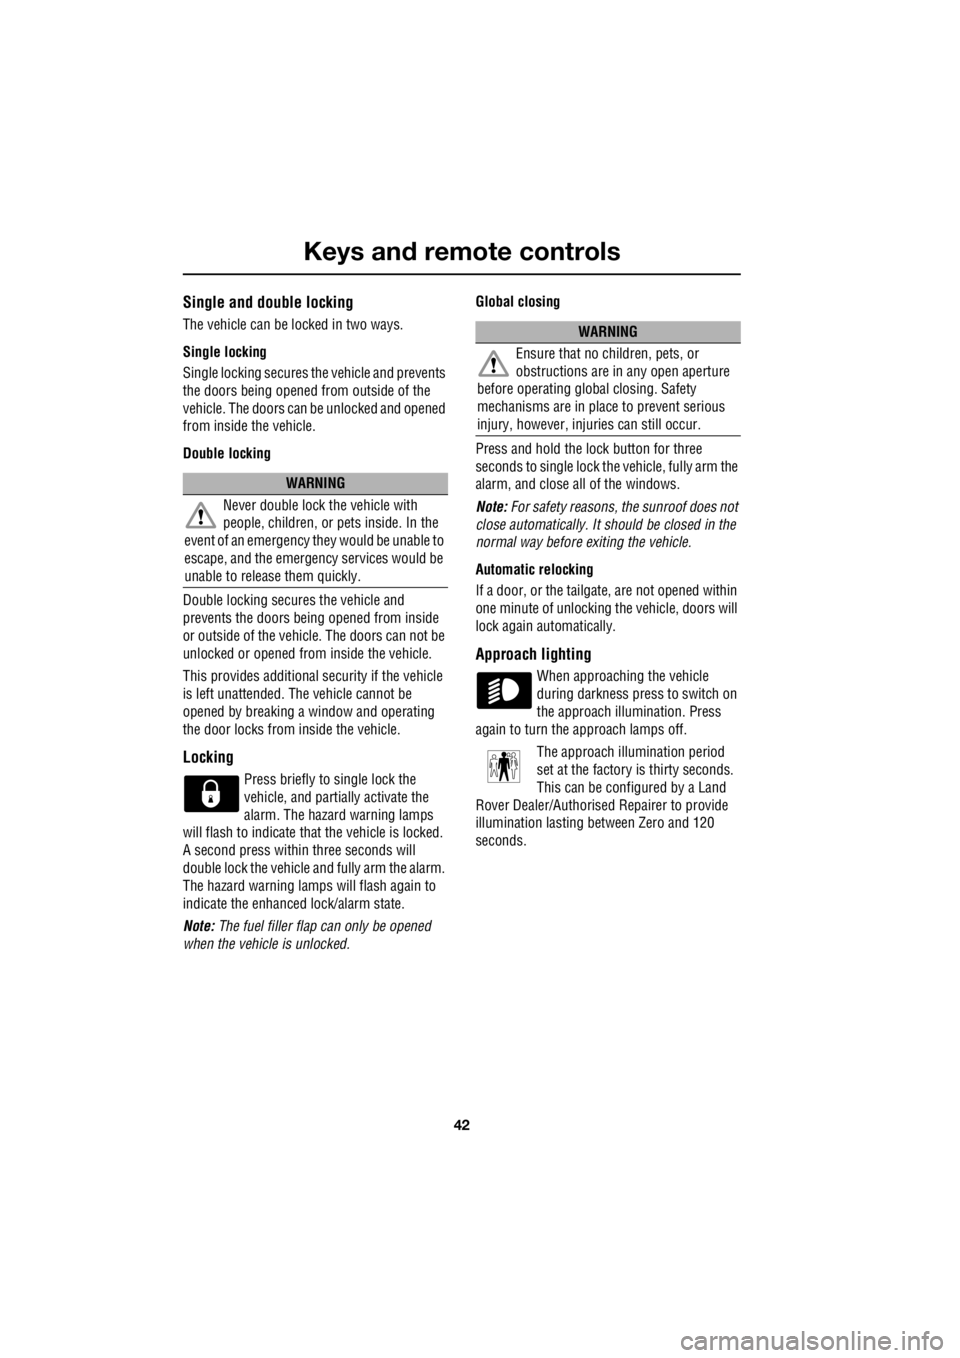
Press briefly to single lock the
vehicle, and partially activate the
alarm. The hazard warning lamps
will flash to indicate that the vehicle is locked.
A second press within three seconds will
double lock the vehicle and fully arm the alarm.
The hazard warning lamps will flash again to
indicate the enhanced lock/alarm state.
Note: The fuel filler flap can only be opened
when the vehicle is unlocked. Global closing
Press and hold the lock button for three
seconds to single lock the vehicle, fully arm the
alarm, and close all of the windows.
Note: For safety reasons, th e sunroof does not
close automatically. It sh ould be closed in the
normal way before exiting the vehicle.
Automatic relocking
If a door, or the tailgate, are not opened within
one minute of unlocking the vehicle, doors will
lock again automatically.
Approach lighting
When approaching the vehicle
during darkness press to switch on
the approach illumination. Press
again to turn the approach lamps off.
The approach ill umination period
set at the factory is thirty seconds.
This can be configured by a Land
Rover Dealer/Authorised Repairer to provide
illumination lasting between Zero and 120
seconds.
WARNING
Never double lock the vehicle with
people, children, or pets inside. In the
event of an emergency th ey would be unable to
escape, and the emergency services would be
unable to release them quickly.
WARNING
Ensure that no children, pets, or
obstructions are in any open aperture
before operating globa l closing. Safety
mechanisms are in place to prevent serious
injury, however, inju ries can still occur.
Page 2763 of 3229

43
Keys and remote controls
R
Tailgate
Press briefly to release the tailgate.
Emergency alarm
Press and hold for three seconds, or
press twice within three seconds, to
activate the horn and the hazard
lamps.
Once active for more than five seconds the
alarm can be cancelled by pressing the button
and holding for three seconds, or pressing
twice within three seconds.
Note: The horn and hazard lamps will switch
off automatically after two minutes and forty
five seconds.
Remote battery
The remote control batteries are recharged
when the remote is docked and the engine is
running. For this reas on it is recommended
that each remote is used periodically. This will
ensure that the batteries are kept charged and
ready for use.
Page 2765 of 3229

45
Alarm
R
AlarmARMING THE ALARM
The engine is automatically
immobilised when the remote
control is removed from the starter
control unit. The alarm system is automatically
armed when the remote lock button is pressed.
The hazard lamps will flash to indicate that the
alarm is armed.
Full alarm
To set full alarm protection ensure that all the
windows and the sunroof are closed. Then
press the lock button twice within three
seconds. The hazard warn ing lights will flash
twice to confirm the alarm state.
Once fully armed the alarm will sound if :-
• the bonnet, tailgate, or a door are opened.
• movement is detected within the vehicle
interior.
• a window, front or rear windscreen, or
sunroof glass are broken.
• the vehicle is raised or tilted.
• the vehicle battery is disconnected.
• an attempt is made to disconnect the alarm
siren.
Note: If the alarm is armed and a window or the
sunroof are left open the alarm will sound due
to movement of air currents.
Partial alarm
To set partial alarm protection, briefly press the
lock button once. The hazard warning lights
will flash once to confirm the alarm state.
Once partially armed the alarm will sound if :-
• the bonnet, tailgate, or a door are opened.
• the vehicle battery is disconnected.
• an attempt is made to disconnect the alarm
siren. Note:
This setting should be used in
circumstances such as travelling on a ferry,
when pets are to be left in the vehicle, when a
window must be left open etc
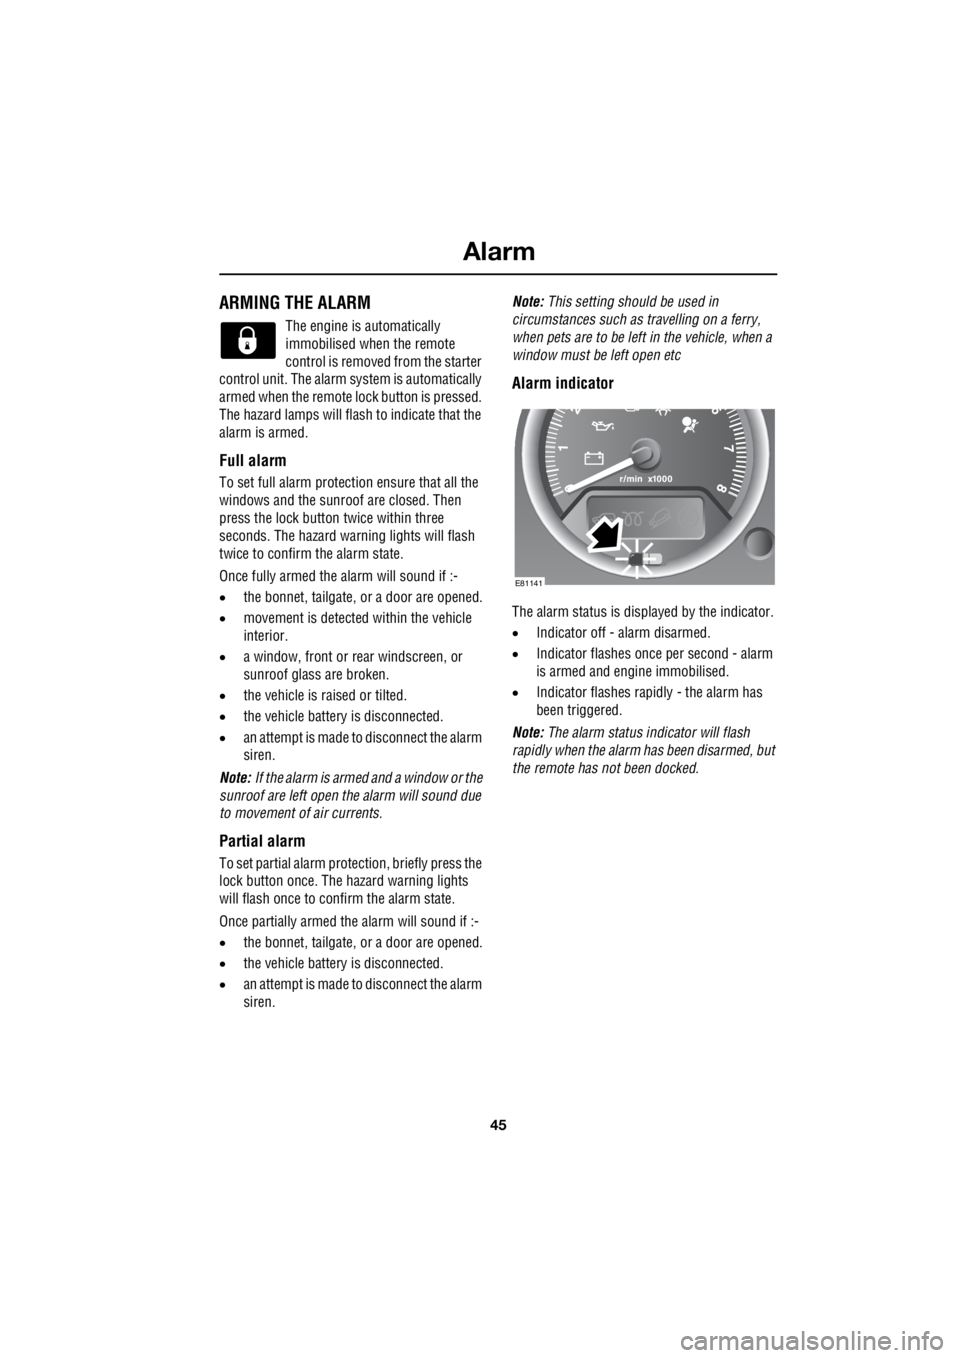
Alarm indicator
The alarm status is disp layed by the indicator.
• Indicator off - alarm disarmed.
• Indicator flashes once per second - alarm
is armed and engine immobilised.
• Indicator flashes rapidly - the alarm has
been triggered.
Note: The alarm status in dicator will flash
rapidly when the alarm has been disarmed, but
the remote has not been docked.
E81141
Page 2766 of 3229

Alarm
46
L
DISARMING THE ALARM
When the vehicle is unlocked using
the remote control, the alarm is
automatically disabled. The hazard
lamps will flash twice to indicate that the alarm
is disabled.
Disarming when the unlock button fails
to work
If, when pressed, the unlock button fails to
operate the vehicle can still be unlocked and
the alarm disabled. To unlock the vehicle :-
1. Unlock the drivers door using the key
blade.
2. Dock the remote control.
Note: When the drivers door is unlocked using
the key, the alarm will sound until the remote is
docked.
Deactivating the alarm when triggered
If the alarm has been triggered it can be
deactivated by pressi ng the remote unlock
button, or by docking the remote control.
Page 2894 of 3229

Vehicle battery
174
L
CHARGING THE VEHICLE BATTERY
1. Disconnect the battery and remove it from
the vehicle.
2. Connect the battery charger in accordance
with the charger manufacturer's
instructions.
3. Once the charge is complete switch off the
power to the charger.
4. Disconnect the charger cables from the
battery.
5. Allow the battery to stand for an hour
before connecting to the vehicle. This will
allow any explosive gasses to dissipate,
and reduce the risk of explosion.
CHANGING THE VEHICLE BATTERY
Disconnecting
1. Ensure that all electrical circuits are
switched off, all windows are closed, and
the alarm is disarmed.
2. Remove the remote control from the
vehicle and wait two minutes to allow the
systems to power down fully.
3. Undo the negative clam p, and lift the cable
and clamp clear of th e battery terminal.
4. Undo the positive clamp, and lift the cable
and clamp clear of th e battery terminal.
5. Undo the battery clamp and lift the battery
clear of the vehicle.
WARNINGS
Ensure that the charger used is of the
correct type and rating for the battery.
Using an unsuitable charger may damage the
battery, and could cause the battery to
explode.
Always charge the battery in a well
ventilated area away from any naked
flames, sparks or ot her ignition sources.
During charging the battery can produce a
highly explosive a nd flammable gas.
CAUTIONS
The battery must be disconnected and
removed from the vehicle before
charging. Failure to do so could result in
damage to the vehicle's electrical system.
Always follow the instructions supplied
with the battery charger. Failure to do so
may result in damage to the battery.
WARNINGS
Use caution when lifting the battery out
of, or into, the vehicl e. It is heavy, and
may cause injury when lifting, or if dropped.
Do not tip the battery when lifting or
moving as tilting the battery more than
45 degrees may damage the battery, and may
cause the electrolyte to leak out. Battery
electrolyte is highly corrosive, and toxic.
CAUTIONS
Do not rest the battery on any part of the
vehicle as it may ca use damage due to
it's weight.
Do not run the engine with the battery
disconnected. Doing so may damage the
charging system.
Page 2895 of 3229

175
Vehicle battery
R
Effects of disconnecting
Disconnecting the battery can affect a number
of vehicle systems, especially if there is
insufficient battery power prior to
disconnection. For example, the alarm may
trigger depending on it's state when the battery
was disconnected. If the alarm does sound,
use the remote control in the normal way to
disarm the security system. The windows may
need resetting to enable the one-shot feature to
operate correctly. See ELECTRIC WINDOWS
(page 93).
Replacement batteries
Battery disposal
Note: Used batteries must be disposed of
correctly as they contain a number of harmful
substances. Seek advice on disposal from your
Land Rover Dealer/Authoris ed Repairer, and/or
your local authority.
Refitting
A new battery should be supplied with plastic
terminal covers. Leave the covers in place
when fitting the battery, and remove them one
at a time to fit the battery cable clamps.
Refitting is an exact reversal of the removal
procedure. If you are in any doubt about fitting
a battery seek qualified assistance before
attempting to fit the battery.
WARNING
Only fit a battery of the correct type and
rating. Fitting an in correct battery may
result in a fire, or damage to the electrical
system. If you are in any doubt when fitting a
battery seek qualified assistance.
WARNING
When refitting the battery ensure that
no metal objects , or vehicle
components, come into contact with the
battery terminals. Metal objects can cause a
spark or short circuit, both of which may result
in an explosion.
CAUTIONS
Ensure that when fitting a battery to the
vehicle, the terminals and battery clamps
are clean, and lightly coated with petroleum
jelly. This will ensure good electrical
connections are made, and help to prevent
corrosion.
Always follow the battery manufacturers
instructions. Failure to do so may result
in damage to the vehicl e and/or the electrical
system.
Page 2920 of 3229

Fuses
200
L
Fuse number Rating (Amps) Fuse co lour Circuits protected
F1 5 tan Rain sensor
F2 10 red SRS
F3 5 tan ABS
F4 5 tan Instrument pack - Accelerator pedal - Light
Switch Module
F5 - - -
F6 15 blue Audio unit
F7 7.5 brown Steering wheel controls
F8 5 tan Instrument pack
F9 15 blue Headlamp main beam
F10 15 blue Sunroof
F11 7.5 brown Reverse lights and interior mirror dip
F12 - - -
F13 15 blue Front fog lamps
F14 15 blue Screen wash
F15 - - -
F16 - - -
F17 7.5 brown Interior lighting
F18 - - -
F19 5 tan Electric seat adjustment
F20 15 blue Rear wiper
F21 5 tan Alarm
F22 20 yellow Fuel pump
F23 20 yellow Steering column lock
F24 - - -
F25 10 red Tailgate - Fuel filler flap
F26 5 tan Diagnostic socket and alarm
F27 5 tan Start button and climate control
F28 5 tan Brake lights
Page 2991 of 3229

Index
271
R
A
ABS driving hints . . . . . . . . . . . . . . . . . . 123
Accessories . . . . . . . . . . . . . . . . . . . . . . . . 37
Adaptive front lighting system (AFS). . . . . 74
Adjusting the headlamps . . . . . . . . . . . . . . 73
Adjusting the steering wheel . . . . . . . . . . . 70
Adjusting the windscreen washer jets . . . . 89 Blocked jets . . . . . . . . . . . . . . . . . . . . . 90
Front . . . . . . . . . . . . . . . . . . . . . . . . . . . 89
Rear . . . . . . . . . . . . . . . . . . . . . . . . . . . 89
AFS . . . . . . . . . . . . . . . . . . . . . . . . . . . . . . 74
Air vents . . . . . . . . . . . . . . . . . . . . . . . . . 101
Airbag service information . . . . . . . . . . . . 63
Airbag warning lamp . . . . . . . . . . . . . . . . . 61
Alternative frequencies . . . . . . . . . . . . . . 229
Alternative Frequency (AF) - Premium audio 230
Alternative Frequency (A F) - Standard audio
230
Approach lamps . . . . . . . . . . . . . . . . . . . . 76
Arming the alarm . . . . . . . . . . . . . . . . . . . 45
Alarm indicator . . . . . . . . . . . . . . . . . . . 45
Full alarm . . . . . . . . . . . . . . . . . . . . . . . 45
Partial alarm . . . . . . . . . . . . . . . . . . . . . 45
Ashtray . . . . . . . . . . . . . . . . . . . . . . . . . . 109
Audio control. . . . . . . . . . . . . . . . . . . 70, 223 Audio control using the telephone buttons .
71
Balance adjustment. . . . . . . . . . . . . . . 224
Bass response adjustment . . . . . . . . . 223
Centre speaker settings . . . . . . . . . . . 224
Fader adjustment . . . . . . . . . . . . . . . . 224
Resetting tone values . . . . . . . . . . . . . 224
Subwoofer settings . . . . . . . . . . . . . . . 224
Surround sound settings . . . . . . . . . . 223
Treble response adjustment . . . . . . . . 223
Audio controls . . . . . . . . . . . . . . . . . . . . . 235
Audio unit overview. . . . . . . . . . . . . . . . . 219 Basic audio functions . . . . . . . . . . . . . 222
Premium audio overview . . . . . . . . . . 219
Standard audio overview . . . . . . . . . . 221
Automatic climate control . . . . . . . . . . . . 103
Controls . . . . . . . . . . . . . . . . . . . . . . . 103 Automatic transmission . . . . . . . . . . . . . . 118
Automatic mode. . . . . . . . . . . . . . . . . . 119
Electronic gear change strategies . . . . 120
Sport mode and CommandShift™ . . . . 120
Autostore control . . . . . . . . . . . . . . . . . . . 225 Autostoring radio stat ions - Premium audio
225
Autostoring radio stati ons - Standard audio
225
Auxiliary heater. . . . . . . . . . . . . . . . . . . . . 104
Auxiliary input (AUX IN) socket . . . . . . . . 250 Auxiliary mode . . . . . . . . . . . . . . . . . . . 251
Auxiliary power sockets . . . . . . . . . . . . . . 110
B
Battery care . . . . . . . . . . . . . . . . . . . . . . . 171
Battery charging . . . . . . . . . . . . . . . . . . . . 174
Battery warning symbols . . . . . . . . . . . . . 171
Bluetooth setup . . . . . . . . . . . . . . . . . . . . 256
Adding or changing a telephone. . . . . . 257
Loss of Bluetooth link . . . . . . . . . . . . . 257
Pairing a telephone to the system . . . . 256
Removing a telephone fr om the system. . .
257
Bonnet lock . . . . . . . . . . . . . . . . . . . . . . . 160
Booster cables . . . . . . . . . . . . . . . . . . . . . 173
Booster cushions . . . . . . . . . . . . . . . . . . . . 66
Brake and clutch fluid check . . . . . . . . . . . 165
Checking the fluid level . . . . . . . . . . . . 165
Topping up the fluid . . . . . . . . . . . . . . . 166
Brakes
Principle of operation . . . . . . . . . . . . . . 123
Bulb changing . . . . . . . . . . . . . . . . . . . . . . 77
Bulb specification chart . . . . . . . . . . . . . . . 86
C
Car wash . . . . . . . . . . . . . . . . . . . . . . . . . 154