Page 65 of 279
operation in such a condition could
cause serious damage to the engine.
VOLT METERWhen the ignition switch is turned to the ON
position, the volt meter indicates the battery
voltage; while the engine is running, it indicates
the alternator voltage of 11 - 15 volts (normal
range
�A). However, while cranking the engine,
the volts drop below the normal range.
If the needle is not in the normal range
�A
while
the engine is running, it may indicate that the
charging system is not functioning properly.
Have the system checked by a NISSAN dealer.
TRIP COMPUTERThe display of the trip computer is situated in the
triple meter. When the ignition switch is turned
to ON, the display scrolls all the modes of the
trip computer and then shows the mode chosen
before the ignition switch is turned OFF.
SIC1955
SIC2234
2-8
Instruments and controls
�
04.8.23/Z33-D/V5.0
�
Page 66 of 279

Switches for the trip computer are located on
the side of the combination meter panel. To
operate the trip computer, press the side of the
switches as shown above.�A: Trip computer mode switch
�B: Trip computer setting switch
When the ignition switch is turned to ON, modes
of the trip computer can be selected by pressing
the trip computer mode switch
�A.
Each time the mode switch
�A
is pressed, the
display will change as follows:
Speed indicator→Outside air temperature
(ICY)→Distance to empty (dte)→Average fuelconsumption and speed→Elapsed time and
trip odometer→Stopwatch→Tire pressure
indicator (PSI)→Up-shift indicator setting (for
M/T models)→Speed indicator
Speed indicator (mph or km/h)The vehicle speed is displayed in MPH or km/h
while driving.
The speed indicator in the trip computer
indicates the reference speed. The actual
speed indicated by the speedometer (com-
bination meter) may differ from the one in
the trip computer.Outside air temperature
(ICY—°For°C)The outside air temperature is displayed in °F or
°C in the range of −22 to 131°F (−30 to 55°C).
The outside air temperature mode includes a low
temperature warning feature: below 37°F (3°C),
the outside air temperature mode is automati-
cally selected and the ICY indicator will illumi-
nate in order to draw the driver’s attention. Press
the mode switch
�A
if you wish to return to the
mode that was selected before the warning
occurred. The ICY indicator will continue blink-
ing as long as the temperature remains below
39°F (4°C).
The ambient temperature sensor is located infront of the radiator. The sensor may be affected
by road or engine heat, wind directions and
other driving conditions. The display may differ
from the actual ambient temperature or the
temperature displayed on various signs or bill-
boards.
Distance to empty (dte — mls or km)The distance to empty (dte) mode provides you
with an estimation of the distance that can be
driven before refueling. The dte is constantly
being calculated, based on the amount of fuel in
the fuel tank and the actual fuel consumption.
The display is updated every 30 seconds.
The dte mode includes a low range warning
feature: when the fuel level is low, the dte mode
is automatically selected and the digits blink in
order to draw the driver’s attention. Press the
mode switch
�Aif you wish to return to the mode
that was selected before the warning occurred.
The dte indicator will remain blinking until the
vehicle is refuelled.
When the fuel level drops even lower, the dte
display will change to (----).
NOTE:
�If the amount of fuel added while the
ignition switch is OFF is small, the dis-
play just before the ignition switch is
SIC1957
Instruments and controls
2-9
�
04.8.23/Z33-D/V5.0
�
Page 67 of 279
/10")
turned OFF may continue to be dis-
played.
�When driving uphill or rounding curves,
the fuel in the tank shifts, which may
momentarily change the display.
Average fuel consumption
(mpg or l (liter)/100 km) and speed
(av. mph or av. km/h)Fuel consumption:
The average fuel consumption mode shows the
average fuel consumption since the last reset.
Resetting is done by pressing the trip computer
setting switch
�B
for more than approximately 1
second. (The average speed is also reset at the
same time.)
The display is updated every 30 seconds. At
about the first 1/3 miles (500 m) after a reset,
the display shows (----).
Speed:
The average speed mode shows the average
vehicle speed since the last reset. Resetting is
done by pressing the setting switch
�Bfor more
than approximately 1 second. (The average fuel
consumption is also reset at the same time.)
The display is updated every 30 seconds. Thefirst 30 seconds after a reset, the display shows
(----).
Elapsed time (h:m:s) and trip
odometer (mls or km)Elapsed time:
The elapsed time mode shows the time since the
last reset. The displayed time can be reset by
pressing the trip computer setting switch
�Bfor
more than approximately 1 second. (The trip
odometer is also reset at the same time.)
Trip odometer:
The trip odometer mode shows the total dis-
tance the vehicle has been driven since the last
reset. Resetting is done by pressing the setting
switch
�Bfor more than approximately 1 second.
(The elapsed time is also reset at the same time.)
Stopwatch (h:m:s)You can use the trip computer as a stopwatch.
Each time the trip computer setting switch
�Bis
pressed, the stopwatch will be operated as
follows:
After 100 hours, the time will start from the reset
display again.Even if the display is switched to the other mode
while the time is starting, the stopwatch contin-
ues to advance until you stop the time in the
stopwatch mode. When the ignition switch is
turned OFF, the time is reset.
Tire pressure indicator (PSI)The tire pressure indicator shows tire pressure
(0 - 51 psi) of all wheels (except the spare tire)
by sending a signal from a sensor that is installed
in each wheel. Press the trip computer setting
switch
�Bto change the display to F (front) or R
(rear).
The tire pressure sensor will activate only when
the vehicle is driven at speeds above 20 MPH
(32 km/h). If the tire pressure signal cannot be
received correctly, the display shows (----).
The tire pressure indicator mode includes a low
tire pressure warning feature. If the vehicle is
being driven with low tire pressure*, the tire
pressure indicator mode is automatically se-
lected and the PSI indicator will blink in order to
attract the driver’s attention. Press the trip com-
puter mode switch
�Aif you wish to return to the
mode that was selected before the warning
occurred. The PSI indicator will continue blinking
until the tire pressure of each tire is properly
adjusted.
2-10
Instruments and controls
�
04.8.23/Z33-D/V5.0
�
Page 68 of 279

lower than 28 psi (except for the above)
For additional information, see “Low tire pres-
sure warning system” in the “5")
*: lower than 26 psi (for 225/50R17 and
235/50R17 tires on
Roadster model)
lower than 28 psi (except for the above)
For additional information, see “Low tire pres-
sure warning system” in the “5. Starting and
driving” section and “Flat tire” in the “6. In case
of emergency” section.
Tire pressure shown in the display may rise
or fall while driving depending on the driv-
ing conditions (heat, etc.) and/or the out-
side temperature. This does not indicate a
system malfunction.
WARNING
The low tire pressure warning system is
not a substitute for the regular tire pres-
sure check. Be sure to check the tire
pressure regularly and adjust it to the
COLD tire pressure shown in the tire
placard.Up-shift indicator setting (rpm) (for
manual transmission models)The up-shift indicator setting mode is used toset the desired engine speed (rpm) for the
up-shift indicator (situated in the tachometer) to
illuminate. When the engine speed approaches
or reaches the set figure, the up-shift indicator
will flash or illuminate to show the driver the
timing for shifting into a higher gear. See “Driving
the vehicle” in the “5. Starting and driving”
section for the use of the up-shift indicator.
When the up-shift indicator setting mode is
selected, the rpm indicator blinks and the engine
speed currently set is displayed. (The initial
factory setting is 6,600 rpm.) The figure can be
changed between 2,000 and 8,000 rpm by
pressing trip computer setting switch
�B. Press-
ing the switch for less than approximately 1
second will add the figure by 100 rpm. If press-
ing for more than approximately 1 second, the
figure will increase by 500 rpm.
If the battery cable is disconnected, the set
engine speed will be returned to the initial figure
(6,600 rpm).
Display priorityIf a low outside air temperature warning,
low dte (distance to empty) range warning
and low tire pressure warning occur simul-
taneously, other display modes switch au-
tomatically to the outside air temperature
display.When trip computer mode switch
�A
is
pressed, the display switches to the mode
chosen before the warning display, but the
ICY indicator will continue blinking.
Instruments and controls
2-11
�
04.8.23/Z33-D/V5.0
�
Page 69 of 279

Automatic transmission check warning
light (A/T models)
Seat belt warning light
Slip indicator light
or")
or
Anti-lock brake warning light
Low washer fluid warning light
Malfunction indicator lamp (MIL)
Automatic transmission check warning
light (A/T models)
Seat belt warning light
Slip indicator light
or
Brake warning light
Supplemental air bag warning light
Traction control system (TCS) off indica-
tor light (if so equipped)
Charge warning light
Automatic transmission position indicator
light (A/T models)
Vehicle dynamic control (VDC) off indica-
tor light (if so equipped)
Door open warning light
Cruise main switch indicator light
(if so equipped)
Soft top indicator light (Roadster models)
Engine oil pressure warning light
Cruise set switch indicator light
(if so equipped)
Turn signal/hazard indicator lights
Low tire pressure warning light
High beam indicator light (Blue)
CHECKING BULBSApplythe parking brake and turn the ignition key
to ON without starting the engine. The following
lights will come on:
,
or
,
,
The following lights come on brieflyand then go
off:
,
or
,
,
,
,
,
If anylight fails to come on, it mayindicate a
burned-out bulb or an open circuit in the elec-trical system. Have the system repaired
promptly.
WARNING LIGHTS
or
Anti-lock brake
warning light
When the ignition switch is turned to the ON
position, the anti-lock brake warning light will
illuminate and then turn off. This indicates the
anti-lock brake system (ABS) is operational.
If the light comes on while the engine is running,it mayindicate the anti-lock brake system is not
functioning properly. Have the system checked
bya NISSAN dealer.
If a malfunction occurs in the system, the anti-
lock function of the brake will cease operation
but the ordinarybrakes will continue to operate.
See “Anti-lock brake system (ABS)” in the “5.
Starting and driving” section for further details.
If the light comes on while you are driving,
contact a NISSAN dealer for repair.
WARNING/INDICATOR LIGHTS
AND AUDIBLE REMINDERS2-12
Instruments and controls
�
04.10.8/Z33-D/V5.0
�
Page 70 of 279

When the ignition switch is turned ON, the light
comes on for 2 seconds. If the light blinks for
approximately 8 seconds, it may indicate the
au")
Automatic transmission check
warning light (A/T models)
When the ignition switch is turned ON, the light
comes on for 2 seconds. If the light blinks for
approximately 8 seconds, it may indicate the
automatic transmission system is not functioning
properly. Have a NISSAN dealer check and
repair the transmission. See “Driving the vehicle”
(automatic transmission) in the “5. Starting and
driving” section.
or
Brake warning light
This light functions for both the parking brake
and the foot brake systems.
Parking brake indicator:
When the ignition key is in the ON position, the
light comes on when the parking brake is ap-
plied.
Low brake fluid warning light:
The light warns of a low brake fluid level. If the
light comes on while the engine is running with
the parking brake not applied, stop the vehicle
and perform the following:
1. Check the brake fluid level. Add brake fluid as
necessary. See “Brake and clutch fluid” in the
“8. Maintenance and do-it-yourself” section.
WARNING
�Your brake system may not be work-
ing properly if the warning light is on.
Driving could be dangerous. If you
judge it to be safe, drive carefully to
the nearest service station for re-
pairs. Otherwise, have your vehicle
towed because driving it could be
dangerous.
�Pressing the brake pedal with the
engine stopped and/or a low brake
fluid level may increase your stop-
ping distance and braking will re-
quire greater pedal effort as well as
pedal travel.
�If the brake fluid level is below the
MINIMUM or MIN mark on the brake
fluid reservoir, do not drive until the
brake system has been checked at a
NISSAN dealer.
2. If the brake fluid level is correct, have the
warning system checked by a NISSAN
dealer. Avoid high speed driving and abrupt
braking.
If both the brake warning light and the anti-lock brake warning light come on simulta-
neously, it may indicate the anti-lock brake
system is not functioning properly. See “Anti-
lock brake warning light” earlier in this sec-
tion.
Charge warning light
If the light comes on while the engine is running,
it may indicate that the charging system is not
functioning properly. Turn the engine off and
check the alternator belt. If the belt is loose,
broken, missing or if the light remains on, see a
NISSAN dealer immediately.
CAUTION
Do not continue driving if the belt is
loose, broken or missing.
Door open warning light
This light comes on when any of the doors
and/or rear hatch are not closed securely while
the ignition switch is ON.
Engine oil pressure warning
light
This light warns of low engine oil pressure. If the
light flickers or comes on during normal driving,
pull off the road in a safe area, stop the engine
Instruments and controls
2-13
�
04.8.23/Z33-D/V5.0
�
Page 71 of 279

immediatelyand call a NISSAN dealer or other
authorized repair shop.
The engine oil pressure warning light is not
designed to indicate a low oil level. Use the
dipstick to check the oil level.See “Engine
oil” in the “8. Maintenance and do-it-yourself”
section.
CAUTION
Running the engine with the engine oil
pressure warning light on could cause
serious damage to the engine almost
immediately. Turn off the engine as
soon as it is safe to do so.
Low tire pressure warning light
After the ignition switch is turned ON, this light
comes on for about 1 second and turns off.
This light warns of low tire pressure.
NISSAN’s low tire pressure warning system is a
tire pressure monitoring system. It monitors tire
pressure of all tires except the spare. When the
tire pressure monitoring system warning light is
lit, one or more of your tires is significantly
under-inflated. You should stop and check your
tires as soon as possible, and inflate them to theproper pressure as indicated on the vehicle’s tire
information placard. Driving on a significantly
under-inflated tire causes the tire to overheat
and can lead to tire malfunction. Under-inflation
also reduces fuel efficiency and tire tread life,
and may affect the vehicle’s handling and stop-
ping ability. Each tire, including the spare, should
be checked monthly when cold and set to the
recommended inflation pressure as specified in
the vehicle placard and Owner’s Manual.
The recommended inflation pressure may also
be found on the Tire and Loading Information
label.
If the vehicle is being driven with low tire pres-
sure*, the light will illuminate and the chime will
sound for about 10 seconds.
*: lower than 26 psi (for 225/50R17 and
235/50R17 tires on
Roadster model)
lower than 28 psi (except for the above)
For additional information, see “Low tire pres-
sure warning system” in the “5. Starting and
driving” section and “Flat tire” in the “6. In case
of emergency” section. You can check the tire
pressure of all 4 tires on the trip computer
display. See “Trip computer” earlier in this sec-
tion.
WARNING
�If the light does not come on with the
ignition switch turned ON, have the
vehicle checked by a NISSAN dealer
as soon as possible.
�If the light comes on while driving,
avoid sudden steering maneuvers or
abrupt braking, reduce vehicle speed,
pull off the road to a safe location
and stop the vehicle as soon as pos-
sible. Serious vehicle damage could
occur and may lead to an accident
and could result in serious personal
injury. Check the tire pressure for all
four tires. Adjust the tire pressure to
the recommended COLD tire pres-
sure shown on the Tire and Loading
Information label to turn the low tire
pressure warning light OFF. If the
light still comes on while driving after
adjusting the tire pressure, a tire may
be flat. If you have a flat tire, replace
it with a spare tire as soon as
possible.
2-14
Instruments and controls
�
04.8.23/Z33-D/V5.0
�
Page 72 of 279

�When a spare tire is mounted or a
wheel is replaced, tire pressure will
not be indicated and the low tire
pressure warning system will not
function. Contact a NISSAN dealer as
soon as possible for tire replacement
and/or system resetting.
CAUTION
�The low tire pressure warning system
is not a substitute for the regular tire
pressure check. Be sure to check the
tire pressure regularly.
�If the vehicle is being driven at
speeds of less than 20 MPH (32
km/h), the low tire pressure warning
system may not operate correctly.
�Be sure to install the specified size of
tires to the front and rear.
Low washer fluid warning light
This light comes on when the washer fluid is at a
low level. Add washer fluid as necessary. See“Window washer fluid” in the “8. Maintenance
and do-it-yourself” section.
Seat belt warning light
The seat belt warning light and chime remind you
to fasten seat belts. The light illuminates when-
ever the ignition key is turned to ON, and will
remain illuminated until the driver’s seat belt is
fastened.
See “Seat belts” in the “1. Safety — Seats, seat
belts and supplemental restraint system” section
for precautions on seat belt usage.
Supplemental air bag warning
light
After turning the ignition key to the ON position,
the supplemental air bag warning light will illu-
minate. The supplemental air bag warning light
will turn off after about 7 seconds if the system is
operational.
If any of the following conditions occur, the
supplemental front air bag, supplemental side air
bag (if so equipped) and curtain side-impact air
bag (if so equipped), and pre-tensioner seat belt
systems need servicing and your vehicle must be
taken to a NISSAN dealer.
�The supplemental air bag warning light re-
mains on after approximately 7 seconds.�The supplemental air bag warning light
flashes intermittently.
�The supplemental air bag warning light does
not come on at all.
Unless checked and repaired, the supplemental
restraint system (air bag system) and/or the
pre-tensioner seat belt may not function prop-
erly. For additional information, see “Supplemen-
tal restraint system” in the “1. Safety — Seats,
seat belts and supplemental restraint system”
section.
WARNING
If the supplemental air bag warning
light is on, it could mean that the
supplemental front air bag, supplemen-
tal side air bag, curtain side-impact air
bag systems and/or pre-tensioner seat
belt systems will not operate in an acci-
dent. To help avoid injury to yourself or
others, have your vehicle checked by a
NISSAN dealer as soon as possible.
Instruments and controls
2-15
�
04.8.23/Z33-D/V5.0
�
 1
1 2
2 3
3 4
4 5
5 6
6 7
7 8
8 9
9 10
10 11
11 12
12 13
13 14
14 15
15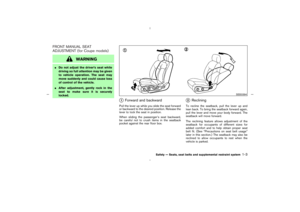 16
16 17
17 18
18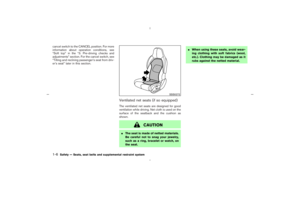 19
19 20
20 21
21 22
22 23
23 24
24 25
25 26
26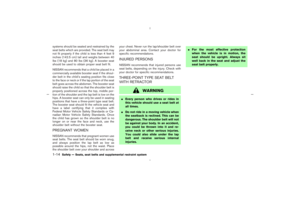 27
27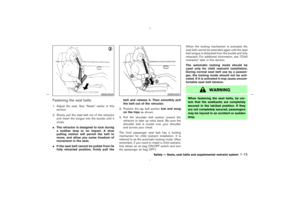 28
28 29
29 30
30 31
31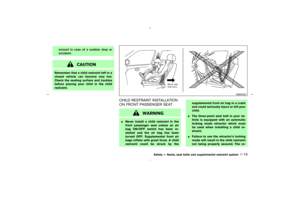 32
32 33
33 34
34 35
35 36
36 37
37 38
38 39
39 40
40 41
41 42
42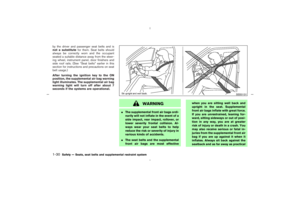 43
43 44
44 45
45 46
46 47
47 48
48 49
49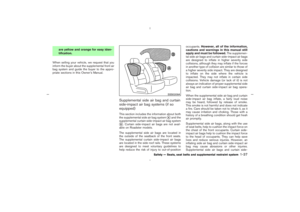 50
50 51
51 52
52 53
53 54
54 55
55 56
56 57
57 58
58 59
59 60
60 61
61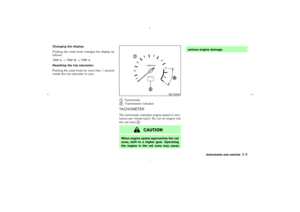 62
62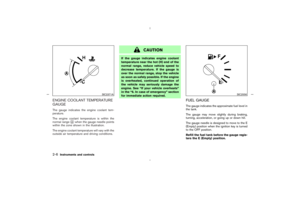 63
63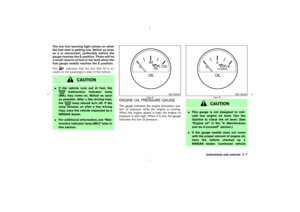 64
64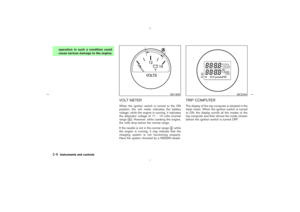 65
65 66
66 67
67 68
68 69
69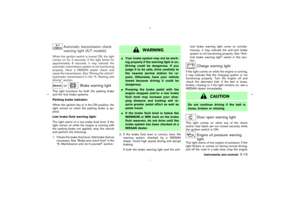 70
70 71
71 72
72 73
73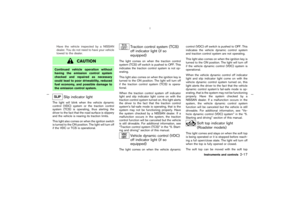 74
74 75
75 76
76 77
77 78
78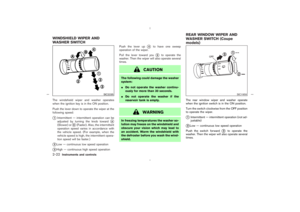 79
79 80
80 81
81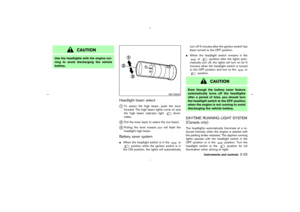 82
82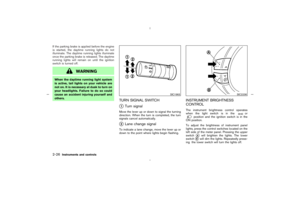 83
83 84
84 85
85 86
86 87
87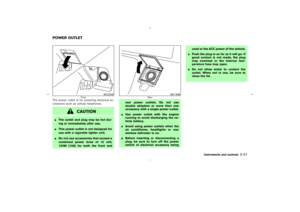 88
88 89
89 90
90 91
91 92
92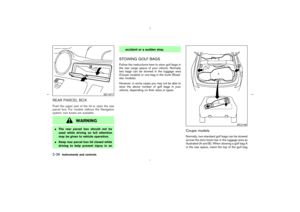 93
93 94
94 95
95 96
96 97
97 98
98 99
99 100
100 101
101 102
102 103
103 104
104 105
105 106
106 107
107 108
108 109
109 110
110 111
111 112
112 113
113 114
114 115
115 116
116 117
117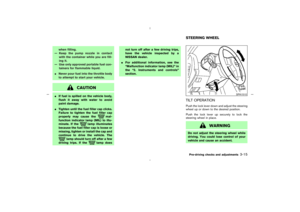 118
118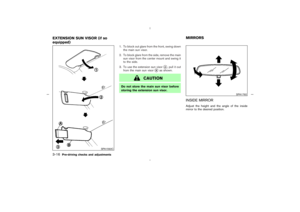 119
119 120
120 121
121 122
122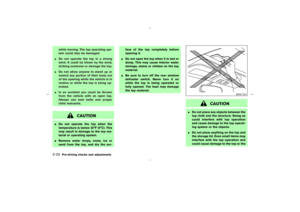 123
123 124
124 125
125 126
126 127
127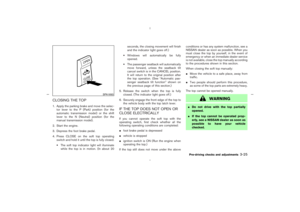 128
128 129
129 130
130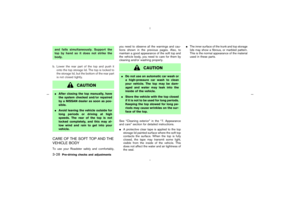 131
131 132
132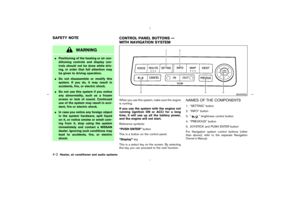 133
133 134
134 135
135 136
136 137
137 138
138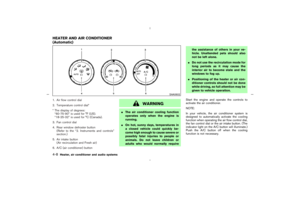 139
139 140
140 141
141 142
142 143
143 144
144 145
145 146
146 147
147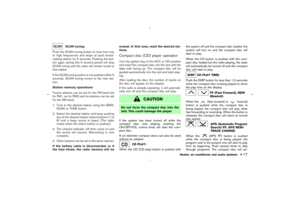 148
148 149
149 150
150 151
151 152
152 153
153 154
154 155
155 156
156 157
157 158
158 159
159 160
160 161
161 162
162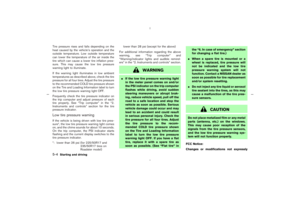 163
163 164
164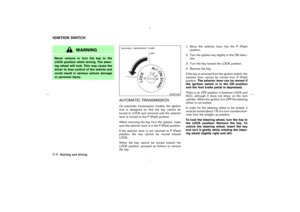 165
165 166
166 167
167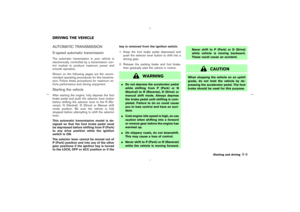 168
168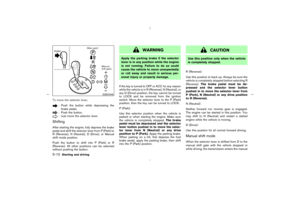 169
169 170
170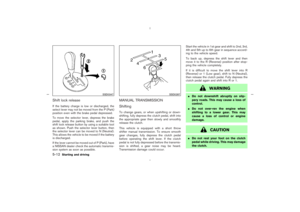 171
171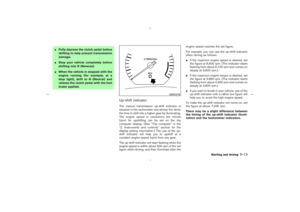 172
172 173
173 174
174 175
175 176
176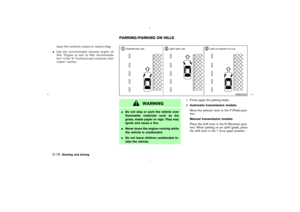 177
177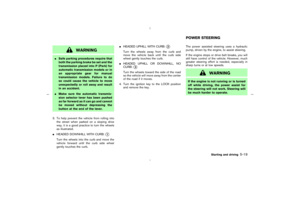 178
178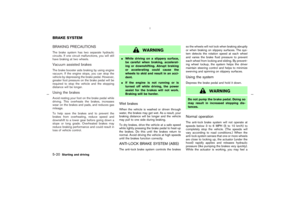 179
179 180
180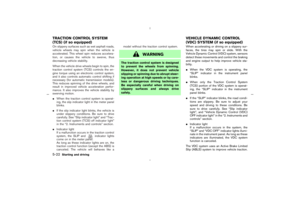 181
181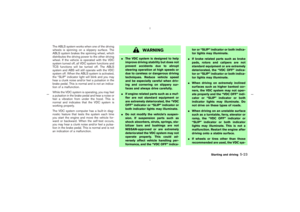 182
182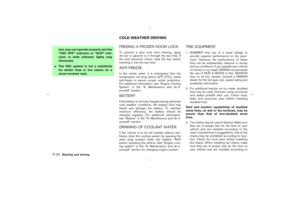 183
183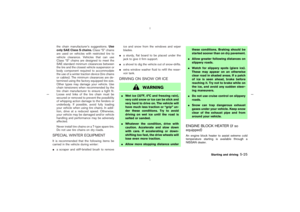 184
184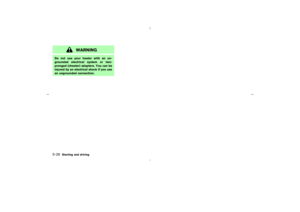 185
185 186
186 187
187 188
188 189
189 190
190 191
191 192
192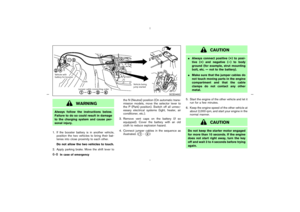 193
193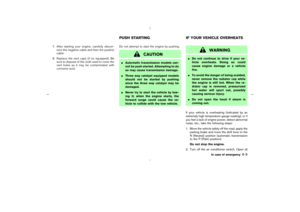 194
194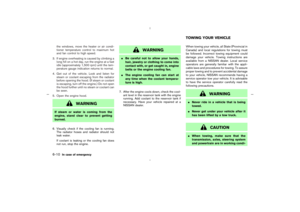 195
195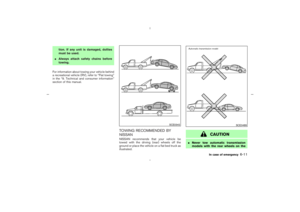 196
196 197
197 198
198 199
199 200
200 201
201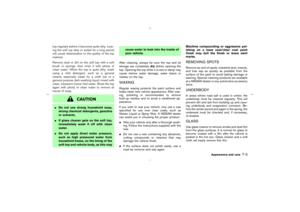 202
202 203
203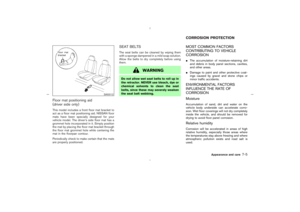 204
204 205
205 206
206 207
207 208
208 209
209 210
210 211
211 212
212 213
213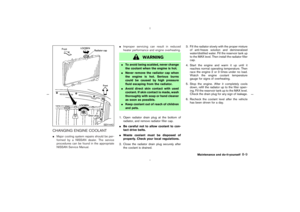 214
214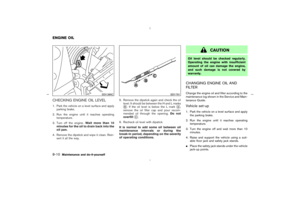 215
215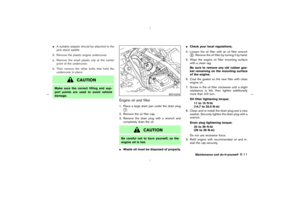 216
216 217
217 218
218 219
219 220
220 221
221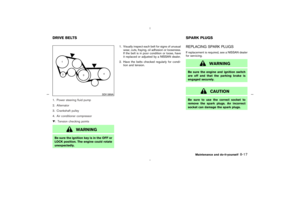 222
222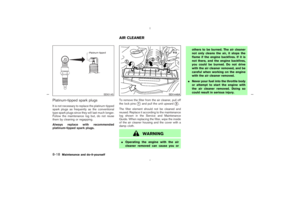 223
223 224
224 225
225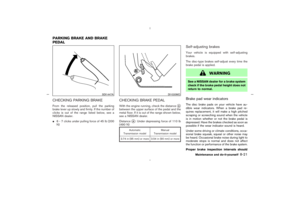 226
226 227
227 228
228 229
229 230
230 231
231 232
232 233
233 234
234 235
235 236
236 237
237 238
238 239
239 240
240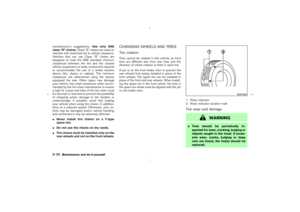 241
241 242
242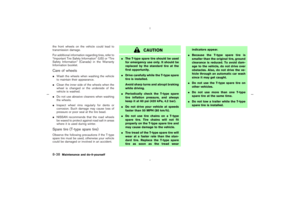 243
243 244
244 245
245 246
246 247
247 248
248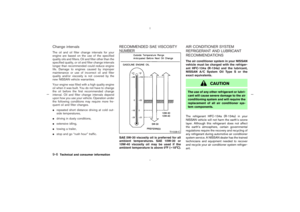 249
249 250
250 251
251 252
252 253
253 254
254 255
255 256
256 257
257 258
258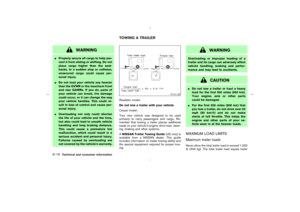 259
259 260
260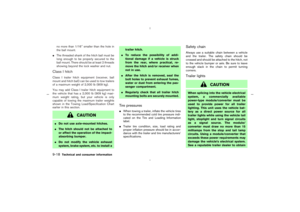 261
261 262
262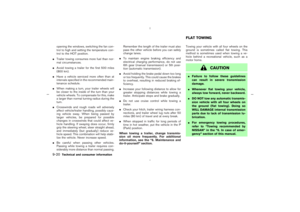 263
263 264
264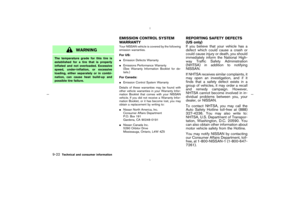 265
265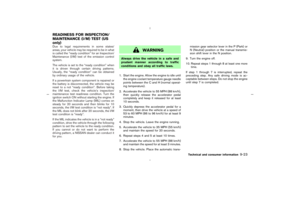 266
266 267
267 268
268 269
269 270
270 271
271 272
272 273
273 274
274 275
275 276
276 277
277 278
278