2004 SUBARU FORESTER engine
[x] Cancel search: enginePage 577 of 2870
CC(H4SO)-9
CRUISE CONTROL SYSTEM (DIAGNOSTIC)
Subaru Select Monitor
5. Subaru Select Monitor
A: OPERATION
1. GENERAL
The on-board diagnosis function of the cruise control
system uses an external Subaru Select Monitor.
The on-board diagnosis function operates in two cat-
egories, which are used depending on the type of
problems;
1) Cruise cancel conditions diagnosis:
(1) This category of diagnosis requires actual
vehicle driving in order to determine the cause,
(as when cruise speed is cancelled during driv-
ing although cruise cancel condition is not en-
tered).
(2) Cruise control module memory stores the
cancel condition (Code No.) which occurred dur-
ing driving. When there are plural cancel condi-
tions (Code No.), they are shown on the Subaru
Select Monitor.
CAUTION:
The cruise control memory stores not only the
cruise “cancel” which occurred (although “can-
cel” operation is not entered by the driver), but
also the “cancel” condition input by the driver.
The content of memory is cleared when igni-
tion switch or cruise main switch is turned OFF.
2) Real-time diagnosis:
The real-time diagnosis function is used to deter-
mine whether or not the input signal system is in
good order, according to signal emitted from
switches, sensors, etc.
(1) Vehicle cannot be driven at cruise speed be-
cause problem occurs in the cruise control sys-
tem or its associated circuits.
(2) Monitor the signal conditions from switches
and sensors.
2. CRUISE CANCEL CONDITIONS DIAG-
NOSIS
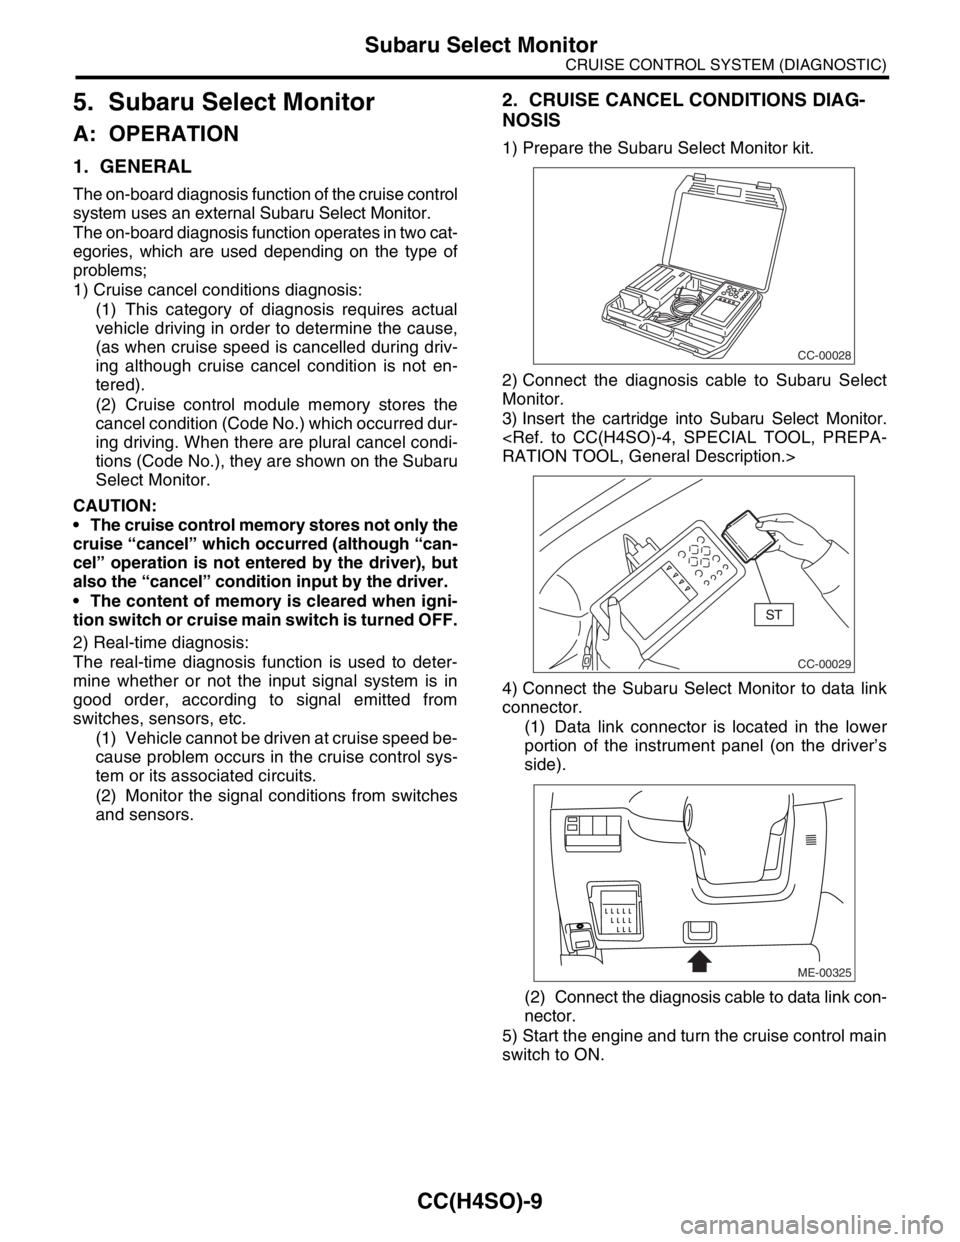
1) Prepare the Subaru Select Monitor kit.
2) Connect the diagnosis cable to Subaru Select
Monitor.
3) Insert the cartridge into Subaru Select Monitor.
4) Connect the Subaru Select Monitor to data link
connector.
(1) Data link connector is located in the lower
portion of the instrument panel (on the driver’s
side).
(2) Connect the diagnosis cable to data link con-
nector.
5) Start the engine and turn the cruise control main
switch to ON.
CC-00028
CC-00029
ME-00325
Page 578 of 2870
CC(H4SO)-10
CRUISE CONTROL SYSTEM (DIAGNOSTIC)
Subaru Select Monitor
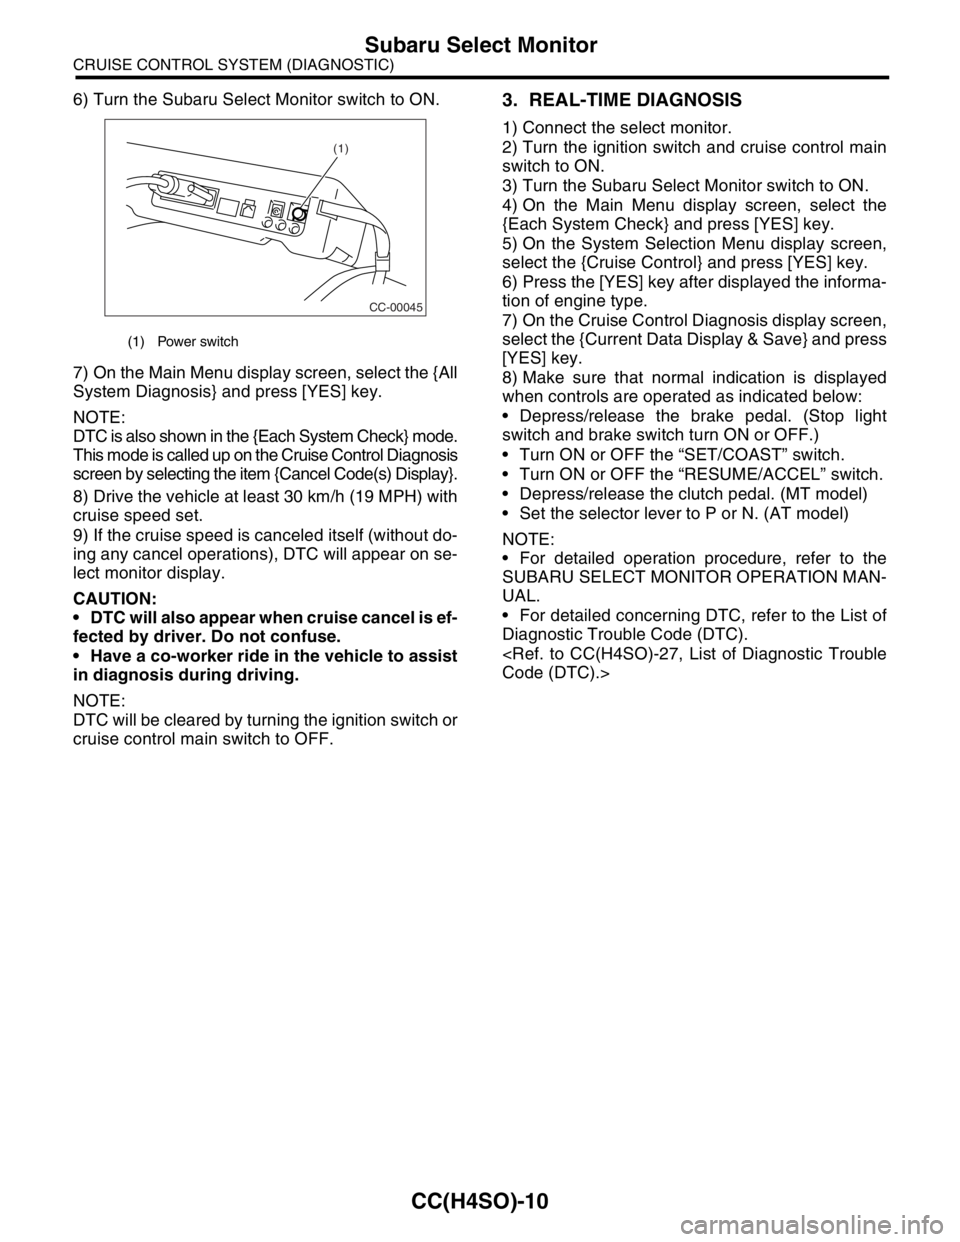
6) Turn the Subaru Select Monitor switch to ON.
7) On the Main Menu display screen, select the {All
System Diagnosis} and press [YES] key.
NOTE:
DTC is also shown in the {Each System Check} mode.
This mode is called up on the Cruise Control Diagnosis
screen by selecting the item {Cancel Code(s) Display}.
8) Drive the vehicle at least 30 km/h (19 MPH) with
cruise speed set.
9) If the cruise speed is canceled itself (without do-
ing any cancel operations), DTC will appear on se-
lect monitor display.
CAUTION:
DTC will also appear when cruise cancel is ef-
fected by driver. Do not confuse.
Have a co-worker ride in the vehicle to assist
in diagnosis during driving.
NOTE:
DTC will be cleared by turning the ignition switch or
cruise control main switch to OFF.3. REAL-TIME DIAGNOSIS
1) Connect the select monitor.
2) Turn the ignition switch and cruise control main
switch to ON.
3) Turn the Subaru Select Monitor switch to ON.
4) On the Main Menu display screen, select the
{Each System Check} and press [YES] key.
5) On the System Selection Menu display screen,
select the {Cruise Control} and press [YES] key.
6) Press the [YES] key after displayed the informa-
tion of engine type.
7) On the Cruise Control Diagnosis display screen,
select the {Current Data Display & Save} and press
[YES] key.
8) Make sure that normal indication is displayed
when controls are operated as indicated below:
Depress/release the brake pedal. (Stop light
switch and brake switch turn ON or OFF.)
Turn ON or OFF the “SET/COAST” switch.
Turn ON or OFF the “RESUME/ACCEL” switch.
Depress/release the clutch pedal. (MT model)
Set the selector lever to P or N. (AT model)
NOTE:
For detailed operation procedure, refer to the
SUBARU SELECT MONITOR OPERATION MAN-
UAL.
For detailed concerning DTC, refer to the List of
Diagnostic Trouble Code (DTC).
(1) Power switch
CC-00045
(1)
Page 599 of 2870

CC(H4SO)-31
CRUISE CONTROL SYSTEM (DIAGNOSTIC)
Diagnostic Procedure with Diagnostic Trouble Code (DTC)
Step Check Yes No
1 CHECK TRANSMISSION TYPE.Is the target MT model? Go to step 2.Go to step 6.
2 CHECK HARNESS BETWEEN BATTERY
AND VEHICLE SPEED SENSOR.
1) Turn the ignition switch to OFF.
2) Disconnect the harness connector from
vehicle speed sensor.
3) Turn the ignition switch to ON.
4) Measure the voltage between vehicle
speed sensor harness connector terminal and
chassis ground.
Connector & terminal
(B17) No. 3 (+) — Chassis ground (
−):Is the voltage more than 10 V? Go to step 3.Check the harness
for open or short
between fuse relay
and vehicle speed
sensor.
3 CHECK HARNESS BETWEEN CRUISE CON-
TROL MODULE AND VEHICLE SPEED SEN-
SOR.
1) Turn the ignition switch to OFF.
2) Disconnect the harness connector from
cruise control module.
3) Measure the resistance between vehicle
speed sensor harness connector terminal and
cruise control module harness connector ter-
minal.
Connector & terminal
(B17) No. 1 — (B94) No. 19:Is the resistance less than 10
Ω?Go to step 4.Repair the har-
ness.
4 CHECK HARNESS BETWEEN VEHICLE
SPEED SENSOR AND ENGINE GROUND.
1) Turn the ignition switch to OFF.
2) Measure the resistance between vehicle
speed sensor harness connector terminal and
engine ground.
Connector & terminal
(B17) No. 2 — Engine ground:Is the resistance less than 10
Ω?Go to step 5.Repair the har-
ness.
5 CHECK VEHICLE SPEED SENSOR.
1) Connect the harness connector to vehicle
speed sensor.
2) Lift-up the vehicle and support with rigid
racks.
3) Drive the vehicle at speed greater than 20
km/h (12 MPH).
Warning:
Be careful not to be caught up by the run-
ning wheels.
4) Measure the voltage between cruise control
module harness connector terminal and chas-
sis ground.
Connector & terminal
(B94) No. 19 (+) — Chassis ground (
−):Is the voltage less than 0 V ←
→ more than 5 V?Replace the cruise
control module.
Module.>Replace the vehi-
cle speed sensor.
6 CHECK HARNESS BETWEEN CRUISE CON-
TROL MODULE AND TCM.
1) Turn the ignition switch to OFF.
2) Disconnect the harness connector from
TCM and cruise control module.
3) Measure the resistance between cruise
control module harness connector terminal
and TCM harness connector terminal.
Connector & terminal
(B94) No. 19 — (B56) No. 17:Is the resistance less than 10
Ω?Go to step 7.Repair the har-
ness.
Page 613 of 2870

CRUISE CONTROL SYSTEM
(DIAGNOSTIC)
CC(H4DOTC 2.5)
Page
1. Basic Diagnostic Procedure ........................................................................2
2. General Description ....................................................................................4
3. Electrical Components Location..................................................................5
4. Engine Control Module (ECM) I/O Signal ...................................................6
5. Subaru Select Monitor.................................................................................8
6. Diagnostic Procedure with Symptom ........................................................10
7. List of Diagnostic Trouble Code (DTC) .....................................................13
8. Diagnostic Procedure with Diagnostic Trouble Code (DTC) .....................16
Page 617 of 2870
CC(H4DOTC 2.5)-5
CRUISE CONTROL SYSTEM (DIAGNOSTIC)
Electrical Components Location
3. Electrical Components Location
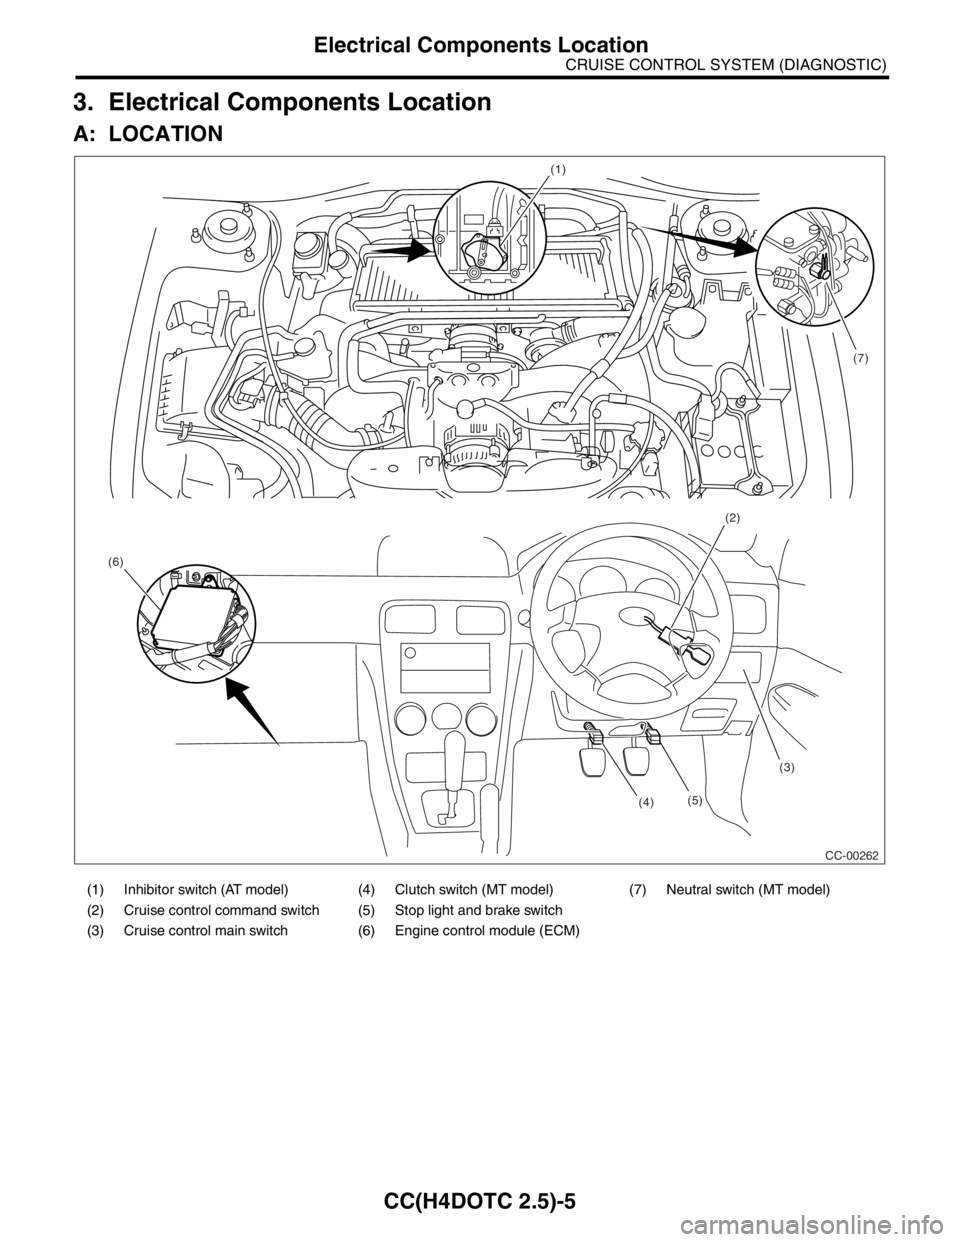
A: LOCATION
(1) Inhibitor switch (AT model) (4) Clutch switch (MT model) (7) Neutral switch (MT model)
(2) Cruise control command switch (5) Stop light and brake switch
(3) Cruise control main switch (6) Engine control module (ECM)
(1)
(2)
(3)
(4) (6)(7)
CC-00262 (5)
Page 618 of 2870
CC(H4DOTC 2.5)-6
CRUISE CONTROL SYSTEM (DIAGNOSTIC)
Engine Control Module (ECM) I/O Signal
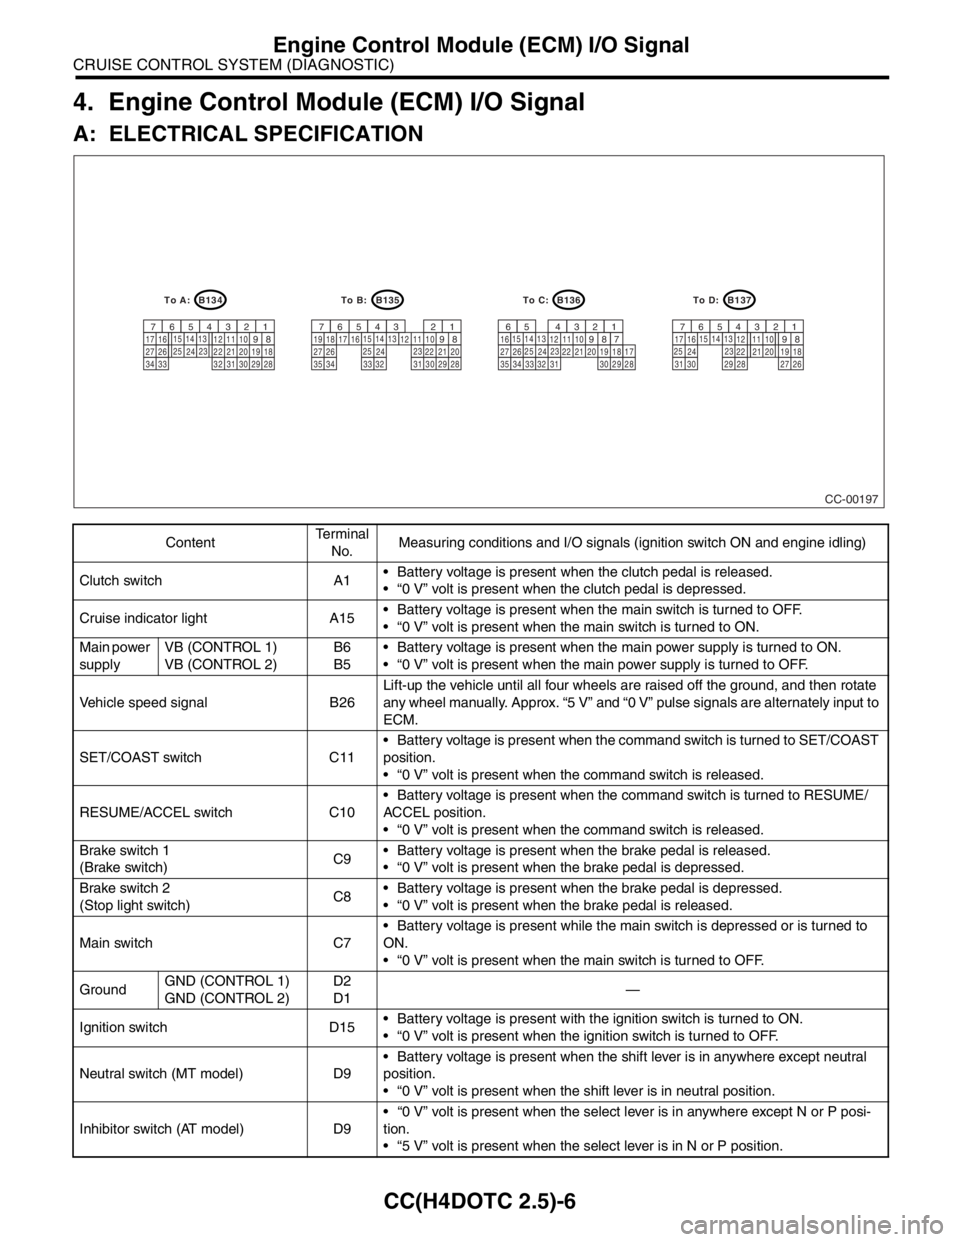
4. Engine Control Module (ECM) I/O Signal
A: ELECTRICAL SPECIFICATION
ContentTe r m i n a l
No.Measuring conditions and I/O signals (ignition switch ON and engine idling)
Clutch switch A1 Battery voltage is present when the clutch pedal is released.
“0 V” volt is present when the clutch pedal is depressed.
Cruise indicator light A15 Battery voltage is present when the main switch is turned to OFF.
“0 V” volt is present when the main switch is turned to ON.
Main power
supplyVB (CONTROL 1)
VB (CONTROL 2)B6
B5 Battery voltage is present when the main power supply is turned to ON.
“0 V” volt is present when the main power supply is turned to OFF.
Vehicle speed signal B26Lift-up the vehicle until all four wheels are raised off the ground, and then rotate
any wheel manually. Approx. “5 V” and “0 V” pulse signals are alternately input to
ECM.
SET/COAST switch C11 Battery voltage is present when the command switch is turned to SET/COAST
position.
“0 V” volt is present when the command switch is released.
RESUME/ACCEL switch C10 Battery voltage is present when the command switch is turned to RESUME/
ACCEL position.
“0 V” volt is present when the command switch is released.
Brake switch 1
(Brake switch)C9 Battery voltage is present when the brake pedal is released.
“0 V” volt is present when the brake pedal is depressed.
Brake switch 2
(Stop light switch)C8 Battery voltage is present when the brake pedal is depressed.
“0 V” volt is present when the brake pedal is released.
Main switch C7 Battery voltage is present while the main switch is depressed or is turned to
ON.
“0 V” volt is present when the main switch is turned to OFF.
GroundGND (CONTROL 1)
GND (CONTROL 2)D2
D1—
Ignition switch D15 Battery voltage is present with the ignition switch is turned to ON.
“0 V” volt is present when the ignition switch is turned to OFF.
Neutral switch (MT model) D9 Battery voltage is present when the shift lever is in anywhere except neutral
position.
“0 V” volt is present when the shift lever is in neutral position.
Inhibitor switch (AT model) D9 “0 V” volt is present when the select lever is in anywhere except N or P posi-
tion.
“5 V” volt is present when the select lever is in N or P position.
CC-00197
B134
9
30 29 28 32 3120 19 18 22 2110 12 1114
24
34 3327 2617 16123456713
23 15
258
B135
9
30 29 28
323120 22 2110 12 1114
24
35
3327 2617 16123456713
23 15
258
B136
9
30 29 28
32 3120 19 18 22 2110 12 1114
24
34 3327 261612345613
23 15
258
B137
9
29 2820 19 18 22
2110 12
1114
2417 16123456713
23 15
2581819
34
7173530 3127 26
To D: To C: To B: To A:
Page 619 of 2870

CC(H4DOTC 2.5)-7
CRUISE CONTROL SYSTEM (DIAGNOSTIC)
Engine Control Module (ECM) I/O Signal
B: WIRING DIAGRAM
Page 620 of 2870
CC(H4DOTC 2.5)-8
CRUISE CONTROL SYSTEM (DIAGNOSTIC)
Subaru Select Monitor
5. Subaru Select Monitor
A: OPERATION
1. GENERAL
The on-board diagnosis function of the cruise con-
trol system uses the Subaru Select Monitor.
The on-board diagnosis function operates in two
categories, which are used depending on the type
of problems;
1) Cruise cancel conditions diagnosis:
(1) This category of diagnosis requires actual ve-
hicle driving in order to determine the cause, (as
when cruise speed is cancelled during driving al-
though cruise cancel condition is not entered).
(2) Cruise control memory of ECM stores the
cancel condition (Code No.) which occurred dur-
ing driving. When there are plural cancel condi-
tions (Code No.), they are shown on the Subaru
Select Monitor.
CAUTION:
The cruise control memory stores not only the
cruise “cancel” which occurred (although “can-
cel” operation is not entered by the driver), but
also the “cancel” condition input by the driver.
The content of memory is cleared when igni-
tion switch or cruise main switch is turned OFF.
2) Real-time diagnosis:
The real-time diagnosis function is used to deter-
mine whether or not the input signal system is in
good order, according to signal emitted from
switches, sensors, etc.
(1) Vehicle cannot be driven at cruise speed be-
cause problem occurs in the cruise control sys-
tem or its associated circuits.
(2) Monitor the signal conditions from switches
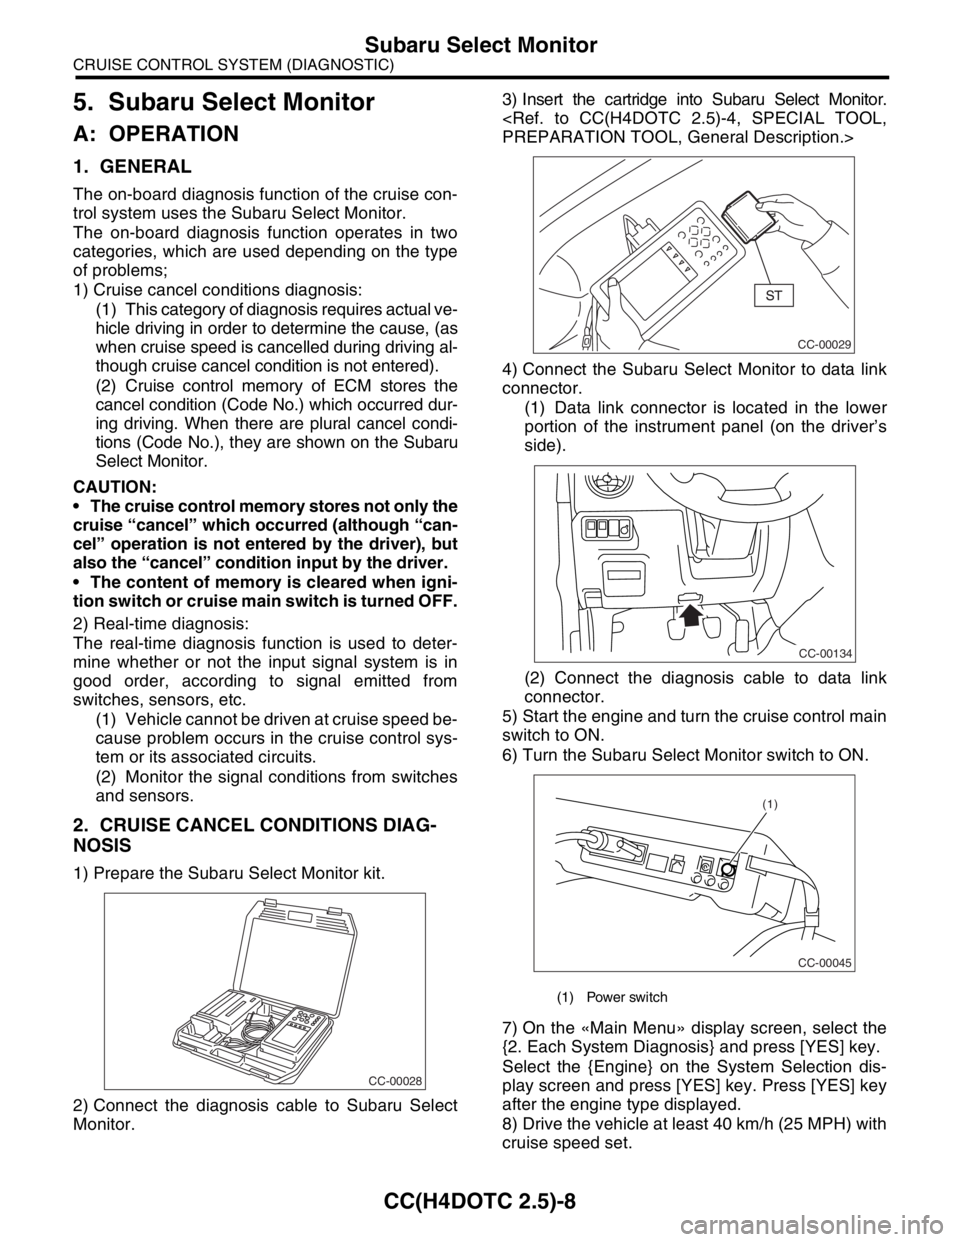
and sensors.
2. CRUISE CANCEL CONDITIONS DIAG-
NOSIS
1) Prepare the Subaru Select Monitor kit.
2) Connect the diagnosis cable to Subaru Select
Monitor.3) Insert the cartridge into Subaru Select Monitor.
4) Connect the Subaru Select Monitor to data link
connector.
(1) Data link connector is located in the lower
portion of the instrument panel (on the driver’s
side).
(2) Connect the diagnosis cable to data link
connector.
5) Start the engine and turn the cruise control main
switch to ON.
6) Turn the Subaru Select Monitor switch to ON.
7) On the «Main Menu» display screen, select the
{2. Each System Diagnosis} and press [YES] key.
Select the {Engine} on the System Selection dis-
play screen and press [YES] key. Press [YES] key
after the engine type displayed.
8) Drive the vehicle at least 40 km/h (25 MPH) with
cruise speed set.
CC-00028
(1) Power switch
CC-00029
CC-00134
CC-00045
(1)