Page 3198 of 4264

7B1-34 MANUAL TRANSMISSION
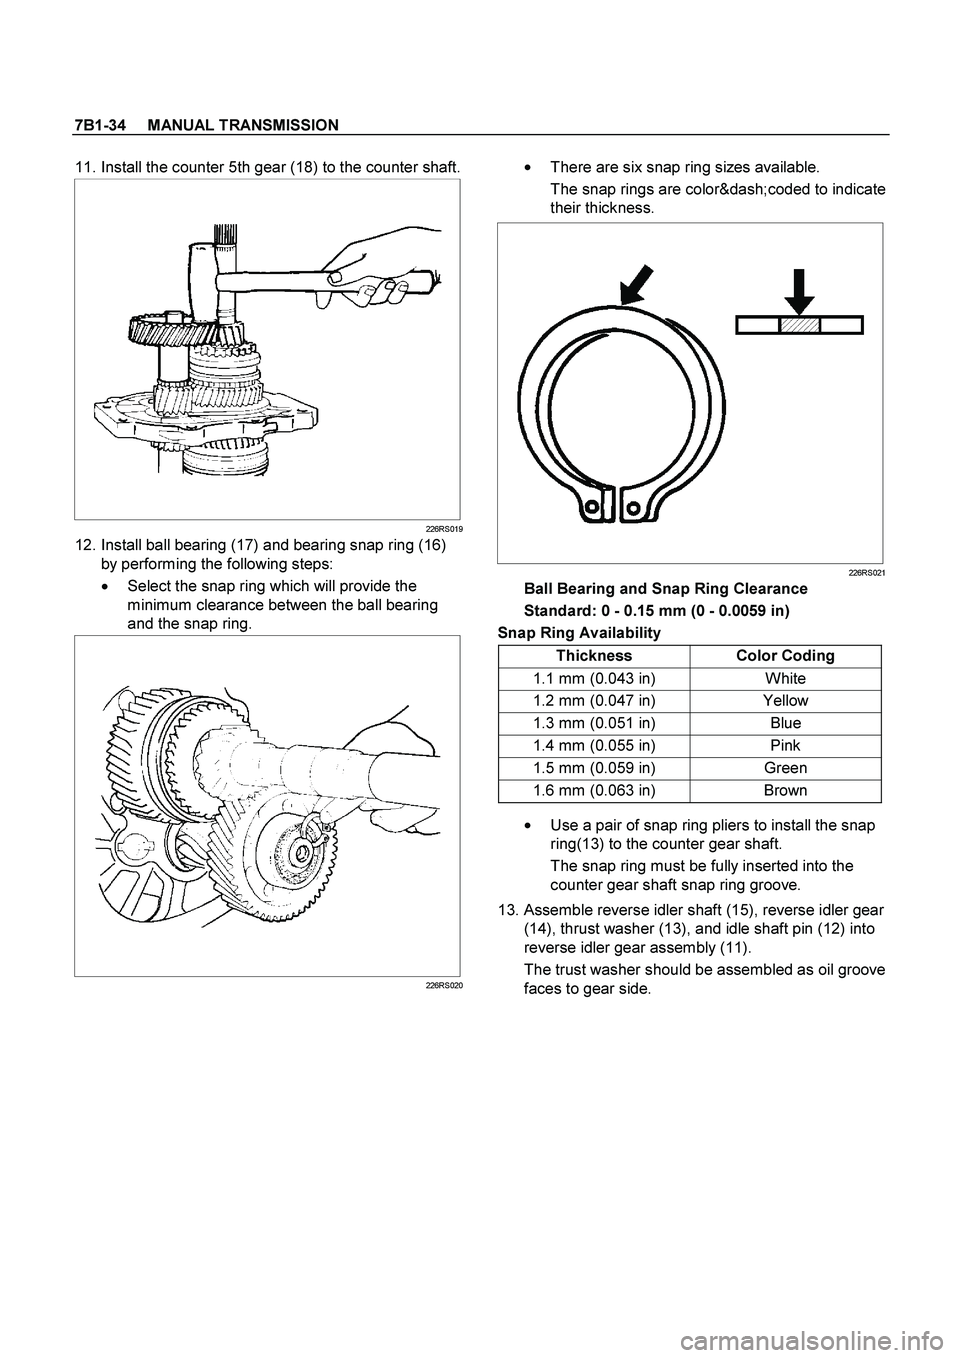
11. Install the counter 5th gear (18) to the counter shaft.
226RS019
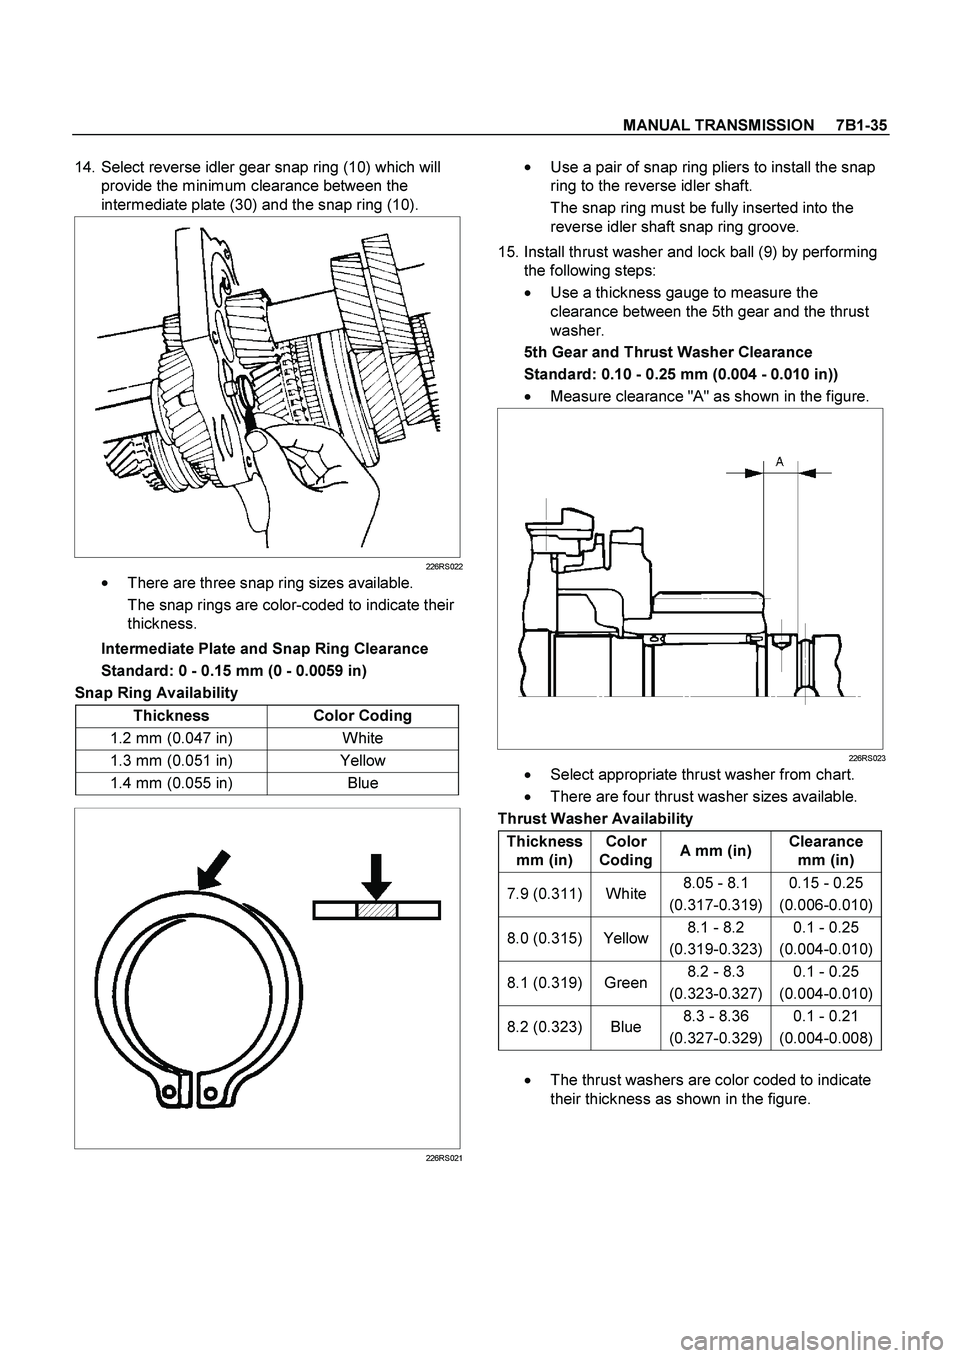
12. Install ball bearing (17) and bearing snap ring (16)
by performing the following steps:
�
Select the snap ring which will provide the
minimum clearance between the ball bearing
and the snap ring.
226RS020
�
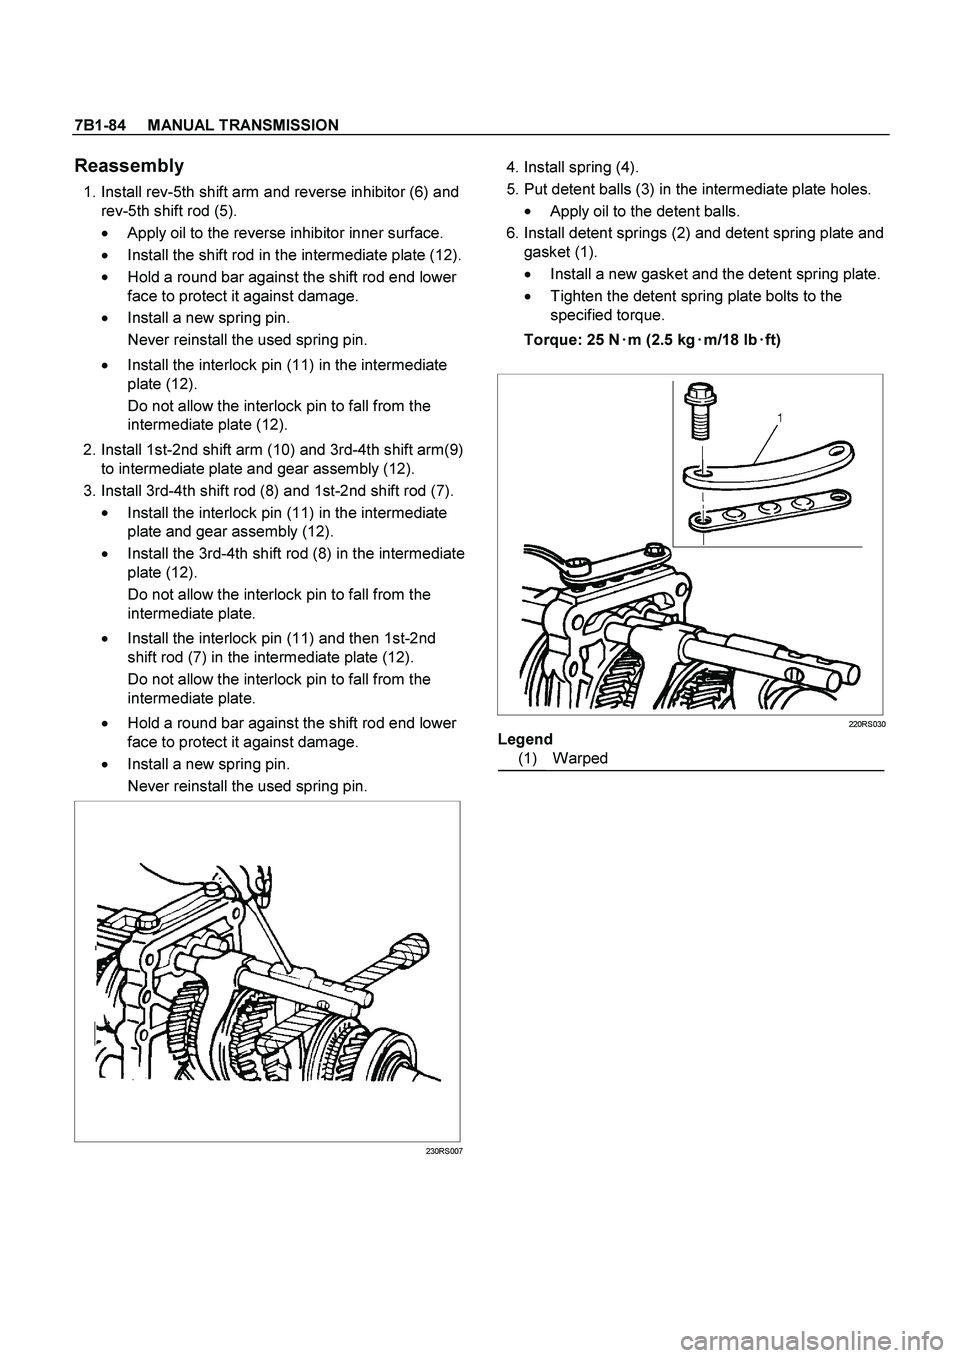
There are six snap ring sizes available.
The snap rings are color‐coded to indicate
their thickness.
226RS021
Ball Bearing and Snap Ring Clearance
Standard: 0 - 0.15 mm (0 - 0.0059 in)
Snap Ring Availability
Thickness Color Coding
1.1 mm (0.043 in) White
1.2 mm (0.047 in) Yellow
1.3 mm (0.051 in) Blue
1.4 mm (0.055 in) Pink
1.5 mm (0.059 in) Green
1.6 mm (0.063 in) Brown
�
Use a pair of snap ring pliers to install the snap
ring(13) to the counter gear shaft.
The snap ring must be fully inserted into the
counter gear shaft snap ring groove.
13. Assemble reverse idler shaft (15), reverse idler gear
(14), thrust washer (13), and idle shaft pin (12) into
reverse idler gear assembly (11).
The trust washer should be assembled as oil groove
faces to gear side.
Page 3199 of 4264

MANUAL TRANSMISSION 7B1-35
14. Select reverse idler gear snap ring (10) which will
provide the minimum clearance between the
intermediate plate (30) and the snap ring (10).
226RS022
�
There are three snap ring sizes available.
The snap rings are color-coded to indicate their
thickness.
Intermediate Plate and Snap Ring Clearance
Standard: 0 - 0.15 mm (0 - 0.0059 in)
Snap Ring Availability
Thickness Color Coding
1.2 mm (0.047 in) White
1.3 mm (0.051 in) Yellow
1.4 mm (0.055 in) Blue
226RS021
�
Use a pair of snap ring pliers to install the snap
ring to the reverse idler shaft.
The snap ring must be fully inserted into the
reverse idler shaft snap ring groove.
15. Install thrust washer and lock ball (9) by performing
the following steps:
�
Use a thickness gauge to measure the
clearance between the 5th gear and the thrust
washer.
5th Gear and Thrust Washer Clearance
Standard: 0.10 - 0.25 mm (0.004 - 0.010 in))
� Measure clearance "A" as shown in the figure.
226RS023
�
Select appropriate thrust washer from chart.
�
There are four thrust washer sizes available.
Thrust Washer Availability
Thickness
mm (in) Color
CodingA mm (in) Clearance
mm (in)
7.9 (0.311) White 8.05 - 8.1
(0.317-0.319) 0.15 - 0.25
(0.006-0.010)
8.0 (0.315) Yellow8.1 - 8.2
(0.319-0.323) 0.1 - 0.25
(0.004-0.010)
8.1 (0.319) Green8.2 - 8.3
(0.323-0.327) 0.1 - 0.25
(0.004-0.010)
8.2 (0.323) Blue 8.3 - 8.36
(0.327-0.329) 0.1 - 0.21
(0.004-0.008)
�
The thrust washers are color coded to indicate
their thickness as shown in the figure.
Page 3207 of 4264

MANUAL TRANSMISSION 7B1-43
Mainshaft Run-out
� Install the mainshaft to V-blocks.
�
Use a dial indicator to measure the mainshaft
central portion run-out.
226RS039
If the measured mainshaft run-out exceeds the
specified limit, the mainshaft must be replaced.
Mainshaft Run-out
Limit: 0.05 mm (0.0020 in)
Gear Inside Diameter
�
Use an inside dial indicator to measure the gear
inside diameter.
226RS040
If the measured value is less than the specified limit,
the gear must be replace.
Gear Inside Diameter
Standard Limit
1st
3rd 45.000 - 45.013 mm
(1.771 - 1.772 in) 45.100 mm
(1.776 in)
2nd 52.000 - 52.013 mm
(2.047 - 2.048 in) 52.100 mm
(2.051 in)
Rev. 48.000 - 48.013 mm
(1.889 - 1.890 in) 48.100 mm
(1.894 in)
5th 32.000 - 32.013 mm
(1.259 - 1.260 in) 32.100 mm
(1.246 in)
Reverse Idler Gear and Idler Gear Shaft
Clearance
�
Use a micrometer to measure the idler gear shaft
diameter.
� Use an inside dial indicator to measure the idler
gear inside diameter.
226RS041
�
Calculate the idler gear and idler gear shaft
clearance.
Idler gear inside diameter-idler gear shaft diameter =
idle gear and idler gear shaft clearance.
If the measured value exceeds the specified limit,
the idle gear and/or the idler gear shaft must be
replaced
Idler Gear and Idler Gear Shaft Clearance
Standard: 0.041 - 0.074 mm (0.0016 -0.0029 in)
Limit: 0.150 mm (0.0059 in)
Page 3214 of 4264
7B1-50 MANUAL TRANSMISSION
Main Data and Specifications
General Specifications
MUA 5G MUA 5S
Transmission type Fully synchronized forward and reverse gears
Control method Remote control with the gear shift lever on the floor.
Gear ratio: Transmission 1st 4.008 4.357
2nd 2.301 2.502
3rd 1.427 1.501
4th 1.000 1.000
5th 0.828 0.809
Rev. 3.651 3.970
Transmission oil capacity 2.95 lit. (3.12 US qt)
Type of lubricant Engine oil: Refer to the chart in "SECTION 0"
Page 3218 of 4264
7B1-54 MANUAL TRANSMISSION
TROUBLESHOOTING
1. ABNORMAL NOISE
1) NOISY IN NEUTRAL
Checkpoint Trouble Cause Countermeasure
Replenish or replace the gear
oilInsufficient or improper gear
oil NG
Mainshaft splines
Synchronizer clutch hub
splinesReplace the main shaft and
the synchronizer clutch hub
Replace the gear(s)
Replace the flywheel pilot
Worn splines
Worn or scuffed gear tooth
contact surfaces
Flywheel pilot bearingWorn flywheel pilot bearing
Bearings (Mainshaft,
countershaft, and transfer
shaft)
Gears (Mainshaft,
countershaft, reverse idler
gear and transfer gears)
Replace the bearing(s)Worn or broken bearing(s)
OK
NG NG NG NG OK
OK
OK
Gear oil
TransmissionRealign the transmissionTransmission misalignment OK
NG
Page 3245 of 4264
MANUAL TRANSMISSION 7B1-81
Intermediate Plate with Gear Assembly, Detent, Shift Arm, Shift Rod, and
Interlock Pin
Disassembled View
RTW47BLF000501
Legend
(1) Detent Spring Plate and Gasket (7) 1st-2nd Shift Rod
(2) Detent Spring (8) 3rd-4th Shift Rod
(3) Detent Ball (9) 3rd-4th Shift Arm
(4) Spring (10) 1st-2nd Shift Arm
(5) Rev-5th Shift Rod (11) Interlock Pin
(6) Rev-5th Shift Arm and Reverse Inhibitor (12) Intermediate Plate and Gear Assembly
Page 3246 of 4264
7B1-82 MANUAL TRANSMISSION
Disassembly
1. Remove detent spring plate and gasket (1), detent
spring (2) and detent ball (3).
Use a magnetic hand to remove the detent balls
from the intermediate plate.
220RS011
2. Remove spring (4).
3. Remove rev-5th shift rod (5), and rev-5th shift arm
and reverse inhibitor (6).
Remove 1st-2nd shift rod (7), 3rd-4th shift rod (8),
3rd-4th shift arm (9), and 1st-2nd shift arm (10).
�
Hold a round bar against the shift rod end.
230RS003
� Use a spring pin remover to remove the shift
arm spring pins from the shift arms and the shift
rods.
230RS0004
�
Be careful not to lose the interlock pins, when
pulling out the shift rod rearward.
Interlock pins are located between the shifter
rods in the intermediate plate.
230RS0005
� Remove the rev-5th, 1st-2nd and 3rd-4th shift
rods carefully.
4. Remove interlock pin (11) from intermediate plate
and gear assembly (12).
Page 3248 of 4264

7B1-84 MANUAL TRANSMISSION
Reassembly
1. Install rev-5th shift arm and reverse inhibitor (6) and
rev-5th shift rod (5).
� Apply oil to the reverse inhibitor inner surface.
� Install the shift rod in the intermediate plate (12).
�
Hold a round bar against the shift rod end lower
face to protect it against damage.
� Install a new spring pin.
Never reinstall the used spring pin.
�
Install the interlock pin (11) in the intermediate
plate (12).
Do not allow the interlock pin to fall from the
intermediate plate (12).
2. Install 1st-2nd shift arm (10) and 3rd-4th shift arm(9)
to intermediate plate and gear assembly (12).
3. Install 3rd-4th shift rod (8) and 1st-2nd shift rod (7).
�
Install the interlock pin (11) in the intermediate
plate and gear assembly (12).
�
Install the 3rd-4th shift rod (8) in the intermediate
plate (12).
Do not allow the interlock pin to fall from the
intermediate plate.
�
Install the interlock pin (11) and then 1st-2nd
shift rod (7) in the intermediate plate (12).
Do not allow the interlock pin to fall from the
intermediate plate.
�
Hold a round bar against the shift rod end lower
face to protect it against damage.
� Install a new spring pin.
Never reinstall the used spring pin.
230RS007
4. Install spring (4).
5. Put detent balls (3) in the intermediate plate holes.
�
Apply oil to the detent balls.
6. Install detent springs (2) and detent spring plate and
gasket (1).
�
Install a new gasket and the detent spring plate.
�
Tighten the detent spring plate bolts to the
specified torque.
Torque: 25 N�
�� �m (2.5 kg�
�� �m/18 lb�
�� �ft)
220RS030
Legend
(1) Warped