Page 2663 of 4323
A08928
ECM Connector ECM and Bracket AssemblyHeater to Register Dust
Lower No.2 Finish Panel
Glove Compartment Door
Wire Harness Connector (Cassette Connector)
A23366
Engine Wire Clamp
Engine WireHeater Hose Ground Strap
Fuel Inlet
HoseBattery
Negative
(±) Cable Heater Hose
Fuel Return
Hose
Generator Wire
Battery
Positive (+)
Terminal Clamp
Generator
Connector
EVAP Hose
w/o Hydraulic Brake Booster:
Brake Booster Tube
EM±76
± ENGINE MECHANICALENGINE UNIT (2WD)
2655 Author�: Date�:
2005 SEQUOIA (RM1146U)
Page 2666 of 4323

EM120±07
B07536
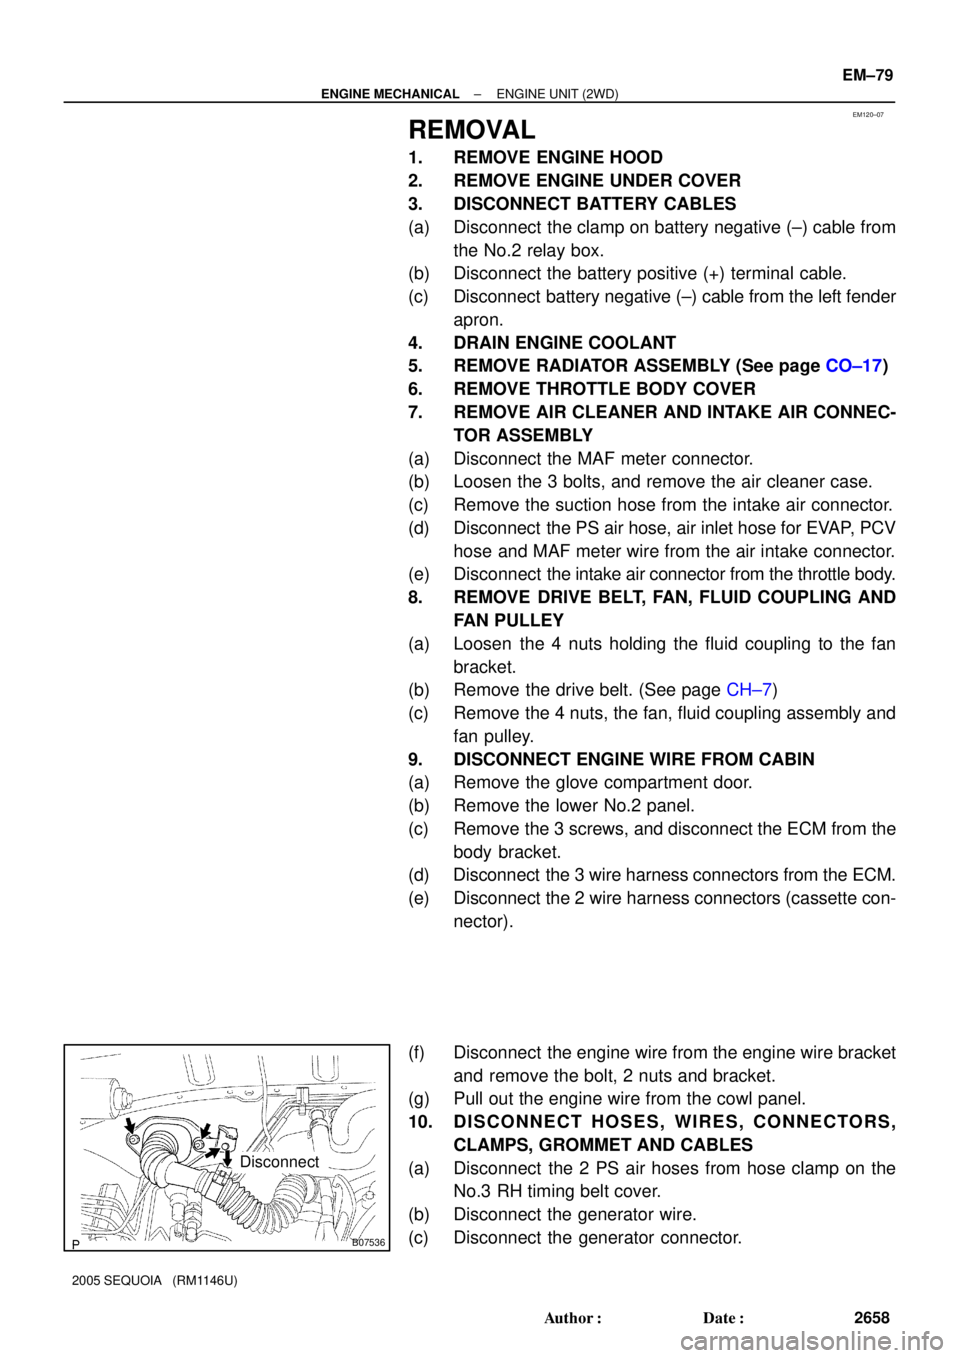
Disconnect
± ENGINE MECHANICALENGINE UNIT (2WD)
EM±79
2658 Author�: Date�:
2005 SEQUOIA (RM1146U)
REMOVAL
1. REMOVE ENGINE HOOD
2. REMOVE ENGINE UNDER COVER
3. DISCONNECT BATTERY CABLES
(a) Disconnect the clamp on battery negative (±) cable from
the No.2 relay box.
(b) Disconnect the battery positive (+) terminal cable.
(c) Disconnect battery negative (±) cable from the left fender
apron.
4. DRAIN ENGINE COOLANT
5. REMOVE RADIATOR ASSEMBLY (See page CO±17)
6. REMOVE THROTTLE BODY COVER
7. REMOVE AIR CLEANER AND INTAKE AIR CONNEC-
TOR ASSEMBLY
(a) Disconnect the MAF meter connector.
(b) Loosen the 3 bolts, and remove the air cleaner case.
(c) Remove the suction hose from the intake air connector.
(d) Disconnect the PS air hose, air inlet hose for EVAP, PCV
hose and MAF meter wire from the air intake connector.
(e) Disconnect the intake air connector from the throttle body.
8. REMOVE DRIVE BELT, FAN, FLUID COUPLING AND
FAN PULLEY
(a) Loosen the 4 nuts holding the fluid coupling to the fan
bracket.
(b) Remove the drive belt. (See page CH±7)
(c) Remove the 4 nuts, the fan, fluid coupling assembly and
fan pulley.
9. DISCONNECT ENGINE WIRE FROM CABIN
(a) Remove the glove compartment door.
(b) Remove the lower No.2 panel.
(c) Remove the 3 screws, and disconnect the ECM from the
body bracket.
(d) Disconnect the 3 wire harness connectors from the ECM.
(e) Disconnect the 2 wire harness connectors (cassette con-
nector).
(f) Disconnect the engine wire from the engine wire bracket
and remove the bolt, 2 nuts and bracket.
(g) Pull out the engine wire from the cowl panel.
10. DISCONNECT HOSES, WIRES, CONNECTORS,
CLAMPS, GROMMET AND CABLES
(a) Disconnect the 2 PS air hoses from hose clamp on the
No.3 RH timing belt cover.
(b) Disconnect the generator wire.
(c) Disconnect the generator connector.
Page 2674 of 4323

A09152
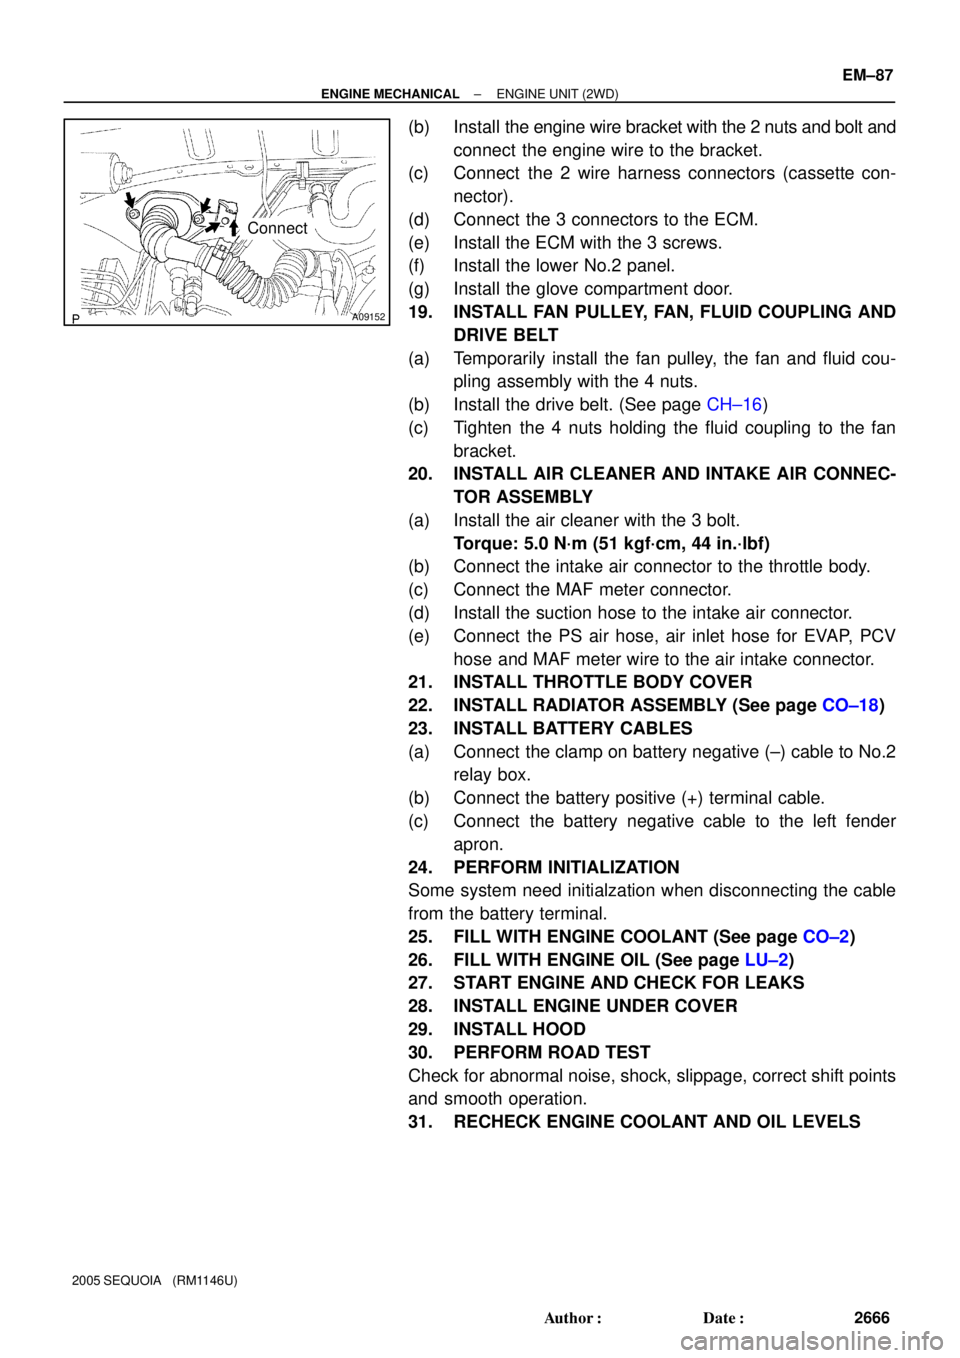
Connect
± ENGINE MECHANICALENGINE UNIT (2WD)
EM±87
2666 Author�: Date�:
2005 SEQUOIA (RM1146U)
(b) Install the engine wire bracket with the 2 nuts and bolt and
connect the engine wire to the bracket.
(c) Connect the 2 wire harness connectors (cassette con-
nector).
(d) Connect the 3 connectors to the ECM.
(e) Install the ECM with the 3 screws.
(f) Install the lower No.2 panel.
(g) Install the glove compartment door.
19. INSTALL FAN PULLEY, FAN, FLUID COUPLING AND
DRIVE BELT
(a) Temporarily install the fan pulley, the fan and fluid cou-
pling assembly with the 4 nuts.
(b) Install the drive belt. (See page CH±16)
(c) Tighten the 4 nuts holding the fluid coupling to the fan
bracket.
20. INSTALL AIR CLEANER AND INTAKE AIR CONNEC-
TOR ASSEMBLY
(a) Install the air cleaner with the 3 bolt.
Torque: 5.0 N´m (51 kgf´cm, 44 in.´lbf)
(b) Connect the intake air connector to the throttle body.
(c) Connect the MAF meter connector.
(d) Install the suction hose to the intake air connector.
(e) Connect the PS air hose, air inlet hose for EVAP, PCV
hose and MAF meter wire to the air intake connector.
21. INSTALL THROTTLE BODY COVER
22. INSTALL RADIATOR ASSEMBLY (See page CO±18)
23. INSTALL BATTERY CABLES
(a) Connect the clamp on battery negative (±) cable to No.2
relay box.
(b) Connect the battery positive (+) terminal cable.
(c) Connect the battery negative cable to the left fender
apron.
24. PERFORM INITIALIZATION
Some system need initialzation when disconnecting the cable
from the battery terminal.
25. FILL WITH ENGINE COOLANT (See page CO±2)
26. FILL WITH ENGINE OIL (See page LU±2)
27. START ENGINE AND CHECK FOR LEAKS
28. INSTALL ENGINE UNDER COVER
29. INSTALL HOOD
30. PERFORM ROAD TEST
Check for abnormal noise, shock, slippage, correct shift points
and smooth operation.
31. RECHECK ENGINE COOLANT AND OIL LEVELS
Page 2676 of 4323
A08928
ECM Connector ECM and Bracket AssemblyHeater to Register Dust
Lower No.2 Finish Panel
Glove Compartment Door
Wire Harness Connector (Cassette Connector)
A23366
Engine Wire Clamp
Engine WireHeater Hose Ground Strap
Fuel Inlet
HoseBattery
Negative
(±) Cable Heater Hose
Fuel Return
Hose
Generator Wire
Battery
Positive (+)
Terminal Clamp
Generator
Connector
EVAP Hose
w/o Hydraulic Brake Booster:
Brake Booster Tube
± ENGINE MECHANICALENGINE UNIT (4WD)
EM±89
2668 Author�: Date�:
2005 SEQUOIA (RM1146U)
Page 2679 of 4323

EM11X±07
EM±92
± ENGINE MECHANICALENGINE UNIT (4WD)
2671 Author�: Date�:
2005 SEQUOIA (RM1146U)
REMOVAL
1. REMOVE FRONT EXHAUST PIPES
(See page EM±126)
2. REMOVE FRONT AND REAR PROPELLER SHAFTS
(See page PR±7)
3. REMOVE FRONT STABILIZER BAR
(See page SA±91)
4. REMOVE TRANSMISSION (See page AT±25)
5. REMOVE ENGINE HOOD
6. REMOVE ENGINE UNDER COVER
7. DISCONNECT BATTERY CABLES
(a) Disconnect the clamp on battery negative (±) cable from
the No.2 relay box.
(b) Disconnect the battery positive (+) terminal cable.
(c) Disconnect the battery negative (±) cable from the left
fender apron.
8. DRAIN ENGINE COOLANT
9. REMOVE RADIATOR ASSEMBLY (See page CO±17)
10. REMOVE THROTTLE BODY COVER
11. REMOVE AIR CLEANER AND INTAKE AIR CONNEC-
TOR ASSEMBLY
(a) Disconnect the MAF meter connector.
(b) Loosen the 3 bolts, and remove the air cleaner case.
(c) Remove the suction hose from the intake air connector.
(d) Disconnect the PS air hose, air inlet hose for EVAP, PCV
hose and MAF meter wire from the air intake connector.
(e) Disconnect the intake air connector from the throttle body.
12. REMOVE DRIVE BELT, FAN, FLUID COUPLING AND
FAN PULLEY
(a) Loosen the 4 nuts holding the fluid coupling to the fan
bracket.
(b) Remove the drive belt. (See page CH±16)
(c) Remove the 4 nuts, the fan, fluid coupling assembly and
fan pulley.
13. DISCONNECT ENGINE WIRE FROM CABIN
(a) Remove the glove compartment door.
(b) Remove the lower No.2 panel.
(c) Remove the 3 screws, and disconnect the ECM from the
body bracket.
(d) Disconnect the 3 wire harness connectors from the ECM.
(e) Disconnect the 2 wire harness connectors (cassette con-
nector).
Page 2684 of 4323

A09152
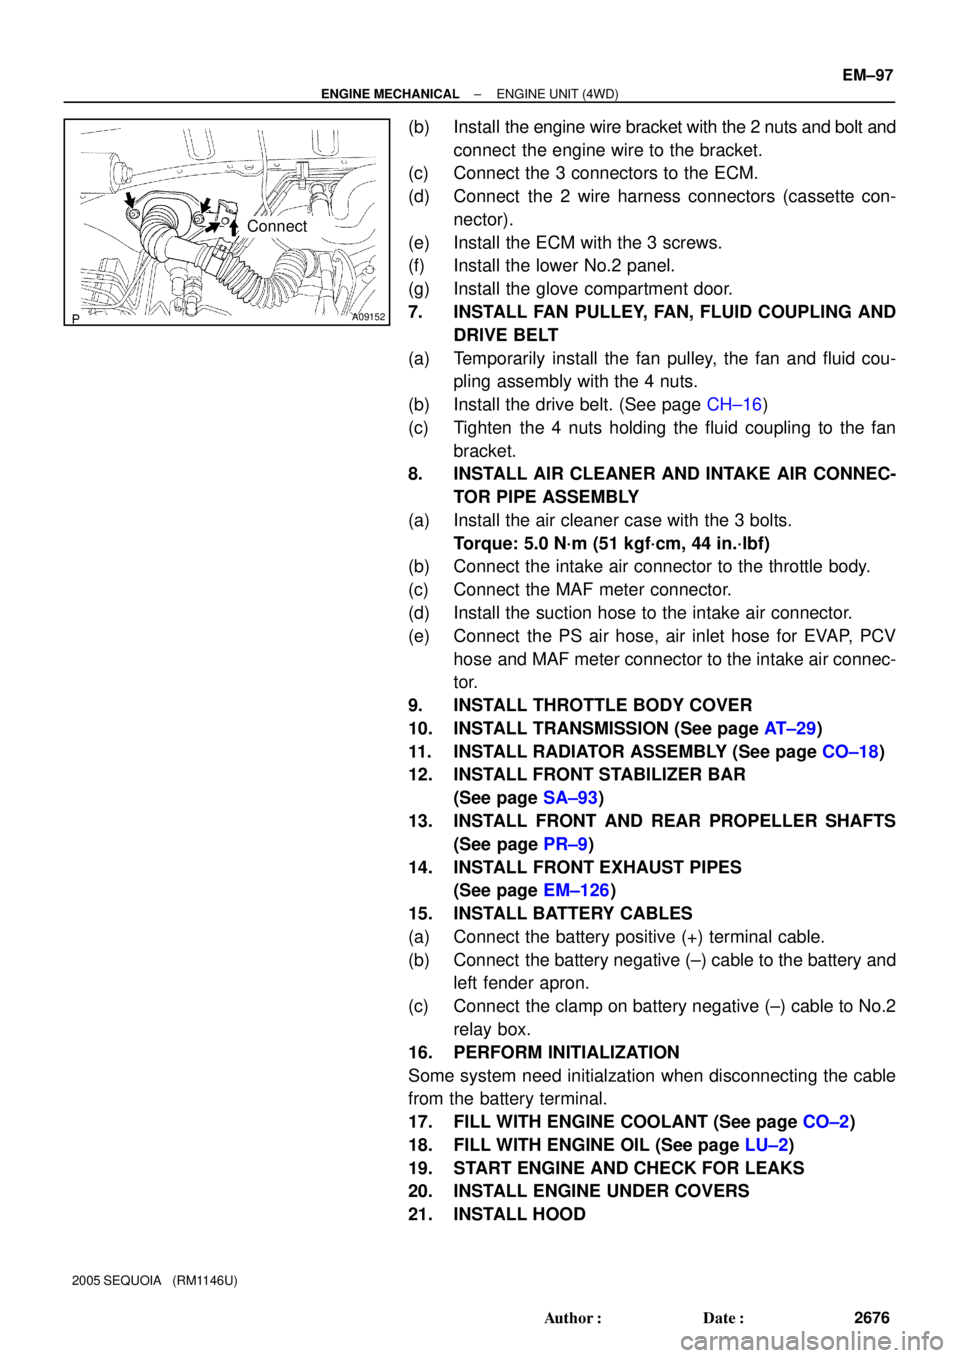
Connect
± ENGINE MECHANICALENGINE UNIT (4WD)
EM±97
2676 Author�: Date�:
2005 SEQUOIA (RM1146U)
(b) Install the engine wire bracket with the 2 nuts and bolt and
connect the engine wire to the bracket.
(c) Connect the 3 connectors to the ECM.
(d) Connect the 2 wire harness connectors (cassette con-
nector).
(e) Install the ECM with the 3 screws.
(f) Install the lower No.2 panel.
(g) Install the glove compartment door.
7. INSTALL FAN PULLEY, FAN, FLUID COUPLING AND
DRIVE BELT
(a) Temporarily install the fan pulley, the fan and fluid cou-
pling assembly with the 4 nuts.
(b) Install the drive belt. (See page CH±16)
(c) Tighten the 4 nuts holding the fluid coupling to the fan
bracket.
8. INSTALL AIR CLEANER AND INTAKE AIR CONNEC-
TOR PIPE ASSEMBLY
(a) Install the air cleaner case with the 3 bolts.
Torque: 5.0 N´m (51 kgf´cm, 44 in.´lbf)
(b) Connect the intake air connector to the throttle body.
(c) Connect the MAF meter connector.
(d) Install the suction hose to the intake air connector.
(e) Connect the PS air hose, air inlet hose for EVAP, PCV
hose and MAF meter connector to the intake air connec-
tor.
9. INSTALL THROTTLE BODY COVER
10. INSTALL TRANSMISSION (See page AT±29)
11. INSTALL RADIATOR ASSEMBLY (See page CO±18)
12. INSTALL FRONT STABILIZER BAR
(See page SA±93)
13. INSTALL FRONT AND REAR PROPELLER SHAFTS
(See page PR±9)
14. INSTALL FRONT EXHAUST PIPES
(See page EM±126)
15. INSTALL BATTERY CABLES
(a) Connect the battery positive (+) terminal cable.
(b) Connect the battery negative (±) cable to the battery and
left fender apron.
(c) Connect the clamp on battery negative (±) cable to No.2
relay box.
16. PERFORM INITIALIZATION
Some system need initialzation when disconnecting the cable
from the battery terminal.
17. FILL WITH ENGINE COOLANT (See page CO±2)
18. FILL WITH ENGINE OIL (See page LU±2)
19. START ENGINE AND CHECK FOR LEAKS
20. INSTALL ENGINE UNDER COVERS
21. INSTALL HOOD
Page 2726 of 4323

B16489
Battery
B06545
Vacuum Gauge
B17595
EC±10
± EMISSION CONTROLEVAPORATIVE EMISSION (EVAP) CONTROL SYSTEM
2718 Author�: Date�:
2005 SEQUOIA (RM1146U)
(d) When not using a hand±held tester:
Operation of the VSV for the EVAP.
(1) Disconnect the VSV for the EVAP connector.
(2) Connect leads from the positive (+) and negative (±)
battery terminals to the VSV for EVAP terminals.
(3) Start the engine.
(e) Check the vacuum when the engine idles.
Vacuum:
Maintain between 0.368 and 19.713 in.Hg (5 to 268
in.Aq) for over 5 seconds
HINT:
If the vacuum does not change, the hose connecting the VSV
and the service port is loose or blocked, or the VSV is malfunc-
tioning.
(f) When using a hand±held tester:
Conclude operation of the VSV for EVAP.
(1) Stop the engine.
(2) Disconnect the hand±held tester from the DLC3.
(g) When not using a hand±held tester:
Conclude operation of the VSV for EVAP.
(1) Stop the engine.
(2) Disconnect the positive (+) and negative (±) leads
of the battery from the VSV for EVAP terminals.
(3) Connect the VSV for EVAP connector.
(h) Disconnect the vacuum gauge from the EVAP service
port on the purge line.
(i) Connect a pressure gauge to the EVAP service port on
the purge line.
(j) Check the pressure.
(1) Prepare a rubber hose that has an inside diameter
of 15 to 18.5 mm.
(2) Disconnect the atmospheric side hose of the pump
module.
(3) Connect the prepared rubber hose to the pump
module, and pinch the rubber hose with the clip to
prevent air from entering into the canister passage.
Page 2734 of 4323

B17517
Air
B17612
B17613
EC±18
± EMISSION CONTROLSECONDARY AIR INJECTION SYSTEM
2726 Author�: Date�:
2005 SEQUOIA (RM1146U)
(e) Apply positive battery between the terminals, check that
air flows from the ports.
If the result is not as specified, replace the VSV.
(f) Connect the 2 vacuum hoses to the VSV.
NOTICE:
Be sure to connect the vacuum hoses correctly.
(g) Connect the connector to the VSV.
(h) Perform procedures (a) to (g) to the other VSV.
3. INSPECT NO. 2 AIR SWITCHING VALVE
(a) Disconnect the vacuum hose from the VSV for the air in-
jection system.
(b) Apply vacuum (30 kPa (306 gf/cm
2, 4.35 psi) to vacuum
hose, check that the vacuum does not decrease.
If operation is not as specified, replace the No.2 air switching
valve.
(c) Release the vacuum, and check that the operation sound
is emited from the No.2 air switching valve.
If operation is not as specified, replace the No.2 air switching
valve.
(d) Perform procedures (a) to (c) to the other No.2 air seitch-
ing valve.