Page 2717 of 2898
REMOVAL AND INSTALLATION/3-DOOR HATCHBACK=NJRS00571. Slide the seat all the way forward and tilt the seatback toward the front.
2. Remove adjuster cover.
3. Remove floor anchor bolt.
4. Remove shoulder anchor bolt.
5. Remove rear side finisher and rear pillar garnish. Refer to BT-34, ªSIDE AND FLOOR TRIMº for details.
6. Disconnect seat belt pre-tensioner connector.
7. Remove the screw securing seat belt pre-tensioner retractor, then remove seat belt and seat belt pre-ten-
sioner retractor.
8. Remove bolts securing seat belt adjuster, then remove seat belt adjuster.
SRS856
SEAT BELTS
Front Seat Belt (Cont'd)
RS-9
Page 2719 of 2898
Rear Seat Belt
REMOVAL AND INSTALLATION/4-DOOR SEDAN WITH 2-POINT TYPE REAR CENTER SEAT
BELT
=NJRS00421. Remove rear seat. Refer to BT-60, ªREAR SEATº for details.
2. Remove outer and floor anchor bolt.
3. Remove rear side garnish. Refer to BT-31, ªSIDE AND FLOOR TRIMº for details.
4. Remove rear parcel shelf finisher. Refer to BT-31, ªSIDE AND FLOOR TRIMº for details.
5. Remove bolts securing rear seat belt retractor, then remove seat belt and seat belt retractor.
SRS814
SEAT BELTS
Rear Seat Belt
RS-11
Page 2721 of 2898
REMOVAL AND INSTALLATION/4-DOOR SEDAN WITH 3-POINT TYPE REAR CENTER SEAT
BELT
=NJRS00631. Remove rear seat. Refer to BT-60, ªREAR SEATº for details.
2. Remove outer and floor anchor bolt.
3. Remove rear side garnish. Refer to BT-31, ªSIDE AND FLOOR TRIMº for details.
4. Remove rear parcel shelf finisher. Refer to BT-31, ªSIDE AND FLOOR TRIMº for details.
5. Remove bolts securing rear seat belt retractor, then remove seat belt and seat belt retractor.
SRS889
SEAT BELTS
Rear Seat Belt (Cont'd)
RS-13
Page 2723 of 2898
REMOVAL AND INSTALLATION/HATCHBACK=NJRS00581. Remove rear seat. Refer to BT-60, ªREAR SEATº for details.
2. Remove outer and floor anchor bolt.
3. Remove rear parcel shelf finisher. Refer to BT-31, ªSIDE AND FLOOR TRIMº for details.
4. Remove rear side garnish. Refer to BT-31, ªSIDE AND FLOOR TRIMº for details.
5. Remove bolts securing rear seat belt retractor, then remove seat belt and seat belt retractor.
6. Remove cover garnish at headlining. Refer to BT-31, ªSIDE AND FLOOR TRIMº for details. Then remove
seat belt retractor.
SRS858
SEAT BELTS
Rear Seat Belt (Cont'd)
RS-15
Page 2731 of 2898

SRS444
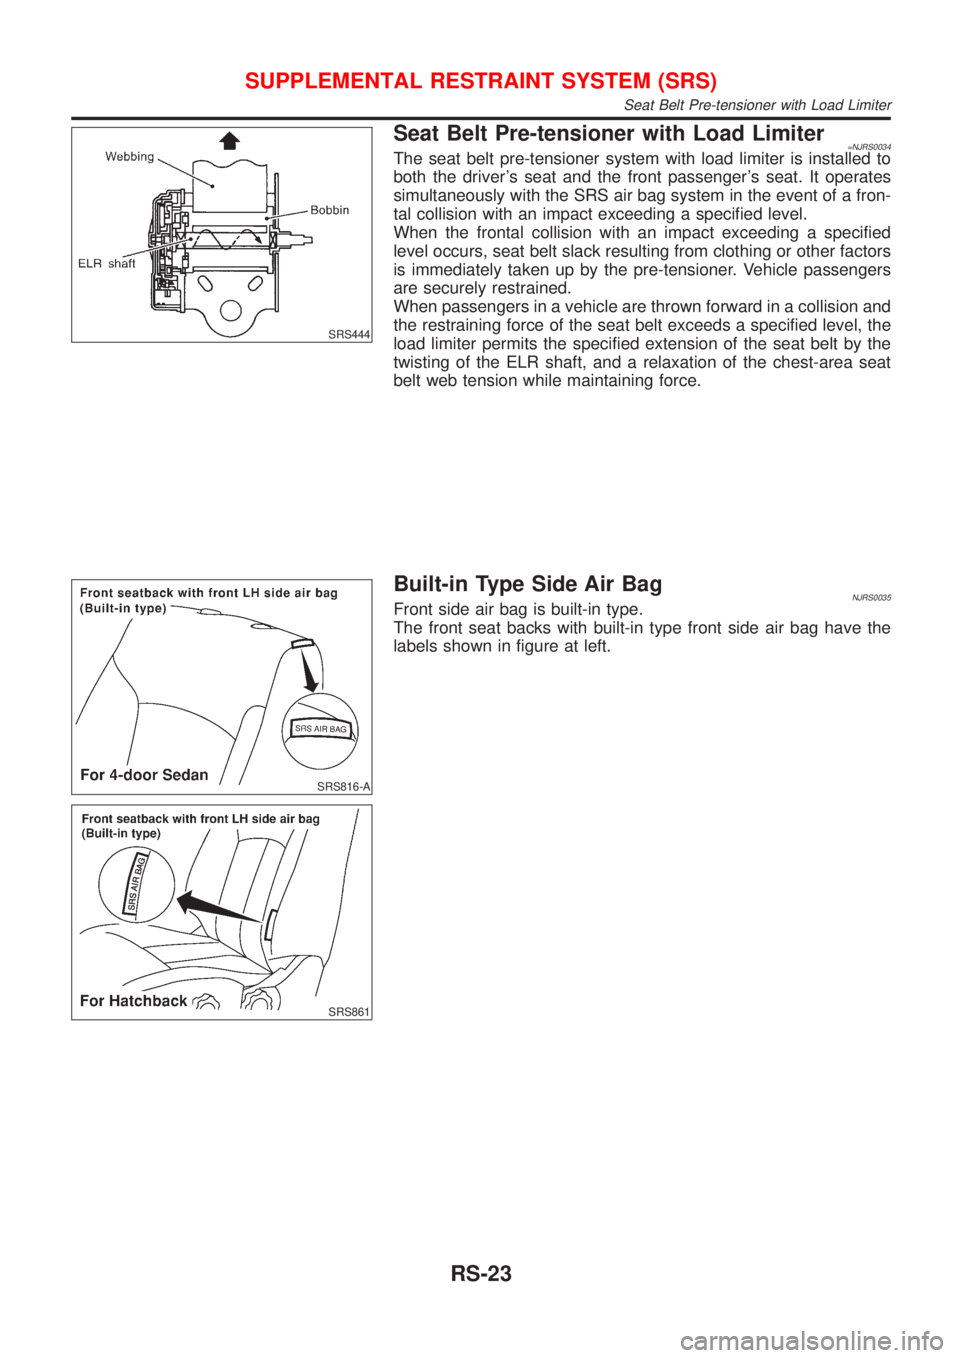
Seat Belt Pre-tensioner with Load Limiter=NJRS0034The seat belt pre-tensioner system with load limiter is installed to
both the driver's seat and the front passenger's seat. It operates
simultaneously with the SRS air bag system in the event of a fron-
tal collision with an impact exceeding a specified level.
When the frontal collision with an impact exceeding a specified
level occurs, seat belt slack resulting from clothing or other factors
is immediately taken up by the pre-tensioner. Vehicle passengers
are securely restrained.
When passengers in a vehicle are thrown forward in a collision and
the restraining force of the seat belt exceeds a specified level, the
load limiter permits the specified extension of the seat belt by the
twisting of the ELR shaft, and a relaxation of the chest-area seat
belt web tension while maintaining force.
SRS816-A
SRS861
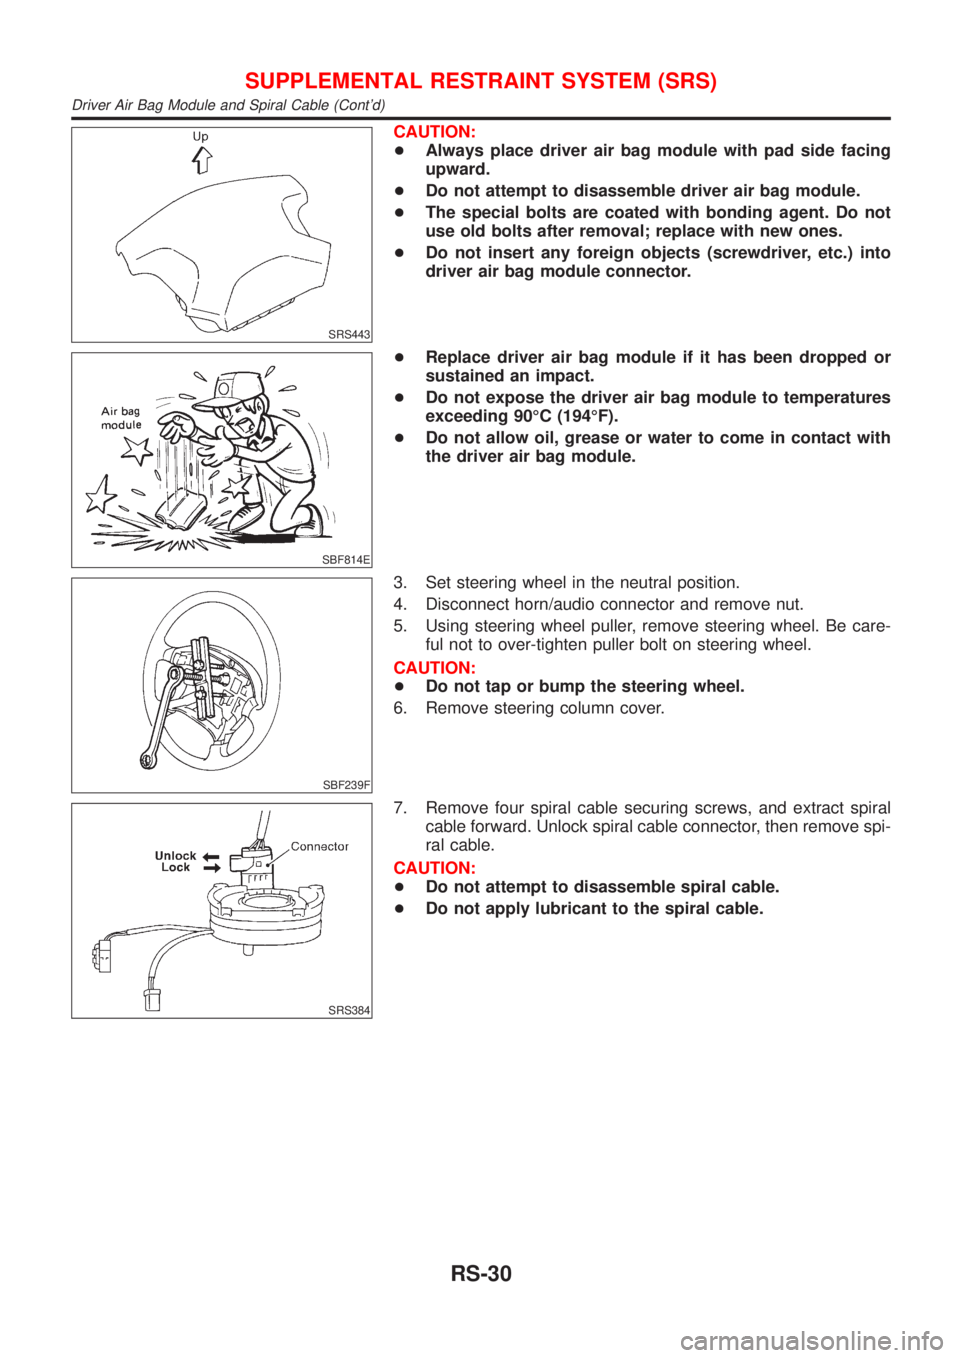
Built-in Type Side Air BagNJRS0035Front side air bag is built-in type.
The front seat backs with built-in type front side air bag have the
labels shown in figure at left.
SUPPLEMENTAL RESTRAINT SYSTEM (SRS)
Seat Belt Pre-tensioner with Load Limiter
RS-23
Page 2738 of 2898

SRS443
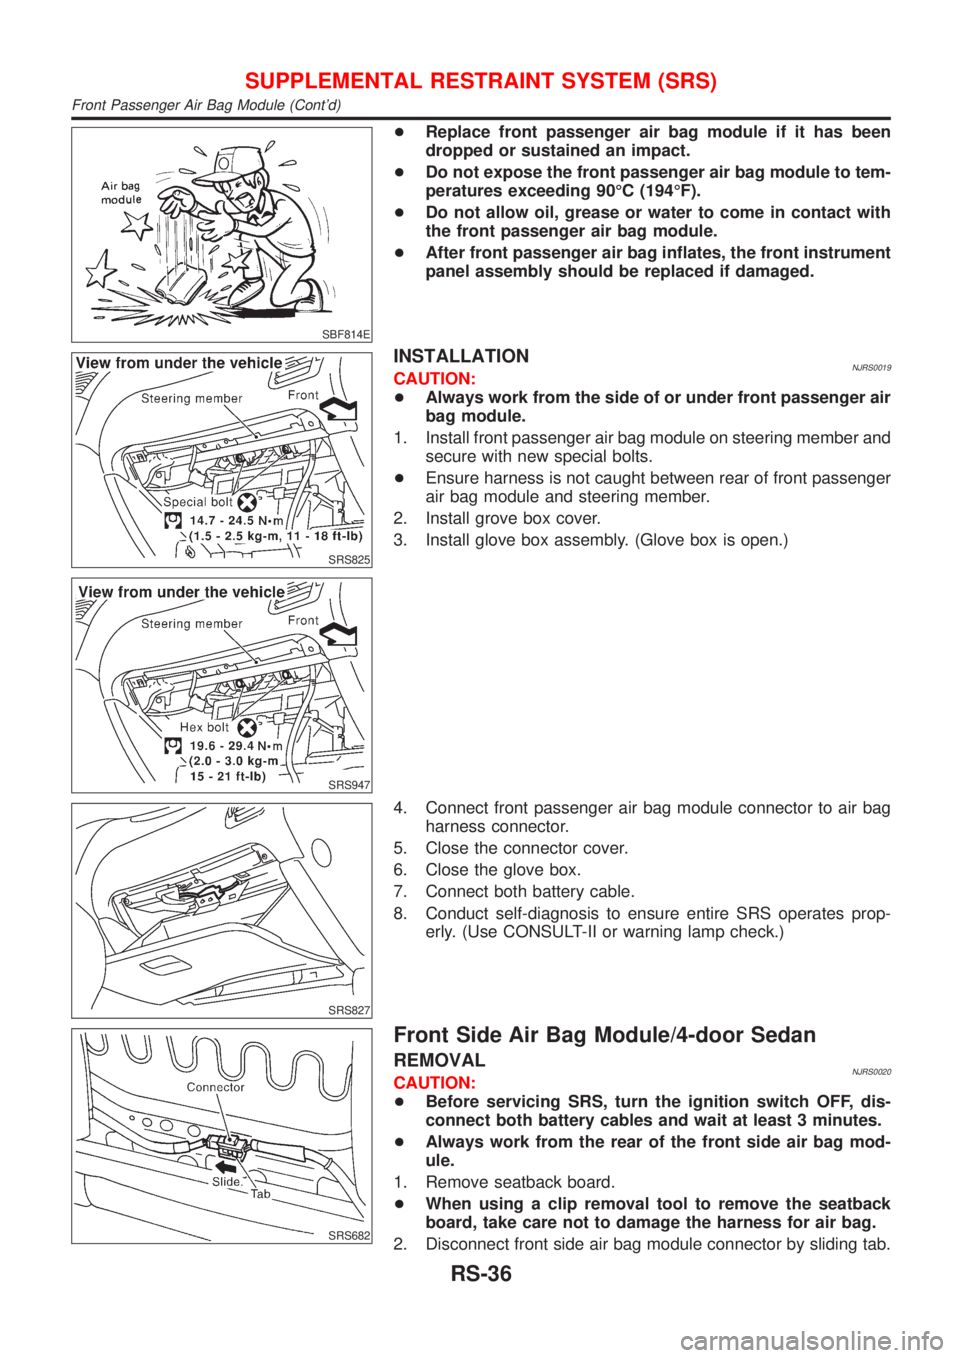
CAUTION:
+Always place driver air bag module with pad side facing
upward.
+Do not attempt to disassemble driver air bag module.
+The special bolts are coated with bonding agent. Do not
use old bolts after removal; replace with new ones.
+Do not insert any foreign objects (screwdriver, etc.) into
driver air bag module connector.
SBF814E
+Replace driver air bag module if it has been dropped or
sustained an impact.
+Do not expose the driver air bag module to temperatures
exceeding 90ÉC (194ÉF).
+Do not allow oil, grease or water to come in contact with
the driver air bag module.
SBF239F
3. Set steering wheel in the neutral position.
4. Disconnect horn/audio connector and remove nut.
5. Using steering wheel puller, remove steering wheel. Be care-
ful not to over-tighten puller bolt on steering wheel.
CAUTION:
+Do not tap or bump the steering wheel.
6. Remove steering column cover.
SRS384
7. Remove four spiral cable securing screws, and extract spiral
cable forward. Unlock spiral cable connector, then remove spi-
ral cable.
CAUTION:
+Do not attempt to disassemble spiral cable.
+Do not apply lubricant to the spiral cable.
SUPPLEMENTAL RESTRAINT SYSTEM (SRS)
Driver Air Bag Module and Spiral Cable (Cont'd)
RS-30
Page 2744 of 2898

SBF814E
+Replace front passenger air bag module if it has been
dropped or sustained an impact.
+Do not expose the front passenger air bag module to tem-
peratures exceeding 90ÉC (194ÉF).
+Do not allow oil, grease or water to come in contact with
the front passenger air bag module.
+After front passenger air bag inflates, the front instrument
panel assembly should be replaced if damaged.
SRS825
SRS947
INSTALLATIONNJRS0019CAUTION:
+Always work from the side of or under front passenger air
bag module.
1. Install front passenger air bag module on steering member and
secure with new special bolts.
+Ensure harness is not caught between rear of front passenger
air bag module and steering member.
2. Install grove box cover.
3. Install glove box assembly. (Glove box is open.)
SRS827
4. Connect front passenger air bag module connector to air bag
harness connector.
5. Close the connector cover.
6. Close the glove box.
7. Connect both battery cable.
8. Conduct self-diagnosis to ensure entire SRS operates prop-
erly. (Use CONSULT-II or warning lamp check.)
SRS682
Front Side Air Bag Module/4-door Sedan
REMOVALNJRS0020CAUTION:
+Before servicing SRS, turn the ignition switch OFF, dis-
connect both battery cables and wait at least 3 minutes.
+Always work from the rear of the front side air bag mod-
ule.
1. Remove seatback board.
+When using a clip removal tool to remove the seatback
board, take care not to damage the harness for air bag.
2. Disconnect front side air bag module connector by sliding tab.
SUPPLEMENTAL RESTRAINT SYSTEM (SRS)
Front Passenger Air Bag Module (Cont'd)
RS-36
Page 2745 of 2898

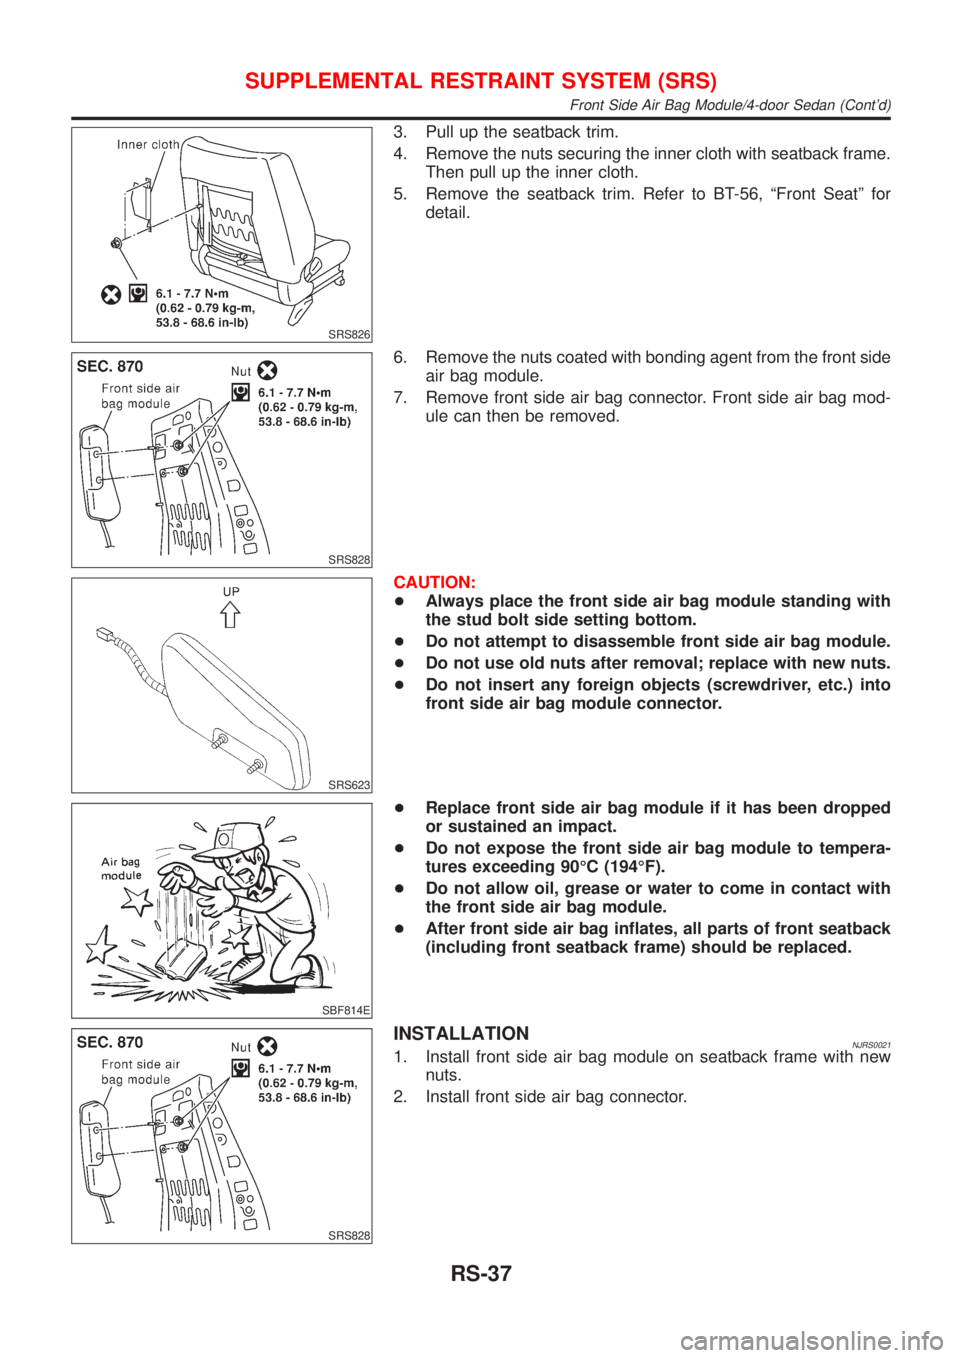
SRS826
3. Pull up the seatback trim.
4. Remove the nuts securing the inner cloth with seatback frame.
Then pull up the inner cloth.
5. Remove the seatback trim. Refer to BT-56, ªFront Seatº for
detail.
SRS828
6. Remove the nuts coated with bonding agent from the front side
air bag module.
7. Remove front side air bag connector. Front side air bag mod-
ule can then be removed.
SRS623
CAUTION:
+Always place the front side air bag module standing with
the stud bolt side setting bottom.
+Do not attempt to disassemble front side air bag module.
+Do not use old nuts after removal; replace with new nuts.
+Do not insert any foreign objects (screwdriver, etc.) into
front side air bag module connector.
SBF814E
+Replace front side air bag module if it has been dropped
or sustained an impact.
+Do not expose the front side air bag module to tempera-
tures exceeding 90ÉC (194ÉF).
+Do not allow oil, grease or water to come in contact with
the front side air bag module.
+After front side air bag inflates, all parts of front seatback
(including front seatback frame) should be replaced.
SRS828
INSTALLATIONNJRS00211. Install front side air bag module on seatback frame with new
nuts.
2. Install front side air bag connector.
SUPPLEMENTAL RESTRAINT SYSTEM (SRS)
Front Side Air Bag Module/4-door Sedan (Cont'd)
RS-37