1999 NISSAN PRIMERA warning lights
[x] Cancel search: warning lightsPage 2022 of 2267

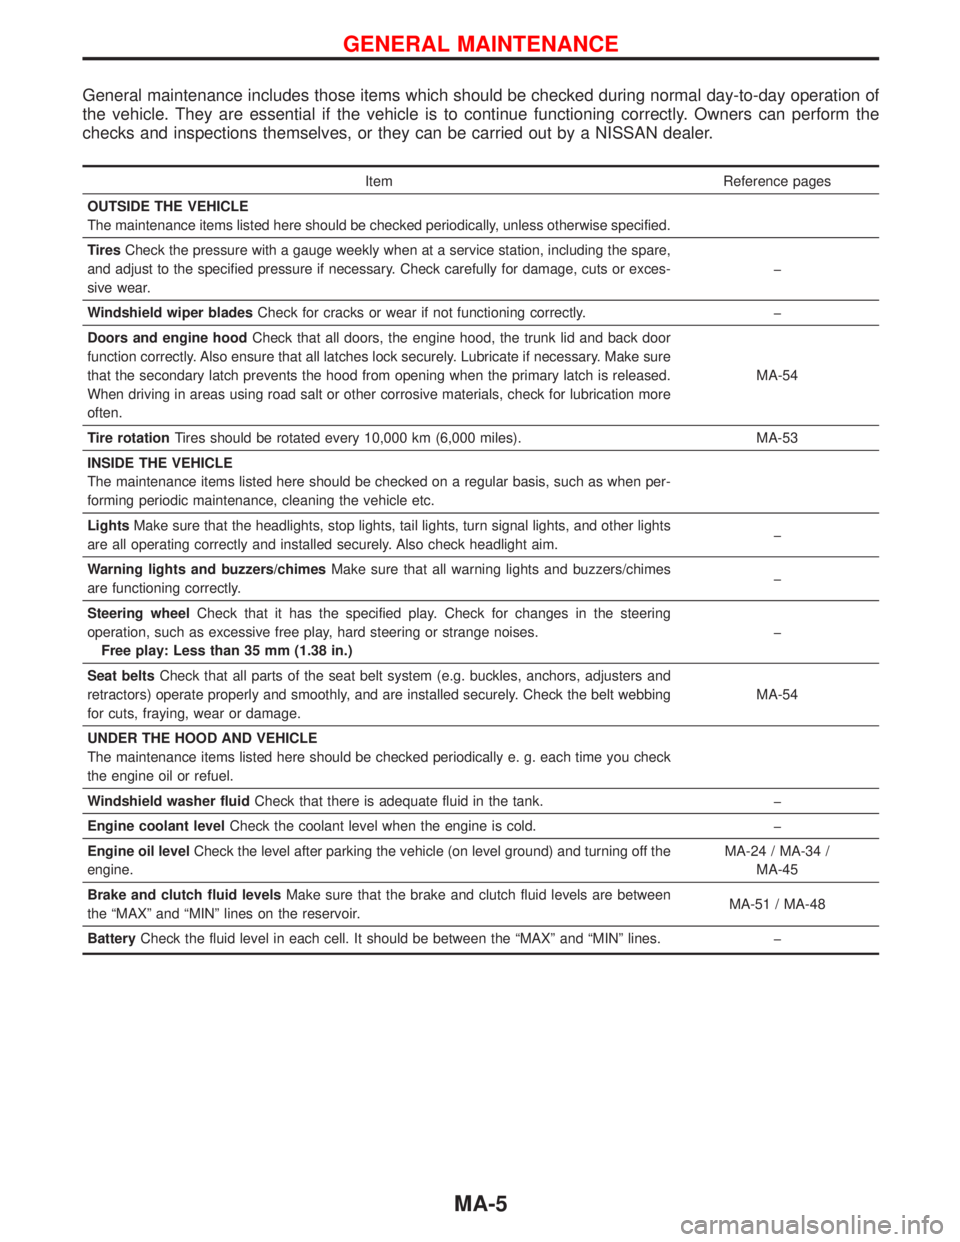
General maintenance includes those items which should be checked during normal day-to-day operation of
the vehicle. They are essential if the vehicle is to continue functioning correctly. Owners can perform the
checks and inspections themselves, or they can be carried out by a NISSAN dealer.
Item Reference pages
OUTSIDE THE VEHICLE
The maintenance items listed here should be checked periodically, unless otherwise specified.
TiresCheck the pressure with a gauge weekly when at a service station, including the spare,
and adjust to the specified pressure if necessary. Check carefully for damage, cuts or exces-
sive wear.�
Windshield wiper bladesCheck for cracks or wear if not functioning correctly.�
Doors and engine hoodCheck that all doors, the engine hood, the trunk lid and back door
function correctly. Also ensure that all latches lock securely. Lubricate if necessary. Make sure
that the secondary latch prevents the hood from opening when the primary latch is released.
When driving in areas using road salt or other corrosive materials, check for lubrication more
often.MA-54
Tire rotationTires should be rotated every 10,000 km (6,000 miles). MA-53
INSIDE THE VEHICLE
The maintenance items listed here should be checked on a regular basis, such as when per-
forming periodic maintenance, cleaning the vehicle etc.
LightsMake sure that the headlights, stop lights, tail lights, turn signal lights, and other lights
are all operating correctly and installed securely. Also check headlight aim.�
Warning lights and buzzers/chimesMake sure that all warning lights and buzzers/chimes
are functioning correctly.�
Steering wheelCheck that it has the specified play. Check for changes in the steering
operation, such as excessive free play, hard steering or strange noises.
Free play: Less than 35 mm (1.38 in.)�
Seat beltsCheck that all parts of the seat belt system (e.g. buckles, anchors, adjusters and
retractors) operate properly and smoothly, and are installed securely. Check the belt webbing
for cuts, fraying, wear or damage.MA-54
UNDER THE HOOD AND VEHICLE
The maintenance items listed here should be checked periodically e. g. each time you check
the engine oil or refuel.
Windshield washer fluidCheck that there is adequate fluid in the tank.�
Engine coolant levelCheck the coolant level when the engine is cold.�
Engine oil levelCheck the level after parking the vehicle (on level ground) and turning off the
engine.MA-24 / MA-34 /
MA-45
Brake and clutch fluid levelsMake sure that the brake and clutch fluid levels are between
the“MAX”and“MIN”lines on the reservoir.MA-51 / MA-48
BatteryCheck the fluid level in each cell. It should be between the“MAX”and“MIN”lines.�
GENERAL MAINTENANCE
MA-5
Page 2212 of 2267

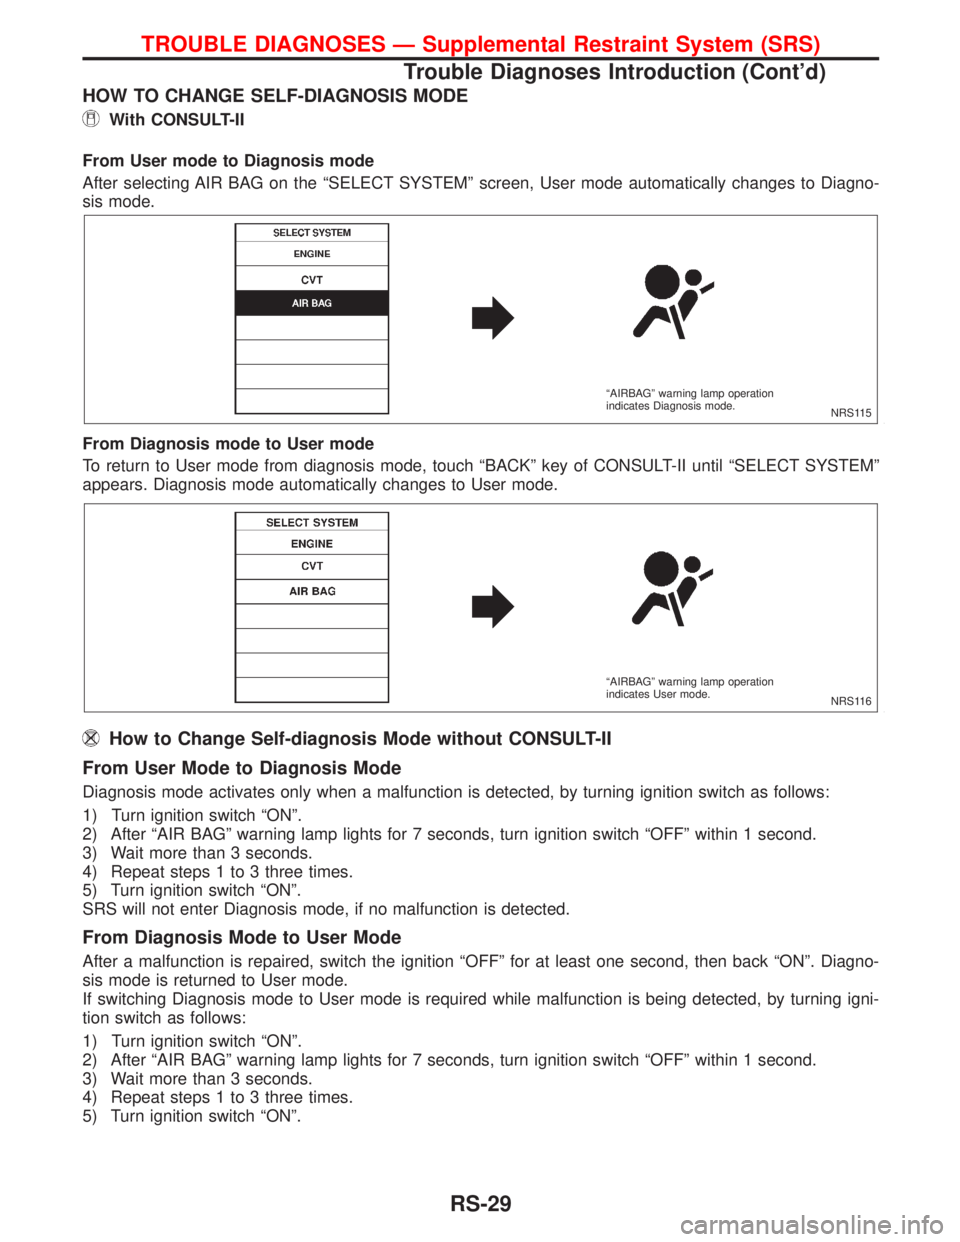
HOW TO CHANGE SELF-DIAGNOSIS MODE
With CONSULT-II
From User mode to Diagnosis mode
After selecting AIR BAG on the ªSELECT SYSTEMº screen, User mode automatically changes to Diagno-
sis mode.
From Diagnosis mode to User mode
To return to User mode from diagnosis mode, touch ªBACKº key of CONSULT-II until ªSELECT SYSTEMº
appears. Diagnosis mode automatically changes to User mode.
How to Change Self-diagnosis Mode without CONSULT-II
From User Mode to Diagnosis Mode
Diagnosis mode activates only when a malfunction is detected, by turning ignition switch as follows:
1) Turn ignition switch ªONº.
2) After ªAIR BAGº warning lamp lights for 7 seconds, turn ignition switch ªOFFº within 1 second.
3) Wait more than 3 seconds.
4) Repeat steps 1 to 3 three times.
5) Turn ignition switch ªONº.
SRS will not enter Diagnosis mode, if no malfunction is detected.
From Diagnosis Mode to User Mode
After a malfunction is repaired, switch the ignition ªOFFº for at least one second, then back ªONº. Diagno-
sis mode is returned to User mode.
If switching Diagnosis mode to User mode is required while malfunction is being detected, by turning igni-
tion switch as follows:
1) Turn ignition switch ªONº.
2) After ªAIR BAGº warning lamp lights for 7 seconds, turn ignition switch ªOFFº within 1 second.
3) Wait more than 3 seconds.
4) Repeat steps 1 to 3 three times.
5) Turn ignition switch ªONº.
NRS115 ªAIRBAGº warning lamp operation
indicates Diagnosis mode.
NRS116 ªAIRBAGº warning lamp operation
indicates User mode.
TROUBLE DIAGNOSES Ð Supplemental Restraint System (SRS)
Trouble Diagnoses Introduction (Cont'd)
RS-29
Page 2231 of 2267

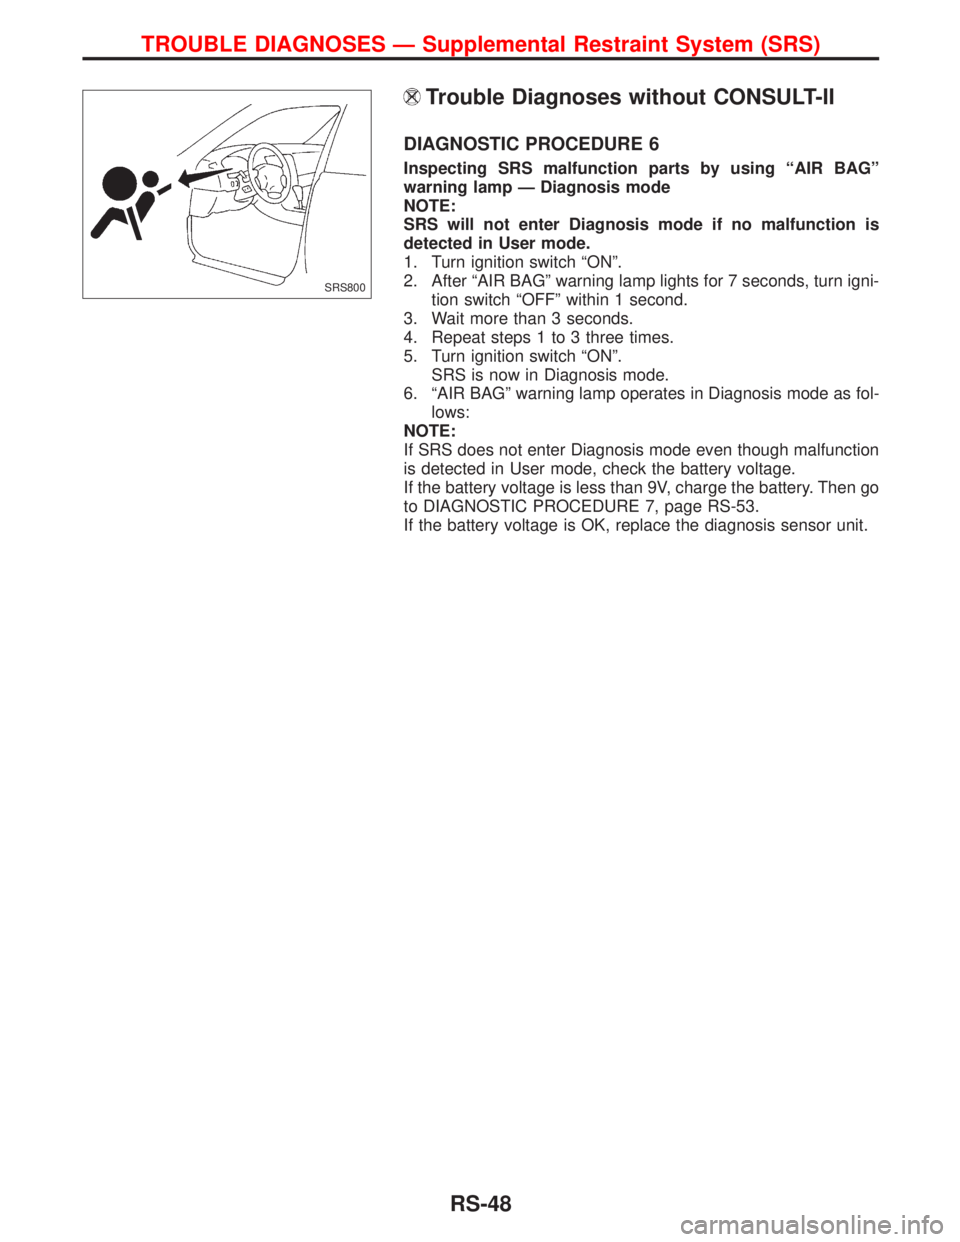
Trouble Diagnoses without CONSULT-II
DIAGNOSTIC PROCEDURE 6
Inspecting SRS malfunction parts by using ªAIR BAGº
warning lamp Ð Diagnosis mode
NOTE:
SRS will not enter Diagnosis mode if no malfunction is
detected in User mode.
1. Turn ignition switch ªONº.
2. After ªAIR BAGº warning lamp lights for 7 seconds, turn igni-
tion switch ªOFFº within 1 second.
3. Wait more than 3 seconds.
4. Repeat steps 1 to 3 three times.
5. Turn ignition switch ªONº.
SRS is now in Diagnosis mode.
6. ªAIR BAGº warning lamp operates in Diagnosis mode as fol-
lows:
NOTE:
If SRS does not enter Diagnosis mode even though malfunction
is detected in User mode, check the battery voltage.
If the battery voltage is less than 9V, charge the battery. Then go
to DIAGNOSTIC PROCEDURE 7, page RS-53.
If the battery voltage is OK, replace the diagnosis sensor unit.
SRS800
TROUBLE DIAGNOSES Ð Supplemental Restraint System (SRS)
RS-48
Page 2237 of 2267

NOTE:
When diagnosis sensor unit is replaced with a new one,
ªAIR BAGº warning lamp will operate in User mode. Check-
ing ªAIR BAGº warning lamp operation in Diagnosis mode
is not required. Go to step 6.
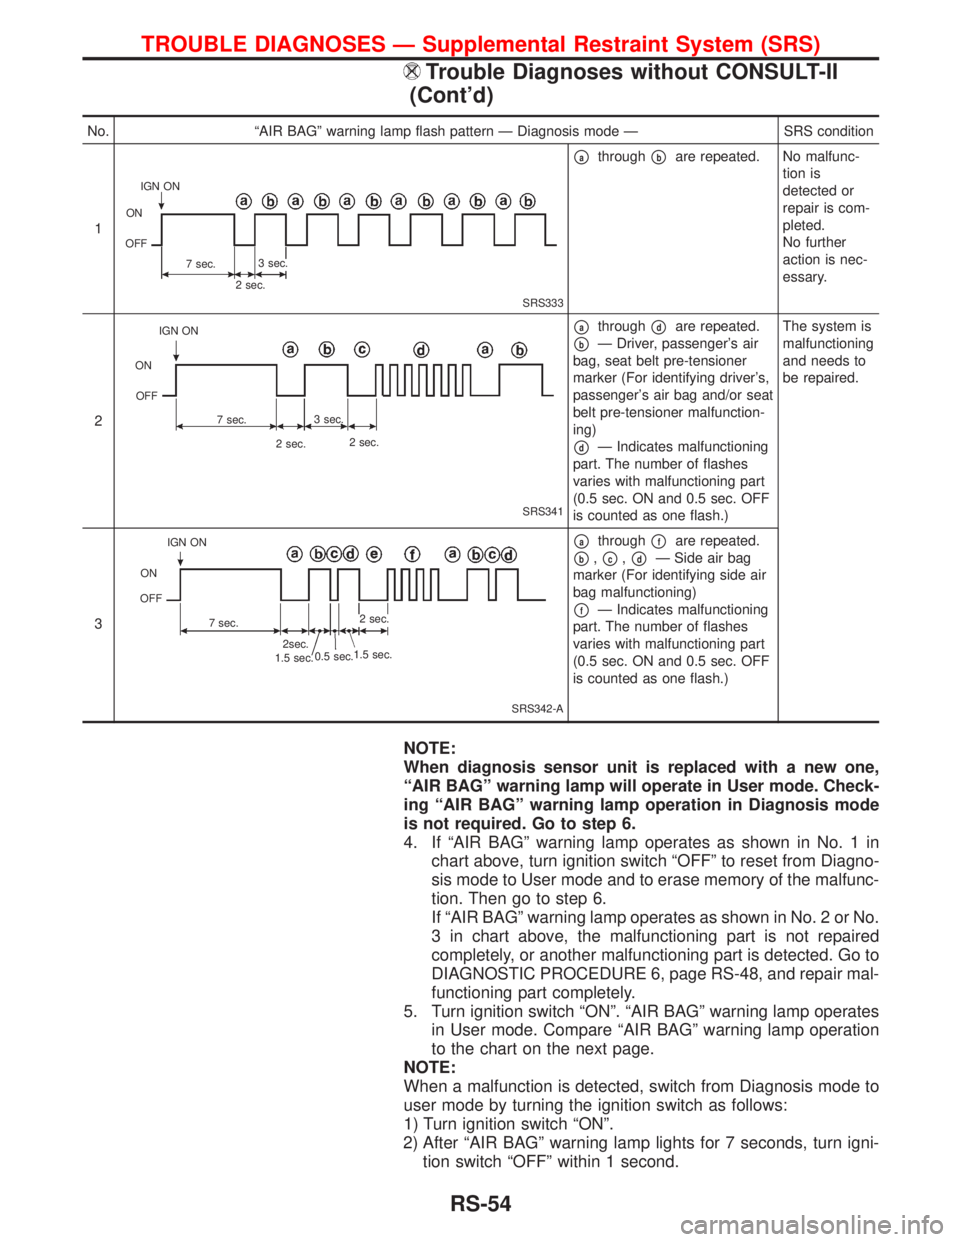
4. If ªAIR BAGº warning lamp operates as shown in No. 1 in
chart above, turn ignition switch ªOFFº to reset from Diagno-
sis mode to User mode and to erase memory of the malfunc-
tion. Then go to step 6.
If ªAIR BAGº warning lamp operates as shown in No. 2 or No.
3 in chart above, the malfunctioning part is not repaired
completely, or another malfunctioning part is detected. Go to
DIAGNOSTIC PROCEDURE 6, page RS-48, and repair mal-
functioning part completely.
5. Turn ignition switch ªONº. ªAIR BAGº warning lamp operates
in User mode. Compare ªAIR BAGº warning lamp operation
to the chart on the next page.
NOTE:
When a malfunction is detected, switch from Diagnosis mode to
user mode by turning the ignition switch as follows:
1) Turn ignition switch ªONº.
2) After ªAIR BAGº warning lamp lights for 7 seconds, turn igni-
tion switch ªOFFº within 1 second.
No. ªAIR BAGº warning lamp flash pattern Ð Diagnosis mode Ð SRS condition
1
SRS333
pathroughpbare repeated. No malfunc-
tion is
detected or
repair is com-
pleted.
No further
action is nec-
essary.
2
SRS341
pathroughpdare repeated.
pbÐ Driver, passenger's air
bag, seat belt pre-tensioner
marker (For identifying driver's,
passenger's air bag and/or seat
belt pre-tensioner malfunction-
ing)
pdÐ Indicates malfunctioning
part. The number of flashes
varies with malfunctioning part
(0.5 sec. ON and 0.5 sec. OFF
is counted as one flash.)The system is
malfunctioning
and needs to
be repaired.
3
SRS342-A
pathroughpfare repeated.
pb,pc,pdÐ Side air bag
marker (For identifying side air
bag malfunctioning)
pfÐ Indicates malfunctioning
part. The number of flashes
varies with malfunctioning part
(0.5 sec. ON and 0.5 sec. OFF
is counted as one flash.)
IGN ON
ON
OFF
7 sec.3 sec.
2 sec.
IGN ON
ON
OFF
7 sec.3 sec.
2 sec.2 sec.
0.5 sec.
1.5 sec. IGN ON
ON
OFF
7 sec.
2sec.
1.5 sec.2 sec.
TROUBLE DIAGNOSES Ð Supplemental Restraint System (SRS)
Trouble Diagnoses without CONSULT-II
(Cont'd)
RS-54