Page 1687 of 2267

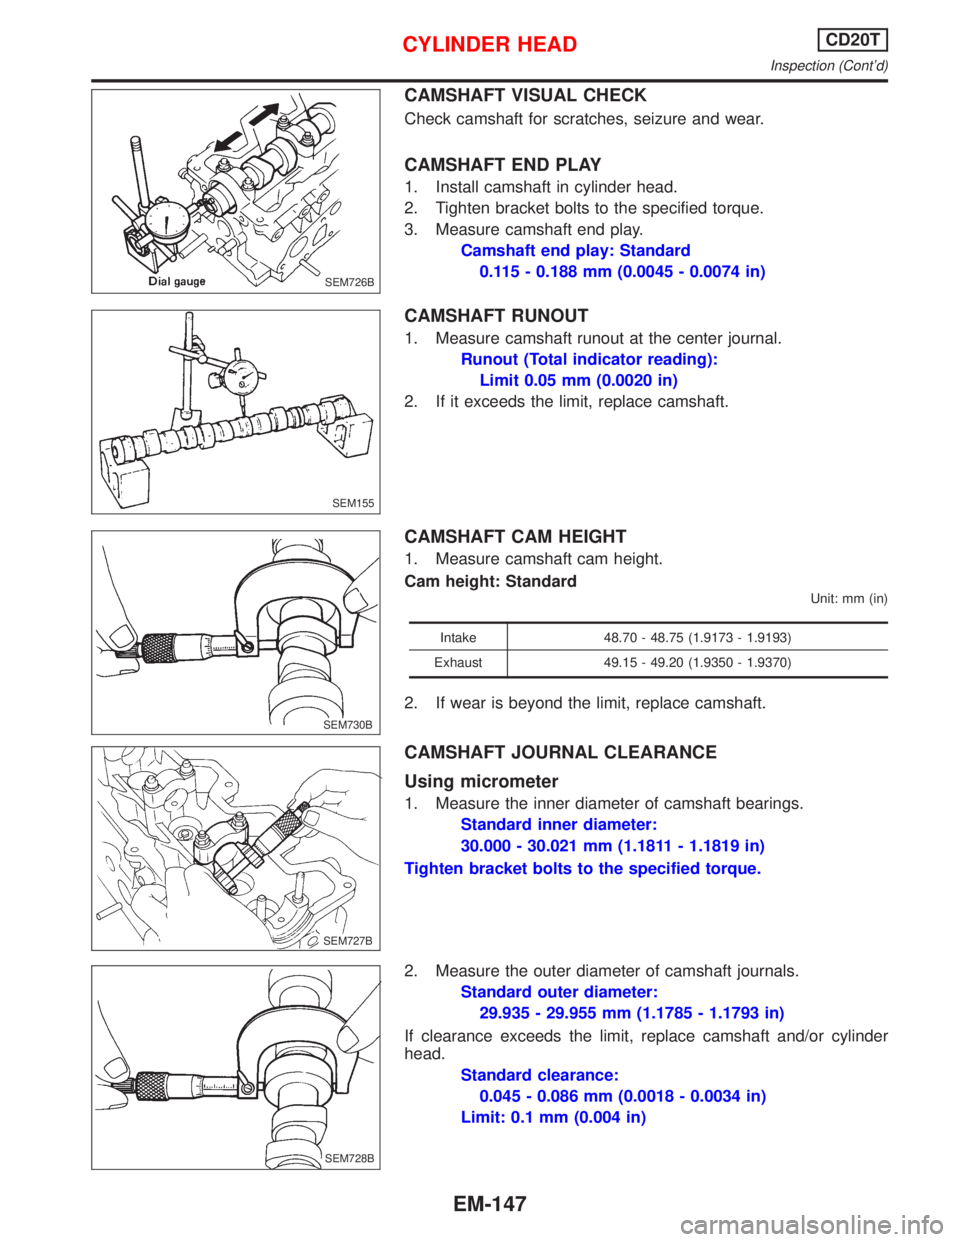
CAMSHAFT VISUAL CHECK
Check camshaft for scratches, seizure and wear.
CAMSHAFT END PLAY
1. Install camshaft in cylinder head.
2. Tighten bracket bolts to the specified torque.
3. Measure camshaft end play.
Camshaft end play: Standard
0.115 - 0.188 mm (0.0045 - 0.0074 in)
CAMSHAFT RUNOUT
1. Measure camshaft runout at the center journal.
Runout (Total indicator reading):
Limit 0.05 mm (0.0020 in)
2. If it exceeds the limit, replace camshaft.
CAMSHAFT CAM HEIGHT
1. Measure camshaft cam height.
Cam height: Standard
Unit: mm (in)
Intake 48.70 - 48.75 (1.9173 - 1.9193)
Exhaust 49.15 - 49.20 (1.9350 - 1.9370)
2. If wear is beyond the limit, replace camshaft.
CAMSHAFT JOURNAL CLEARANCE
Using micrometer
1. Measure the inner diameter of camshaft bearings.
Standard inner diameter:
30.000 - 30.021 mm (1.1811 - 1.1819 in)
Tighten bracket bolts to the specified torque.
2. Measure the outer diameter of camshaft journals.
Standard outer diameter:
29.935 - 29.955 mm (1.1785 - 1.1793 in)
If clearance exceeds the limit, replace camshaft and/or cylinder
head.
Standard clearance:
0.045 - 0.086 mm (0.0018 - 0.0034 in)
Limit: 0.1 mm (0.004 in)
SEM726B
SEM155
.SEM730B
.SEM727B
SEM728B
CYLINDER HEADCD20T
Inspection (Cont'd)
EM-147
Page 1713 of 2267

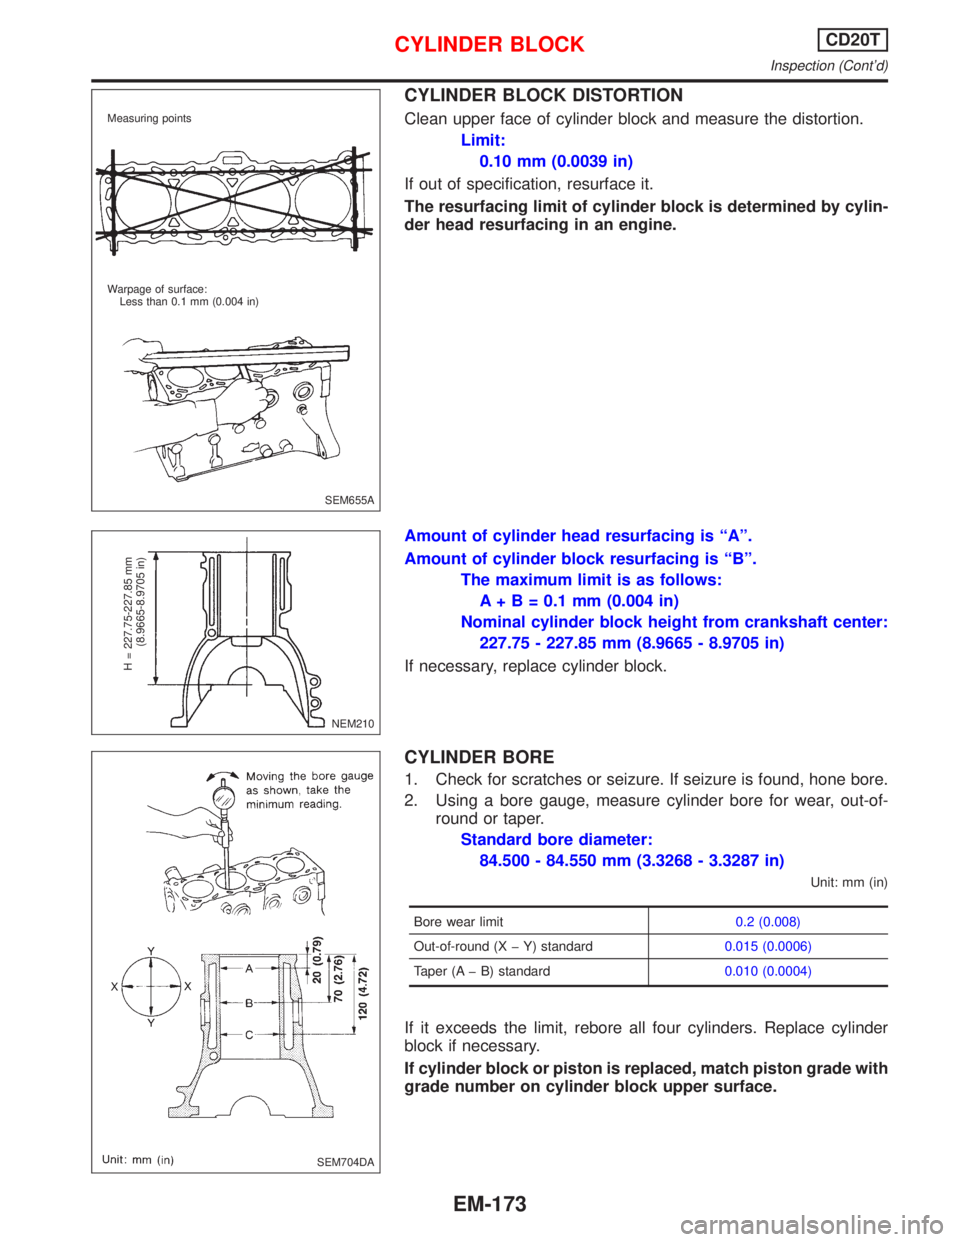
CYLINDER BLOCK DISTORTION
Clean upper face of cylinder block and measure the distortion.
Limit:
0.10 mm (0.0039 in)
If out of specification, resurface it.
The resurfacing limit of cylinder block is determined by cylin-
der head resurfacing in an engine.
Amount of cylinder head resurfacing is ªAº.
Amount of cylinder block resurfacing is ªBº.
The maximum limit is as follows:
A + B = 0.1 mm (0.004 in)
Nominal cylinder block height from crankshaft center:
227.75 - 227.85 mm (8.9665 - 8.9705 in)
If necessary, replace cylinder block.
CYLINDER BORE
1. Check for scratches or seizure. If seizure is found, hone bore.
2. Using a bore gauge, measure cylinder bore for wear, out-of-
round or taper.
Standard bore diameter:
84.500 - 84.550 mm (3.3268 - 3.3287 in)
Unit: mm (in)
Bore wear limit0.2 (0.008)
Out-of-round (X þ Y) standard0.015 (0.0006)
Taper (A þ B) standard0.010 (0.0004)
If it exceeds the limit, rebore all four cylinders. Replace cylinder
block if necessary.
If cylinder block or piston is replaced, match piston grade with
grade number on cylinder block upper surface.
SEM655A Measuring points
Warpage of surface:
Less than 0.1 mm (0.004 in)
NEM210
H = 227.75-227.85 mm
(8.9665-8.9705 in)
SEM704DA
CYLINDER BLOCKCD20T
Inspection (Cont'd)
EM-173
Page 1718 of 2267
General SpecificationsNCEM0028
EngineQG16DE QG18DE
ClassificationGasoline
Cylinder arrangement4, in-line
Displacement
cm
3(cu in)1,596 (97.39) 1,769 (107.94)
Bore´stroke
mm (in)76.0´88.0 (2.992´3.465) 80.0´88.0 (3.150´3.465)
Valve arrangementDOHC
Firing order1-3-4-2
Number of piston ringsCompression 2
Oil 1
Number of main bearings5
Compression ratio9.5
EM120
abcde f
Valve timingQG16DE 222É 228É -4É (16É) 52É (32É) þ2É 44É
QG18DE 222É 236É 0É (20É) 56É (36É) þ2É 44É
( ): Valve timing control ON
Compression PressureNJEM0029Unit: kPa (bar, kg/cm2, psi)/350 rpm
Standard1,324 (13.24, 13.5, 192)
Minimum1,128 (11.28, 11.5, 164)
Difference limit between cylinders 98 (0.98, 1.0, 14)
Cylinder HeadNCEM0030Unit: mm (in)
Standard Limit
Head surface flatness Less than 0.03 (0.0012) 0.1 (0.004)
Height 117.8 - 118.0 (4.638 - 4.646) Ð
SERVICE DATA AND SPECIFICATIONS (SDS)QG
General Specifications
EM-178
Page 1719 of 2267

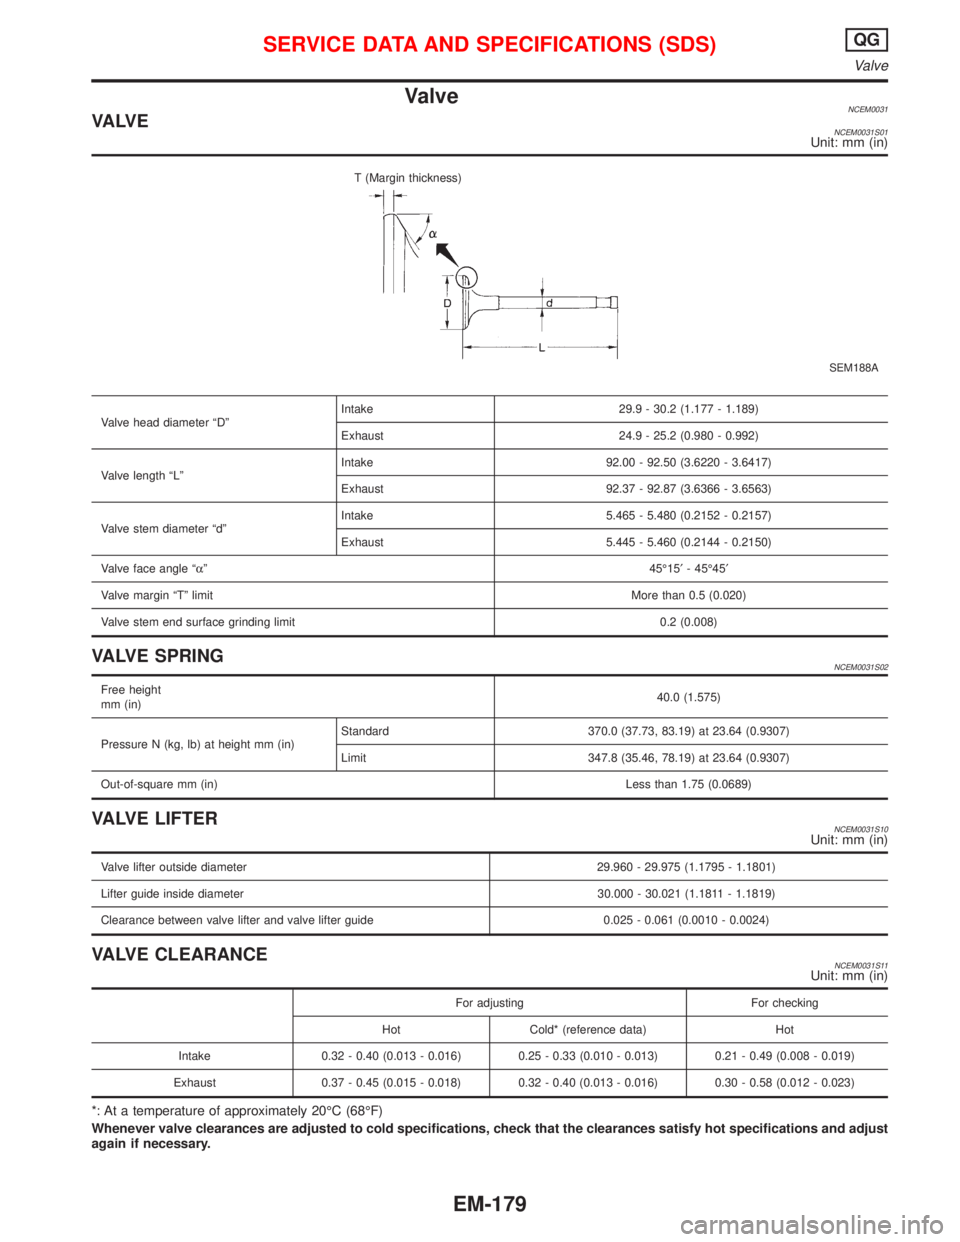
ValveNCEM0031VA LV ENCEM0031S01Unit: mm (in)
SEM188A
T (Margin thickness)
Valve head diameter ªDºIntake 29.9 - 30.2 (1.177 - 1.189)
Exhaust 24.9 - 25.2 (0.980 - 0.992)
Valve length ªLºIntake 92.00 - 92.50 (3.6220 - 3.6417)
Exhaust 92.37 - 92.87 (3.6366 - 3.6563)
Valve stem diameter ªdºIntake 5.465 - 5.480 (0.2152 - 0.2157)
Exhaust 5.445 - 5.460 (0.2144 - 0.2150)
Valve face angle ªaº45É15¢- 45É45¢
Valve margin ªTº limitMore than 0.5 (0.020)
Valve stem end surface grinding limit 0.2 (0.008)
VALVE SPRINGNCEM0031S02
Free height
mm (in)40.0 (1.575)
Pressure N (kg, lb) at height mm (in)Standard 370.0 (37.73, 83.19) at 23.64 (0.9307)
Limit 347.8 (35.46, 78.19) at 23.64 (0.9307)
Out-of-square mm (in)Less than 1.75 (0.0689)
VALVE LIFTERNCEM0031S10Unit: mm (in)
Valve lifter outside diameter 29.960 - 29.975 (1.1795 - 1.1801)
Lifter guide inside diameter 30.000 - 30.021 (1.1811 - 1.1819)
Clearance between valve lifter and valve lifter guide 0.025 - 0.061 (0.0010 - 0.0024)
VALVE CLEARANCENCEM0031S11Unit: mm (in)
For adjusting For checking
Hot Cold* (reference data) Hot
Intake 0.32 - 0.40 (0.013 - 0.016) 0.25 - 0.33 (0.010 - 0.013) 0.21 - 0.49 (0.008 - 0.019)
Exhaust 0.37 - 0.45 (0.015 - 0.018) 0.32 - 0.40 (0.013 - 0.016) 0.30 - 0.58 (0.012 - 0.023)
*: At a temperature of approximately 20ÉC (68ÉF)
Whenever valve clearances are adjusted to cold specifications, check that the clearances satisfy hot specifications and adjust
again if necessary.
SERVICE DATA AND SPECIFICATIONS (SDS)QG
Valve
EM-179
Page 1723 of 2267
VALVE SEAT RESURFACE LIMITNCEM0031S08Unit: mm (in)
AEM343
Depth (L)Intake 35.95 - 36.55 (1.4154 - 1.4390)
Exhaust 35.92 - 36.52 (1.4142 - 1.4378)
Camshaft and Camshaft BearingNCEM0032Unit: mm (in)
Engine model QG16DE QG18DE
Cam height ªAºIntake 40.220 - 40.410 (1.5835 - 1.5909) 40.610 - 40.800 (1.5988 - 1.6063)
Exhaust 40.056 - 40.245 (1.5770 - 1.5844)
Cam wear limit0.20 (0.0079)
EM671
Standard Limit
Camshaft journal to bearing clearance 0.045 - 0.086 (0.0018 - 0.0034) 0.15 (0.0059)
Inner diameter of
camshaft bearingNo. 1 28.000 - 28.021 (1.1024 - 1.1032)
Ð
No. 2 to No. 5 24.000 - 24.021 (0.9449 - 0.9457)
Outer diameter of
camshaft journalNo. 1 27.935 - 27.955 (1.0998 - 1.1006)
Ð
No. 2 to No. 5 23.935 - 23.955 (0.9423 - 0.9431)
Camshaft runout [TIR*] Less than 0.02 (0.0008) 0.1 (0.004)
Camshaft end play 0.115 - 0.188 (0.0045 - 0.0074) 0.20 (0.0079)
*Total indicator reading
SERVICE DATA AND SPECIFICATIONS (SDS)QG
Valve (Cont'd)
EM-183
Page 1724 of 2267
Cylinder BlockNCEM0033Unit: mm (in)
SEM171D Crankshaft center
20 (0.79)
60 (2.36)
100 (3.94)
QG16DE QG18DE
Limit
Standard
Surface flatness Less than 0.03 (0.0012) 0.1 (0.004)
Height ªHº (nominal) 213.95 - 214.05 (8.4232 - 8.4271) Ð
Cylinder bore
inner diameterStandardGrade No. 176.000 - 76.0610
(2.9921 - 2.9925)80.000 - 80.010
(3.1496 - 3.1500)
0.2 (0.008) Grade No. 276.010 - 76.020
(2.7957 - 2.7961)80.010 - 80.020
(3.1500 - 3.1504)
Grade No. 376.020 - 76.030
(2.7961 - 2.9933)80.020 - 80.030
(3.1504 - 3.1508)
Out-of-round (X þ Y) Less than 0.015 (0.0006) Ð
Taper (A þ B) Less than 0.01 (0.0004) Ð
Difference in inner diameter between cylinders 0.05 (0.0020) 0.2 (0.008)
SERVICE DATA AND SPECIFICATIONS (SDS)QG
Cylinder Block
EM-184
Page 1728 of 2267
General Specifications
Cylinder arrangement In-line 4
Displacement cm
3(cu in) 1,998 (121.92)
Bore and stroke mm (in) 86 x 86 (3.39 x 3.39)
Valve arrangement DOHC
Firing order 1-3-4-2
Number of piston rings
Compression 2
Oil 1
Number of main bearings 5
Compression ratio 10.0
Valve timing
EM120Unit: degree
abcde f
SR20DE 232É 240É 6É 54É 3É 49É
Inspection and Adjustment
COMPRESSION PRESSURE
Unit: kPa (bar, kg/cm2, psi)/300 rpm
Standard1,275
(12.75, 13.0, 185)
Minimum1,079
(10.79, 11.0, 156)
Differential limit between cylin-
ders98
(0.98, 1.0, 14)
CYLINDER HEAD
Unit: mm (in)
Standard Limit
Head surface distortionLess than
0.03 (0.0012)0.1 (0.004)
SEM956C Nominal cylinder head height:
H = 136.9 - 137.1 mm (5.390 - 5.398 in)
SERVICE DATA AND SPECIFICATIONS (SDS)SR20DE
General Specifications
EM-188
Page 1729 of 2267

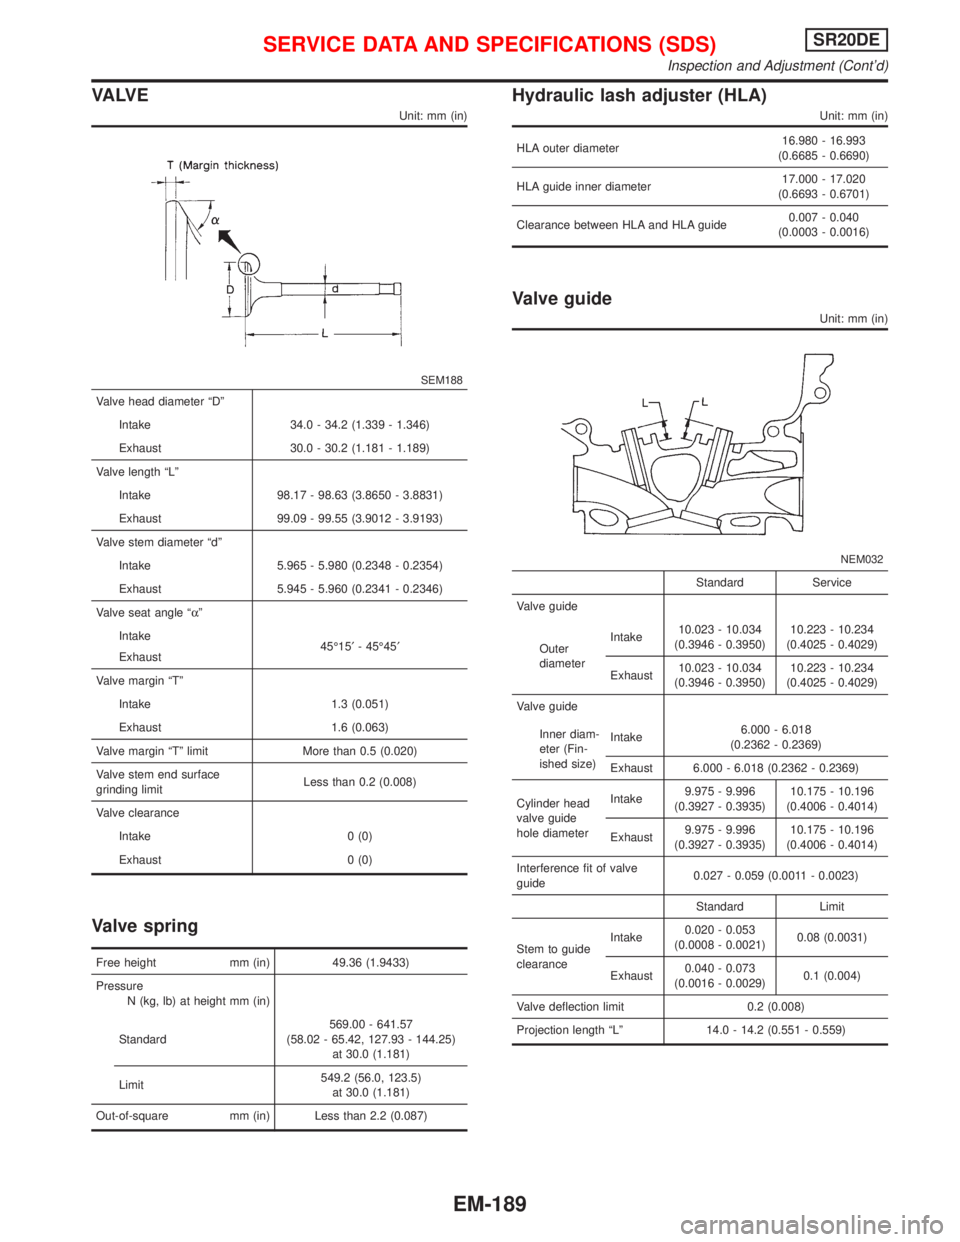
VA LV E
Unit: mm (in)
SEM188
Valve head diameter ªDº
Intake 34.0 - 34.2 (1.339 - 1.346)
Exhaust 30.0 - 30.2 (1.181 - 1.189)
Valve length ªLº
Intake 98.17 - 98.63 (3.8650 - 3.8831)
Exhaust 99.09 - 99.55 (3.9012 - 3.9193)
Valve stem diameter ªdº
Intake 5.965 - 5.980 (0.2348 - 0.2354)
Exhaust 5.945 - 5.960 (0.2341 - 0.2346)
Valve seat angle ªaº
Intake
Exhaust45É15¢- 45É45¢
Valve margin ªTº
Intake 1.3 (0.051)
Exhaust 1.6 (0.063)
Valve margin ªTº limit More than 0.5 (0.020)
Valve stem end surface
grinding limitLess than 0.2 (0.008)
Valve clearance
Intake 0 (0)
Exhaust 0 (0)
Valve spring
Free height mm (in) 49.36 (1.9433)
Pressure
N (kg, lb) at height mm (in)
Standard569.00 - 641.57
(58.02 - 65.42, 127.93 - 144.25)
at 30.0 (1.181)
Limit549.2 (56.0, 123.5)
at 30.0 (1.181)
Out-of-square mm (in) Less than 2.2 (0.087)
Hydraulic lash adjuster (HLA)
Unit: mm (in)
HLA outer diameter16.980 - 16.993
(0.6685 - 0.6690)
HLA guide inner diameter17.000 - 17.020
(0.6693 - 0.6701)
Clearance between HLA and HLA guide0.007 - 0.040
(0.0003 - 0.0016)
Valve guide
Unit: mm (in)
NEM032
Standard Service
Valve guide
Outer
diameterIntake10.023 - 10.034
(0.3946 - 0.3950)10.223 - 10.234
(0.4025 - 0.4029)
Exhaust10.023 - 10.034
(0.3946 - 0.3950)10.223 - 10.234
(0.4025 - 0.4029)
Valve guide
Inner diam-
eter (Fin-
ished size)Intake6.000 - 6.018
(0.2362 - 0.2369)
Exhaust 6.000 - 6.018 (0.2362 - 0.2369)
Cylinder head
valve guide
hole diameterIntake9.975 - 9.996
(0.3927 - 0.3935)10.175 - 10.196
(0.4006 - 0.4014)
Exhaust9.975 - 9.996
(0.3927 - 0.3935)10.175 - 10.196
(0.4006 - 0.4014)
Interference fit of valve
guide0.027 - 0.059 (0.0011 - 0.0023)
Standard Limit
Stem to guide
clearanceIntake0.020 - 0.053
(0.0008 - 0.0021)0.08 (0.0031)
Exhaust0.040 - 0.073
(0.0016 - 0.0029)0.1 (0.004)
Valve deflection limit 0.2 (0.008)
Projection length ªLº 14.0 - 14.2 (0.551 - 0.559)
SERVICE DATA AND SPECIFICATIONS (SDS)SR20DE
Inspection and Adjustment (Cont'd)
EM-189