Page 1235 of 2543
MAINTENANCE SCHEDULE
SCHEDULE A
CONDITIONS:
wTowing a trailer, using a camper or car top carrier.
wRepeated short trips of less than 8 km (5 miles) with outside temperature remaining below freezing.
wExtensive idling and/or low speed driving for long distances, such as police, taxi or door±to ±door
delivery use.
wOperating on dusty, rough, muddy or salt spread roads.
Maintenance operation: A = Check and adjust if necessary.
R = Replace, change or lubricate.
I = Inspect and correct or replace if necessary.
MA±6
MA±9
MA±6
MA±7
MA±7
MA±7
MA±8
MA±8
MA±9
MA±9
MA±9
MA±6
MA±11
MA±11
MA±10
MA±12
MA±12
MA±13
MA±14, 15
MA±13
MA±16
See page
(item No.)System
ENGINE
FUEL
IGNITION
EVAP
BRAKES
CHASSIS
MA±2± MAINTENANCEMAINTENANCE SCHEDULE
Page 1237 of 2543
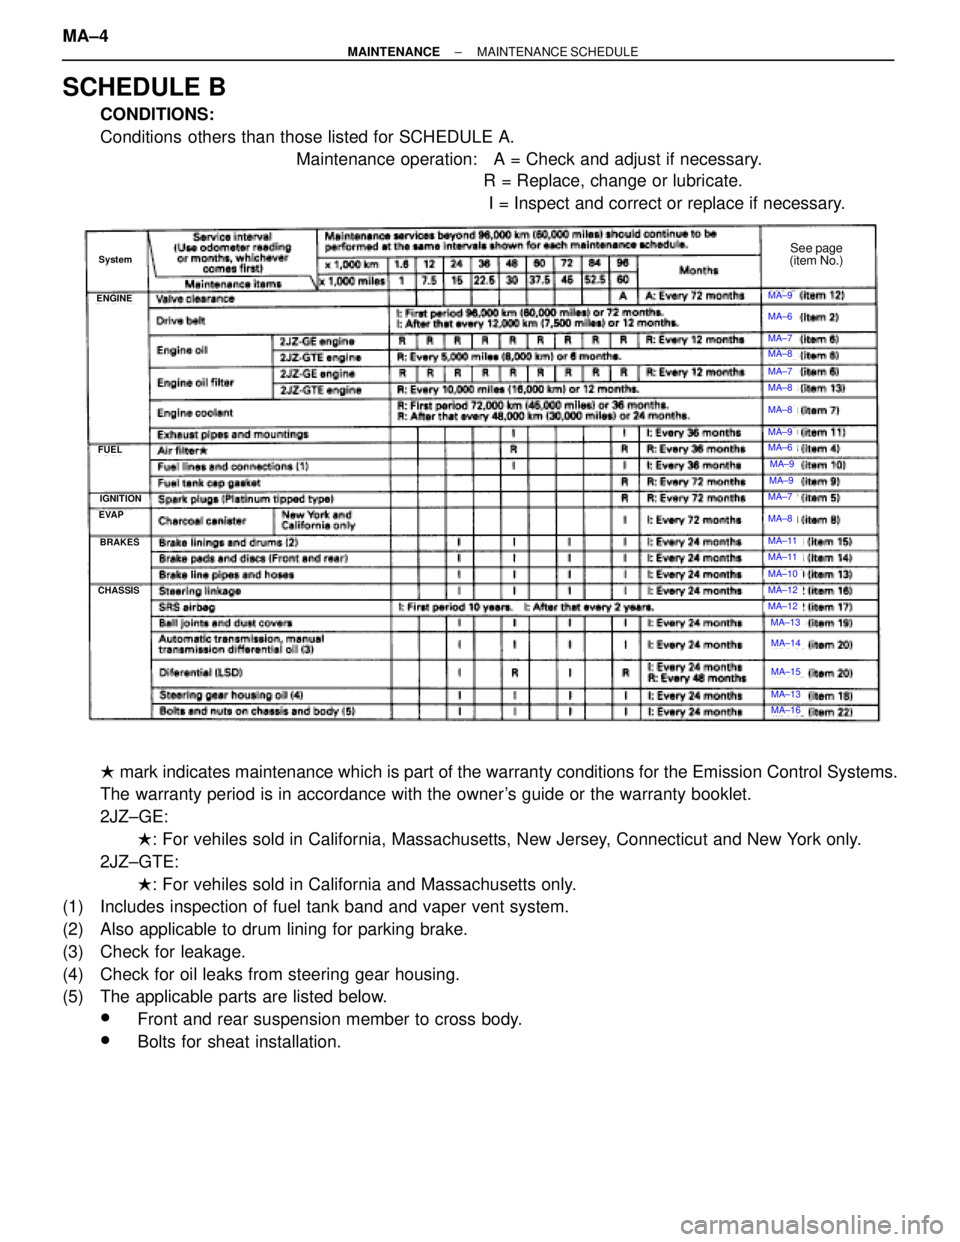
SCHEDULE B
CONDITIONS:
Conditions others than those listed for SCHEDULE A.
Maintenance operation: A = Check and adjust if necessary.
R = Replace, change or lubricate.
I = Inspect and correct or replace if necessary.
MA±9
See page
(item No.)
MA±6
MA±7
MA±7
MA±8
MA±8
MA±8
MA±8
MA±7
MA±9
MA±9
MA±9
MA±6
MA±11
MA±11
MA±10
MA±12
MA±12
MA±13
MA±14
MA±15
MA±13
MA±16
IGNITION
ENGINE
FUEL
EVAP
BRAKES
System
CHASSIS
� mark indicates maintenance which is part of the warranty conditions for the Emission Control Systems.
The warranty period is in accordance with the owner's guide or the warranty booklet.
2JZ±GE:
�: For vehiles sold in California, Massachusetts, New Jersey, Connecticut and New York only.
2JZ±GTE:
�: For vehiles sold in California and Massachusetts only.
(1) Includes inspection of fuel tank band and vaper vent system.
(2) Also applicable to drum lining for parking brake.
(3) Check for leakage.
(4) Check for oil leaks from steering gear housing.
(5) The applicable parts are listed below.
wFront and rear suspension member to cross body.
wBolts for sheat installation. MA±4
± MAINTENANCEMAINTENANCE SCHEDULE
Page 1321 of 2543
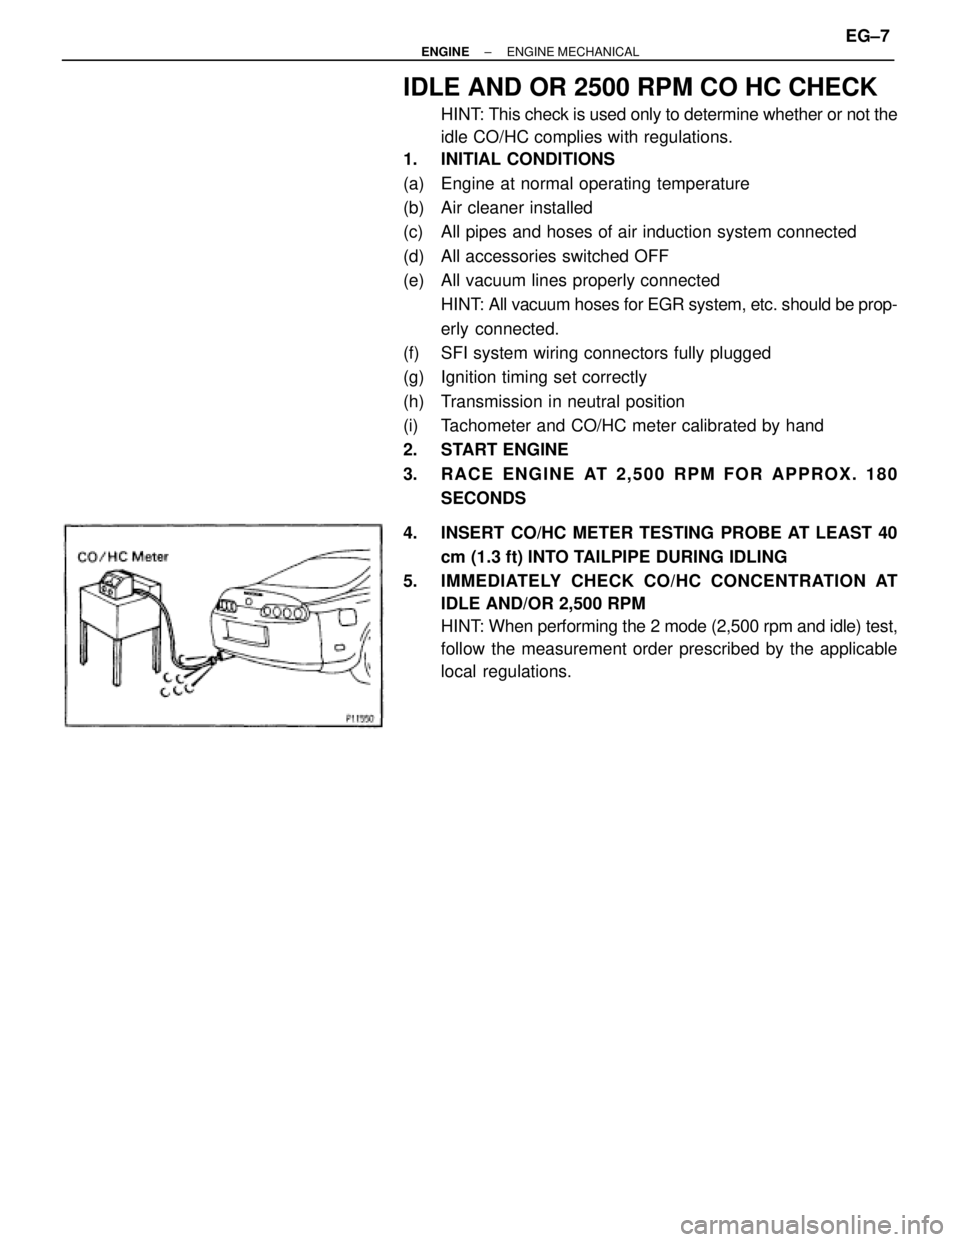
IDLE AND OR 2500 RPM CO HC CHECK
HINT: This check is used only to determine whether or not the
idle CO/HC complies with regulations.
1. INITIAL CONDITIONS
(a) Engine at normal operating temperature
(b) Air cleaner installed
(c) All pipes and hoses of air induction system connected
(d) All accessories switched OFF
(e) All vacuum lines properly connected
HINT: All vacuum hoses for EGR system, etc. should be prop-
erly connected.
(f) SFI system wiring connectors fully plugged
(g) Ignition timing set correctly
(h) Transmission in neutral position
(i) Tachometer and CO/HC meter calibrated by hand
2. START ENGINE
3. RACE ENGINE AT 2,500 RPM FOR APPROX. 180
SECONDS
4. INSERT CO/HC METER TESTING PROBE AT LEAST 40
cm (1.3 ft) INTO TAILPIPE DURING IDLING
5. IMMEDIATELY CHECK CO/HC CONCENTRATION AT
IDLE AND/OR 2,500 RPM
HINT: When performing the 2 mode (2,500 rpm and idle) test,
follow the measurement order prescribed by the applicable
local regulations.
± ENGINEENGINE MECHANICALEG±7
Page 1322 of 2543
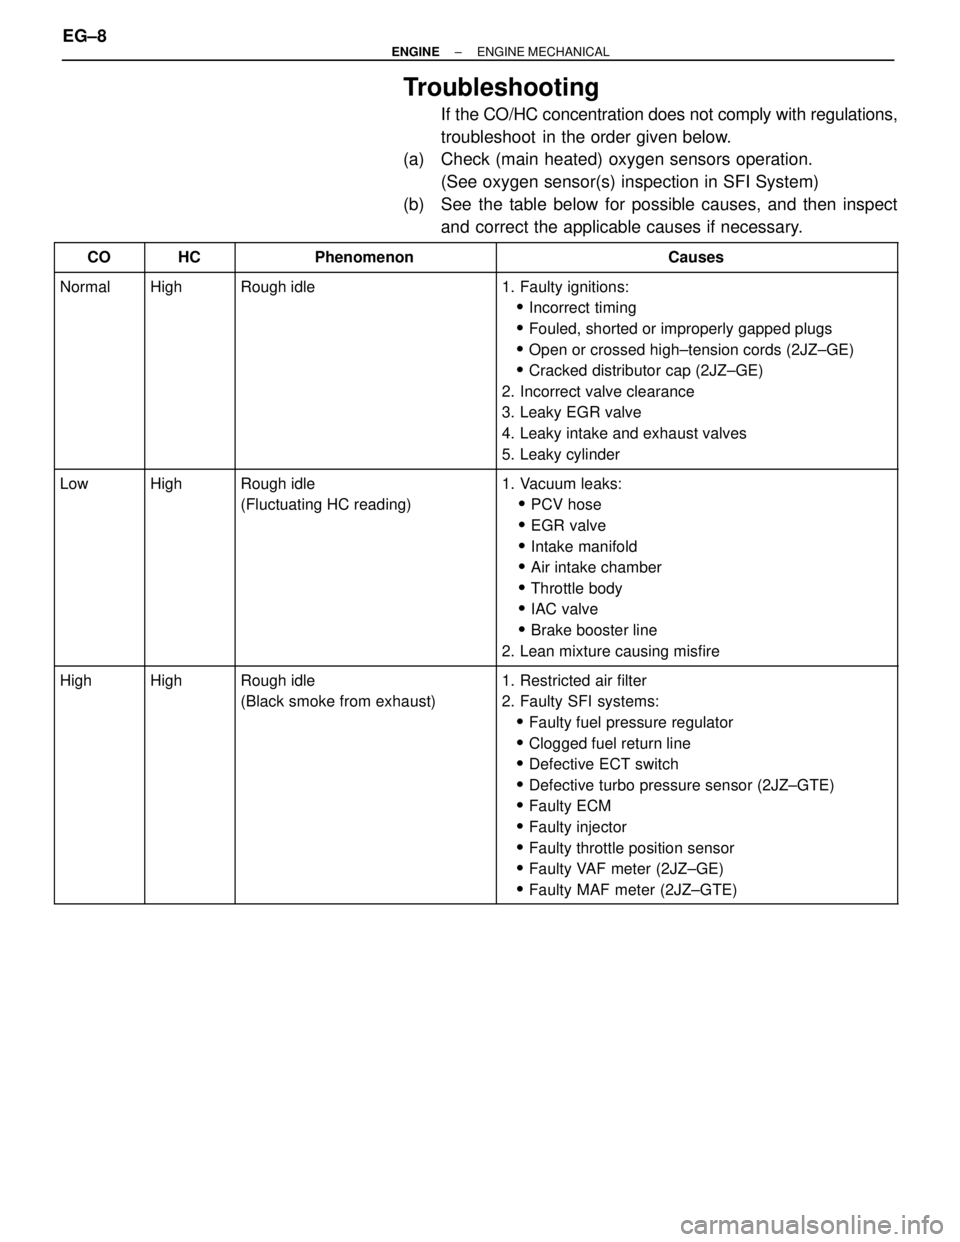
Troubleshooting
If the CO/HC concentration does not comply with regulations,
troubleshoot in the order given below.
(a) Check (main heated) oxygen sensors operation.
(See oxygen sensor(s) inspection in SFI System)
(b) See the table below for possible causes, and then inspect
and correct the applicable causes if necessary.
���� ����CO����� �����HC������������ ������������Phenomenon������������������ ������������������Causes
���� �
��� �
��� �
��� �
��� �
��� �
��� �
��� ����
Normal����� �
���� �
���� �
���� �
���� �
���� �
���� �
���� �����
High������������ �
����������� �
����������� �
����������� �
����������� �
����������� �
����������� �
����������� ������������
Rough idle������������������ �
����������������� �
����������������� �
����������������� �
����������������� �
����������������� �
����������������� �
����������������� ������������������
1. Faulty ignitions:
�Incorrect timing
�Fouled, shorted or improperly gapped plugs
�Open or crossed high±tension cords (2JZ±GE)
�Cracked distributor cap (2JZ±GE)
2. Incorrect valve clearance
3. Leaky EGR valve
4. Leaky intake and exhaust valves
5. Leaky cylinder
���� �
��� �
��� �
��� �
��� �
��� �
��� �
��� ����
Low����� �
���� �
���� �
���� �
���� �
���� �
���� �
���� �����
High������������ �
����������� �
����������� �
����������� �
����������� �
����������� �
����������� �
����������� ������������
Rough idle
(Fluctuating HC reading)������������������ �
����������������� �
����������������� �
����������������� �
����������������� �
����������������� �
����������������� �
����������������� ������������������
1. Vacuum leaks:
�PCV hose
�EGR valve
�Intake manifold
�Air intake chamber
�Throttle body
�IAC valve
�Brake booster line
2. Lean mixture causing misfire
���� �
��� �
��� �
��� �
��� �
��� �
��� �
��� �
��� �
��� ����
High����� �
���� �
���� �
���� �
���� �
���� �
���� �
���� �
���� �
���� �����
High������������ �
����������� �
����������� �
����������� �
����������� �
����������� �
����������� �
����������� �
����������� �
����������� ������������
Rough idle
(Black smoke from exhaust)������������������ �
����������������� �
����������������� �
����������������� �
����������������� �
����������������� �
����������������� �
����������������� �
����������������� �
����������������� ������������������
1. Restricted air filter
2. Faulty SFI systems:
�Faulty fuel pressure regulator
�Clogged fuel return line
�Defective ECT switch
�Defective turbo pressure sensor (2JZ±GTE)
�Faulty ECM
�Faulty injector
�Faulty throttle position sensor
�Faulty VAF meter (2JZ±GE)
�Faulty MAF meter (2JZ±GTE)
EG±8± ENGINEENGINE MECHANICAL
Page 1323 of 2543
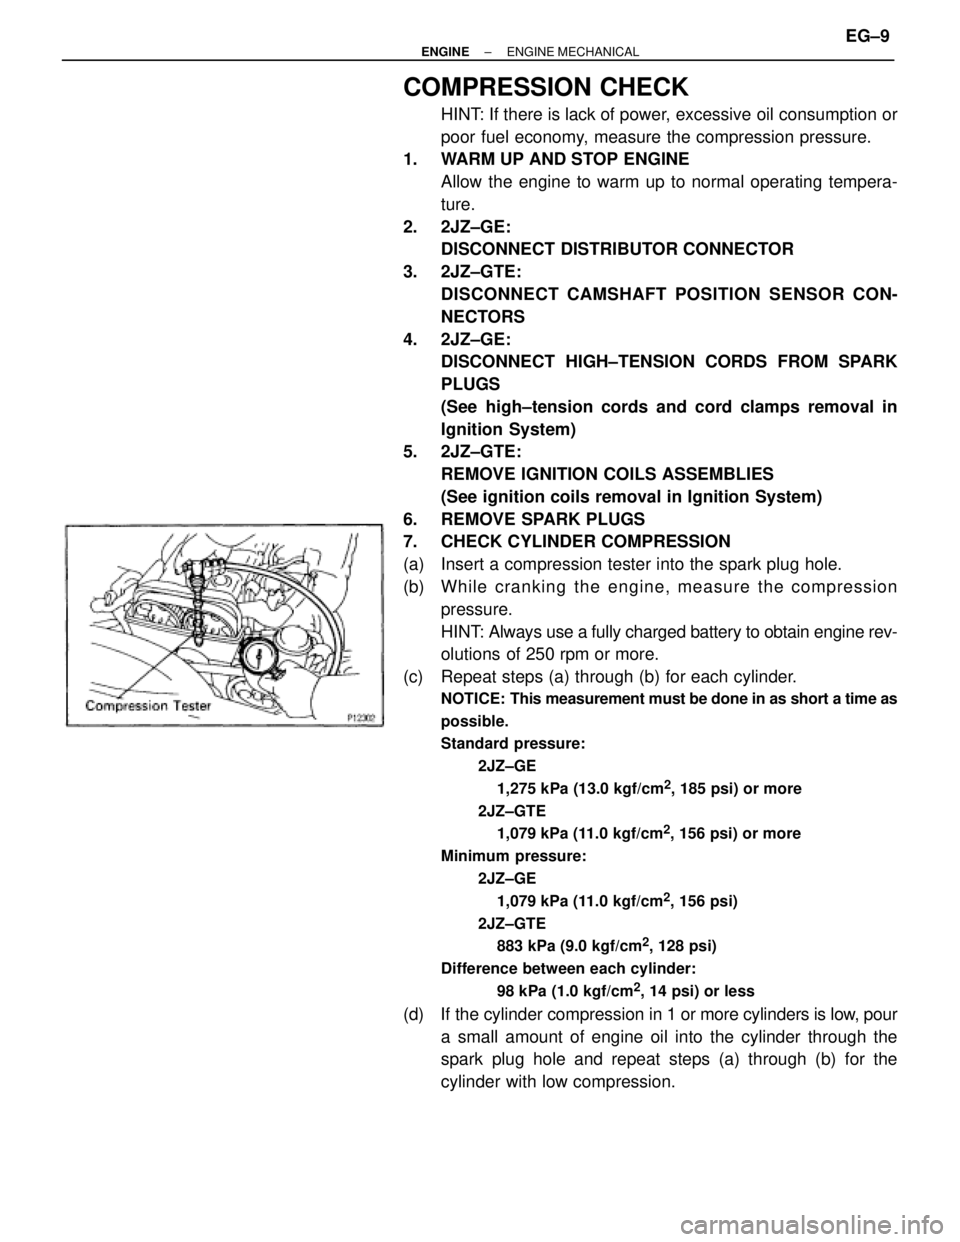
COMPRESSION CHECK
HINT: If there is lack of power, excessive oil consumption or
poor fuel economy, measure the compression pressure.
1. WARM UP AND STOP ENGINE
Allow the engine to warm up to normal operating tempera-
ture.
2. 2JZ±GE:
DISCONNECT DISTRIBUTOR CONNECTOR
3. 2JZ±GTE:
DISCONNECT CAMSHAFT POSITION SENSOR CON-
NECTORS
4. 2JZ±GE:
DISCONNECT HIGH±TENSION CORDS FROM SPARK
PLUGS
(See high±tension cords and cord clamps removal in
Ignition System)
5. 2JZ±GTE:
REMOVE IGNITION COILS ASSEMBLIES
(See ignition coils removal in Ignition System)
6. REMOVE SPARK PLUGS
7. CHECK CYLINDER COMPRESSION
(a) Insert a compression tester into the spark plug hole.
(b) Wh ile cra n kin g th e en g in e , me a su re th e co mp re ssio n
pressure.
HINT: Always use a fully charged battery to obtain engine rev-
olutions of 250 rpm or more.
(c) Repeat steps (a) through (b) for each cylinder.
NOTICE: This measurement must be done in as short a time as
possible.
Standard pressure:
2JZ±GE
1,275 kPa (13.0 kgf/cm
2, 185 psi) or more
2JZ±GTE
1,079 kPa (11.0 kgf/cm
2, 156 psi) or more
Minimum pressure:
2JZ±GE
1,079 kPa (11.0 kgf/cm
2, 156 psi)
2JZ±GTE
883 kPa (9.0 kgf/cm
2, 128 psi)
Difference between each cylinder:
98 kPa (1.0 kgf/cm
2, 14 psi) or less
(d) If the cylinder compression in 1 or more cylinders is low, pour
a small amount of engine oil into the cylinder through the
spark plug hole and repeat steps (a) through (b) for the
cylinder with low compression.
± ENGINEENGINE MECHANICALEG±9
Page 1324 of 2543
wIf adding oil helps the compression, it is likely that the
piston rings and/or cylinder bore are probably worn or
damaged.
wIf pressure stays low, a valve may be sticking or seating
improper, or there may be leakage past the gasket.
8. REINSTALL SPARK PLUGS
9. 2JZ±GE:
RECONNECT HIGH±TENSION CORDS TO SPARK
PLUGS
(See high±tension cords and cord clamps installation in
Ignition System)
10. 2JZ±GTE:
REINSTALL IGNITION COILS ASSEMBLIES
(See ignition coils installation in Ignition System)
11. 2JZ±GE:
RECONNECT DISTRIBUTOR CONNECTOR
12. 2JZ±GTE:
RECONNECT CAMSHAFT POSITION SENSOR CONNEC-
TORS EG±10
± ENGINEENGINE MECHANICAL
Page 1325 of 2543
VALVE CLEARANCE INSPECTION AND
ADJUSTMENT (2JZ±GE)
HINT: Inspect and adjust the valve clearance when the en-
gine is cold.
1. REMOVE THROTTLE BODY AND INTAKE AIR
CONNECTOR ASSEMBLY
(See steps 1 to 9 in injector removal in SFI System)
2. DISCONNECT HIGH±TENSION CORDS FROM
CYLINDER HEAD COVERS
(See high±tension cords and cord clamps removal in
Ignition System)
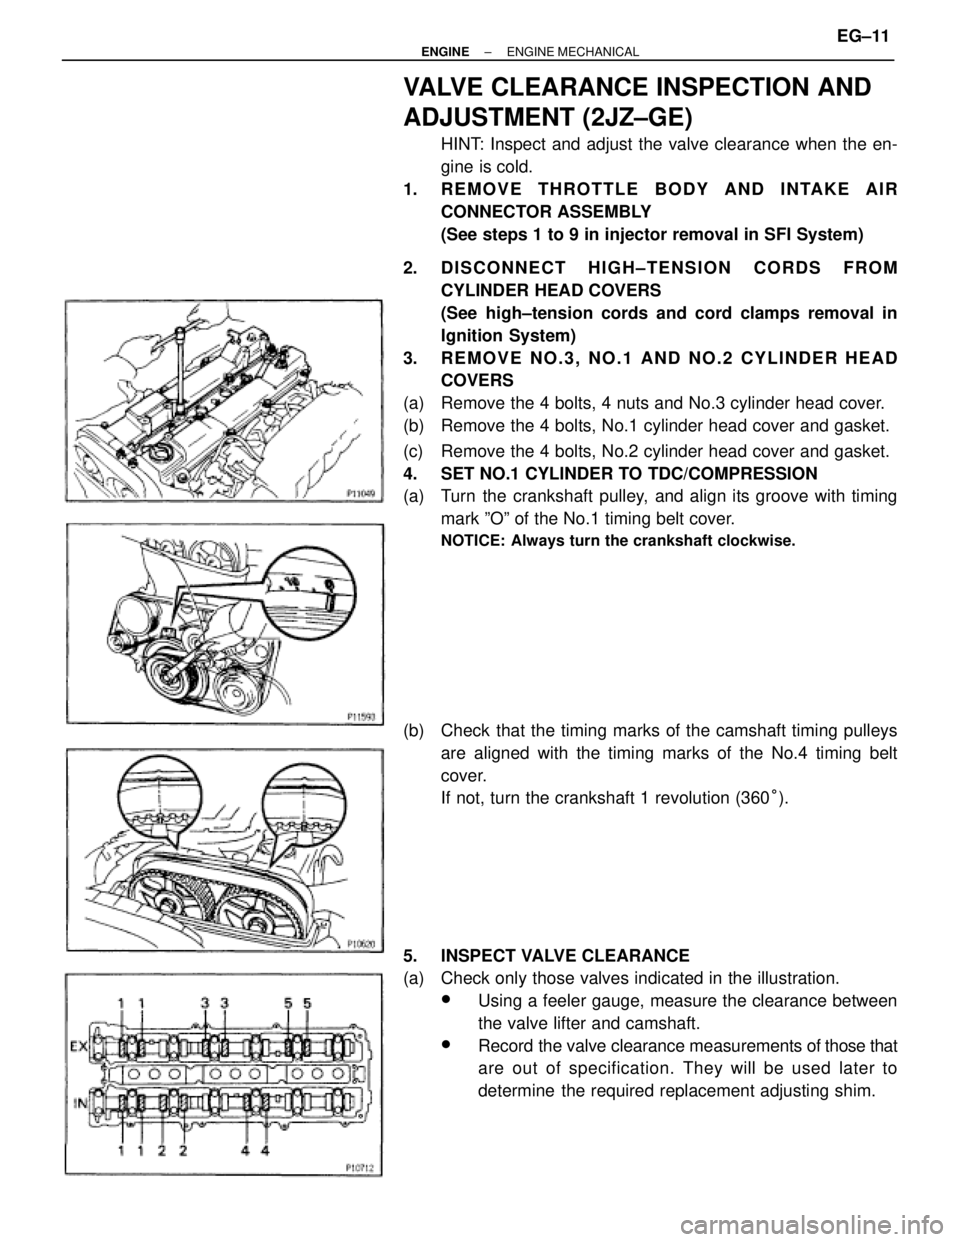
3. REMOVE NO.3, NO.1 AND NO.2 CYLINDER HEAD
COVERS
(a) Remove the 4 bolts, 4 nuts and No.3 cylinder head cover.
(b) Remove the 4 bolts, No.1 cylinder head cover and gasket.
(c) Remove the 4 bolts, No.2 cylinder head cover and gasket.
4. SET NO.1 CYLINDER TO TDC/COMPRESSION
(a) Turn the crankshaft pulley, and align its groove with timing
mark ºOº of the No.1 timing belt cover.
NOTICE: Always turn the crankshaft clockwise.
(b) Check that the timing marks of the camshaft timing pulleys
are aligned with the timing marks of the No.4 timing belt
cover.
If not, turn the crankshaft 1 revolution (360°).
5. INSPECT VALVE CLEARANCE
(a) Check only those valves indicated in the illustration.
wUsing a feeler gauge, measure the clearance between
the valve lifter and camshaft.
wRecord the valve clearance measurements of those that
are out of specification. They will be used later to
determine the required replacement adjusting shim.
± ENGINEENGINE MECHANICALEG±11
Page 1330 of 2543
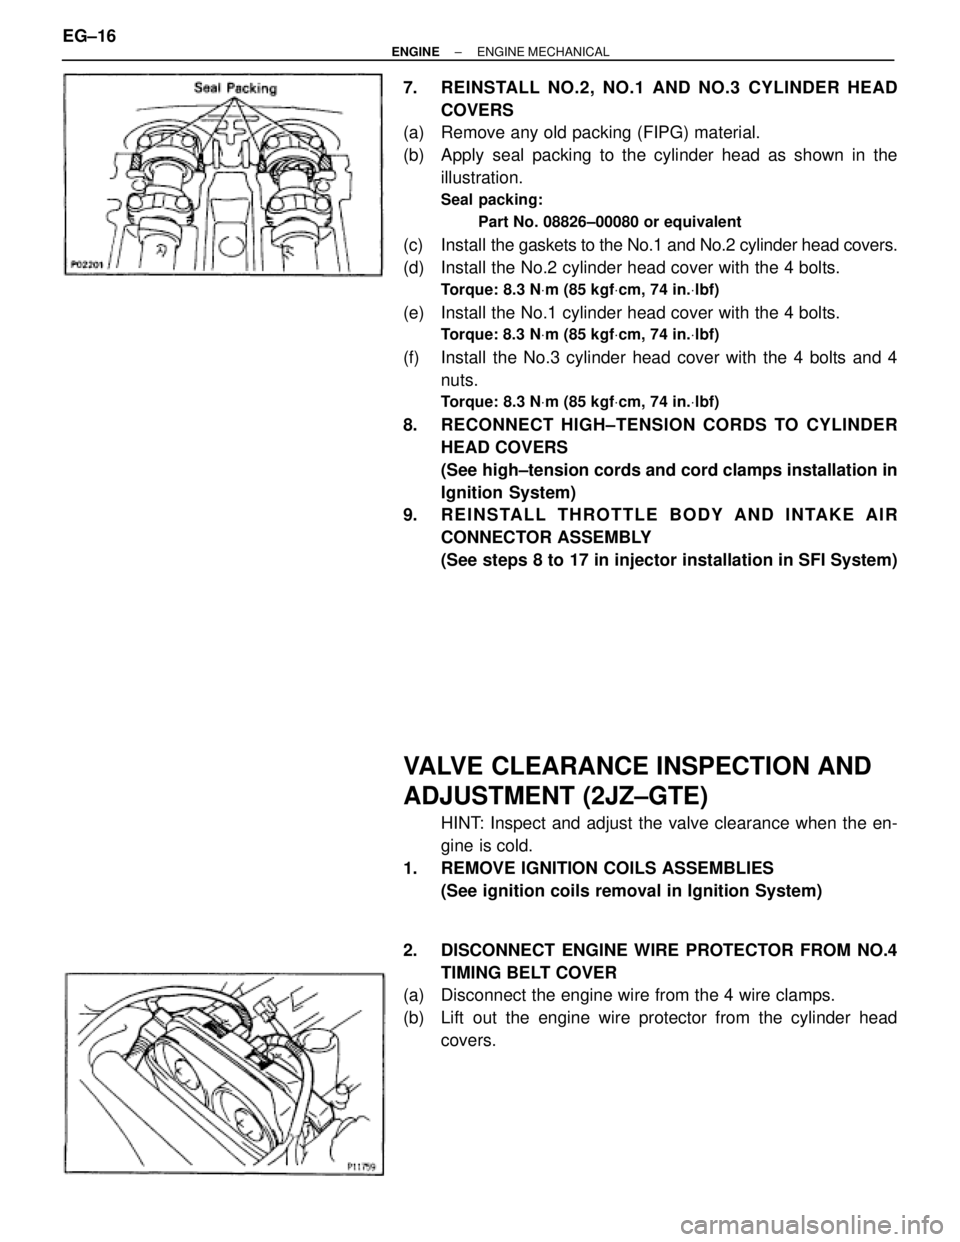
7. REINSTALL NO.2, NO.1 AND NO.3 CYLINDER HEAD
COVERS
(a) Remove any old packing (FIPG) material.
(b) Apply seal packing to the cylinder head as shown in the
illustration.
Seal packing:
Part No. 08826±00080 or equivalent
(c) Install the gaskets to the No.1 and No.2 cylinder head covers.
(d) Install the No.2 cylinder head cover with the 4 bolts.
Torque: 8.3 NVm (85 kgfVcm, 74 in.Vlbf)
(e) Install the No.1 cylinder head cover with the 4 bolts.
Torque: 8.3 NVm (85 kgfVcm, 74 in.Vlbf)
(f) Install the No.3 cylinder head cover with the 4 bolts and 4
nuts.
Torque: 8.3 NVm (85 kgfVcm, 74 in.Vlbf)
8. RECONNECT HIGH±TENSION CORDS TO CYLINDER
HEAD COVERS
(See high±tension cords and cord clamps installation in
Ignition System)
9. REINSTALL THROTTLE BODY AND INTAKE AIR
CONNECTOR ASSEMBLY
(See steps 8 to 17 in injector installation in SFI System)
VALVE CLEARANCE INSPECTION AND
ADJUSTMENT (2JZ±GTE)
HINT: Inspect and adjust the valve clearance when the en-
gine is cold.
1. REMOVE IGNITION COILS ASSEMBLIES
(See ignition coils removal in Ignition System)
2. DISCONNECT ENGINE WIRE PROTECTOR FROM NO.4
TIMING BELT COVER
(a) Disconnect the engine wire from the 4 wire clamps.
(b) Lift out the engine wire protector from the cylinder head
covers. EG±16
± ENGINEENGINE MECHANICAL