1993 FORD MONDEO battery
[x] Cancel search: batteryPage 92 of 279
Caution: Don’t drive the vehicle
without a thermostat. The lack of
a thermostat will slow warm-up
time. The engine management system’s
ECU will then stay in warm-up mode for
longer than necessary, causing emissions
and fuel economy to suffer.
9If the radiator top hose is hot, it means that
the coolant is flowing and the thermostat is
open. Consult the “Fault diagnosis”section at
the front of this manual to assist in tracing
possible cooling system faults.
Thermostat test
10If the thermostat remains in the open
position at room temperature, it is faulty, and
must be renewed as a matter of course.
11To test it fully, suspend the (closed)
thermostat on a length of string in a container
of cold water, with a thermometer beside it;
ensure that neither touches the side of the
container.
12Heat the water, and check the
temperature at which the thermostat begins to
open; compare this value with that specified.
Continue to heat the water until the
thermostat is fully open; the temperature at
which this should happen is stamped in the
unit’s end. Remove the thermostat and allow
it to cool down; check that it closes fully.
13If the thermostat does not open and close
as described, if it sticks in either position, or if
it does not open at the specified temperature,
it must be renewed.
Refitting
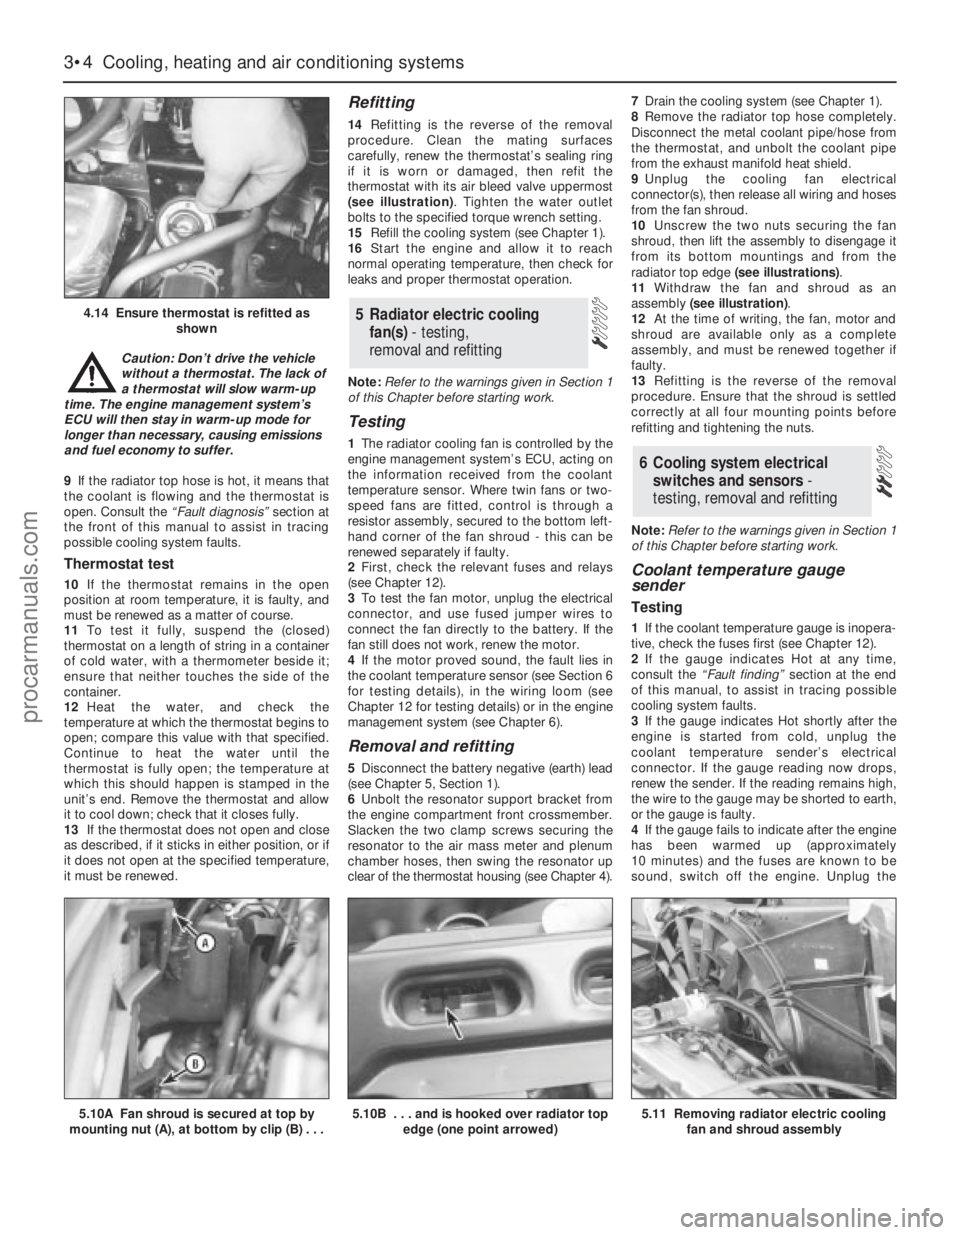
14Refitting is the reverse of the removal
procedure. Clean the mating surfaces
carefully, renew the thermostat’s sealing ring
if it is worn or damaged, then refit the
thermostat with its air bleed valve uppermost
(see illustration). Tighten the water outlet
bolts to the specified torque wrench setting.
15Refill the cooling system (see Chapter 1).
16Start the engine and allow it to reach
normal operating temperature, then check for
leaks and proper thermostat operation.
Note:Refer to the warnings given in Section 1
of this Chapter before starting work.
Testing
1The radiator cooling fan is controlled by the
engine management system’s ECU, acting on
the information received from the coolant
temperature sensor. Where twin fans or two-
speed fans are fitted, control is through a
resistor assembly, secured to the bottom left-
hand corner of the fan shroud - this can be
renewed separately if faulty.
2First, check the relevant fuses and relays
(see Chapter 12).
3To test the fan motor, unplug the electrical
connector, and use fused jumper wires to
connect the fan directly to the battery. If the
fan still does not work, renew the motor.
4If the motor proved sound, the fault lies in
the coolant temperature sensor (see Section 6
for testing details), in the wiring loom (see
Chapter 12 for testing details) or in the engine
management system (see Chapter 6).
Removal and refitting
5Disconnect the battery negative (earth) lead
(see Chapter 5, Section 1).
6Unbolt the resonator support bracket from
the engine compartment front crossmember.
Slacken the two clamp screws securing the
resonator to the air mass meter and plenum
chamber hoses, then swing the resonator up
clear of the thermostat housing (see Chapter 4).7Drain the cooling system (see Chapter 1).
8Remove the radiator top hose completely.
Disconnect the metal coolant pipe/hose from
the thermostat, and unbolt the coolant pipe
from the exhaust manifold heat shield.
9Unplug the cooling fan electrical
connector(s), then release all wiring and hoses
from the fan shroud.
10Unscrew the two nuts securing the fan
shroud, then lift the assembly to disengage it
from its bottom mountings and from the
radiator top edge (see illustrations).
11Withdraw the fan and shroud as an
assembly (see illustration).
12At the time of writing, the fan, motor and
shroud are available only as a complete
assembly, and must be renewed together if
faulty.
13Refitting is the reverse of the removal
procedure. Ensure that the shroud is settled
correctly at all four mounting points before
refitting and tightening the nuts.
Note:Refer to the warnings given in Section 1
of this Chapter before starting work.
Coolant temperature gauge
sender
Testing
1If the coolant temperature gauge is inopera-
tive, check the fuses first (see Chapter 12).
2If the gauge indicates Hot at any time,
consult the “Fault finding”section at the end
of this manual, to assist in tracing possible
cooling system faults.
3If the gauge indicates Hot shortly after the
engine is started from cold, unplug the
coolant temperature sender’s electrical
connector. If the gauge reading now drops,
renew the sender. If the reading remains high,
the wire to the gauge may be shorted to earth,
or the gauge is faulty.
4If the gauge fails to indicate after the engine
has been warmed up (approximately
10 minutes) and the fuses are known to be
sound, switch off the engine. Unplug the
6 Cooling system electrical
switches and sensors-
testing, removal and refitting
5 Radiator electric cooling
fan(s)- testing,
removal and refitting
3•4 Cooling, heating and air conditioning systems
4.14 Ensure thermostat is refitted as
shown
5.10A Fan shroud is secured at top by
mounting nut (A), at bottom by clip (B) . . .5.10B . . . and is hooked over radiator top
edge (one point arrowed)5.11 Removing radiator electric cooling
fan and shroud assembly
procarmanuals.com
Page 93 of 279
sender’s electrical connector, and use a
jumper wire to connect the white/red wire to a
clean earth point (bare metal) on the engine.
Switch on the ignition without starting the
engine. If the gauge now indicates Hot, renew
the sender.
5If the gauge still does not work, the circuit
may be open, or the gauge may be faulty. See
Chapter 12 for additional information.
Removal
6Unbolt the resonator support bracket from
the engine compartment front crossmember.
Slacken the two clamp screws securing the
resonator to the air mass meter and plenum
chamber hoses, then swing the resonator up
clear of the thermostat housing (see Chap-
ter 4).
7Drain the cooling system (see Chapter 1).
8Disconnect the expansion tank coolant
hose and the radiator top hose from the
thermostat housing’s water outlet, then
disconnect the metal coolant pipe/hose from
the thermostat.
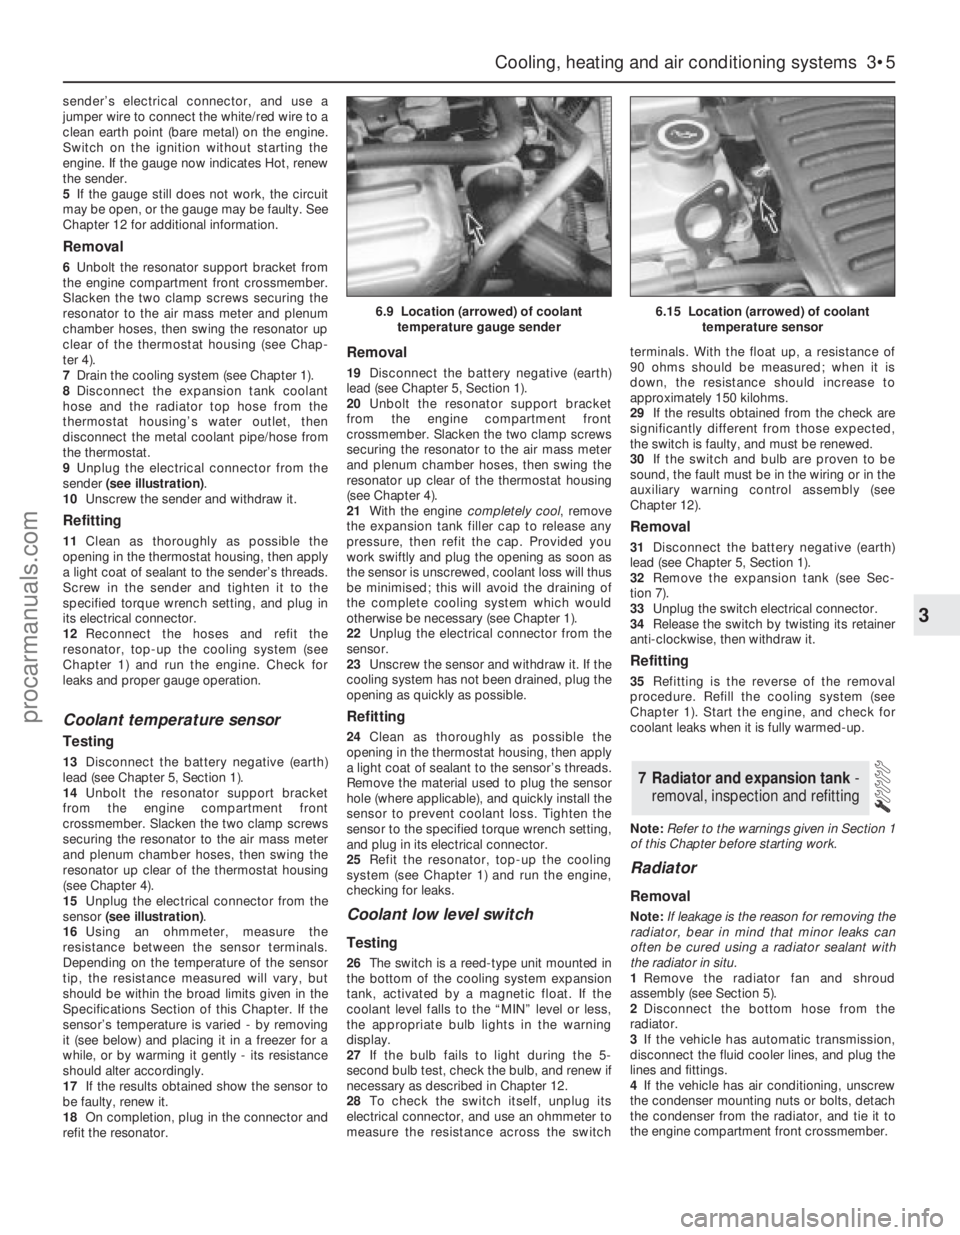
9Unplug the electrical connector from the
sender (see illustration).
10Unscrew the sender and withdraw it.
Refitting
11Clean as thoroughly as possible the
opening in the thermostat housing, then apply
a light coat of sealant to the sender’s threads.
Screw in the sender and tighten it to the
specified torque wrench setting, and plug in
its electrical connector.
12Reconnect the hoses and refit the
resonator, top-up the cooling system (see
Chapter 1) and run the engine. Check for
leaks and proper gauge operation.
Coolant temperature sensor
Testing
13Disconnect the battery negative (earth)
lead (see Chapter 5, Section 1).
14Unbolt the resonator support bracket
from the engine compartment front
crossmember. Slacken the two clamp screws
securing the resonator to the air mass meter
and plenum chamber hoses, then swing the
resonator up clear of the thermostat housing
(see Chapter 4).
15Unplug the electrical connector from the
sensor (see illustration).
16Using an ohmmeter, measure the
resistance between the sensor terminals.
Depending on the temperature of the sensor
tip, the resistance measured will vary, but
should be within the broad limits given in the
Specifications Section of this Chapter. If the
sensor’s temperature is varied - by removing
it (see below) and placing it in a freezer for a
while, or by warming it gently - its resistance
should alter accordingly.
17If the results obtained show the sensor to
be faulty, renew it.
18On completion, plug in the connector and
refit the resonator.
Removal
19Disconnect the battery negative (earth)
lead (see Chapter 5, Section 1).
20Unbolt the resonator support bracket
from the engine compartment front
crossmember. Slacken the two clamp screws
securing the resonator to the air mass meter
and plenum chamber hoses, then swing the
resonator up clear of the thermostat housing
(see Chapter 4).
21With the engine completely cool, remove
the expansion tank filler cap to release any
pressure, then refit the cap. Provided you
work swiftly and plug the opening as soon as
the sensor is unscrewed, coolant loss will thus
be minimised; this will avoid the draining of
the complete cooling system which would
otherwise be necessary (see Chapter 1).
22Unplug the electrical connector from the
sensor.
23Unscrew the sensor and withdraw it. If the
cooling system has not been drained, plug the
opening as quickly as possible.
Refitting
24Clean as thoroughly as possible the
opening in the thermostat housing, then apply
a light coat of sealant to the sensor’s threads.
Remove the material used to plug the sensor
hole (where applicable), and quickly install the
sensor to prevent coolant loss. Tighten the
sensor to the specified torque wrench setting,
and plug in its electrical connector.
25Refit the resonator, top-up the cooling
system (see Chapter 1) and run the engine,
checking for leaks.
Coolant low level switch
Testing
26The switch is a reed-type unit mounted in
the bottom of the cooling system expansion
tank, activated by a magnetic float. If the
coolant level falls to the “MIN” level or less,
the appropriate bulb lights in the warning
display.
27If the bulb fails to light during the 5-
second bulb test, check the bulb, and renew if
necessary as described in Chapter 12.
28To check the switch itself, unplug its
electrical connector, and use an ohmmeter to
measure the resistance across the switchterminals. With the float up, a resistance of
90 ohms should be measured; when it is
down, the resistance should increase to
approximately 150 kilohms.
29If the results obtained from the check are
significantly different from those expected,
the switch is faulty, and must be renewed.
30If the switch and bulb are proven to be
sound, the fault must be in the wiring or in the
auxiliary warning control assembly (see
Chapter 12).
Removal
31Disconnect the battery negative (earth)
lead (see Chapter 5, Section 1).
32Remove the expansion tank (see Sec-
tion 7).
33Unplug the switch electrical connector.
34Release the switch by twisting its retainer
anti-clockwise, then withdraw it.
Refitting
35Refitting is the reverse of the removal
procedure. Refill the cooling system (see
Chapter 1). Start the engine, and check for
coolant leaks when it is fully warmed-up.
Note:Refer to the warnings given in Section 1
of this Chapter before starting work.
Radiator
Removal
Note:If leakage is the reason for removing the
radiator, bear in mind that minor leaks can
often be cured using a radiator sealant with
the radiator in situ.
1Remove the radiator fan and shroud
assembly (see Section 5).
2Disconnect the bottom hose from the
radiator.
3If the vehicle has automatic transmission,
disconnect the fluid cooler lines, and plug the
lines and fittings.
4If the vehicle has air conditioning, unscrew
the condenser mounting nuts or bolts, detach
the condenser from the radiator, and tie it to
the engine compartment front crossmember.
7 Radiator and expansion tank -
removal, inspection and refitting
Cooling, heating and air conditioning systems 3•5
3
6.9 Location (arrowed) of coolant
temperature gauge sender6.15 Location (arrowed) of coolant
temperature sensor
procarmanuals.com
Page 95 of 279
Heater blower motor
Removal
1Disconnect the battery negative (earth) lead
(see Chapter 5, Section 1).
2Release the four clips (by pulling them out)
securing the passenger side footwell upper
trim panel, then withdraw the panel.
3Unplug the motor’s electrical connector.
4Lift the motor’s retaining lug slightly, twist
the motor anti-clockwise (seen from beneath)
through approximately 30°, then withdraw the
assembly.
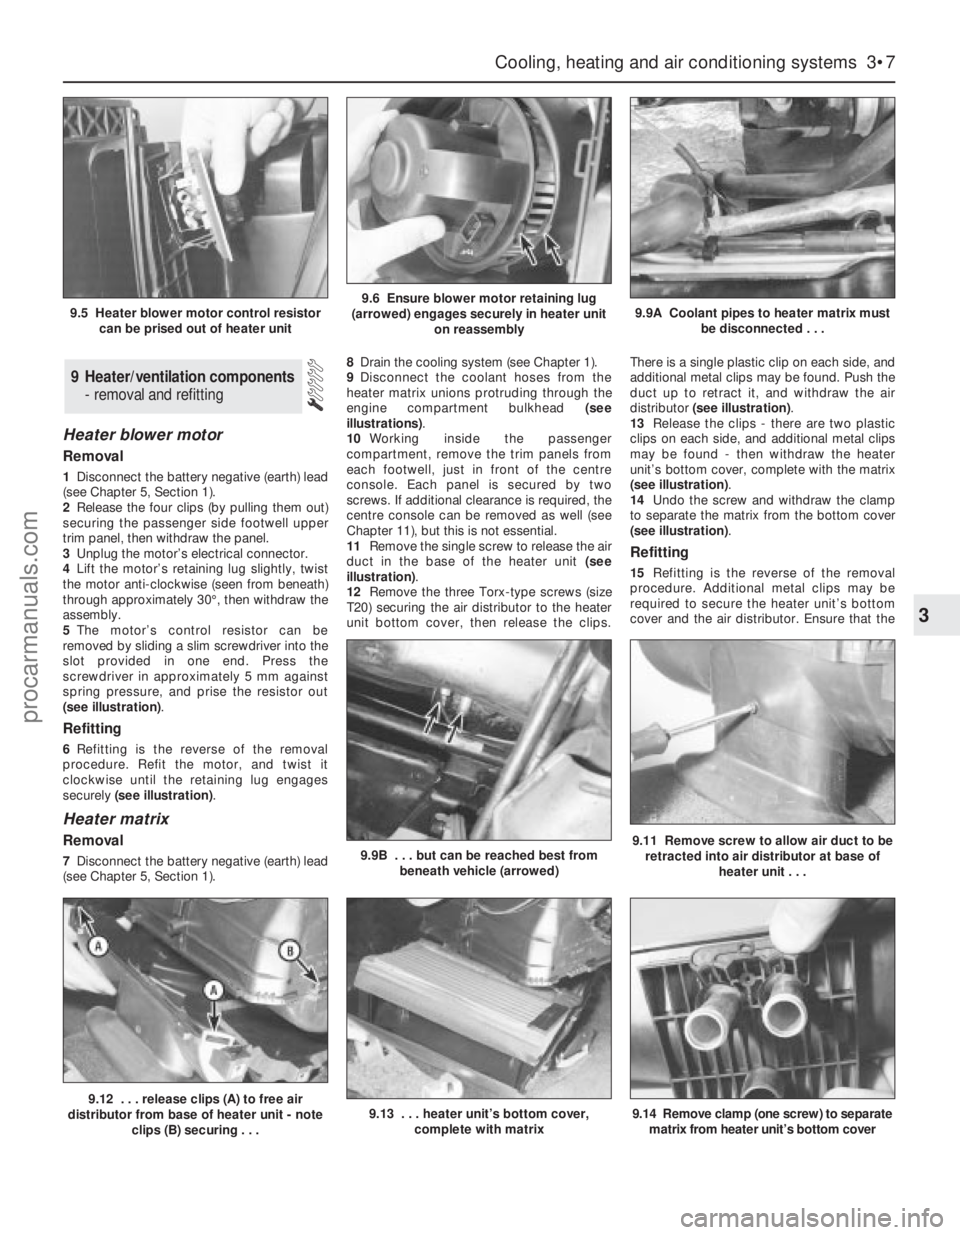
5The motor’s control resistor can be
removed by sliding a slim screwdriver into the
slot provided in one end. Press the
screwdriver in approximately 5 mm against
spring pressure, and prise the resistor out
(see illustration).
Refitting
6Refitting is the reverse of the removal
procedure. Refit the motor, and twist it
clockwise until the retaining lug engages
securely (see illustration).
Heater matrix
Removal
7Disconnect the battery negative (earth) lead
(see Chapter 5, Section 1).8Drain the cooling system (see Chapter 1).
9Disconnect the coolant hoses from the
heater matrix unions protruding through the
engine compartment bulkhead (see
illustrations).
10Working inside the passenger
compartment, remove the trim panels from
each footwell, just in front of the centre
console. Each panel is secured by two
screws. If additional clearance is required, the
centre console can be removed as well (see
Chapter 11), but this is not essential.
11Remove the single screw to release the air
duct in the base of the heater unit (see
illustration).
12Remove the three Torx-type screws (size
T20) securing the air distributor to the heater
unit bottom cover, then release the clips.There is a single plastic clip on each side, and
additional metal clips may be found. Push the
duct up to retract it, and withdraw the air
distributor (see illustration).
13Release the clips - there are two plastic
clips on each side, and additional metal clips
may be found - then withdraw the heater
unit’s bottom cover, complete with the matrix
(see illustration).
14Undo the screw and withdraw the clamp
to separate the matrix from the bottom cover
(see illustration).
Refitting
15Refitting is the reverse of the removal
procedure. Additional metal clips may be
required to secure the heater unit’s bottom
cover and the air distributor. Ensure that the
9 Heater/ventilation components
- removal and refitting
Cooling, heating and air conditioning systems 3•7
3
9.12 . . . release clips (A) to free air
distributor from base of heater unit - note
clips (B) securing . . .9.13 . . . heater unit’s bottom cover,
complete with matrix9.14 Remove clamp (one screw) to separate
matrix from heater unit’s bottom cover
9.5 Heater blower motor control resistor
can be prised out of heater unit9.6 Ensure blower motor retaining lug
(arrowed) engages securely in heater unit
on reassembly9.9A Coolant pipes to heater matrix must
be disconnected . . .
9.9B . . . but can be reached best from
beneath vehicle (arrowed)9.11 Remove screw to allow air duct to be
retracted into air distributor at base of
heater unit . . .
procarmanuals.com
Page 96 of 279
duct is lowered from the air distributor and
secured with its screw.
16Refill the cooling system with the proper
mixture of antifreeze and water (see Chapter
1). Start the engine and allow it to reach
normal operating temperature, indicated by
the radiator top hose becoming hot. Recheck
the coolant level and add more if required,
then check for leaks. Check the operation of
the heater.
Pollen filter
17Refer to Chapter 1.
Blower/air conditioning control
Removal
1Disconnect the battery negative (earth) lead
(see Chapter 5, Section 1).
2Remove the ashtray. Referring to the
relevant Sections of Chapter 11, undo the two
upper screws from the centre console and
pull out the cassette storage compartment,
then remove the radio/cassette player.
3Pull the heater control/radio bezel out of the
three clips securing its top edge, pull it
forwards and unplug the switch electrical
connector (where fitted).
4Pull off the heater control knobs, and
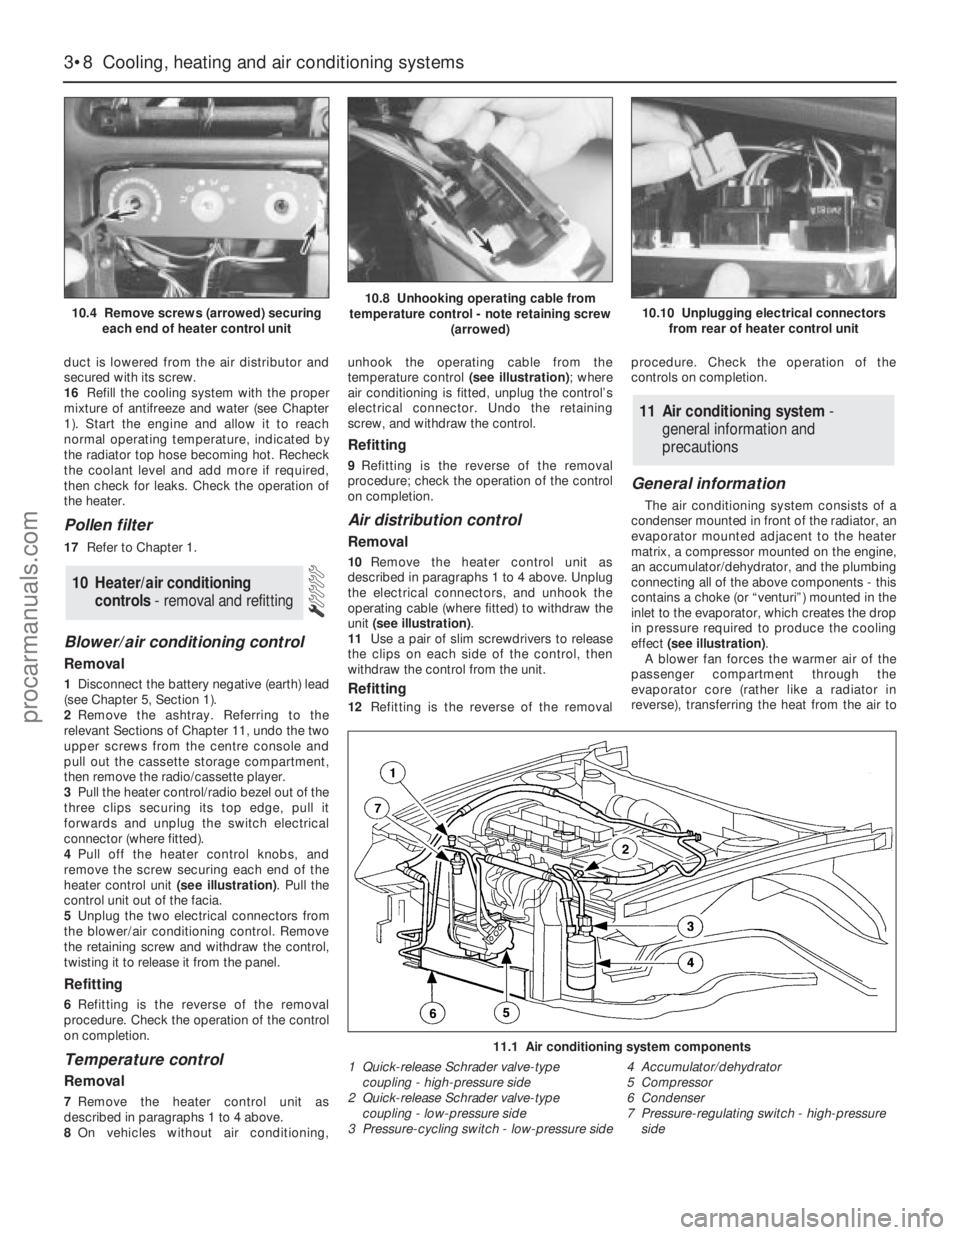
remove the screw securing each end of the
heater control unit (see illustration). Pull the
control unit out of the facia.
5Unplug the two electrical connectors from
the blower/air conditioning control. Remove
the retaining screw and withdraw the control,
twisting it to release it from the panel.
Refitting
6Refitting is the reverse of the removal
procedure. Check the operation of the control
on completion.
Temperature control
Removal
7Remove the heater control unit as
described in paragraphs 1 to 4 above.
8On vehicles without air conditioning,unhook the operating cable from the
temperature control (see illustration); where
air conditioning is fitted, unplug the control’s
electrical connector. Undo the retaining
screw, and withdraw the control.
Refitting
9Refitting is the reverse of the removal
procedure; check the operation of the control
on completion.
Air distribution control
Removal
10Remove the heater control unit as
described in paragraphs 1 to 4 above. Unplug
the electrical connectors, and unhook the
operating cable (where fitted) to withdraw the
unit (see illustration).
11Use a pair of slim screwdrivers to release
the clips on each side of the control, then
withdraw the control from the unit.
Refitting
12Refitting is the reverse of the removalprocedure. Check the operation of the
controls on completion.
General information
The air conditioning system consists of a
condenser mounted in front of the radiator, an
evaporator mounted adjacent to the heater
matrix, a compressor mounted on the engine,
an accumulator/dehydrator, and the plumbing
connecting all of the above components - this
contains a choke (or “venturi”) mounted in the
inlet to the evaporator, which creates the drop
in pressure required to produce the cooling
effect (see illustration).
A blower fan forces the warmer air of the
passenger compartment through the
evaporator core (rather like a radiator in
reverse), transferring the heat from the air to
11 Air conditioning system -
general information and
precautions
10 Heater/air conditioning
controls- removal and refitting
3•8 Cooling, heating and air conditioning systems
10.4 Remove screws (arrowed) securing
each end of heater control unit10.8 Unhooking operating cable from
temperature control - note retaining screw
(arrowed)10.10 Unplugging electrical connectors
from rear of heater control unit
11.1 Air conditioning system components
1 Quick-release Schrader valve-type
coupling - high-pressure side
2 Quick-release Schrader valve-type
coupling - low-pressure side
3 Pressure-cycling switch - low-pressure side4 Accumulator/dehydrator
5 Compressor
6 Condenser
7 Pressure-regulating switch - high-pressure
side
procarmanuals.com
Page 97 of 279
the refrigerant. The liquid refrigerant boils off
into low-pressure vapour, taking the heat with
it when it leaves the evaporator.
Precautions
Warning: The air conditioning
system is under high pressure.
Do not loosen any fittings or
remove any components until
after the system has been discharged. Air
conditioning refrigerant should be properly
discharged into an approved type of
container, at a dealer service department
or an automotive air conditioning repair
facility capable of handling R134a
refrigerant. Always wear eye protection
when disconnecting air conditioning
system fittings.
When an air conditioning system is fitted, it
is necessary to observe the following special
precautions whenever dealing with any part of
the system, its associated components, and
any items which necessitate disconnection of
the system:
(a) While the refrigerant used - R134a - is
less damaging to the environment than
the previously-used R12, it is still a very
dangerous substance. It must not be
allowed into contact with the skin or eyes,
or there is a risk of frostbite. It must also
not be discharged in an enclosed space -
while it is not toxic, there is a risk of
suffocation. The refrigerant is heavier than
air, and so must never be discharged over
a pit.
(b) The refrigerant must not be allowed to
come in contact with a naked flame,
otherwise a poisonous gas will be created
- under certain circumstances, this can
form an explosive mixture with air. For
similar reasons, smoking in the presence
of refrigerant is highly dangerous,
particularly if the vapour is inhaled
through a lighted cigarette.
(c) Never discharge the system to the
atmosphere - R134a is not an ozone-
depleting ChloroFluoroCarbon (CFC) as is
R12, but is instead a hydrofluorocarbon,
which causes environmental damage by
contributing to the “greenhouse effect” if
released into the atmosphere.
(d) R134a refrigerant must notbe mixed with
R12; the system uses different seals (now
green-coloured, previously black) and has
different fittings requiring different tools,
so that there is no chance of the two
types of refrigerant becoming mixed
accidentally.
(e) If for any reason the system must be
disconnected, entrust this task to your
Ford dealer or a refrigeration engineer.
(f) It is essential that the system be
professionally discharged prior to using
any form of heat - welding, soldering,
brazing, etc - in the vicinity of the system,
before having the vehicle oven-dried at a
temperature exceeding 70°C after
repainting, and before disconnecting any
part of the system.Warning: The air conditioning
system is under high pressure.
Do not loosen any fittings or
remove any components until after the
system has been discharged. Air
conditioning refrigerant should be properly
discharged into an approved type of
container, at a dealer service department
or an automotive air conditioning repair
facility capable of handling R134a
refrigerant. Cap or plug the pipe lines as
soon as they are disconnected, to prevent
the entry of moisture. Always wear eye
protection when disconnecting air
conditioning system fittings.
Note: This Section refers to the components
of the air conditioning system itself - refer to
Sections 9 and 10 for details of components
common to the heating/ventilation system.
Condenser
1Have the refrigerant discharged at a dealer
service department or an automotive air
conditioning repair facility.
2Disconnect the battery negative (earth) lead
(see Chapter 5, Section 1).
3Remove the radiator undershield (see
Chapter 1).
4Using the Ford service tool 34-001,
disconnect the refrigerant lines from the
condenser. Immediately cap the open fittings,
to prevent the entry of dirt and moisture.
5Unbolt the condenser (see illustration 7.5)
and lift it out of the vehicle. Store it upright, to
prevent oil loss.
6Refitting is the reverse of removal.
7If a new condenser was installed, add 20 cc
of refrigerant oil to the system.
8Have the system evacuated, charged and
leak-tested by the specialist who discharged
it.
Evaporator
9The evaporator is mounted with the heater
matrix. Apart from the need to have the
refrigerant discharged, and to use Ford
service tools 34-001 and 34-003 to
disconnect the lines, the procedure is as
described in Section 9 of this Chapter.
10On reassembly, if a new evaporator was
installed, add 20 cc of refrigerant oil to the
system.
11Have the system evacuated, charged and
leak-tested by the specialist who discharged
it.
Compressor
12Have the refrigerant discharged at a
dealer service department or an automotive
air conditioning repair facility.
13Disconnect the battery negative (earth)
lead (see Chapter 5, Section 1).
14Remove the radiator undershield (see
Chapter 1).15Remove the auxiliary drivebelt (see
Chapter 1).
16Unbolt the compressor from the cylinder
block/crankcase, press it to one side, and
unscrew the clamping bolt to disconnect the
refrigerant lines. Plug the line connections,
swing the compressor upright, unplug its
electrical connector, then withdraw the
compressor from the vehicle. Note:Keep the
compressor level during handling and storage.
If the compressor has seized, or if you find
metal particles in the refrigerant lines, the
system must be flushed out by an air
conditioning technician, and the
accumulator/dehydrator must be renewed.
17Prior to installation, turn the compressor
clutch centre six times, to disperse any oil that
has collected in the head.
18Refit the compressor in the reverse order
of removal; renew all seals disturbed.
19If you are installing a new compressor,
refer to the compressor manufacturer’s
instructions for adding refrigerant oil to the
system.
20Have the system evacuated, charged and
leak-tested by the specialist that discharged
it.
Accumulator/dehydrator
21Have the refrigerant discharged at a
dealer service department or an automotive
air conditioning repair facility.
22Disconnect the battery negative (earth)
lead (see Chapter 5, Section 1).
23The accumulator/dehydrator, which acts
as a reservoir and filter for the refrigerant, is
located in the left-hand front corner of the
engine compartment. Using the Ford service
tool 34-003, disconnect the refrigerant line
next to the accumulator/dehydrator from the
compressor. Immediately cap the open
fittings, to prevent the entry of dirt and
moisture, then unplug the pressure-cycling
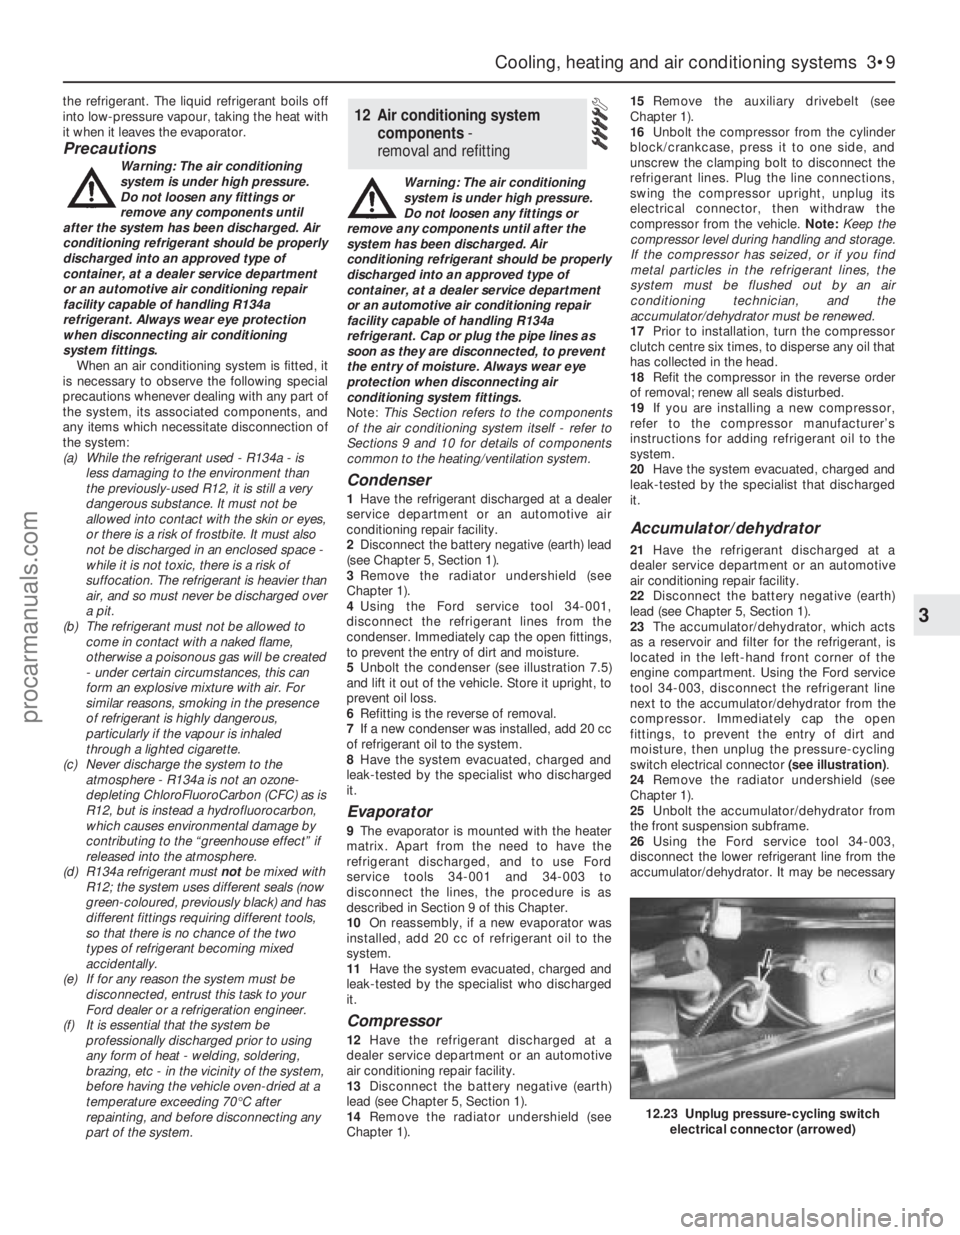
switch electrical connector (see illustration).
24Remove the radiator undershield (see
Chapter 1).
25Unbolt the accumulator/dehydrator from
the front suspension subframe.
26Using the Ford service tool 34-003,
disconnect the lower refrigerant line from the
accumulator/dehydrator. It may be necessary
12 Air conditioning system
components -
removal and refitting
Cooling, heating and air conditioning systems 3•9
3
12.23 Unplug pressure-cycling switch
electrical connector (arrowed)
procarmanuals.com
Page 98 of 279
to unscrew the pressure-cycling switch to
allow the use of the tool. Immediately cap the
open fittings, to prevent the entry of dirt and
moisture.
27Withdraw the accumulator/dehydrator.
28Refit the accumulator/dehydrator in the
reverse order of removal; renew all seals
disturbed.
29If you are installing a new accumulator/
dehydrator, refer to the manufacturer’s
instructions for adding refrigerant oil to the
system.
30Have the system evacuated, charged and
leak-tested by the specialist that discharged
it.Pressure-cycling and pressure-
regulating switches
31Have the refrigerant discharged at a
dealer service department or an automotive
air conditioning repair facility.
32Disconnect the battery negative (earth)
lead (see Chapter 5, Section 1).
33Unplug the switch electrical connector,
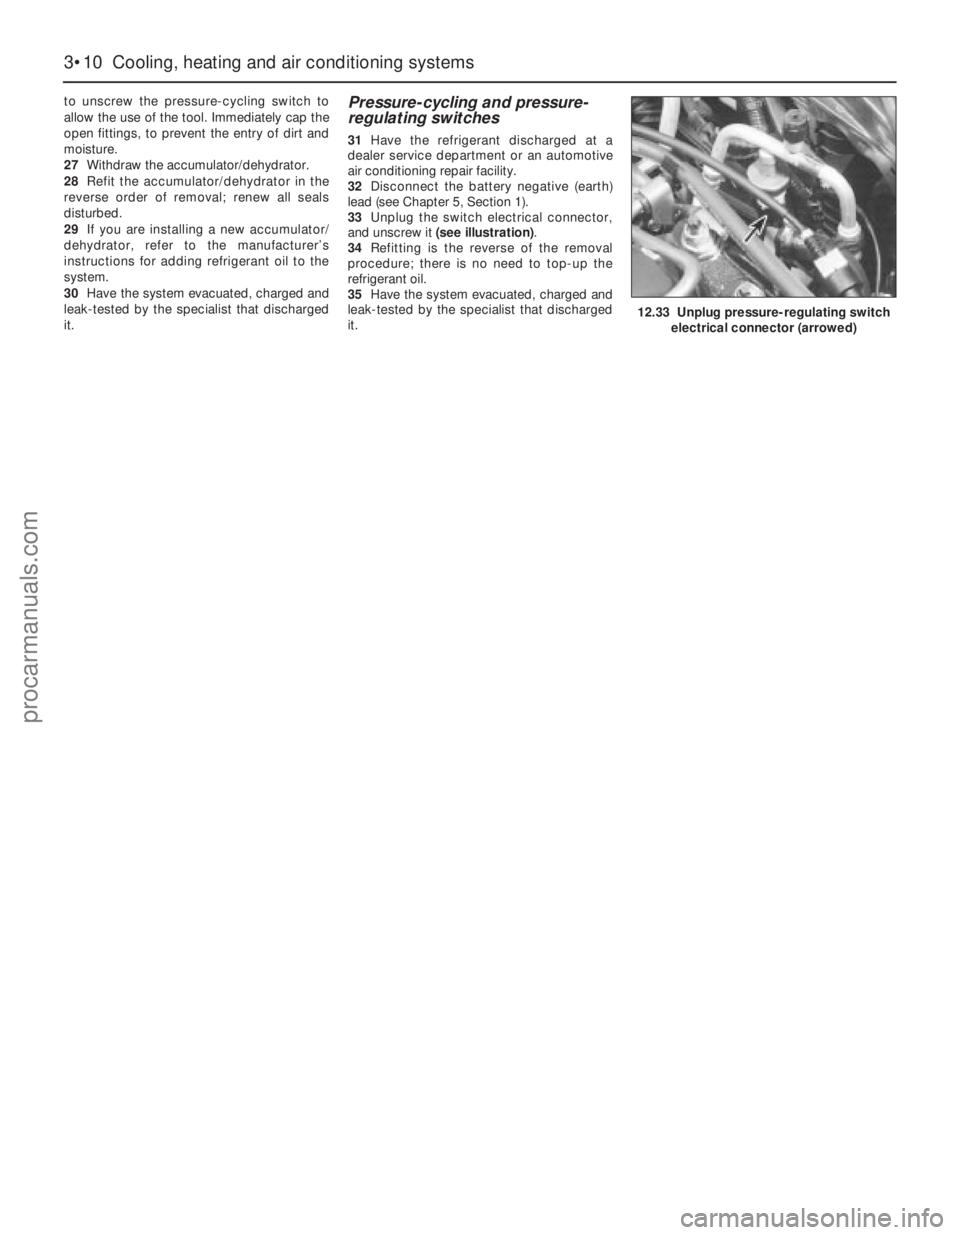
and unscrew it (see illustration).
34Refitting is the reverse of the removal
procedure; there is no need to top-up the
refrigerant oil.
35Have the system evacuated, charged and
leak-tested by the specialist that discharged
it.
3•10 Cooling, heating and air conditioning systems
12.33 Unplug pressure-regulating switch
electrical connector (arrowed)
procarmanuals.com
Page 101 of 279
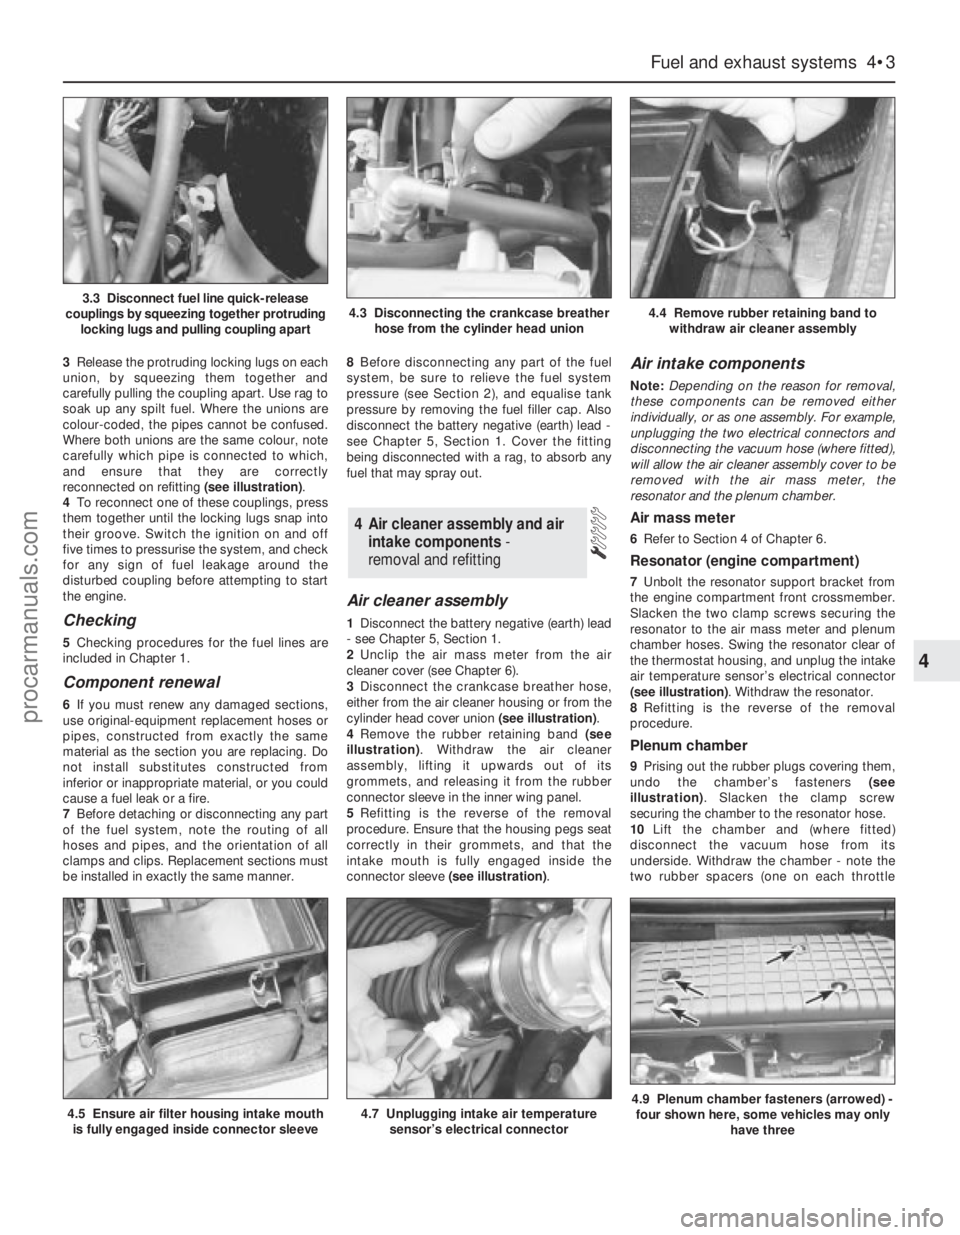
3Release the protruding locking lugs on each
union, by squeezing them together and
carefully pulling the coupling apart. Use rag to
soak up any spilt fuel. Where the unions are
colour-coded, the pipes cannot be confused.
Where both unions are the same colour, note
carefully which pipe is connected to which,
and ensure that they are correctly
reconnected on refitting (see illustration).
4To reconnect one of these couplings, press
them together until the locking lugs snap into
their groove. Switch the ignition on and off
five times to pressurise the system, and check
for any sign of fuel leakage around the
disturbed coupling before attempting to start
the engine.
Checking
5Checking procedures for the fuel lines are
included in Chapter 1.
Component renewal
6If you must renew any damaged sections,
use original-equipment replacement hoses or
pipes, constructed from exactly the same
material as the section you are replacing. Do
not install substitutes constructed from
inferior or inappropriate material, or you could
cause a fuel leak or a fire.
7Before detaching or disconnecting any part
of the fuel system, note the routing of all
hoses and pipes, and the orientation of all
clamps and clips. Replacement sections must
be installed in exactly the same manner.8Before disconnecting any part of the fuel
system, be sure to relieve the fuel system
pressure (see Section 2), and equalise tank
pressure by removing the fuel filler cap. Also
disconnect the battery negative (earth) lead -
see Chapter 5, Section 1. Cover the fitting
being disconnected with a rag, to absorb any
fuel that may spray out.
Air cleaner assembly
1Disconnect the battery negative (earth) lead
- see Chapter 5, Section 1.
2Unclip the air mass meter from the air
cleaner cover (see Chapter 6).
3Disconnect the crankcase breather hose,
either from the air cleaner housing or from the
cylinder head cover union (see illustration).
4Remove the rubber retaining band (see
illustration). Withdraw the air cleaner
assembly, lifting it upwards out of its
grommets, and releasing it from the rubber
connector sleeve in the inner wing panel.
5Refitting is the reverse of the removal
procedure. Ensure that the housing pegs seat
correctly in their grommets, and that the
intake mouth is fully engaged inside the
connector sleeve (see illustration).
Air intake components
Note:Depending on the reason for removal,
these components can be removed either
individually, or as one assembly. For example,
unplugging the two electrical connectors and
disconnecting the vacuum hose (where fitted),
will allow the air cleaner assembly cover to be
removed with the air mass meter, the
resonator and the plenum chamber.
Air mass meter
6Refer to Section 4 of Chapter 6.
Resonator (engine compartment)
7Unbolt the resonator support bracket from
the engine compartment front crossmember.
Slacken the two clamp screws securing the
resonator to the air mass meter and plenum
chamber hoses. Swing the resonator clear of
the thermostat housing, and unplug the intake
air temperature sensor’s electrical connector
(see illustration). Withdraw the resonator.
8Refitting is the reverse of the removal
procedure.
Plenum chamber
9Prising out the rubber plugs covering them,
undo the chamber’s fasteners (see
illustration). Slacken the clamp screw
securing the chamber to the resonator hose.
10Lift the chamber and (where fitted)
disconnect the vacuum hose from its
underside. Withdraw the chamber - note the
two rubber spacers (one on each throttle
4 Air cleaner assembly and air
intake components -
removal and refitting
Fuel and exhaust systems 4•3
4
4.5 Ensure air filter housing intake mouth
is fully engaged inside connector sleeve4.7 Unplugging intake air temperature
sensor’s electrical connector4.9 Plenum chamber fasteners (arrowed) -
four shown here, some vehicles may only
have three
3.3 Disconnect fuel line quick-release
couplings by squeezing together protruding
locking lugs and pulling coupling apart4.3 Disconnecting the crankcase breather
hose from the cylinder head union4.4 Remove rubber retaining band to
withdraw air cleaner assembly
procarmanuals.com
Page 102 of 279
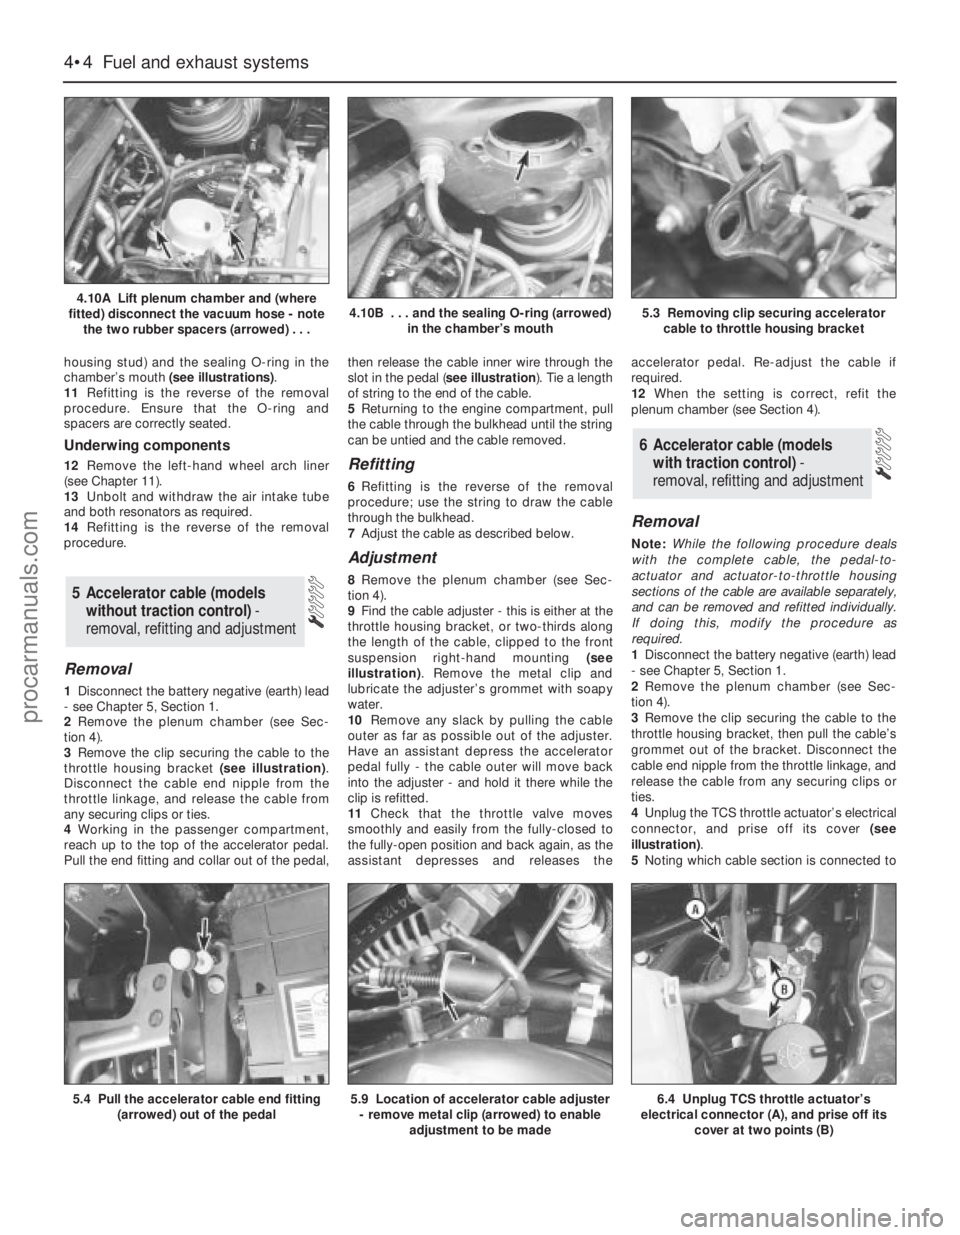
housing stud) and the sealing O-ring in the
chamber’s mouth (see illustrations).
11Refitting is the reverse of the removal
procedure. Ensure that the O-ring and
spacers are correctly seated.
Underwing components
12Remove the left-hand wheel arch liner
(see Chapter 11).
13Unbolt and withdraw the air intake tube
and both resonators as required.
14Refitting is the reverse of the removal
procedure.
Removal
1Disconnect the battery negative (earth) lead
- see Chapter 5, Section 1.
2Remove the plenum chamber (see Sec-
tion 4).
3Remove the clip securing the cable to the
throttle housing bracket (see illustration).
Disconnect the cable end nipple from the
throttle linkage, and release the cable from
any securing clips or ties.
4Working in the passenger compartment,
reach up to the top of the accelerator pedal.
Pull the end fitting and collar out of the pedal,then release the cable inner wire through the
slot in the pedal (see illustration). Tie a length
of string to the end of the cable.
5Returning to the engine compartment, pull
the cable through the bulkhead until the string
can be untied and the cable removed.
Refitting
6Refitting is the reverse of the removal
procedure; use the string to draw the cable
through the bulkhead.
7Adjust the cable as described below.
Adjustment
8Remove the plenum chamber (see Sec-
tion 4).
9Find the cable adjuster - this is either at the
throttle housing bracket, or two-thirds along
the length of the cable, clipped to the front
suspension right-hand mounting (see
illustration). Remove the metal clip and
lubricate the adjuster’s grommet with soapy
water.
10Remove any slack by pulling the cable
outer as far as possible out of the adjuster.
Have an assistant depress the accelerator
pedal fully - the cable outer will move back
into the adjuster - and hold it there while the
clip is refitted.
11Check that the throttle valve moves
smoothly and easily from the fully-closed to
the fully-open position and back again, as the
assistant depresses and releases theaccelerator pedal. Re-adjust the cable if
required.
12When the setting is correct, refit the
plenum chamber (see Section 4).
Removal
Note:While the following procedure deals
with the complete cable, the pedal-to-
actuator and actuator-to-throttle housing
sections of the cable are available separately,
and can be removed and refitted individually.
If doing this, modify the procedure as
required.
1Disconnect the battery negative (earth) lead
- see Chapter 5, Section 1.
2Remove the plenum chamber (see Sec-
tion 4).
3Remove the clip securing the cable to the
throttle housing bracket, then pull the cable’s
grommet out of the bracket. Disconnect the
cable end nipple from the throttle linkage, and
release the cable from any securing clips or
ties.
4Unplug the TCS throttle actuator’s electrical
connector, and prise off its cover (see
illustration).
5Noting which cable section is connected to
6 Accelerator cable (models
with traction control)-
removal, refitting and adjustment
5 Accelerator cable (models
without traction control) -
removal, refitting and adjustment
4•4 Fuel and exhaust systems
4.10A Lift plenum chamber and (where
fitted) disconnect the vacuum hose - note
the two rubber spacers (arrowed) . . .4.10B . . . and the sealing O-ring (arrowed)
in the chamber’s mouth5.3 Removing clip securing accelerator
cable to throttle housing bracket
5.4 Pull the accelerator cable end fitting
(arrowed) out of the pedal5.9 Location of accelerator cable adjuster
- remove metal clip (arrowed) to enable
adjustment to be made6.4 Unplug TCS throttle actuator’s
electrical connector (A), and prise off its
cover at two points (B)
procarmanuals.com