Page 1154 of 2389
Reduced blow±by gas (HC)
Reduced evaporative HC
Reduces NOx
Reduces HC
1 CO and NOx
Regulates all engine conditions for reduction of
exhaust emissions.
Remarks *For inspection and repair of the EFI system, refer to the EFI section of this manual.Positive crankcase ventilation
Fuel evaporative emission control
Exhaust gas recirculation
Three±way catalyst
Electronic fuel injection*
SYSTEM PURPOSE
PCV
EVAP
EGR
TWC
EFI Abbreviation
Purpose System
± EMISSION CONTROL SYSTEMS (3S±FE)System PurposeEC±2
Page 1165 of 2389
Reduces blow±by gas (HC)
Reduces evaporative HC
Reduces HC and CO
Reduces NOx
Reduces HC, CO and NOx
Regulates all engine conditions for reduction of
exhaust emissions. Positive Crankcase ventilation
Fuel evaporative emission control
Dash pot
Exhaust gas recirculation
Three±way catalyst
Electronic fuel injection*
Remarks *For inspection and repair of the EFI system, refer to EFI section of this
manual.
SYSTEM PURPOSE
PCV
EVAP
DP
EGR
TWC
EFI Abbreviation
Purpose
System
± EMISSION CONTROL SYSTEMS (2VZ±FE)System PurposeEC±13
Page 1171 of 2389
To reduce NC and CO emissions, when decelerating the dash pot opens the throttle valve slightly more than at idle.
This causes the air±fuel mixture to bum completely.
DASH POT (DP) SYSTEM
(MT only)
Slightly opens and then slowly closes to idle
position Pushed in by return force of throttle valve
Pushed in by return force of throttle valvePushed out by diaphragm springHigh speed position Idle speed positionThrottle Valve
Normal driving
DecelerationDiaphragm
Condition
CLOSED
CLOSED Idling
OPENVTV
± EMISSION CONTROL SYSTEMS (2VZ±FE)Dash Pot (DP) System (MT only)EC±19
Page 1196 of 2389

ADJUSTMENT OF IGNITION TIMING
3S±FE (See steps 7 to 10 on pages IG±16 and 17)
2VZ±FE (See steps 6 to 11 on pages IG±20 and 21)
Ignition timing:
10°BTDC @ idle
(w/ Terminals TE1 and E1 connected)
ADJUSTMENT OF IDLE SPEED (3S±FE)
(See HINT on page FI±17)
1. INITIAL CONDITIONS
(a) Engine at normal operating temperature
(b) Air cleaner installed
(c) All pipes and hoses of air induction system connected
(d) All vacuum lines connected
HINT: All vacuum hoses for EGR systems, etc. should be
properly connected.
(e) EFI system wiring connectors fully plugged
(f) All accessories switched OFF
(g) Transmission in N range
2. CONNECT TACHOMETER (See page IG±16)
3. ADJUST IDLE SPEED
(a) Using SST, connect terminals TE1 and E1 of the check
connector.
SST 09845±18020
HINT: Decrease the rpm after the engine maintains a speed
of the 1,000 ± 1,300 rpm for 5 seconds.
(d) Remove SST.
4. FURTHER CHECK IDLE SPEED
Idle speed: 700
+ 5O rpm
If the idle speed is not within these values, carry out either of
the below listed procedures and then recheck the idle speed.
Carry out a driving test, including stop±go several times at a
speed above 10 km/h, or± start the engine, idle for
30 seconds and then turn the engine 'off repeatedly. By
doing this, idle data will be stored in the ISC and the idle rpm
will be at specified value.(b) Check the idle speed.
Idle speed: 660 rpm or more
(c) If the idle speed is not as specified, adjust the idle speed
by turning the IDLE SPEED ADJUSTING
SCREW.
± ENGINE MECHANICALEngine Tune±UpEM±19
Page 1197 of 2389

IDLE AND OR 2,500 RPM HC CO
CONCENTRATION CHECK
METHOD
HINT: This check is used only to determine whether or not
the idle HC/CO complies with regulations.
1. INITIAL CONDITIONS
(b) Engine at normal operating temperature
(b) Air cleaner installed
(e) All pipes and hoses of air induction system connected
(d) All operating accessories switched OFF
(e) All vacuum lines properly connected
HINT: All vacuum hoses for EGR systems, etc. should be
properly connected.
(f) EFI system wiring connectors fully plugged
(g) Ignition timing set correctly
(h) Transmission in N range
(i) Tachometer and HC/CO meter calibrated and at hand
2. START ENGINE
3. RACE ENGINE AT 2,500 RPM FOR APPROX. 2
MINUTES
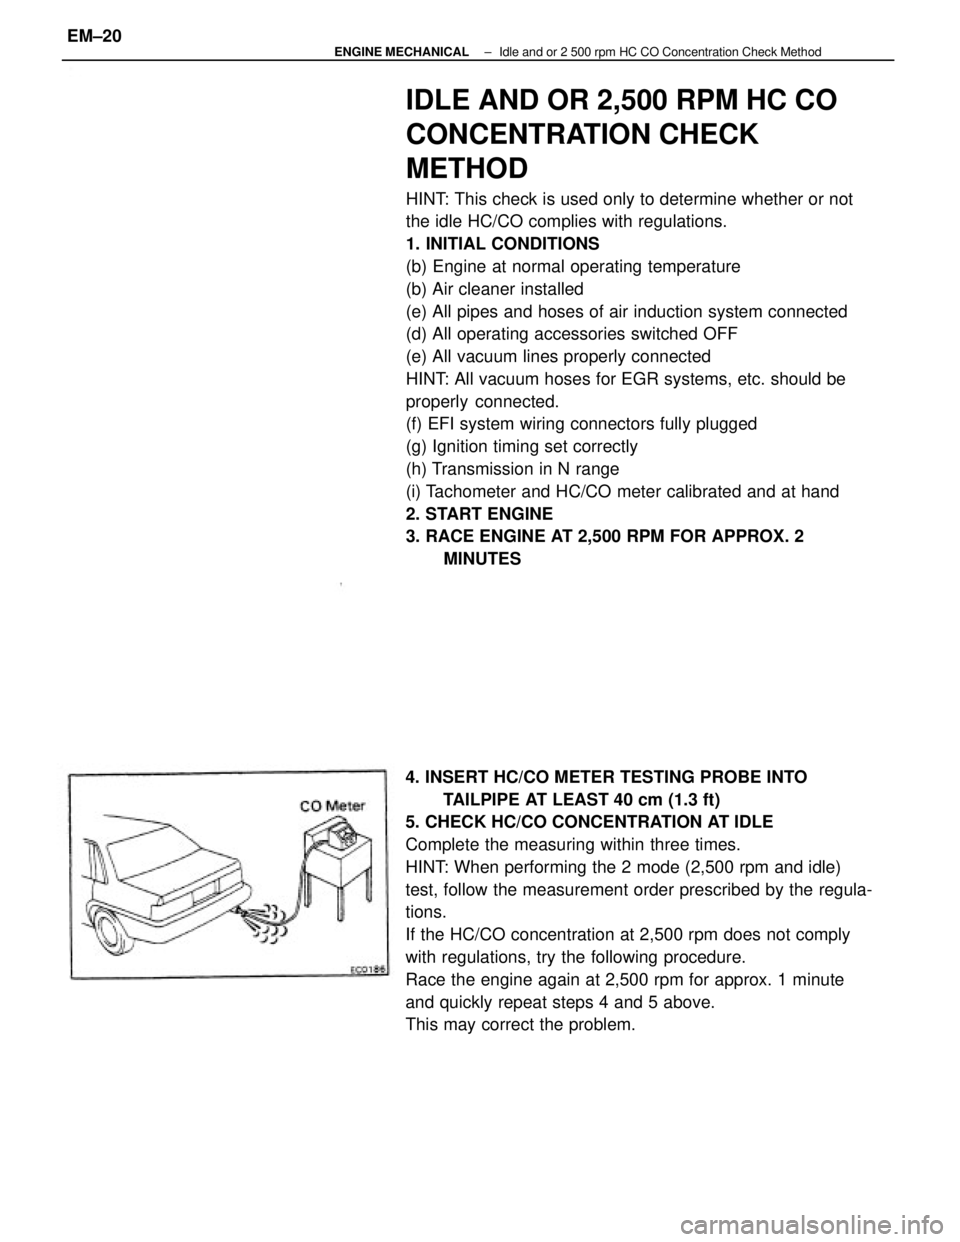
4. INSERT HC/CO METER TESTING PROBE INTO
TAILPIPE AT LEAST 40 cm (1.3 ft)
5. CHECK HC/CO CONCENTRATION AT IDLE
Complete the measuring within three times.
HINT: When performing the 2 mode (2,500 rpm and idle)
test, follow the measurement order prescribed by the regula-
tions.
If the HC/CO concentration at 2,500 rpm does not comply
with regulations, try the following procedure.
Race the engine again at 2,500 rpm for approx. 1 minute
and quickly repeat steps 4 and 5 above.
This may correct the problem.
± ENGINE MECHANICALIdle and or 2 500 rpm HC CO Concentration Check MethodEM±20
Page 1425 of 2389
![TOYOTA CAMRY V20 1986 Service Information To Ignition SW
IG Terminal
Fuse
Relay
SW2 SolenoidVoltmeter [A]
[B]
[C] SW1
Ohmmeter
SW
INTRODUCTION±HOW TO PERFORM FOR SYSTEM INSPECTION
A±5
6
Wire Harness Repair Manual (RM1022E)
HOW TO PERFORM FO TOYOTA CAMRY V20 1986 Service Information To Ignition SW
IG Terminal
Fuse
Relay
SW2 SolenoidVoltmeter [A]
[B]
[C] SW1
Ohmmeter
SW
INTRODUCTION±HOW TO PERFORM FOR SYSTEM INSPECTION
A±5
6
Wire Harness Repair Manual (RM1022E)
HOW TO PERFORM FO](/manual-img/14/57449/w960_57449-1424.png)
To Ignition SW
IG Terminal
Fuse
Relay
SW2 SolenoidVoltmeter [A]
[B]
[C] SW1
Ohmmeter
SW
INTRODUCTION±HOW TO PERFORM FOR SYSTEM INSPECTION
A±5
6
Wire Harness Repair Manual (RM1022E)
HOW TO PERFORM FOR SYSTEM INSPECTION
This inspection procedure is a simple troubleshooting which should be carried out on the vehicle during
system operation and is based on the assumption of system component trouble
Always inspect the trouble taking the following items into consideration:
�Ground point fault
�Open or short circuit of the wire harness
�Connector or terminal connection fault
�Fuse or fusible link fault
NOTICE:
�This is an on±vehicle inspection during system operation.
Therefore, inspect the trouble with due regard for safety.
�If connecting the battery directly, be careful not to cause a short circuit, and select the applicable
voltage.
1. Voltage Check
(a)Establish conditions in which voltage is present at the
check point.
Example:
[A] ± Ignition SW on
[B] ± Ignition SW and SW 1 on
[C] ± Ignition SW, SW 1 and Relay on (SW 2 off)
(b)Using a voltmeter, connect the negative (±) lead to a
good ground point or negative (±) battery terminal
and the positive (+) lead to the connector or
component terminal. This check can be done with a
test bulb instead of a voltmeter.
2. Continuity and Resistance Check
(a)Disconnect the battery terminal or wire so there is no
voltage between the check points.
(b)Contact the two leads of an ohmmeter to each of the
check points.
A
Page 1427 of 2389
![TOYOTA CAMRY V20 1986 Service Information Fuse Case Test Bulb
Short [A]
SW1
Short [B]
Relay
Light
Short [C]
SW2 SolenoidDisconnect
Disconnect DisconnectTo Ignition SW
IG Terminal
INTRODUCTION±HOW TO PERFORM FOR SYSTEM INSPECTION
A±7
8
Wire TOYOTA CAMRY V20 1986 Service Information Fuse Case Test Bulb
Short [A]
SW1
Short [B]
Relay
Light
Short [C]
SW2 SolenoidDisconnect
Disconnect DisconnectTo Ignition SW
IG Terminal
INTRODUCTION±HOW TO PERFORM FOR SYSTEM INSPECTION
A±7
8
Wire](/manual-img/14/57449/w960_57449-1426.png)
Fuse Case Test Bulb
Short [A]
SW1
Short [B]
Relay
Light
Short [C]
SW2 SolenoidDisconnect
Disconnect DisconnectTo Ignition SW
IG Terminal
INTRODUCTION±HOW TO PERFORM FOR SYSTEM INSPECTION
A±7
8
Wire Harness Repair Manual (RM1022E)
4. Finding a Short Circuit
(a)Remove the blown fuse and eliminate all loads from
the fuse.
(b)Connect a test bulb in place of the fuse.
(c)Establish conditions in which the test bulb comes on.
Example:
[A] ± Ignition SW on
[B] ± Ignition SW and SW 1 on
[C] ± Ignition SW, SW 1 and Relay on (Connect the Relay)
and SW 2 off (or disconnect SW 2)
(d)Disconnect and reconnect the connectors while
watching the test bulb. The short lies between the
connector where the test bulb stays lit and the
connector where the bulb goes out.
(e)Find the exact location of the short by lightly shaking
the problem wire along the body.
CAUTION:
(a)Do not open the cover or the case of the ECU
unless absolutely necessary. (If the IC terminals
are touched, the IC may be destroyed by static
electricity.)
(b)When replacing the internal mechanism (ECU
part) of the digital meter, be careful that no part of
your body or clothing comes in contact with the
terminals of leads from the IC, etc. of the
replacement part (spare part).
A
Page 1447 of 2389

Notch Retainer
(Yellow)
Seal rubber
Condition of cover opening
Side Lock
Center Lock Side Lock
TERMINAL AND CONNECTOR REPAIR±TERMINAL REPLACEMENT
B±18
28
Wire Harness Repair Manual (RM1022E)
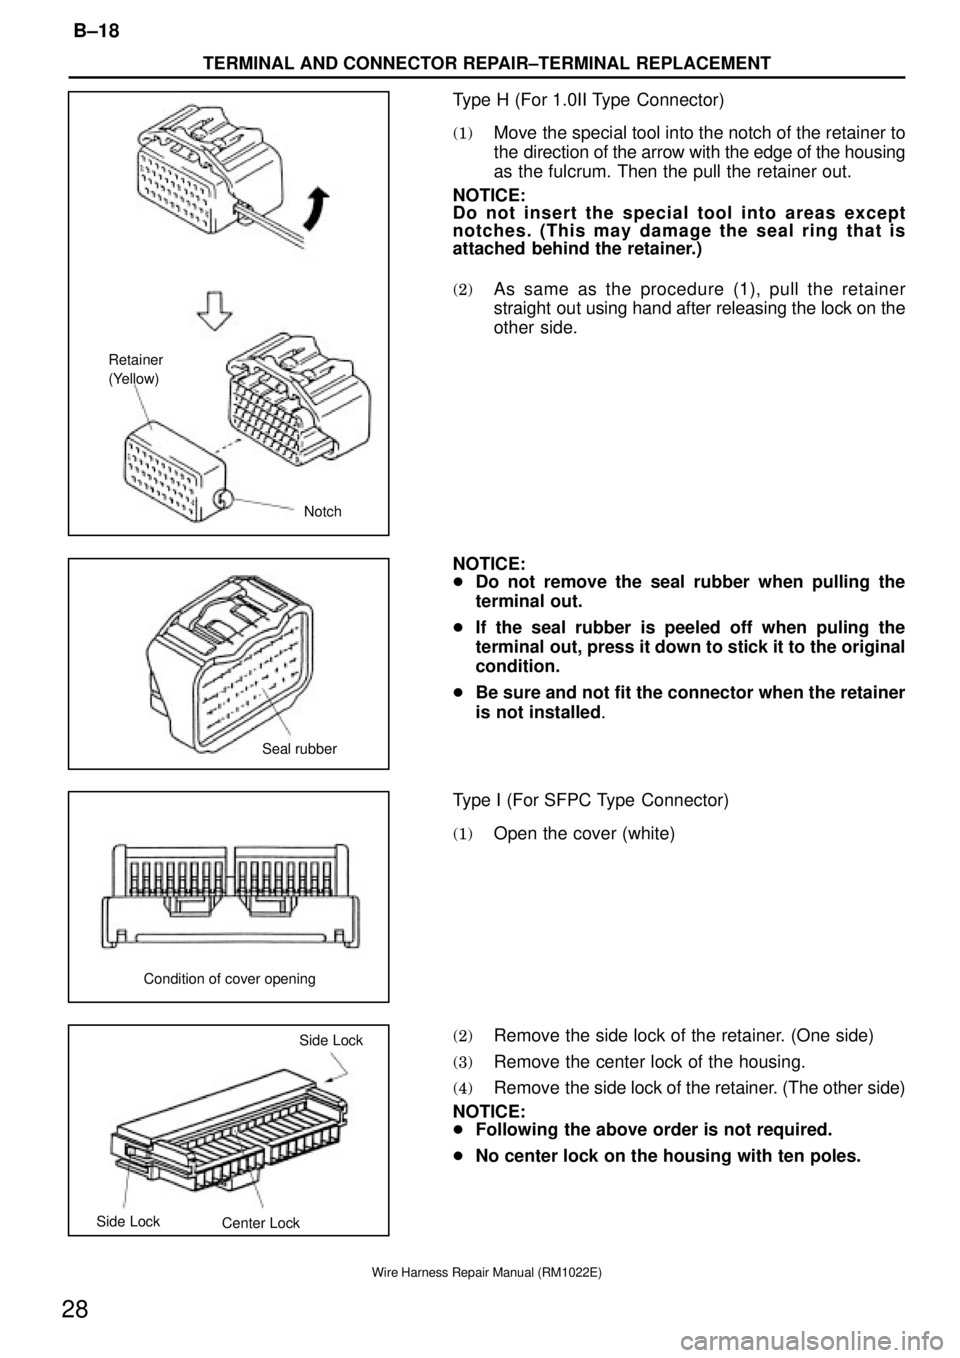
Type H (For 1.0II Type Connector)
(1)Move the special tool into the notch of the retainer to
the direction of the arrow with the edge of the housing
as the fulcrum. Then the pull the retainer out.
NOTICE:
Do not insert the special tool into areas except
notches. (This may damage the seal ring that is
attached behind the retainer.)
(2)As same as the procedure (1), pull the retainer
straight out using hand after releasing the lock on the
other side.
NOTICE:
�Do not remove the seal rubber when pulling the
terminal out.
�If the seal rubber is peeled off when puling the
terminal out, press it down to stick it to the original
condition.
�Be sure and not fit the connector when the retainer
is not installed.
Type I (For SFPC Type Connector)
(1)Open the cover (white)
(2)Remove the side lock of the retainer. (One side)
(3)Remove the center lock of the housing.
(4)Remove the side lock of the retainer. (The other side)
NOTICE:
�Following the above order is not required.
�No center lock on the housing with ten poles.