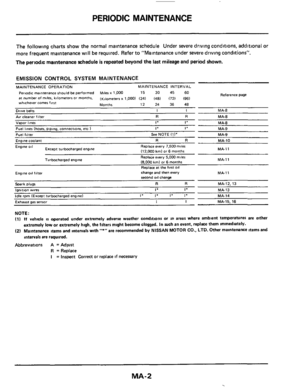
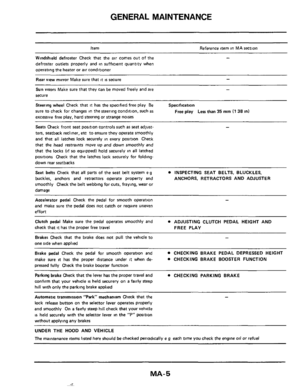
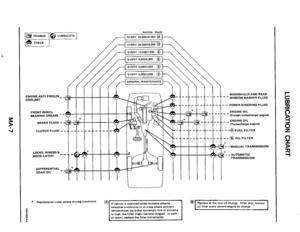
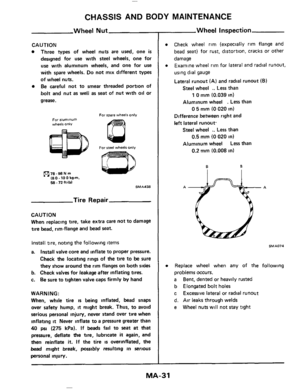
Page 17 of 38

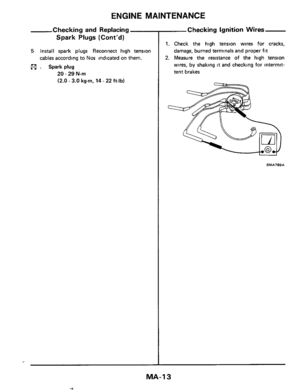
CHASSIS AND BODY MAINTENANCE
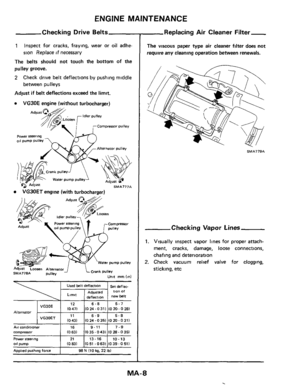
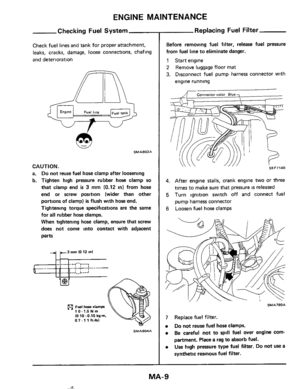
Checking Exhaust System
Check exhaust pipes, muffler and mounting for
proper attachment,
leaks, cracks, damage, loose
connections, chafing and deterioration
W SMA211A
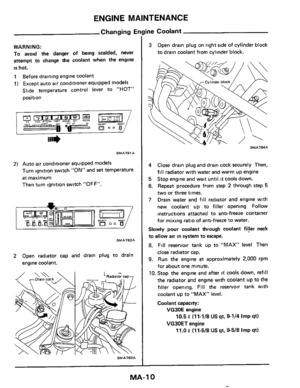
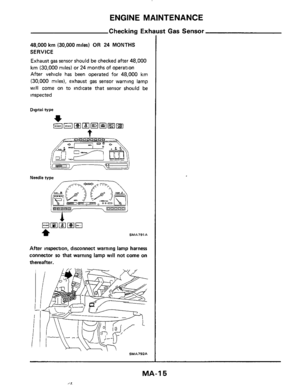
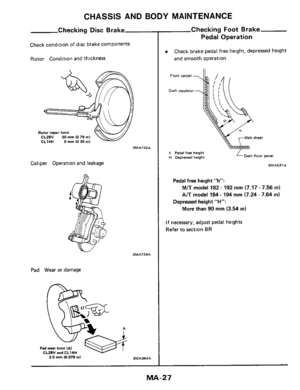
-Checking Clutch Operation -
Check clutch pedal height, free travel and smooth
omration
Floor carpet
Dash insulator
H Pedal free height A Pedal free travel
SMA558A
Pedal free height "H":
Pedal free travel "A":
195.205 mm (7.68 - 8.07 in)
1 ~ 3 rnrn (0.04 - 0.12 in)
If necessary, adjust clutch pedal free height and
pedal free travel. Refer
to section CL
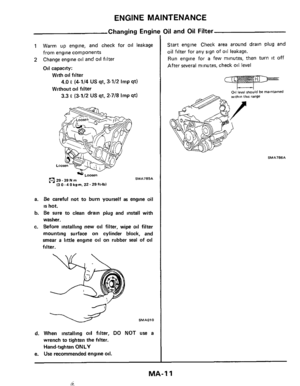
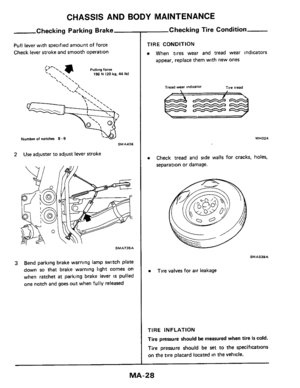
-Checking Clutch Fluid Level-
If fluid level is extremely low, check clutch system
for leaks
Changing Clutch Fluid
Refill with recommended brake fluid "DOT
3"
Do not reuse drained brake fluid
Be careful not to splash brake fluid on painted
areas.
Drain the fluid in the air bleeder valve
SCLOO9
Refill until the new fluid comes out in the air
bleeder valve
Use same procedure as in bleeding hydraulic
system to refill the fluid
Refer to section CL
MA-I 7
,
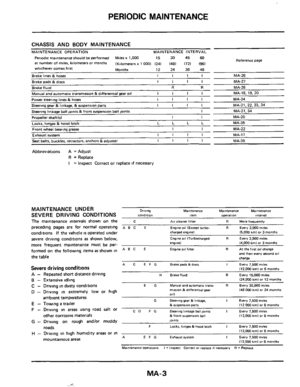
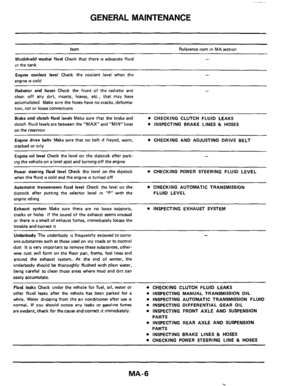
Page 18 of 38
CHASSIS AND BODY MAINTENANCE
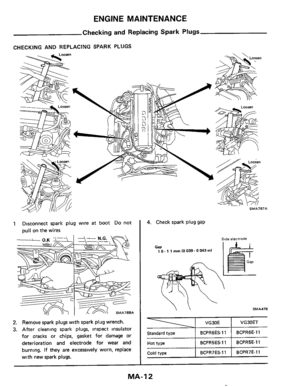
Checking Clutch System
Check clutch fluid lines for proper attachment,
leaks, chafing, deterioration, etc
SMA741A
Checking M/T Oil
1. Check manual transmission for signs of leakage
SMA429A
2 Check oil level
LFiller plug
SMAl03
Never start engine while checking oil level.
Changing M/T Oil
n
Drain plug
Oil capacity:
FS5W71C and BW T-5 (FS5R90A)
1.9 Liters (4 US pt, 3-3/8 Imp pt)
MA-1 8
Page 19 of 38
CHASSIS AND BODY MAINTENANCE
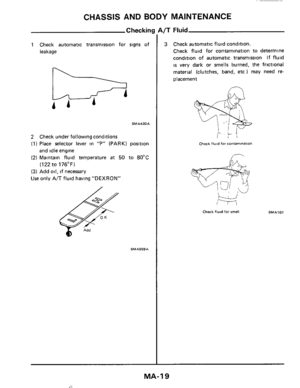
1 Check automatic transmission for signs of
leakage
SMA430A
2 Check under following conditions
(1) Place selector lever in "P" (PARK) position
and
idle engine
(2) Maintain fluid temperature at 50 to 80°C
(122 to 176'F)
(3) Add oil, if necessary
Use only A/T fluid having "DEXRON"
SMA559A
L/T Fluid
3 Check automatic fluid condition.
Check fluid for contamination to determine
condition of automatic transmission If fluid
is very dark or smells burned, the frictional
material (clutches, band,
etc ) may need re-
placement
Check flwd for COntaminarlOn
r?
,w
Check fluid for smell SMA107
MA-19
Page 20 of 38
CHASSIS AND BODY MAINTENANCE
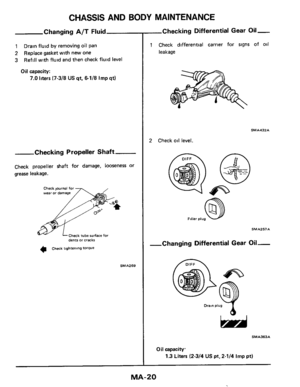
Changing A/T Fluid
1
2
3
Drain fluid by removing oil pan
Replace gasket with new
one
Refill with fluid and then check fluid level
Oil capacity:
7.0 liters (7-3/8 US qt, &1/8 Imp qt)
Checking Propeller Shaft
Check propeller shaft for damage, looseness or
grease leakage.
Check iwrnal far , wear or damage
Check rube surface for ~ ~~ dents or cracks
4 Check tightening torque
SMA269
-Checking
Differential Gear Oil-
1 Check differential carrier for signs of oil
leakage
SMA432A
2 Check oil level.
o T-
SMA257A
-Changing Differential Gear Oil-
-
SMA363A
Oil capacity.
1.3 Liters (2-3/4 US pt, 2-1/4 Imp pt)
MA-20
Page 21 of 38
CHASSIS AND BODY MAINTENANCE
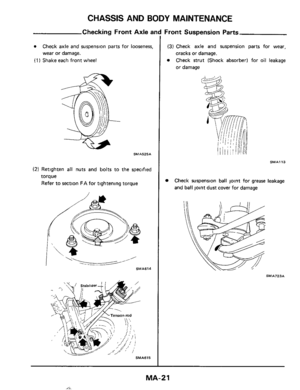
Checking Front Axle and Front Suspension Parts
(1) Shake each front wheel
Check axle and suspension parts for looseness,
wear or damage.
SMA525A
(2) Retighten all nuts and bolts to the specified
torque
Refer to section
FA for tightening torque
SMA614
SMA615
(3) Check axle and suspension parts for wear,
cracks or damage.
0 Check strut (Shock absorber) for oil leakage
or damage
SMA113
Check suspension ball joint for grease leakage
and ball joint dust cover for damage
SMA7ZJA
MA-21
LL
Page 22 of 38
CHASSIS AND BODY MAINTENANCE
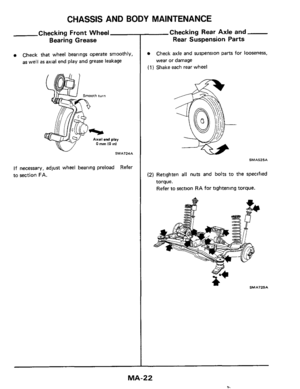
Checking Front Wheel
Bearing Grease
0 Check that wheel bearings operate smoothly,
as well
as axial end play and grease leakage
Smooth turn
0 mm (0 ,"I
SMA724A v
If necessary, adjust wheel bearing preload
to section
FA.
Refer
Checking Rear Axle and
Rear Suspension Parts
0
(1) Shake each rear wheel
Check axle and suspenslon parts for looseness,
wear or damage
SMA525A
(2) Retighten all nuts and bolts to the specified
torque.
Refer
to sectlon RA for tightening torque.
MA-22
.
Page 23 of 38

(3) Check axle and suspension parts for wear,
cracks or damage
0 Check shock absorber for oil leakage or")
CHASSIS AND BODY MAINTENANCE
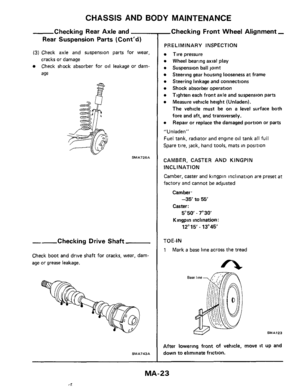
Checking Rear Axle and
Rear Suspension Parts (Cont'd)
(3) Check axle and suspension parts for wear,
cracks or damage
0 Check shock absorber for oil leakage or dam-
age
- SMA726A
--Checking Drive Shaft
Check boot and drive shaft for cracks, wear, dam-
age or grease leakage.
SM A743 A
,Checking Front Wheel Alignment -
PRELIMINARY INSPECTION
Tire pressure
Wheel bearing axial play
Suspension ball joint
Steering linkage and connections
Shock absorber operation
Tighten each front axle and suspension parts
Measure vehicle height (Unladen).
The vehicle must be on a level surface both
fore and
aft, and transversely.
Repair or replace the damaged portion or
parts
Steering gear housing looseness at frame
" U n I aden "
Fuel tank, radiator and engine oil tank all full
Spare tire, lack, hand tools, mats in position
CAMBER, CASTER AND KINGPIN
INCLINATION
Camber, caster and kingpin inclination are preset
at
factory and cannot be adjusted
Camber.
-35 to 55'
Caster :
5"50 - 7"3Q
Kingpin inclination:
12"15' - 13"45'
TOE-IN
1 Mark a base line across the tread
After lowering front of vehicle, move it up and
down
to eliminate friction.
MA-23
4
Page 24 of 38
CHASSIS AND BODY MAINTENANCE
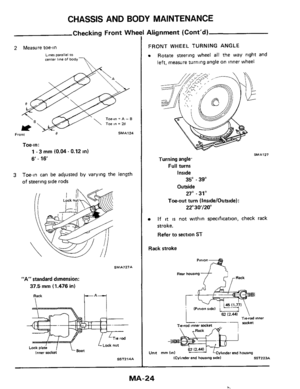
Checking Front Whe
2 Measure toe-in
Liner parallel to center line of body-
Toe-in = A - 8
SMA124 Front
Toe-in:
1 - 3 mm (0.04. 0.12 in)
6-16
3 Town can be adjusted by varying the length
of steering side rods
SMA727A
"A" standard dimension:
37.5 mm (1.476 in)
inner rocket
SST274A
Alignment (Cont'd)
FRONT WHEEL TURNING ANGLE
a Rotate steering wheel all the way right and
left, measure turning angle on inner wheel
SMA127
Turning angle.
Full turns
Inside
Outside
35" - 39"
27"
~ 31"
Toe-out turn (Insideloutside):
22"30/20"
If it is not within speclfication, check rack
stroke.
Refer to section
ST
Rack stroke
r Rack
Tie-rod inner i. socket Tie-rod inner socket
,Rack -1
Unit mm (in) (Cvlander end housing ndel SST223A
MA-24
.


 Place selector lever in \"P\" (PARK) position
and
idle engi")

 Shake each front wheel
Check axle and suspension parts for looseness,
wear or damage.
SMA525A
(2) Retighte")


6-16
3 Town can be adjus")