Page 71 of 513

CHASSIS
DIFFERENTIAL
CARRIER
CONTENTS
DESCRIPTION
REMOVAL
DISASSEMBL
Y
INSPECTION
AND
REPAIR
ASSEMBLY
AND
ADJUSTMENT
Assembling
differential
gear
case
Setting
and
adjusting
drive
pinion
PD
4
PD
5
PD
5
PD
7
PD
8
PD
9
PD
10
Adjusting
drive
pinion
preload
Setting
and
adjusting
side
bearing
shims
INSTALLATION
TROUBLE
DIAGNOSES
AND
CORRECTIONS
SERVICE
DATA
AND
SPECIFICATIONS
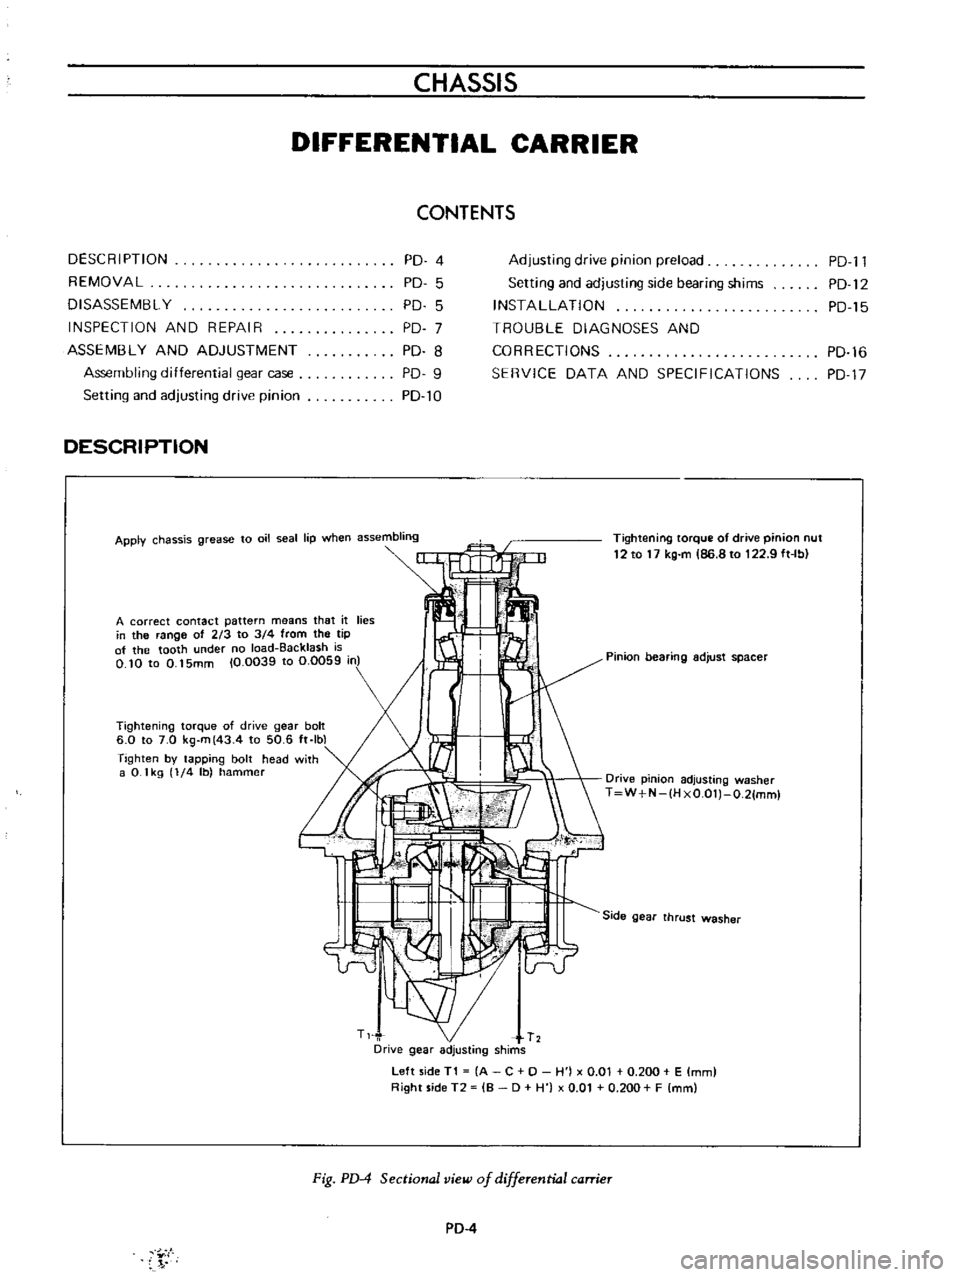
DESCRIPTION
Apply
chassis
grease
to
oil
seal
lip
when
assembling
Tightening
torque
of
drive
pinion
nut
12
to
17
kg
m
86
8
to
122
9
ft
Ib
A
correct
contact
pattern
means
that
it
lies
in
the
range
of
213
to
3
4
from
the
tip
of
the
tooth
under
no
load
Backlash
is
O
10
to
0
15mm
10
0039
to
0
0059
in
Pinion
bearing
adjust
spacer
Tightening
torque
of
drive
gear
bolt
6
0
to
7
0
kg
m
43
4
to
50
6
ft
Ibl
Tighten
by
tapping
bolt
head
with
a
0
1
kg
1
4
Ib
hammer
Drive
pinion
adjusting
washer
T
W
N
IH
xO
OlJ
O
21mml
Side
gear
thrust
washer
Left
side
T1
A
C
0
H
j
x
0
01
0
200
E
mm
Right
side
T2
B
0
H
0
01
0
200
F
mm
Fig
PD
4
Sectional
view
of
differential
carrier
PD
4
Y
I
PD
l1
PD
12
PD
15
PD
16
PD
17
Page 75 of 513

CHASSIS
Before
inspecting
various
parts
thoroughly
wash
them
so
that
damage
and
wear
can
be
easily
detected
Then
proceed
as
follows
Check
gear
teeth
for
scoring
cracking
and
chipping
and
make
sure
that
tooth
pattern
indicates
correct
meshing
depth
If
any
defect
is
evident
replace
parts
as
required
Note
Drive
pinion
and
drive
gear
are
supplied
for
replacement
as
a
set
therefore
should
either
part
be
damaged
replace
as
a
set
Check
the
pinion
gear
shaft
and
pinion
gear
mating
faces
for
scoring
and
signs
of
wear
and
replace
as
required
Follow
the
same
procedure
for
inner
faces
of
side
gear
and
their
seats
on
differential
case
3
Inspect
all
bearing
races
and
rollers
for
scoring
chipping
or
evidence
of
excessive
wear
They
should
be
in
tiptop
condition
not
worn
with
mirror
like
surfaces
Replace
if
there
is
a
doubt
on
their
efficiency
since
an
incorrect
bearing
operation
may
result
in
noisiness
and
gear
seizure
4
Inspect
thrust
washer
faces
Small
defects
can
be
corrected
with
emery
paper
In
ASSEMBLY
AND
AD
JUSTMENT
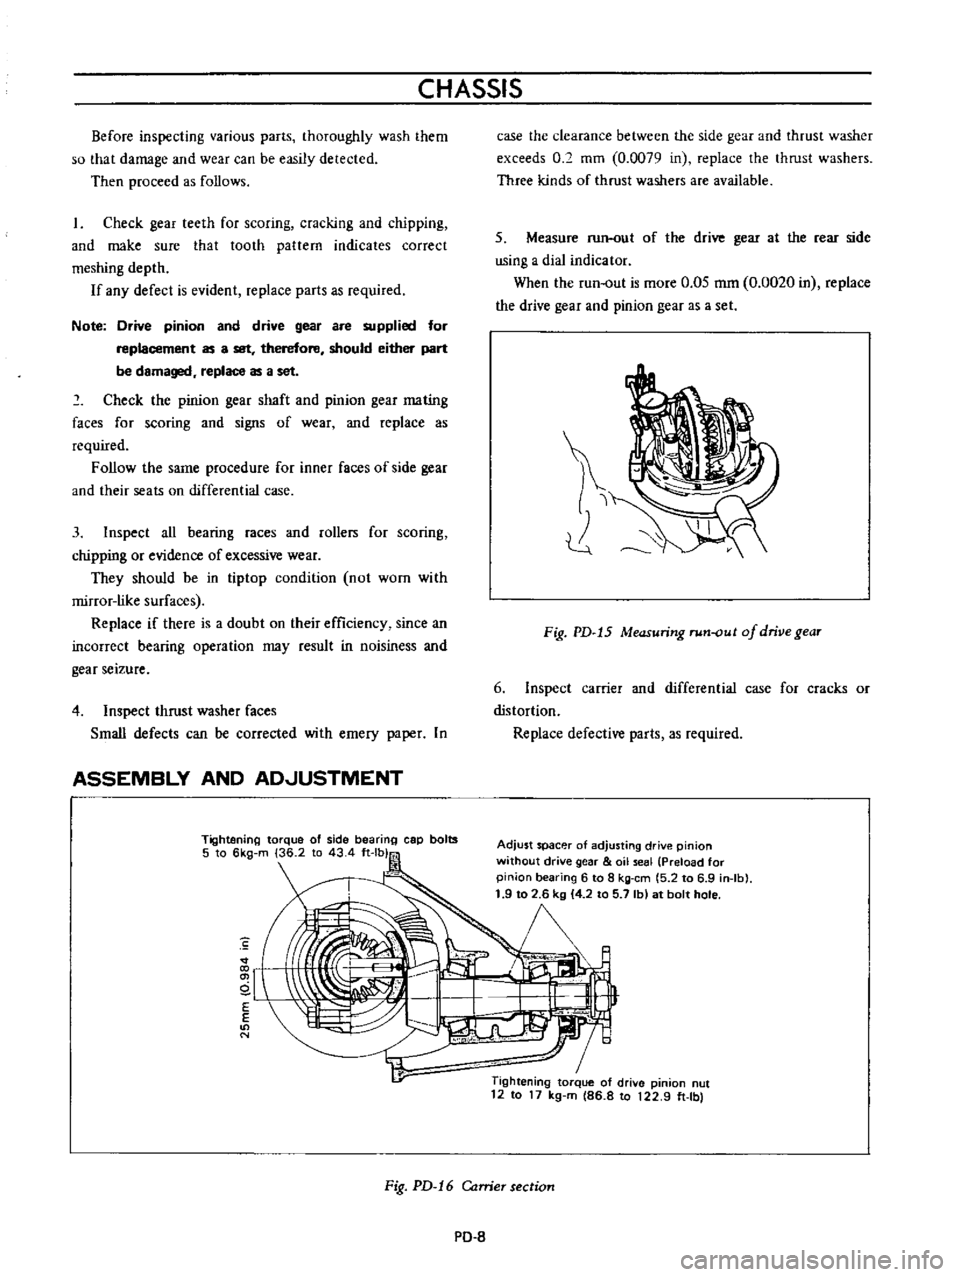
Tightening
torque
of
side
bearing
cap
bolts
5
to
6kg
m
36
2
to
43
4
ft
lb
co
g
E
E
on
N
case
the
clearance
between
the
side
gear
and
thrust
washer
exceeds
0
2
mm
0
0079
in
replace
the
thrust
washers
Three
kinds
of
thrust
washers
are
available
5
Measure
run
out
of
the
drive
gear
at
the
rear
side
using
a
dial
indicator
When
the
run
out
is
more
0
05
mm
0
0020
in
replace
the
drive
gear
and
pinion
gear
as
a
set
Fig
PD
15
Measuring
run
out
of
drive
gear
6
Inspect
carrier
and
differential
case
for
cracks
or
distortion
Replace
defective
parts
as
required
Adjust
spacer
of
adjusting
drive
pinion
without
drive
gear
oil
seal
Preload
for
pinion
bearing
6
to
8
kg
em
5
2
to
6
9
in
Ib
1
9
to
2
6
kg
4
2
to
5
7
Ib
at
bolt
hole
1
Tightening
torque
of
drive
pinion
nut
12
to
17
kg
m
86
8
to
122
9
ft
Ibl
Fig
PD
16
Carrier
section
PO
8
Page 81 of 513

CHASSIS
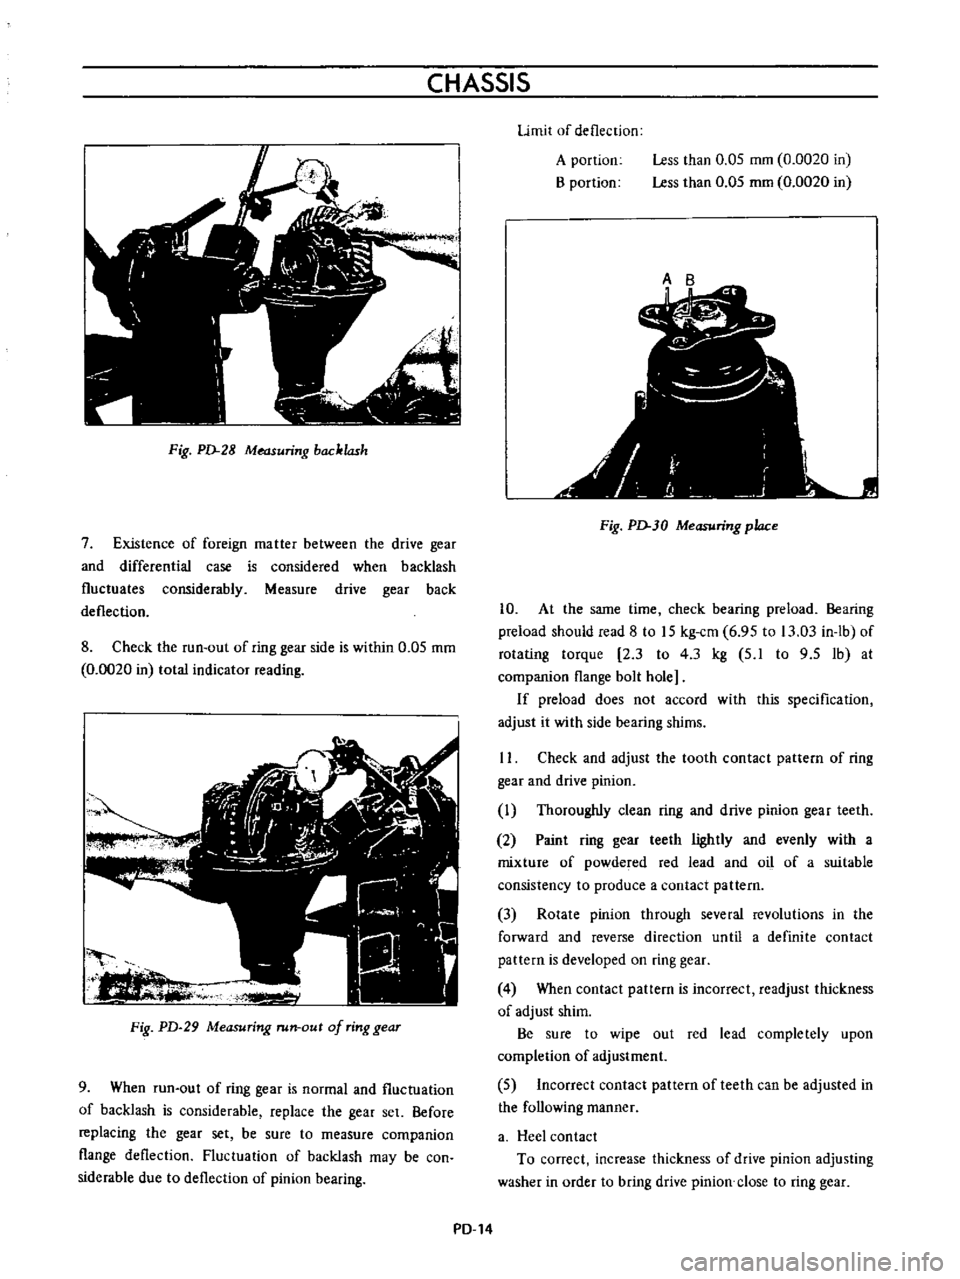
Fig
PD
28
Measuring
backlash
7
Existence
of
foreign
matter
between
the
drive
gear
and
differential
case
is
considered
when
backlash
fluctuates
considerably
Measure
drive
gear
back
deflection
8
Check
the
run
out
of
ring
gear
side
is
within
0
05
mm
0
0020
in
total
indicator
reading
ot
Fig
PD
29
Measuring
run
out
of
ring
gear
9
When
run
out
of
ring
gear
is
normal
and
fluctuation
of
backlash
is
considerable
replace
the
gear
set
Before
replacing
the
gear
set
be
sure
to
measure
companion
flange
deflection
Fluctuation
of
backlash
may
be
con
siderable
due
to
deflection
of
pinion
bearing
Limit
of
deflection
A
portioo
B
portion
Less
than
0
05
mm
0
0020
in
Less
than
0
05
mm
0
0020
in
Ct
r
r
f
1
I
f
i
r
I
oj
j
12
r
Fig
PD
30
Measuring
place
10
At
the
same
time
check
bearing
preload
Bearing
preload
should
read
8
to
15
kg
cm
6
95
to
13
03
in
lb
of
rotating
torque
2
3
to
4
3
kg
5
1
to
9
5
1b
at
companion
flange
bolt
hole
If
preload
does
not
accord
with
this
specification
adjust
it
with
side
bearing
shims
II
Check
and
adjust
the
tooth
contact
pattern
of
ring
gear
and
drive
pinion
I
Thoroughly
clean
ring
and
drive
pinion
gear
teeth
2
Paint
ring
gear
teeth
lightly
and
evenly
with
a
mixture
of
powdered
red
lead
and
oil
of
a
suitable
consistency
to
produce
a
contact
pattern
3
Rorate
pinion
through
several
revolutions
in
the
forward
and
reverse
direction
until
a
definite
contact
pattern
is
developed
on
ring
gear
4
When
contact
pattern
is
incorrect
readjust
thickness
of
adjust
shim
Be
sure
to
wipe
out
red
lead
completely
upon
completion
of
adjustment
5
Incorrect
contact
pattern
of
teeth
can
be
adjusted
in
the
following
manner
a
Heel
contact
To
correct
increase
thickness
of
drive
pinion
adjusting
washer
in
order
to
bring
drive
pinion
close
to
ring
gear
PD
14