2021 ALFA ROMEO STELVIO turn signal
[x] Cancel search: turn signalPage 44 of 280
GETTING TO KNOW YOUR VEHICLE
42
NOTE:
If the indicator light stays on constantly,
programming is complete and the garage
door/device should activate when the
HomeLink® button is pressed.
To program the two remaining HomeLink®
buttons, repeat each step for each
remaining button. DO NOT erase the chan-
nels.
If you unplugged the garage door opener/
device for programming, plug it back in at this
time.
Reprogramming A Single HomeLink® Button
(Canadian/Gate Operator)
To reprogram a channel that has been previ -
ously trained, follow these steps:
1. Place the ignition to the ON/RUN position.
2. Press and hold the desired HomeLink® button until the indicator light begins to
flash after 20 seconds. Do not release the
button.
3. Without releasing the button, proceed with “Canadian/Gate Operator Programming”
step 2 and follow all remaining steps.
EXTERIOR LIGHTS
Headlight Switch
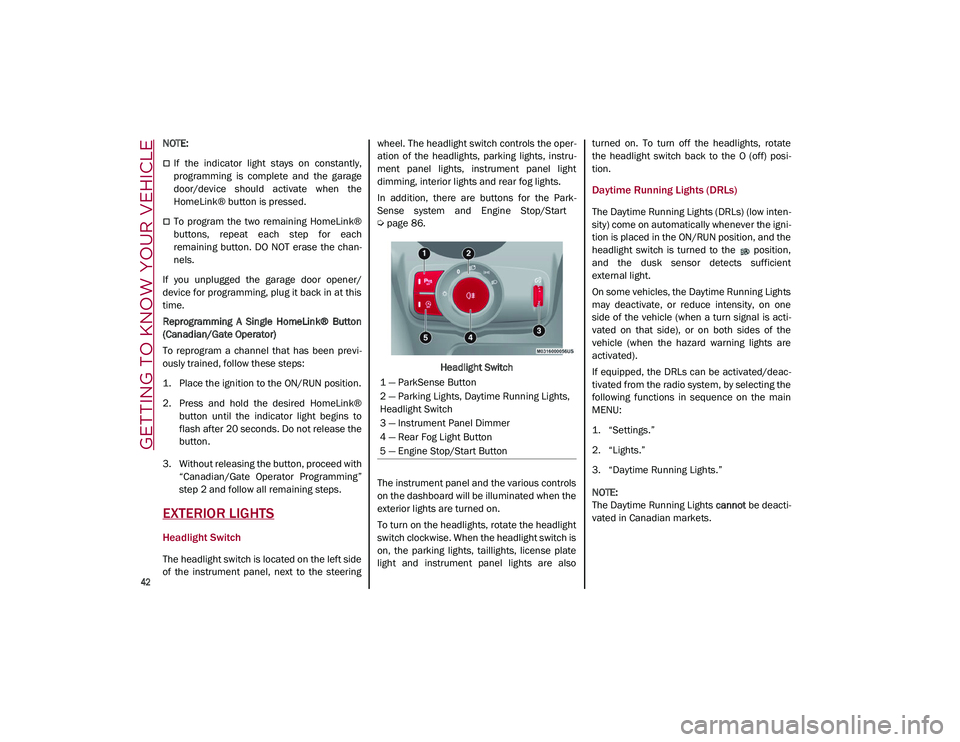
The headlight switch is located on the left side
of the instrument panel, next to the steering wheel. The headlight switch controls the oper
-
ation of the headlights, parking lights, instru -
ment panel lights, instrument panel light
dimming, interior lights and rear fog lights.
In addition, there are buttons for the Park -
Sense system and Engine Stop/Start
Ú
page 86.
Headlight Switch
The instrument panel and the various controls
on the dashboard will be illuminated when the
exterior lights are turned on.
To turn on the headlights, rotate the headlight
switch clockwise. When the headlight switch is
on, the parking lights, taillights, license plate
light and instrument panel lights are also turned on. To turn off the headlights, rotate
the headlight switch back to the O (off) posi
-
tion.
Daytime Running Lights (DRLs)
The Daytime Running Lights (DRLs) (low inten -
sity) come on automatically whenever the igni -
tion is placed in the ON/RUN position, and the
headlight switch is turned to the position,
and the dusk sensor detects sufficient
external light.
On some vehicles, the Daytime Running Lights
may deactivate, or reduce intensity, on one
side of the vehicle (when a turn signal is acti -
vated on that side), or on both sides of the
vehicle (when the hazard warning lights are
activated).
If equipped, the DRLs can be activated/deac -
tivated from the radio system, by selecting the
following functions in sequence on the main
MENU:
1. “Settings.”
2. “Lights.”
3. “Daytime Running Lights.”
NOTE:
The Daytime Running Lights cannot be deacti -
vated in Canadian markets.
1 — ParkSense Button
2 — Parking Lights, Daytime Running Lights,
Headlight Switch
3 — Instrument Panel Dimmer
4 — Rear Fog Light Button
5 — Engine Stop/Start Button
21_GU_OM_EN_USC_t.book Page 42
Page 45 of 280
43
High Beam Headlights
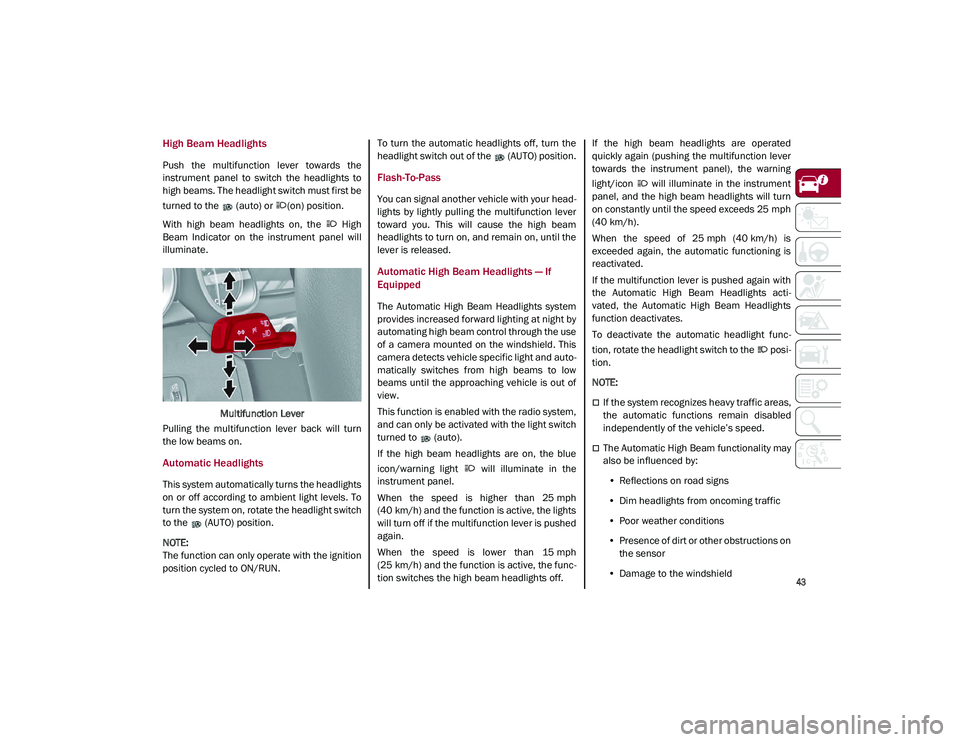
Push the multifunction lever towards the
instrument panel to switch the headlights to
high beams. The headlight switch must first be
turned to the (auto) or (on) position.
With high beam headlights on, the High
Beam Indicator on the instrument panel will
illuminate.Multifunction Lever
Pulling the multifunction lever back will turn
the low beams on.
Automatic Headlights
This system automatically turns the headlights
on or off according to ambient light levels. To
turn the system on, rotate the headlight switch
to the (AUTO) position.
NOTE:
The function can only operate with the ignition
position cycled to ON/RUN. To turn the automatic headlights off, turn the
headlight switch out of the (AUTO) position.
Flash-To-Pass
You can signal another vehicle with your head
-
lights by lightly pulling the multifunction lever
toward you. This will cause the high beam
headlights to turn on, and remain on, until the
lever is released.
Automatic High Beam Headlights — If
Equipped
The Automatic High Beam Headlights system
provides increased forward lighting at night by
automating high beam control through the use
of a camera mounted on the windshield. This
camera detects vehicle specific light and auto -
matically switches from high beams to low
beams until the approaching vehicle is out of
view.
This function is enabled with the radio system,
and can only be activated with the light switch
turned to (auto).
If the high beam headlights are on, the blue
icon/warning light will illuminate in the
instrument panel.
When the speed is higher than 25 mph
(40 km/h) and the function is active, the lights
will turn off if the multifunction lever is pushed
again.
When the speed is lower than 15 mph
(25 km/h) and the function is active, the func -
tion switches the high beam headlights off. If the high beam headlights are operated
quickly again (pushing the multifunction lever
towards the instrument panel), the warning
light/icon will illuminate in the instrument
panel, and the high beam headlights will turn
on constantly until the speed exceeds 25 mph
(40 km/h).
When the speed of 25 mph (40 km/h) is
exceeded again, the automatic functioning is
reactivated.
If the multifunction lever is pushed again with
the Automatic High Beam Headlights acti
-
vated, the Automatic High Beam Headlights
function deactivates.
To deactivate the automatic headlight func -
tion, rotate the headlight switch to the posi -
tion.
NOTE:
If the system recognizes heavy traffic areas,
the automatic functions remain disabled
independently of the vehicle’s speed.
The Automatic High Beam functionality may
also be influenced by:
• Reflections on road signs
• Dim headlights from oncoming traffic
• Poor weather conditions
• Presence of dirt or other obstructions on
the sensor
• Damage to the windshield
21_GU_OM_EN_USC_t.book Page 43
Page 46 of 280
GETTING TO KNOW YOUR VEHICLE
44
Parking Lights
To turn on the parking lights and instrument
panel lights, rotate the headlight switch clock-
wise to the position. All of the parking lights
will turn on for eight minutes, and opening the
door activates an audible warning.
To leave only the lights on one side (right/left)
illuminated, move the multifunction lever
(located on the left side of the steering wheel)
to the side that you want to remain on. With
the parking lights on, the indicator light on
the instrument panel will illuminate.
To turn off the parking lights, rotate the head -
light switch back to the O (off) position.
Headlight Off Delay
To assist when exiting the vehicle, the “Head -
light Off Delay” feature will leave the head -
lights on for up to 90 seconds. This delay is
initiated when the ignition is placed in the OFF
position while the headlight switch is on, and
then the headlight switch is cycled off. Head -
light delay can be canceled by either turning
on the headlights or side lights, or by placing
the ignition in the ON position.
The function can be activated from the radio
system by selecting the following functions in
sequence on the main menu:
1. “Settings.”
2. “Lights.”
3. “Headlight Off Delay.”
Rear Fog Lights
The rear fog light switch is located within the
headlight switch.
Push the button, located in the center of
the headlight switch, to turn the rear fog lights
on/off.
The rear fog lights turn on only when the head -
lights or parking lights are also turned on. The
lights can be turned off by pushing the
button again or by turning the headlight switch
to the O (off) position.
When the engine is stopped with the rear fog
lights on, they will be off the next time the
engine is started.
Adaptive Headlight System (AFS) — If
Equipped
This is a system combined with Xenon head -
lights (Bi-Xenon 35 W headlamp, if equipped)
which directs the headlights horizontally, and
continuously and automatically adapts them
to the driving conditions around bends or
when cornering.
The system directs the headlights to light up
the road in the best way, taking into account
the speed of the vehicle and the bend or
corner angle, as well as the speed at which the
steering wheel is turned.
The adaptive lights are automatically activated
when the vehicle is started.
Turn Signals
Move the multifunction lever up or down to
activate the turn signals. The arrows on each
side of the instrument cluster flash to show
proper operation.
The or turn signal will blink on the instru -
ment panel.
Lane Change Assist
Lightly push the lever up or down once, without
moving beyond the detent, and the turn signal
will flash five times then automatically turn off.
To turn off the flashing before the end of the
cycle, move the lever in the opposite direction
until the first click (about half way).
INTERIOR LIGHTS
Courtesy lights are turned on when the front
doors are opened or when the dimmer control
is rotated to its farthest upward position. The
glove compartment light turns on automati -
cally when the glove compartment is opened
and turn off when it is closed. The door cour -
tesy lights illuminate when one of the front
doors is opened, and turn off when it is closed.
The liftgate courtesy lights turn on automati -
cally when the liftgate is opened and turn off
when it is closed. All of these lights turn on and
off regardless of the ignition status.
21_GU_OM_EN_USC_t.book Page 44
Page 64 of 280
GETTING TO KNOW YOUR VEHICLE
62
Closing The Hood
To close, lower the hood to approximately
16 inches (40 cm) from the engine compart-
ment then let it drop. Make sure that the hood
is completely closed and fully latched.
NOTE:
Since the hood is equipped with a double
locking system, one for each side, you must
check that it is closed on each side.
POWER LIFTGATE
Unlocking of the liftgate is electrically oper -
ated and is deactivated when the vehicle is in
motion.
If anything obstructs the power liftgate while it
is closing or opening, the liftgate will automat -
ically reverse to the closed or open position,
provided it meets sufficient resistance.
Opening
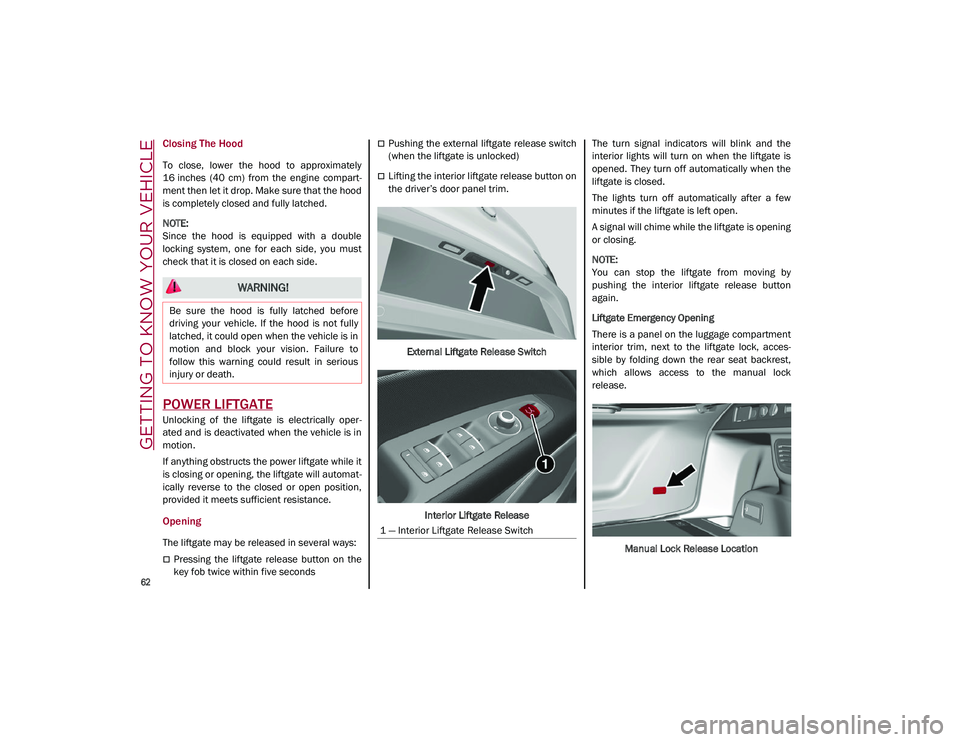
The liftgate may be released in several ways:
Pressing the liftgate release button on the
key fob twice within five seconds
Pushing the external liftgate release switch
(when the liftgate is unlocked)
Lifting the interior liftgate release button on
the driver’s door panel trim.
External Liftgate Release Switch
Interior Liftgate Release The turn signal indicators will blink and the
interior lights will turn on when the liftgate is
opened. They turn off automatically when the
liftgate is closed.
The lights turn off automatically after a few
minutes if the liftgate is left open.
A signal will chime while the liftgate is opening
or closing.
NOTE:
You can stop the liftgate from moving by
pushing the interior liftgate release button
again.
Liftgate Emergency Opening
There is a panel on the luggage compartment
interior trim, next to the liftgate lock, acces
-
sible by folding down the rear seat backrest,
which allows access to the manual lock
release.
Manual Lock Release Location
WARNING!
Be sure the hood is fully latched before
driving your vehicle. If the hood is not fully
latched, it could open when the vehicle is in
motion and block your vision. Failure to
follow this warning could result in serious
injury or death.
1 — Interior Liftgate Release Switch
21_GU_OM_EN_USC_t.book Page 62
Page 65 of 280
63
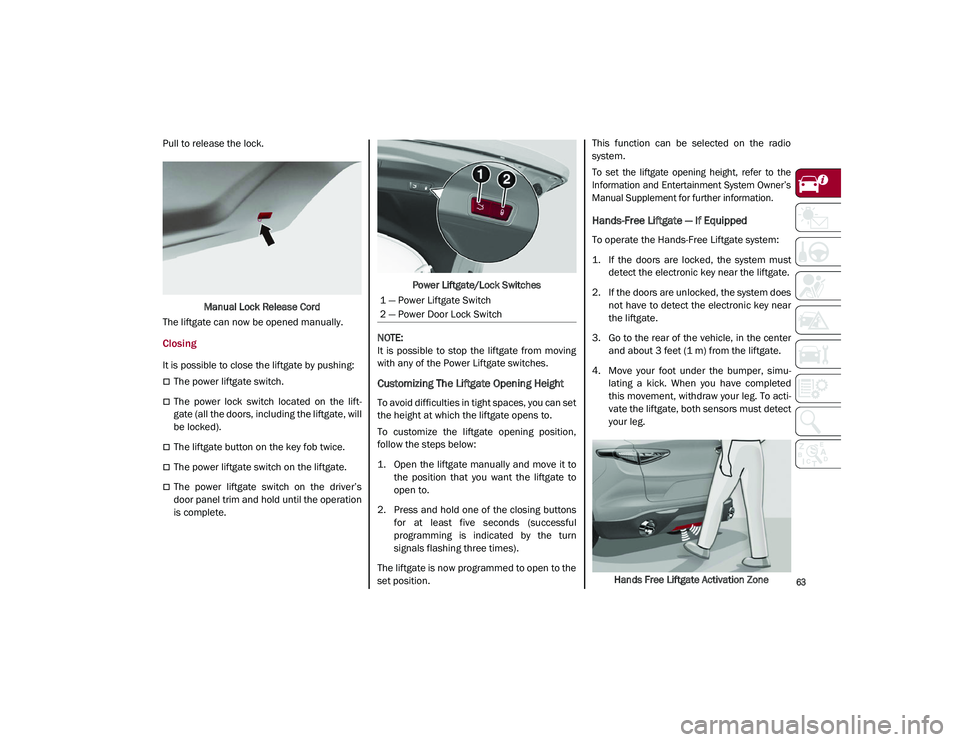
Pull to release the lock.Manual Lock Release Cord
The liftgate can now be opened manually.
Closing
It is possible to close the liftgate by pushing:
The power liftgate switch.
The power lock switch located on the lift -
gate (all the doors, including the liftgate, will
be locked).
The liftgate button on the key fob twice.
The power liftgate switch on the liftgate.
The power liftgate switch on the driver’s
door panel trim and hold until the operation
is complete. Power Liftgate/Lock Switches
NOTE:
It is possible to stop the liftgate from moving
with any of the Power Liftgate switches.
Customizing The Liftgate Opening Height
To avoid difficulties in tight spaces, you can set
the height at which the liftgate opens to.
To customize the liftgate opening position,
follow the steps below:
1. Open the liftgate manually and move it to the position that you want the liftgate to
open to.
2. Press and hold one of the closing buttons for at least five seconds (successful
programming is indicated by the turn
signals flashing three times).
The liftgate is now programmed to open to the
set position. This function can be selected on the radio
system.
To set the liftgate opening height, refer to the
Information and Entertainment System Owner’s
Manual Supplement for further information.
Hands-Free Liftgate — If Equipped
To operate the Hands-Free Liftgate system:
1. If the doors are locked, the system must
detect the electronic key near the liftgate.
2. If the doors are unlocked, the system does not have to detect the electronic key near
the liftgate.
3. Go to the rear of the vehicle, in the center and about 3 feet (1 m) from the liftgate.
4. Move your foot under the bumper, simu -
lating a kick. When you have completed
this movement, withdraw your leg. To acti -
vate the liftgate, both sensors must detect
your leg.
Hands Free Liftgate Activation Zone
1 — Power Liftgate Switch
2 — Power Door Lock Switch
21_GU_OM_EN_USC_t.book Page 63
Page 71 of 280
69
3. Instrument Cluster Display•The instrument cluster display features
a driver interactive display
Ú
page 69.
4. Fuel Gauge •The digital bar gauge shows the amount
of fuel in the tank.
• The fuel reserve/limited range
warning light turns on, a message is
displayed and there is an acoustic
signal when about 2.4 gallons (9 liters)
of fuel are left in the tank.
• The fuel pump symbol points to the
side of the vehicle where the fuel door is
located.
• P
roceeding further, the second white
notch will go off and the last one will become red, together with the indica-
tion "E" present at the bottom of the
tank. Fuel
Level Gauge
NOTE:
If the low fuel warning light switches on, refuel
at the earliest opportunity.
5. Speedometer •Indicates vehicle speed.
NOTE:
The hard telltales will illuminate for a bulb
check when the ignition is first cycled.
INSTRUMENT CLUSTER
DISPLAY
Instrument Cluster Display Description
This vehicle is equipped with a driver interac -
tive display that is located in the instrument
cluster.
When one or more of the doors have been
opened or closed and the ignition is in the OFF
position, the instrument cluster will display the
vehicle mileage for a few seconds.
Reconfigurable Instrument Cluster Display
During operation, the instrument cluster
display is divided into multiple sections which
show driving data, warnings, and failure indi -
cations.
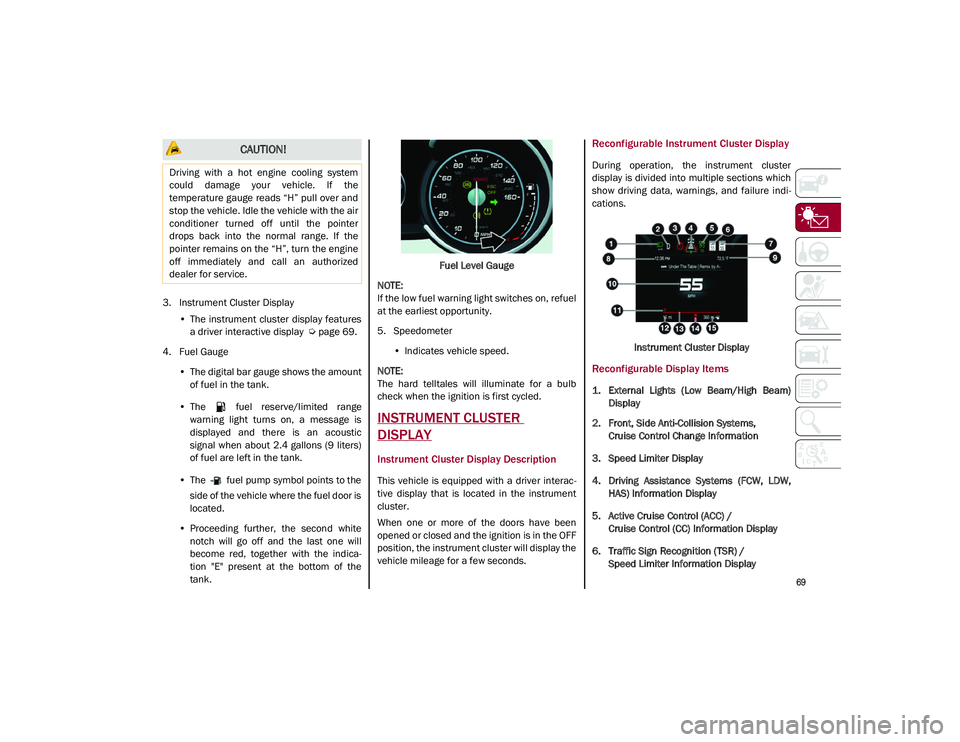
Instrument Cluster Display
Reconfigurable Display Items
1. External Lights (Low Beam/High Beam)Display
2. Front, Side Anti-Collision Systems, Cruise Control Change Information
3. Speed Limiter Display
4. Driving Assistance Systems (FCW, LDW, HAS) Information Display
5. Active Cruise Control (ACC) / Cruise Control (CC) Information Display
6. Traffic Sign Recognition (TSR) / Speed Limiter Information Display
CAUTION!
Driving with a hot engine cooling system
could damage your vehicle. If the
temperature gauge reads “H” pull over and
stop the vehicle. Idle the vehicle with the air
conditioner turned off until the pointer
drops back into the normal range. If the
pointer remains on the “H”, turn the engine
off immediately and call an authorized
dealer for service.
21_GU_OM_EN_USC_t.book Page 69
Page 76 of 280
GETTING TO KNOW YOUR INSTRUMENT PANEL
74
(Continued)
To access and the change the setting, turn and
push the Rotary Pad or press the desired
setting on the touchscreen.
WARNING LIGHTS AND
MESSAGES ON THE
INSTRUMENT PANEL
The following pages consist of warning lights
and messages.
NOTE:
The warning light turns on together with a
dedicated message and/or chime when
applicable. These indications are precau-
tionary and as such must not be considered
as exhaustive and/or alternative to the
information contained in the Owner’s
Manual, which you are advised to read care -
fully in all cases. Always refer to the informa -
tion in this section in the event of a failure
indication.
The failure indicators appearing on the
display are divided into two categories: very
serious and less serious faults. Serious
faults are indicated by a repeated and
prolonged warning cycle. Less serious faults
are indicated by a warning cycle with a
shorter duration. You can stop the warning
cycle in both cases by pushing the button
located on the windshield wiper stalk. The
instrument panel warning light will stay on
until the cause of the failure is eliminated.
Red Warning Lights
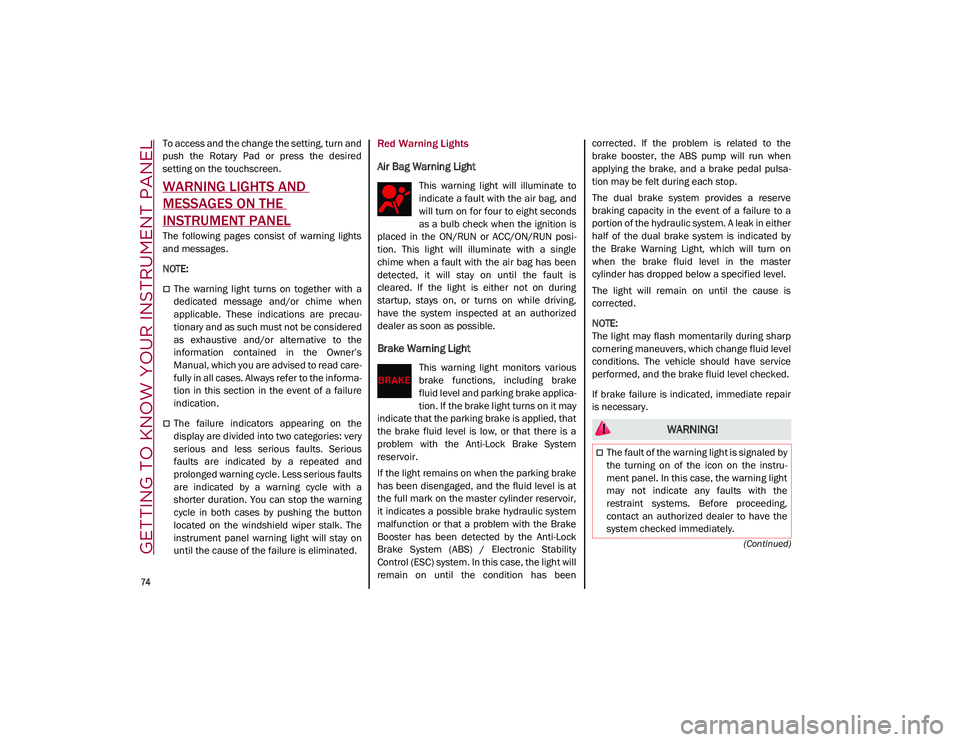
Air Bag Warning Light
This warning light will illuminate to
indicate a fault with the air bag, and
will turn on for four to eight seconds
as a bulb check when the ignition is
placed in the ON/RUN or ACC/ON/RUN posi -
tion. This light will illuminate with a single
chime when a fault with the air bag has been
detected, it will stay on until the fault is
cleared. If the light is either not on during
startup, stays on, or turns on while driving,
have the system inspected at an authorized
dealer as soon as possible.
Brake Warning Light
This warning light monitors various
brake functions, including brake
fluid level and parking brake applica -
tion. If the brake light turns on it may
indicate that the parking brake is applied, that
the brake fluid level is low, or that there is a
problem with the Anti-Lock Brake System
reservoir.
If the light remains on when the parking brake
has been disengaged, and the fluid level is at
the full mark on the master cylinder reservoir,
it indicates a possible brake hydraulic system
malfunction or that a problem with the Brake
Booster has been detected by the Anti-Lock
Brake System (ABS) / Electronic Stability
Control (ESC) system. In this case, the light will
remain on until the condition has been corrected. If the problem is related to the
brake booster, the ABS pump will run when
applying the brake, and a brake pedal pulsa
-
tion may be felt during each stop.
The dual brake system provides a reserve
braking capacity in the event of a failure to a
portion of the hydraulic system. A leak in either
half of the dual brake system is indicated by
the Brake Warning Light, which will turn on
when the brake fluid level in the master
cylinder has dropped below a specified level.
The light will remain on until the cause is
corrected.
NOTE:
The light may flash momentarily during sharp
cornering maneuvers, which change fluid level
conditions. The vehicle should have service
performed, and the brake fluid level checked.
If brake failure is indicated, immediate repair
is necessary.
WARNING!
The fault of the warning light is signaled by
the turning on of the icon on the instru -
ment panel. In this case, the warning light
may not indicate any faults with the
restraint systems. Before proceeding,
contact an authorized dealer to have the
system checked immediately.
21_GU_OM_EN_USC_t.book Page 74
Page 77 of 280
75
Vehicles equipped with the Anti-Lock Brake
System (ABS) are also equipped with Elec-
tronic Brake Force Distribution (EBD). In the
event of an EBD failure, the Brake Warning
Light will turn on along with the ABS Light.
Immediate repair to the ABS system is
required.
Operation of the Brake Warning Light can be
checked by turning the ignition switch from the
OFF position to the ON/RUN position. The light
should illuminate for approximately two
seconds. The light should then turn off unless
the parking brake is applied or a brake fault is
detected. If the light does not illuminate, have
the light inspected by an authorized dealer.
The light also will turn on when the parking
brake is applied with the ignition switch in the
ON/RUN position.
NOTE:
This light shows only that the parking brake is
applied. It does not show the degree of brake
application.
Seat Belt Reminder Warning Light
When the ignition is first placed in
the ON/RUN position, if the driver’s
seat belt is unbuckled, a chime will
sound and the light will turn on.
When driving, if the driver or front passenger
seat belt remains unbuckled, the Seat Belt
Reminder Light will flash or remain on contin -
uously and a chime will sound
Ú
page 163.
Electronic Brake Force Distribution (EBD)
Failure
The simultaneous turning on of the
BRAKE (red) and (amber) warning
lights with the engine on indicates
either a failure of the EBD system or
that the system is not available. In this case,
the rear wheels may suddenly lock and the
vehicle may swerve when braking abruptly.
Drive very carefully to the nearest authorized
dealer to have the system inspected immedi -
ately.
Oil Temperature Warning Light
This telltale indicates engine oil
temperature is high.
Stop the vehicle and shut off the engine as
soon as possible. If the problem persists,
contact an authorized dealer.
Amber Warning Lights
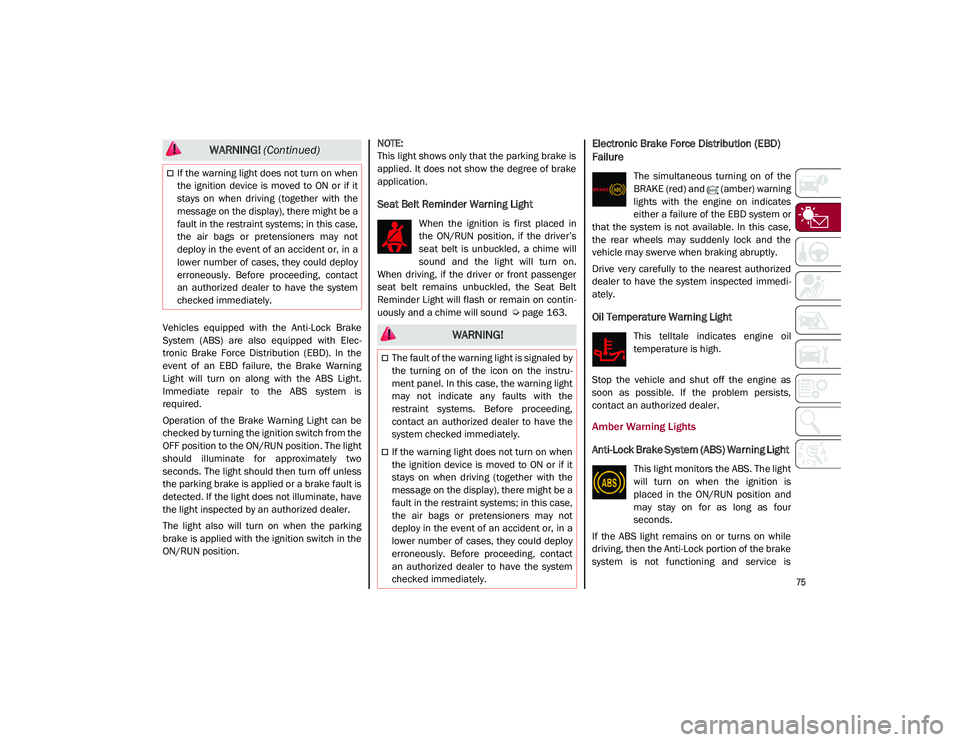
Anti-Lock Brake System (ABS) Warning Light
This light monitors the ABS. The light
will turn on when the ignition is
placed in the ON/RUN position and
may stay on for as long as four
seconds.
If the ABS light remains on or turns on while
driving, then the Anti-Lock portion of the brake
system is not functioning and service is
If the warning light does not turn on when
the ignition device is moved to ON or if it
stays on when driving (together with the
message on the display), there might be a
fault in the restraint systems; in this case,
the air bags or pretensioners may not
deploy in the event of an accident or, in a
lower number of cases, they could deploy
erroneously. Before proceeding, contact
an authorized dealer to have the system
checked immediately.
WARNING! (Continued)
WARNING!
The fault of the warning light is signaled by
the turning on of the icon on the instru -
ment panel. In this case, the warning light
may not indicate any faults with the
restraint systems. Before proceeding,
contact an authorized dealer to have the
system checked immediately.
If the warning light does not turn on when
the ignition device is moved to ON or if it
stays on when driving (together with the
message on the display), there might be a
fault in the restraint systems; in this case,
the air bags or pretensioners may not
deploy in the event of an accident or, in a
lower number of cases, they could deploy
erroneously. Before proceeding, contact
an authorized dealer to have the system
checked immediately.
21_GU_OM_EN_USC_t.book Page 75