Page 73 of 232
Page 74 of 232
The Pedestrian Warning System (if equipped) causes
Model Y to emit sound when driving below 20 mph (32
km/h). Electric vehicles operate quietly and this sound
helps to alert pedestrians of your oncoming vehicle. The
sound, which activates whenever
Model Y is shifted out
of Park, gets louder as speed increases.
NOTE: The Pedestrian Warning System is not available in
vehicles manufactured prior to September 2020.
WARNING: If sound cannot be heard, pedestrians
may not be aware of your oncoming vehicle, which
may increase the likelihood of a collision resulting
in serious injury or death. If the Pedestrian
Warning System is not operating, immediately
contact Tesla.
Pedestrian Warning System
72MODEL Y OWNER
Page 75 of 232

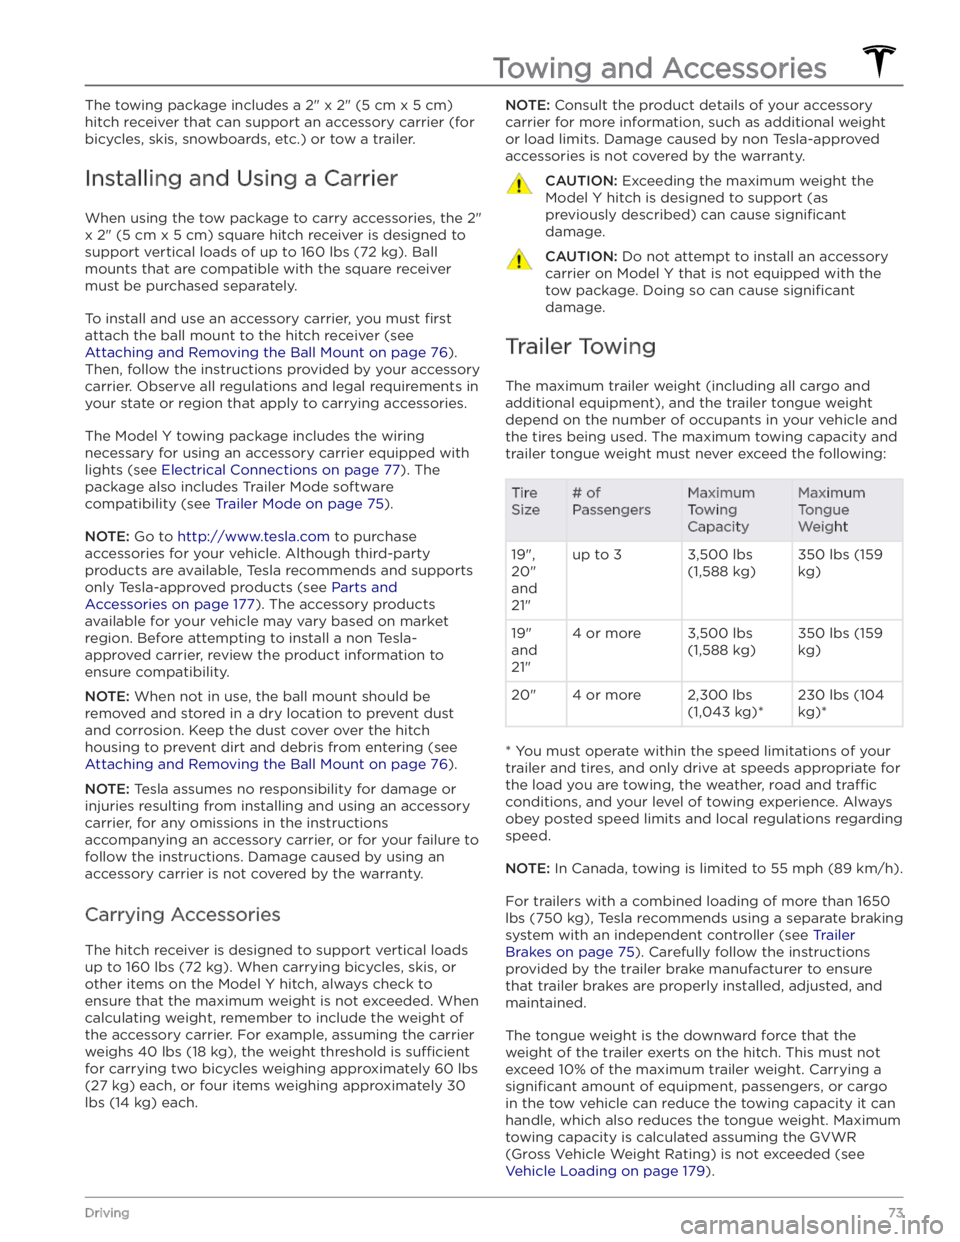
The towing package includes a 2" x 2" (5 cm x 5 cm)
hitch receiver that can support an accessory carrier (for bicycles, skis, snowboards, etc.) or tow a trailer.
Installing and Using a Carrier
When using the tow package to carry accessories, the 2"
x 2" (5 cm x 5 cm) square hitch receiver is designed to
support vertical loads of up to
160 lbs (72 kg). Ball
mounts that are compatible with the square receiver
must be purchased separately.
To install and use an accessory carrier, you must first
attach the ball mount to the hitch receiver (see
Attaching and Removing the Ball Mount on page 76).
Then, follow the instructions provided by your accessory
carrier. Observe all regulations and legal requirements in your state or region that apply to carrying accessories.
The Model Y towing package includes the wiring
necessary for using an accessory carrier equipped with lights (see
Electrical Connections on page 77). The
package also includes Trailer Mode software compatibility (see
Trailer Mode on page 75).
NOTE: Go to http://www.tesla.com to purchase
accessories for your vehicle. Although third-party products are available, Tesla recommends and supports
only Tesla-approved products (see
Parts and
Accessories on page 177). The accessory products
available for your vehicle may vary based on market
region. Before attempting to install a non Tesla-
approved carrier, review the product information to ensure compatibility.
NOTE: When not in use, the ball mount should be
removed and stored in a dry location to prevent dust and corrosion. Keep the dust cover over the hitch housing to prevent dirt and debris from entering (see
Attaching and Removing the Ball Mount on page 76).
NOTE: Tesla assumes no responsibility for damage or
injuries resulting from installing and using an accessory carrier, for any omissions in the instructions accompanying an accessory carrier, or for your failure to follow the instructions. Damage caused by using an accessory carrier is not covered by the warranty.
Carrying Accessories
The hitch receiver is designed to support vertical loads
up to
160 lbs (72 kg). When carrying bicycles, skis, or
other items on the
Model Y hitch, always check to
ensure that the maximum weight is not exceeded. When calculating weight, remember to include the weight of
the accessory carrier.
For example, assuming the carrier
weighs 40 lbs (18 kg), the weight threshold is su
Page 76 of 232
NOTE: If the information on the hitch label conflicts
with the information provided in this owner
Page 77 of 232
Page 78 of 232
2. Remove the cover located under the dashboard in the driver’s side footwell.3.
Peel back the carpet to expose the vehicle
Page 79 of 232

To attach a ball mount:
1.
Remove the dust cover from the hitch housing by using a small object, such as a
flat screwdriver, to pry
between the dust cover and hitch housing. Store the dust cover in a secure location.
2.
If necessary, remove the cotter pin from the locking
bolt and slide the locking bolt out of the hitch assembly.
3.
Slide the ball holder into the hitch assembly.
4.
Align the hole in the ball holder with the one in the hitch assembly.
5.
Slide the locking bolt through the hitch assembly/ball holder.
6.
Insert the cotter pin in the hole at the end of the
locking bolt.
To remove a ball mount:
1.
Remove the cotter pin from the locking bolt and slide
the locking bolt out of the ball holder/hitch assembly.
2. Pull the ball holder out of the hitch assembly.3.
Re-install the dust cover for the hitch housing and
store the ball mount in a secure location.
Electrical Connections
Regulations require all trailers to be equipped with tail lights, brake lights, side marker lights, and turn signals.
To provide power for trailer lighting, a built-in 7-pin
wiring connector is provided near the hitch support
Page 80 of 232
NOTE: Loss of trailer lights when towing may be the
result of a fault in the trailer wiring or excessive power
consumption by the lights connected to the trailer output(s). When this occurs, a Trailer Mode icon
appears on the touchscreen. Fix any issues with the wiring and/or reduce the number of lights connected to the trailer output(s), then toggle Trailer Mode
off and
on again.
CAUTION: Always ensure that the trailer electrical
cable does not contact or drag on the ground and
there is enough slack in the cable to allow for
turns.
WARNING: Use only the electrical connections
designed by Tesla. Do not attempt to directly
splice or attempt to connect a trailer’s electrical
wiring using any other method. Doing so can
damage the vehicle