2019 DODGE GRAND CARAVAN side door
[x] Cancel search: side doorPage 61 of 490

To return to the full open position, the door must first be
closed and then opened by pushing the latch again to
release.
Power Mirrors — If Equipped
The power mirror controls are located on the driver-side
door trim panel.The power mirror controls consist of mirror select buttons
and a four-way mirror control switch. To adjust a mirror,
push either the L (left) or R (right) to select the mirror that
you want to adjust.
NOTE:
A light in the selected button will illuminate
indicating the mirror is activated and can be adjusted.
Using the mirror control switch, push on any of the four
arrows for the direction that you want the mirror to move.
Observation Mirror
Power Mirror Controls
3
GETTING TO KNOW YOUR VEHICLE 59
Page 65 of 490

NOTE:The Headlights with Wipers feature can be turned
on or off through the instrument cluster display — if
equipped. Refer to “Instrument Cluster Display” in “Get-
ting To Know Your Instrument Panel” for further informa-
tion.
Headlight Delay — If Equipped
This feature provides the safety of headlight illumination
for up to 90 seconds after exiting your vehicle.
To activate the delay feature, turn OFF the ignition switch
while the headlights are still on. Then turn off the head-
lights within 45 seconds. The 90 second delay interval
begins when the headlight switch is turned off. If the
headlights or parking lights are turned back on or the
ignition switch is turned ON, the delay will be cancelled.
When exiting the vehicle the driver can choose to have the
headlights remain on for 30, 60 or 90 seconds or not remain
on. To change the timer setting, see an authorized dealer.
The headlight delay time is programmable on vehicles
equipped with an instrument cluster display. Refer to
“Instrument Cluster Display” in “Getting To Know Your
Instrument Panel” for further information.
If the headlights are turned off before the ignition, they will
turn off in the normal manner. NOTE:
The headlights must be turned off within 45 sec-
onds of turning the ignition OFF to activate this feature.
Lights-On Reminder
If the headlights or the parking lights are left on, or if the
dimmer control is in the extreme top position after the
ignition switch is turned OFF, a chime will sound when the
driver’s door is opened.
Front Fog Lights — If Equipped
To activate the front fog lights, turn on the parking lights or
the low beam headlights and push in the headlight switch
control knob. Pushing the headlight switch control knob in
a second time will turn the front fog lights off.
Turn Signals
Move the multifunction lever up or down and the arrows
on each side of the instrument cluster display will flash to
show proper operation of the front and rear turn signal
lights.
NOTE: If either light remains on and does not flash, or
there is a very fast flash rate, check for a defective outside
light bulb. If an indicator fails to light when the lever is
moved, it would suggest that the indicator bulb is defec-
tive.
3
GETTING TO KNOW YOUR VEHICLE 63
Page 66 of 490

Turn Signal Warning
If the vehicle electronics sense that the vehicle has traveled
at over 18 mph (29 km/h) for about 1 mile (1.6 km) with the
turn signals on, a chime will sound to alert the driver.
Lane Change Assist
Tap the lever up or down once, without moving beyond
the detent, and the turn signal (right or left) will flash three
times then automatically turn off.
Battery Protection
This feature provides battery protection to avoid wearing
down the battery if the headlights or parking lights are left
on for extended periods of time when the ignition is in the
OFF position. After eight minutes of the ignition being in
the OFF position and the headlight switch in any position
other than OFF or AUTO, the lights will turn off automati-
cally until the next cycle of the ignition or headlight switch.
The battery protection feature will be disabled if the
ignition is placed in any position other than OFF during the
eight minute delay.
INTERIOR LIGHTS
Courtesy/Interior Lighting
At the forward end of the overhead console are two
courtesy lights (standard dome light has two buttons).
These interior lights are turned on when a door or the
liftgate is opened, the remote keyless entry key fob is
activated, or when the dimmer control is moved to the
extreme top.
The interior lights will automatically turn off in approxi-
mately 10 minutes for the first activation and 90 seconds
every activation thereafter until the engine is started, if one
of the following occur:
•A door, sliding door or the liftgate is left open.
• Any overhead reading light is left on.
NOTE: The ignition must be cycled to the OFF position for
this feature to operate.
The courtesy lights also function as reading lights. Push in
on each lens to turn these lights on while inside the vehicle.
Push a second time to turn each light off. You may adjust
the direction of these lights by pushing the outside ring,
which is identified with four directional arrows (LED
lamps only).
64 GETTING TO KNOW YOUR VEHICLE
Page 67 of 490
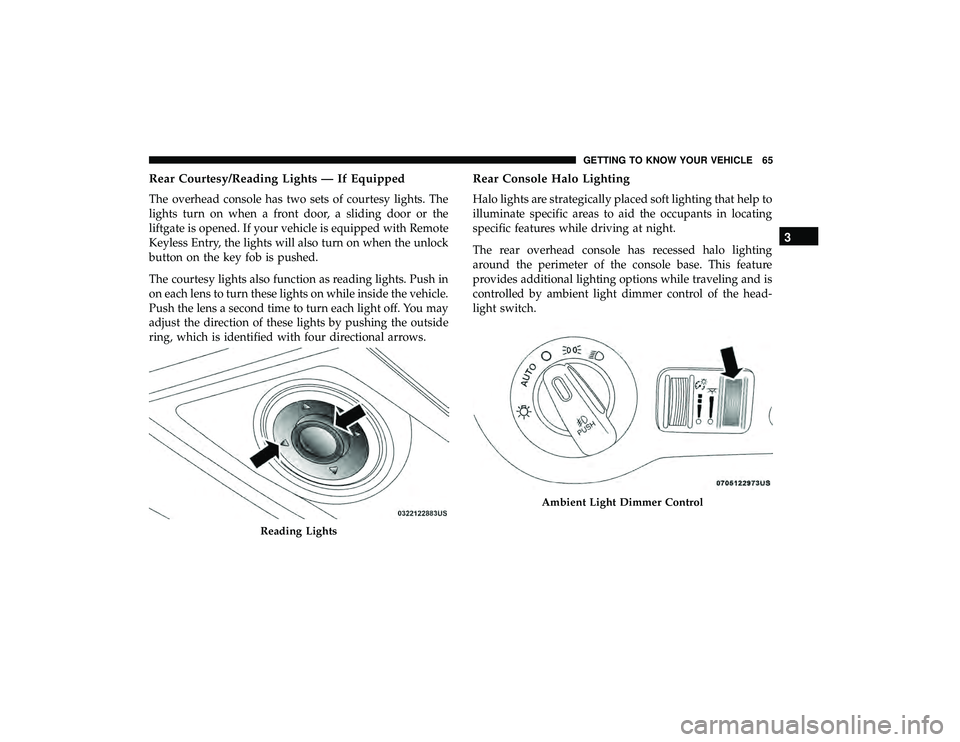
Rear Courtesy/Reading Lights — If Equipped
The overhead console has two sets of courtesy lights. The
lights turn on when a front door, a sliding door or the
liftgate is opened. If your vehicle is equipped with Remote
Keyless Entry, the lights will also turn on when the unlock
button on the key fob is pushed.
The courtesy lights also function as reading lights. Push in
on each lens to turn these lights on while inside the vehicle.
Push the lens a second time to turn each light off. You may
adjust the direction of these lights by pushing the outside
ring, which is identified with four directional arrows.
Rear Console Halo Lighting
Halo lights are strategically placed soft lighting that help to
illuminate specific areas to aid the occupants in locating
specific features while driving at night.
The rear overhead console has recessed halo lighting
around the perimeter of the console base. This feature
provides additional lighting options while traveling and is
controlled by ambient light dimmer control of the head-
light switch.
Reading Lights
Ambient Light Dimmer Control
3
GETTING TO KNOW YOUR VEHICLE 65
Page 93 of 490
WARNING!
There is no anti-pinch protection when the window is
almost closed. To avoid personal injury be sure to clear
your arms, hands, fingers and all objects from the
window path before closing.
Auto Up Reset — If Equipped
To reactivate the Auto Up feature, perform the following
steps after vehicle power is restored:
1. Pull the window control up to close the window com- pletely and continue to hold the control up for an
additional two seconds after the window is closed.
2. Push the window control down firmly to the second detent to open the window completely and continue to
hold the control down for an additional two seconds
after the window is fully open.
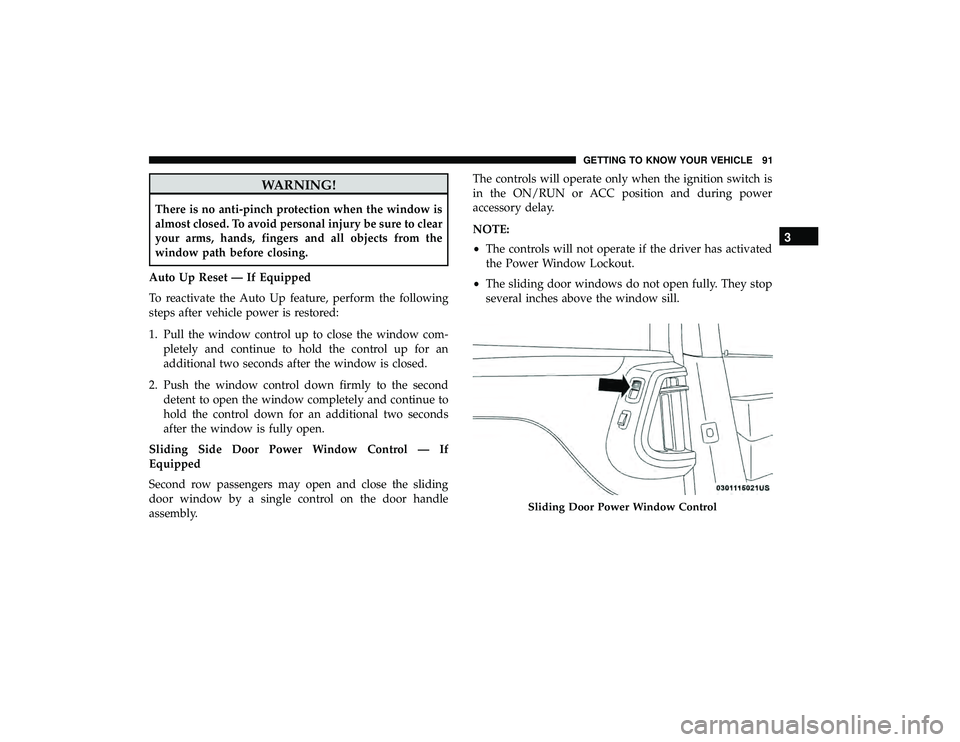
Sliding Side Door Power Window Control — If
Equipped
Second row passengers may open and close the sliding
door window by a single control on the door handle
assembly. The controls will operate only when the ignition switch is
in the ON/RUN or ACC position and during power
accessory delay.
NOTE:
•
The controls will not operate if the driver has activated
the Power Window Lockout.
• The sliding door windows do not open fully. They stop
several inches above the window sill.
Sliding Door Power Window Control
3
GETTING TO KNOW YOUR VEHICLE 91
Page 100 of 490
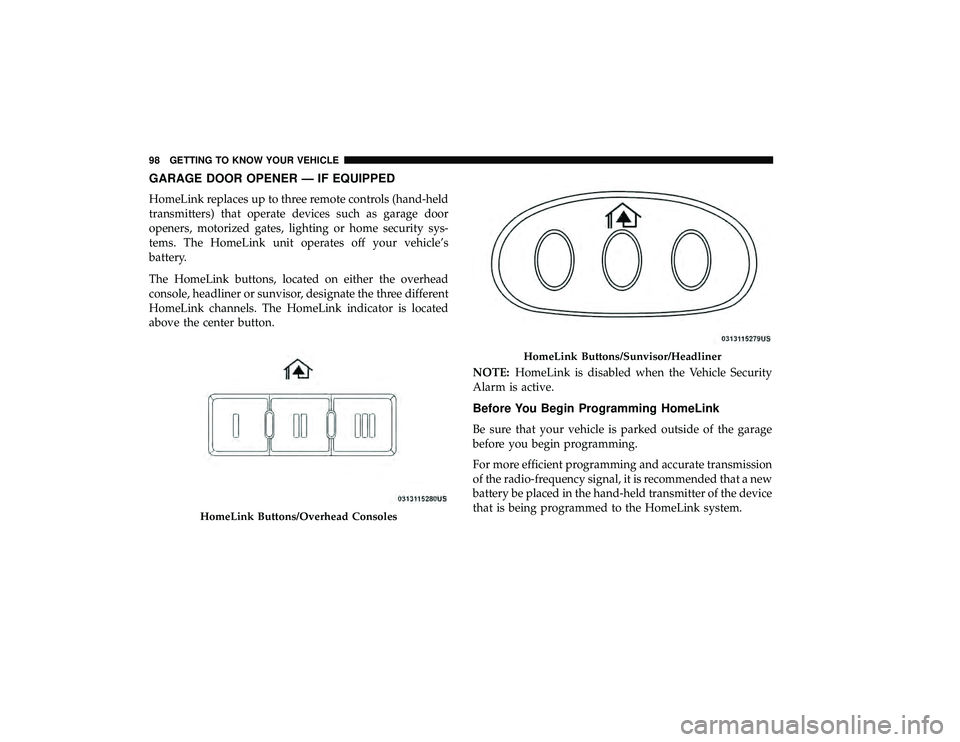
GARAGE DOOR OPENER — IF EQUIPPED
HomeLink replaces up to three remote controls (hand-held
transmitters) that operate devices such as garage door
openers, motorized gates, lighting or home security sys-
tems. The HomeLink unit operates off your vehicle’s
battery.
The HomeLink buttons, located on either the overhead
console, headliner or sunvisor, designate the three different
HomeLink channels. The HomeLink indicator is located
above the center button.NOTE:HomeLink is disabled when the Vehicle Security
Alarm is active.
Before You Begin Programming HomeLink
Be sure that your vehicle is parked outside of the garage
before you begin programming.
For more efficient programming and accurate transmission
of the radio-frequency signal, it is recommended that a new
battery be placed in the hand-held transmitter of the device
that is being programmed to the HomeLink system.
HomeLink Buttons/Overhead Consoles
HomeLink Buttons/Sunvisor/Headliner
98 GETTING TO KNOW YOUR VEHICLE
Page 101 of 490
To erase the channels, place the ignition in the ON/RUN
position and push and hold the two outside HomeLink
buttons (I and III) for up 20 seconds or until the red
indicator flashes.
NOTE:
•Erasing all channels should only be performed when
programming HomeLink for the first time. Do not erase
channels when programming additional buttons.
• If you have any problems, or require assistance, please
call toll-free 1-800-355-3515 or, on the Internet at
HomeLink.com for information or assistance.
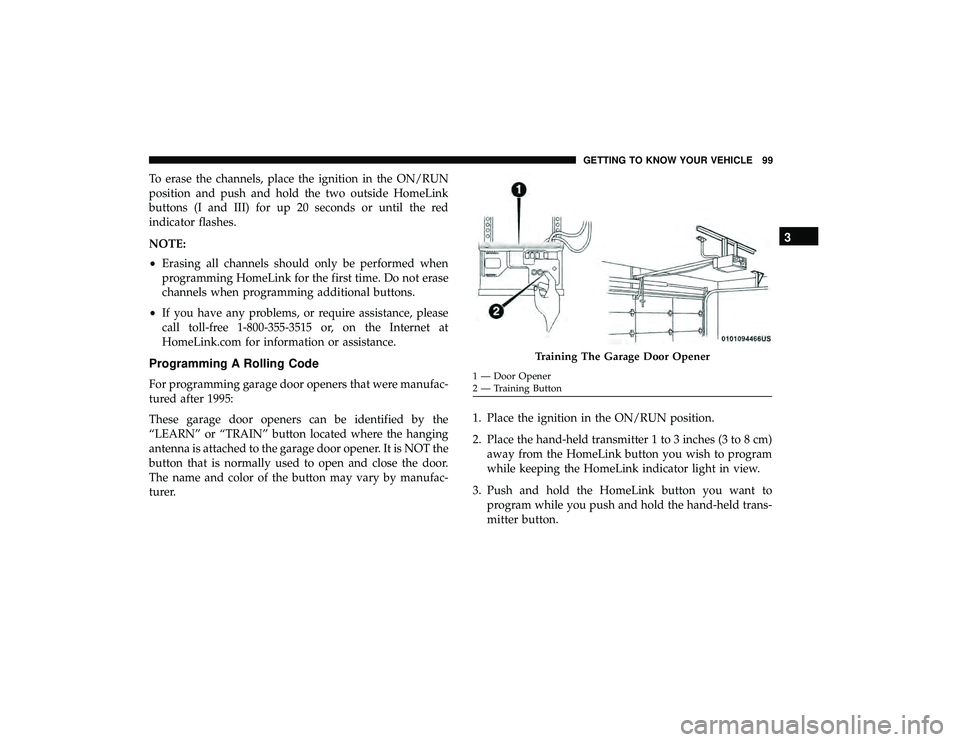
Programming A Rolling Code
For programming garage door openers that were manufac-
tured after 1995:
These garage door openers can be identified by the
“LEARN” or “TRAIN” button located where the hanging
antenna is attached to the garage door opener. It is NOT the
button that is normally used to open and close the door.
The name and color of the button may vary by manufac-
turer. 1. Place the ignition in the ON/RUN position.
2. Place the hand-held transmitter 1 to 3 inches (3 to 8 cm)
away from the HomeLink button you wish to program
while keeping the HomeLink indicator light in view.
3. Push and hold the HomeLink button you want to program while you push and hold the hand-held trans-
mitter button.
Training The Garage Door Opener
1 — Door Opener
2 — Training Button
3
GETTING TO KNOW YOUR VEHICLE 99
Page 103 of 490
NOTE:For vehicles equipped with Keyless Enter-N-Go,
place the ignition in the RUN position with the engine ON.
Make sure while programming HomeLink with the engine
ON that your vehicle is outside of your garage, or that the
garage door remains open at all times.
2. Place the hand-held transmitter 1 to 3 inches (3 to 8 cm) away from the HomeLink button you wish to program
while keeping the HomeLink indicator light in view.
3. Push and hold the HomeLink button you want to program while you push and hold the hand-held trans-
mitter button.
4. Continue to hold both buttons and observe the indicator light. The HomeLink indicator will flash slowly and
then rapidly after HomeLink has received the frequency
signal from the hand-held transmitter. Release both
buttons after the indicator light changes from slow to
rapid.
5. Push and hold the programmed HomeLink button and observe the indicator light.
• If the indicator light stays on constantly, programming
is complete and the garage door/device should acti-
vate when the HomeLink button is pushed. •
To program the two remaining HomeLink buttons,
repeat each step for each remaining button. DO NOT
erase the channels.
Reprogramming A Single HomeLink Button
(Non-Rolling Code)
To reprogram a channel that has been previously trained,
follow these steps:
1. Cycle the ignition to the ON/RUN position.
2. Push and hold the desired HomeLink button until the indicator light begins to flash after 20 seconds. Do not
release the button.
3. Without releasing the button, proceed with “Program-
ming A Non-Rolling Code” step two and follow all
remaining steps.
Canadian/Gate Operator Programming
For programming transmitters in Canada/United States
that require the transmitter signals to “time-out” after
several seconds of transmission:
Canadian radio frequency laws require transmitter signals
to time-out (or quit) after several seconds of transmission,
which may not be long enough for HomeLink to pick up
3
GETTING TO KNOW YOUR VEHICLE 101