2019 DODGE GRAND CARAVAN Radio
[x] Cancel search: RadioPage 2 of 490

INSTALLATION OF RADIO TRANSMITTING
EQUIPMENT
Special design considerations are incorporated into this
vehicle’s electronic system to provide immunity to radio
frequency signals. Mobile two-way radios and telephone
equipment must be installed properly by trained person-
nel. The following must be observed during installation.
The positive power connection should be made directly
to the battery and fused as close to the battery as possible.
The negative power connection should be made to body
sheet metal adjacent to the negative battery connection.
This connection should not be fused.
Antennas for two-way radios should be mounted on the
roof or the rear area of the vehicle. Care should be used
in mounting antennas with magnet bases. Magnets may
affect the accuracy or operation of the compass on
vehicles so equipped.
The antenna cable should be as short as practical and
routed away from the vehicle wiring when possible. Use
only fully shielded coaxial cable.
Carefully match the antenna and cable to the radio to
ensure a low Standing Wave Ratio (SWR).Mobile radio equipment with output power greater than
normal may require special precautions.
All installations should be checked for possible interfer-
ence between the communications equipment and the
vehicle’s electronic systems.
WARNING:
Operating, servicing and maintaining a
passenger vehicle or off-road highway
motor vehicle can expose you to chemicals
including engine exhaust, carbon monoxide,
phthalates, and lead, which are known to
the State of California to cause cancer and
birth defects or other reproductive harm.
To minimize exposure, avoid breathing
exhaust, do not idle the engine except as
necessary, service your vehicle in a
well-ventilated area and wear gloves or
wash your hands frequently when servicing
your vehicle. For more information go to
www.P65Warnings.ca.gov/passenger-vehicle.
VEHICLES SOLD IN CANADA
With respect to any Vehicles Sold in Canada, the name
FCA US LLC shall be deemed to be deleted and the name
FCA Canada Inc. used in substitution therefore.
DRIVING AND ALCOHOL
Drunken driving is one of the most frequent causes of
accidents.
Your driving ability can be seriously impaired with blood
alcohol levels far below the legal minimum. If you are
drinking, don’t drive. Ride with a designated non-
drinking driver, call a cab, a friend, or use public trans-
portation.
WARNING!
Driving after drinking can lead to an accident.
Your perceptions are less sharp, your reflexes are
slower, and your judgment is impaired when you
have been drinking. Never drink and then drive.
This manual illustrates and describes the operation of
features and equipment that are either standard or op-
tional on this vehicle. This manual may also include a
description of features and equipment that are no longer
available or were not ordered on this vehicle. Please
disregard any features and equipment described in this
manual that are not on this vehicle.
FCA US LLC reserves the right to make changes in design
and specifications, and/or make additions to or improve-
ments to its products without imposing any obligation
upon itself to install them on products previously manu-
factured.
Copyright © 2018 FCA US LLC
Page 22 of 490

Programming Additional Key Fobs
Programming the key fob may be performed by an autho-
rized dealer.
NOTE:Once a key fob is programmed to a vehicle, it
cannot be repurposed and reprogrammed to another ve-
hicle.
General Information
The following regulatory statement applies to all radio
frequency (RF) devices equipped in this vehicle:
This device complies with Part 15 of the FCC Rules and
with Industry Canada license-exempt RSS standard(s).
Operation is subject to the following two conditions:
1. This device may not cause harmful interference, and
2. This device must accept any interference received, in- cluding interference that may cause undesired opera-
tion.
NOTE: Changes or modifications not expressly approved
by the party responsible for compliance could void the
user ’s authority to operate the equipment.
IGNITION SWITCH
Wireless Ignition Node (WIN) — If Equipped
The Wireless Ignition Node (WIN) operates similar to an
ignition switch. It has four operating positions, three with
detents and one that is spring-loaded. The detent positions
are OFF, ACC, and ON/RUN. The START position is a
spring-loaded momentary contact position. When released
from the START position, the switch automatically returns
to the ON/RUN position.
20 GETTING TO KNOW YOUR VEHICLE
Page 25 of 490

To Exit Remote Start Mode And Drive The Vehicle
Before the end of the 15-minute cycle, push and release the
unlock button on the key fob to unlock the doors and
disarm the vehicle security alarm (if equipped). Then,
insert the key into the ignition and place the ignition in the
ON/RUN position.
NOTE:
•The ignition must be placed in the ON/RUN position in
order to drive the vehicle.
• The message “Remote Start Active — Key To Run” will
display in the instrument cluster display until you insert
and turn the key to ON/RUN position.
General Information
The following regulatory statement applies to all radio
frequency (RF) devices equipped in this vehicle:
This device complies with Part 15 of the FCC Rules and
with Industry Canada license-exempt RSS standard(s).
Operation is subject to the following two conditions:
1. This device may not cause harmful interference, and
2.
This device must accept any interference received, includ-
ing interference that may cause undesired operation.
NOTE: Changes or modifications not expressly approved
by the party responsible for compliance could void the
user ’s authority to operate the equipment.
SENTRY KEY
The Sentry Key Immobilizer system prevents unauthorized
vehicle operation by disabling the engine. The system does
not need to be armed or activated. Operation is automatic,
regardless of whether the vehicle is locked or unlocked.
The system uses a key fob, keyless push button ignition and
a RF receiver to prevent unauthorized vehicle operation.
Therefore, only key fobs that are programmed to the vehicle
can be used to start and operate the vehicle. The system
cannot reprogram a key fob obtained from another vehicle.
After turning the ignition switch to the ON/RUN position,
the vehicle security light will turn on for three seconds for
a bulb check. If the light remains on after the bulb check, it
indicates that there is a problem with the electronics. In
addition, if the light begins to flash after the bulb check, it
indicates that someone attempted to start the engine with
an invalid key fob. In the event that a valid key fob is used
to start the engine but there is an issue with the vehicle
electronics, the engine will start and shut off after two
seconds.
3
GETTING TO KNOW YOUR VEHICLE 23
Page 26 of 490

If the vehicle security light turns on during normal vehicle
operation (vehicle running for longer than ten seconds), it
indicates that there is a fault in the electronics. Should this
occur, have the vehicle serviced as soon as possible by an
authorized dealer.
CAUTION!
The Sentry Key Immobilizer system is not compatible
with some aftermarket remote starting systems. Use of
these systems may result in vehicle starting problems
and loss of security protection.
All of the key fobs provided with your new vehicle have
been programmed to the vehicle electronics.
Key Programming
Key fob programming is performed at an authorized
dealer.
Replacement Keys
NOTE: Only key fobs that are programmed to the vehicle
electronics can be used to start and operate the vehicle.
Once a key fob is programmed to a vehicle, it cannot be
programmed to any other vehicle.
CAUTION!
Always remove the key fobs from the vehicle and lock
all doors when leaving the vehicle unattended.
NOTE: Duplication of key fobs may be performed at an
authorized dealer. This procedure consists of programming
a blank key fob to the vehicle electronics. A blank key fob
is one that has never been programmed.
When having the Sentry Key Immobilizer System serviced,
bring all vehicle keys with you to an authorized dealer.
General Information
The following regulatory statement applies to all radio
frequency (RF) devices equipped in this vehicle:
This device complies with Part 15 of the FCC Rules and
with Industry Canada license-exempt RSS standard(s).
Operation is subject to the following two conditions:
1. This device may not cause harmful interference, and
2. This device must accept any interference received, in- cluding interference that may cause undesired opera-
tion.
24 GETTING TO KNOW YOUR VEHICLE
Page 68 of 490

Dimmer Controls
The dimmer switch is located next to the headlight switch.
With the parking lights or headlights on, rotating the left
dimmer control upward will increase the brightness of the
instrument panel lights.
Rotating the left dimmer control completely upward to the
second detent (extreme top position) will turn on the
interior lights. The interior lights will remain on when the
dimmer control is in this position.
Rotating the left dimmer control to the off position (ex-
treme bottom) will turn the interior lights off, and will
remain off when the doors or liftgate are opened.
Parade Mode (Daytime Brightness Feature)
Rotate the dimmer control upward to the first detent. This
feature brightens all text displays such as the odometer,
instrument cluster display, and radio when the parking
lights or headlights are on.
WINDSHIELD WIPER AND WASHERS
The wipers and washers are operated by a switch within
the multifunction lever. Rotate the end of the multifunction
lever to select the desired wiper speed.
Instrument Panel Dimmer Control
Washer And Wiper Controls
66 GETTING TO KNOW YOUR VEHICLE
Page 70 of 490

NOTE:The mist feature does not activate the washer
pump; therefore, no washer fluid will be sprayed on the
windshield. The wash function must be used in order to
spray the windshield with washer fluid.
Rear Wiper And Washer
Rotating the center ring of the wiper lever to the first detent
activates the rear intermittent wipers. To activate the
washers, rotate the center ring fully forward and the
washers will spray until the ring is released, and then
resume the intermittent interval.
NOTE: Rear window wipers function in the intermittent
wiper speed only.
CLIMATE CONTROLS
The Climate Control System allows you to regulate the
temperature, air flow, and direction of air circulating
throughout the vehicle. The controls are located on the
touchscreen (if equipped) and on the instrument panel
below the radio.
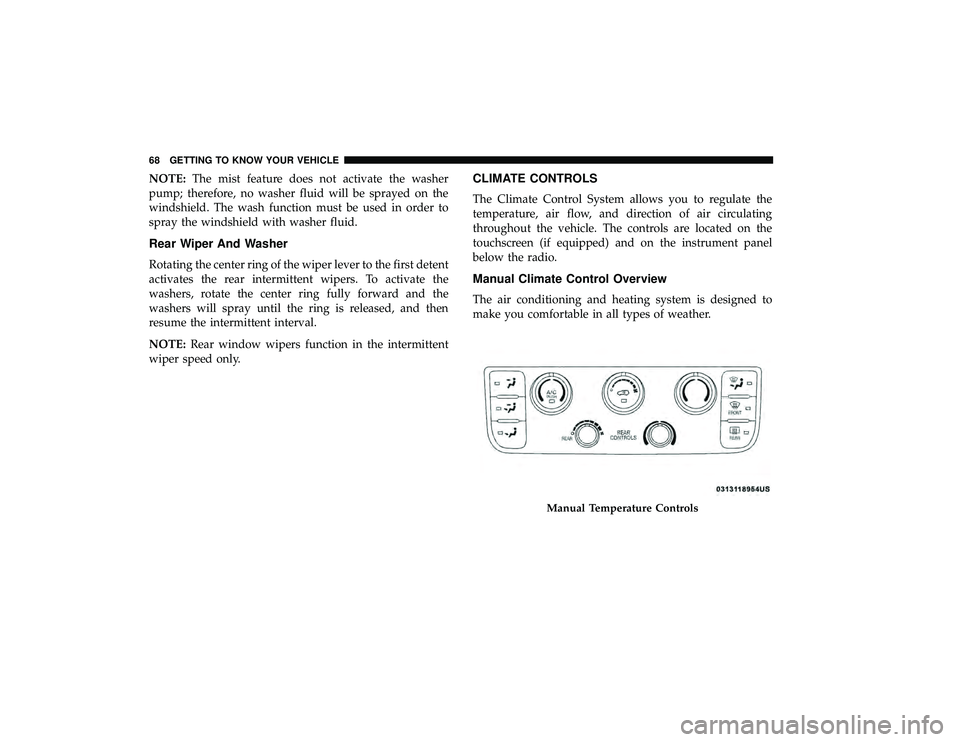
Manual Climate Control Overview
The air conditioning and heating system is designed to
make you comfortable in all types of weather.
Manual Temperature Controls
68 GETTING TO KNOW YOUR VEHICLE
Page 74 of 490

Controlling The Rear Climate Controls From The
Front Panel Controls
The rear MTC system has floor air outlets at the rear right
side of the 3rd Row seats and overhead outlets at each
outboard rear seating position. The system provides heated
air through the floor outlets or cool, dehumidified air
through the headliner outlets.
The rear system temperature control buttons on the face-
plate are located below the radio system, located on the
instrument panel.
Rear Manual Climate Controls
72 GETTING TO KNOW YOUR VEHICLE
Page 100 of 490

GARAGE DOOR OPENER — IF EQUIPPED
HomeLink replaces up to three remote controls (hand-held
transmitters) that operate devices such as garage door
openers, motorized gates, lighting or home security sys-
tems. The HomeLink unit operates off your vehicle’s
battery.
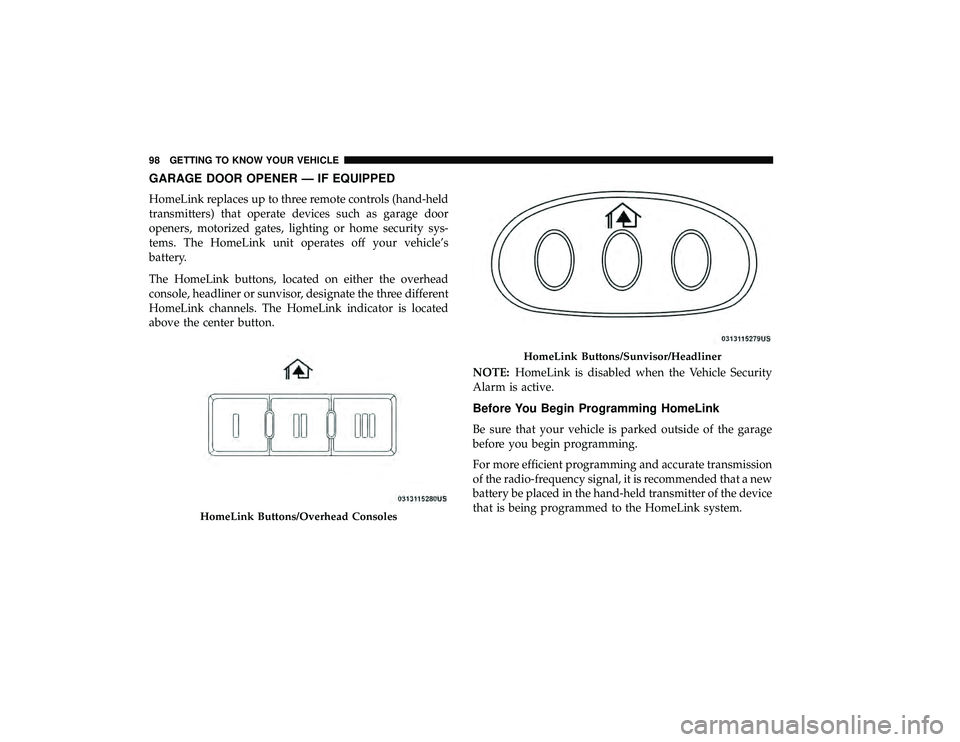
The HomeLink buttons, located on either the overhead
console, headliner or sunvisor, designate the three different
HomeLink channels. The HomeLink indicator is located
above the center button.NOTE:HomeLink is disabled when the Vehicle Security
Alarm is active.
Before You Begin Programming HomeLink
Be sure that your vehicle is parked outside of the garage
before you begin programming.
For more efficient programming and accurate transmission
of the radio-frequency signal, it is recommended that a new
battery be placed in the hand-held transmitter of the device
that is being programmed to the HomeLink system.
HomeLink Buttons/Overhead Consoles
HomeLink Buttons/Sunvisor/Headliner
98 GETTING TO KNOW YOUR VEHICLE